Removal Procedure
- Remove the battery tray. Refer to BATTERY TRAY REPLACEMENT
.
 Courtesy of SUZUKI OF AMERICA CORP.
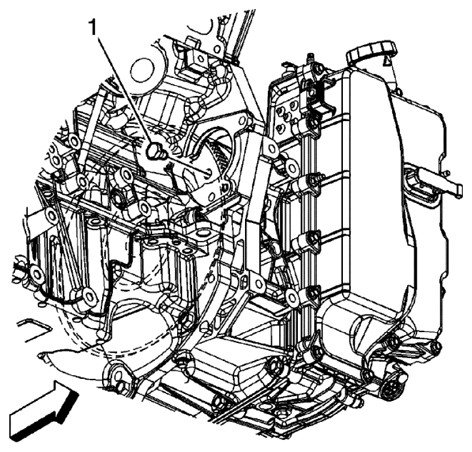
- Disconnect the control valve body transmission control module (TCM) electrical connector (1).
 Courtesy of SUZUKI OF AMERICA CORP.
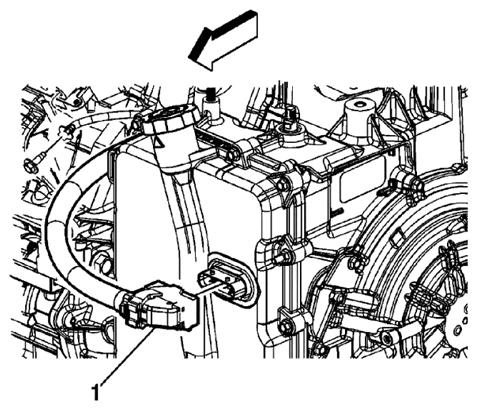
- Remove the transmission fluid cooler pipe retainer nut (1).
- Remove the transmission fluid cooler inlet hose and seal (2) from the transmission.
- Plug and/or cap the hose and transmission to prevent contamination.
 Courtesy of SUZUKI OF AMERICA CORP.
- Remove the transmission fluid cooler pipe retainer nut (1).
- Remove the transmission fluid cooler outlet hose and seal (2) from the transmission.
- Plug and/or cap the hose and transmission to prevent contamination.
- Remove the frame. Refer to FRAME REPLACEMENT
.
 Courtesy of SUZUKI OF AMERICA CORP.
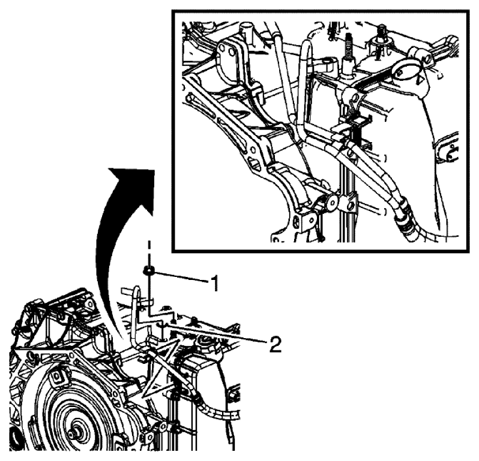
- Remove the upper transmission to engine bolts (1, 2).
- Remove the range selector cable, cable bracket, and left transmission mount. Refer to TRANSMISSION REAR MOUNT REPLACEMENT (FWD) or TRANSMISSION REAR MOUNT REPLACEMENT (AWD) .
- Disconnect the wheel drives. Refer to FRONT WHEEL DRIVE SHAFT REPLACEMENT
.
- Remove the transfer case, all wheel drive (AWD) only. Refer to TRANSFER CASE ASSEMBLY REPLACEMENT
.
- Remove the intermediate drive shaft, front wheel drive (FWD) only. Refer to INTERMEDIATE SHAFT REPLACEMENT
.
- Use a transmission jack in order to support the transmission.
- Remove the rear transmission mount bracket, FWD only. Refer to TRANSMISSION MOUNT BRACKET REPLACEMENT - REAR (FWD) or TRANSMISSION MOUNT BRACKET REPLACEMENT - REAR (AWD) .
- Remove the left transmission mount. Refer to TRANSMISSION MOUNT REPLACEMENT - LEFT SIDE .
- Remove the front transmission mount. Refer to TRANSMISSION FRONT MOUNT REPLACEMENT .
 Courtesy of SUZUKI OF AMERICA CORP.
- Remove the starter. Refer to STARTER REPLACEMENT
.
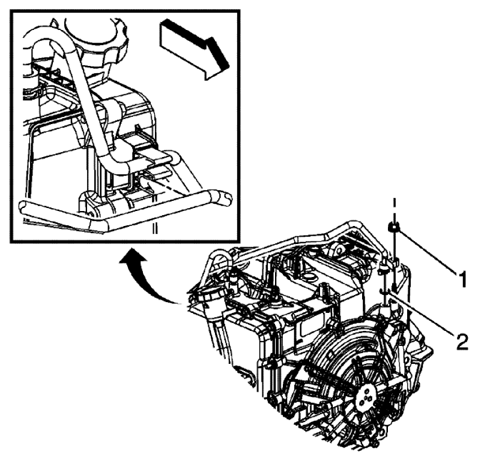
- Mark the relationship of the flywheel to the torque converter for reassembly.
- Remove the torque converter to flywheel bolts (1).
 Courtesy of SUZUKI OF AMERICA CORP.
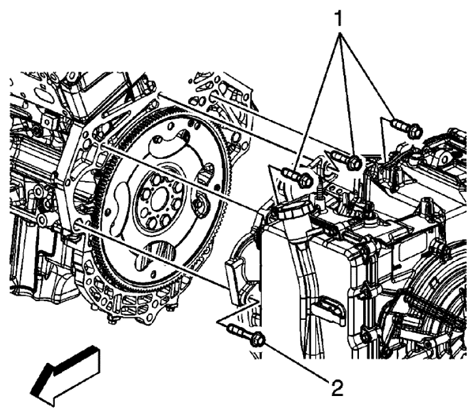
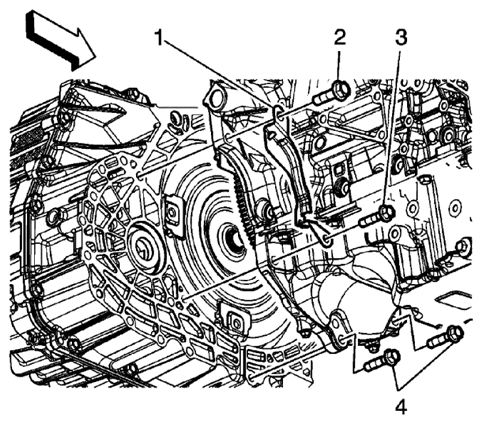
- Remove the flywheel inspection cover bolts (2, 3).
- Remove the flywheel inspection cover (1).
- Remove the remaining transmission bolts (4).
- Separate the transmission from the engine.
- Lower the transmission with the transmission jack far enough to remove the transmission.