Removal Procedure
- Raise and support the vehicle. Refer to LIFTING AND JACKING THE VEHICLE
.
- Drain the rear differential, if needed. Refer to REAR AXLE LUBRICANT REPLACEMENT .
- Remove the spare tire.
- Remove the muffler assembly. Refer to MUFFLER REPLACEMENT
.
- Remove the rear wheel drive shafts. Refer to REAR WHEEL DRIVE SHAFT REPLACEMENT
.
- Remove the propeller shaft from the vehicle. Refer to PROPELLER SHAFT REPLACEMENT
.
- Remove the rear wheel drive module clutch housing. Refer to REAR WHEEL DRIVE MODULE CLUTCH HOUSING REPLACEMENT .
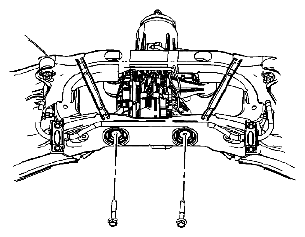
- Support the rear differential with a transmission jack stand.
 Courtesy of SUZUKI OF AMERICA CORP.
- Remove the rear differential support bushing bolts.
 Courtesy of SUZUKI OF AMERICA CORP.
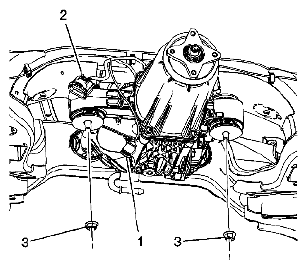
- Remove the front mounting nuts for the rear differential (3).
- Lower the rear differential to gain access rear differential clutch control module.
- Remove the small electrical connector from the control module (1).
- Remove the large electrical connector from the control module (2).
 Courtesy of SUZUKI OF AMERICA CORP.
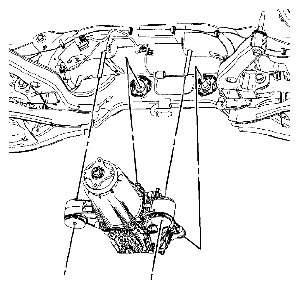
- Remove the rear differential assembly from the vehicle.