Front Heater Core Remove & Install
Fig. 38 Exploded View Of Front Heater:
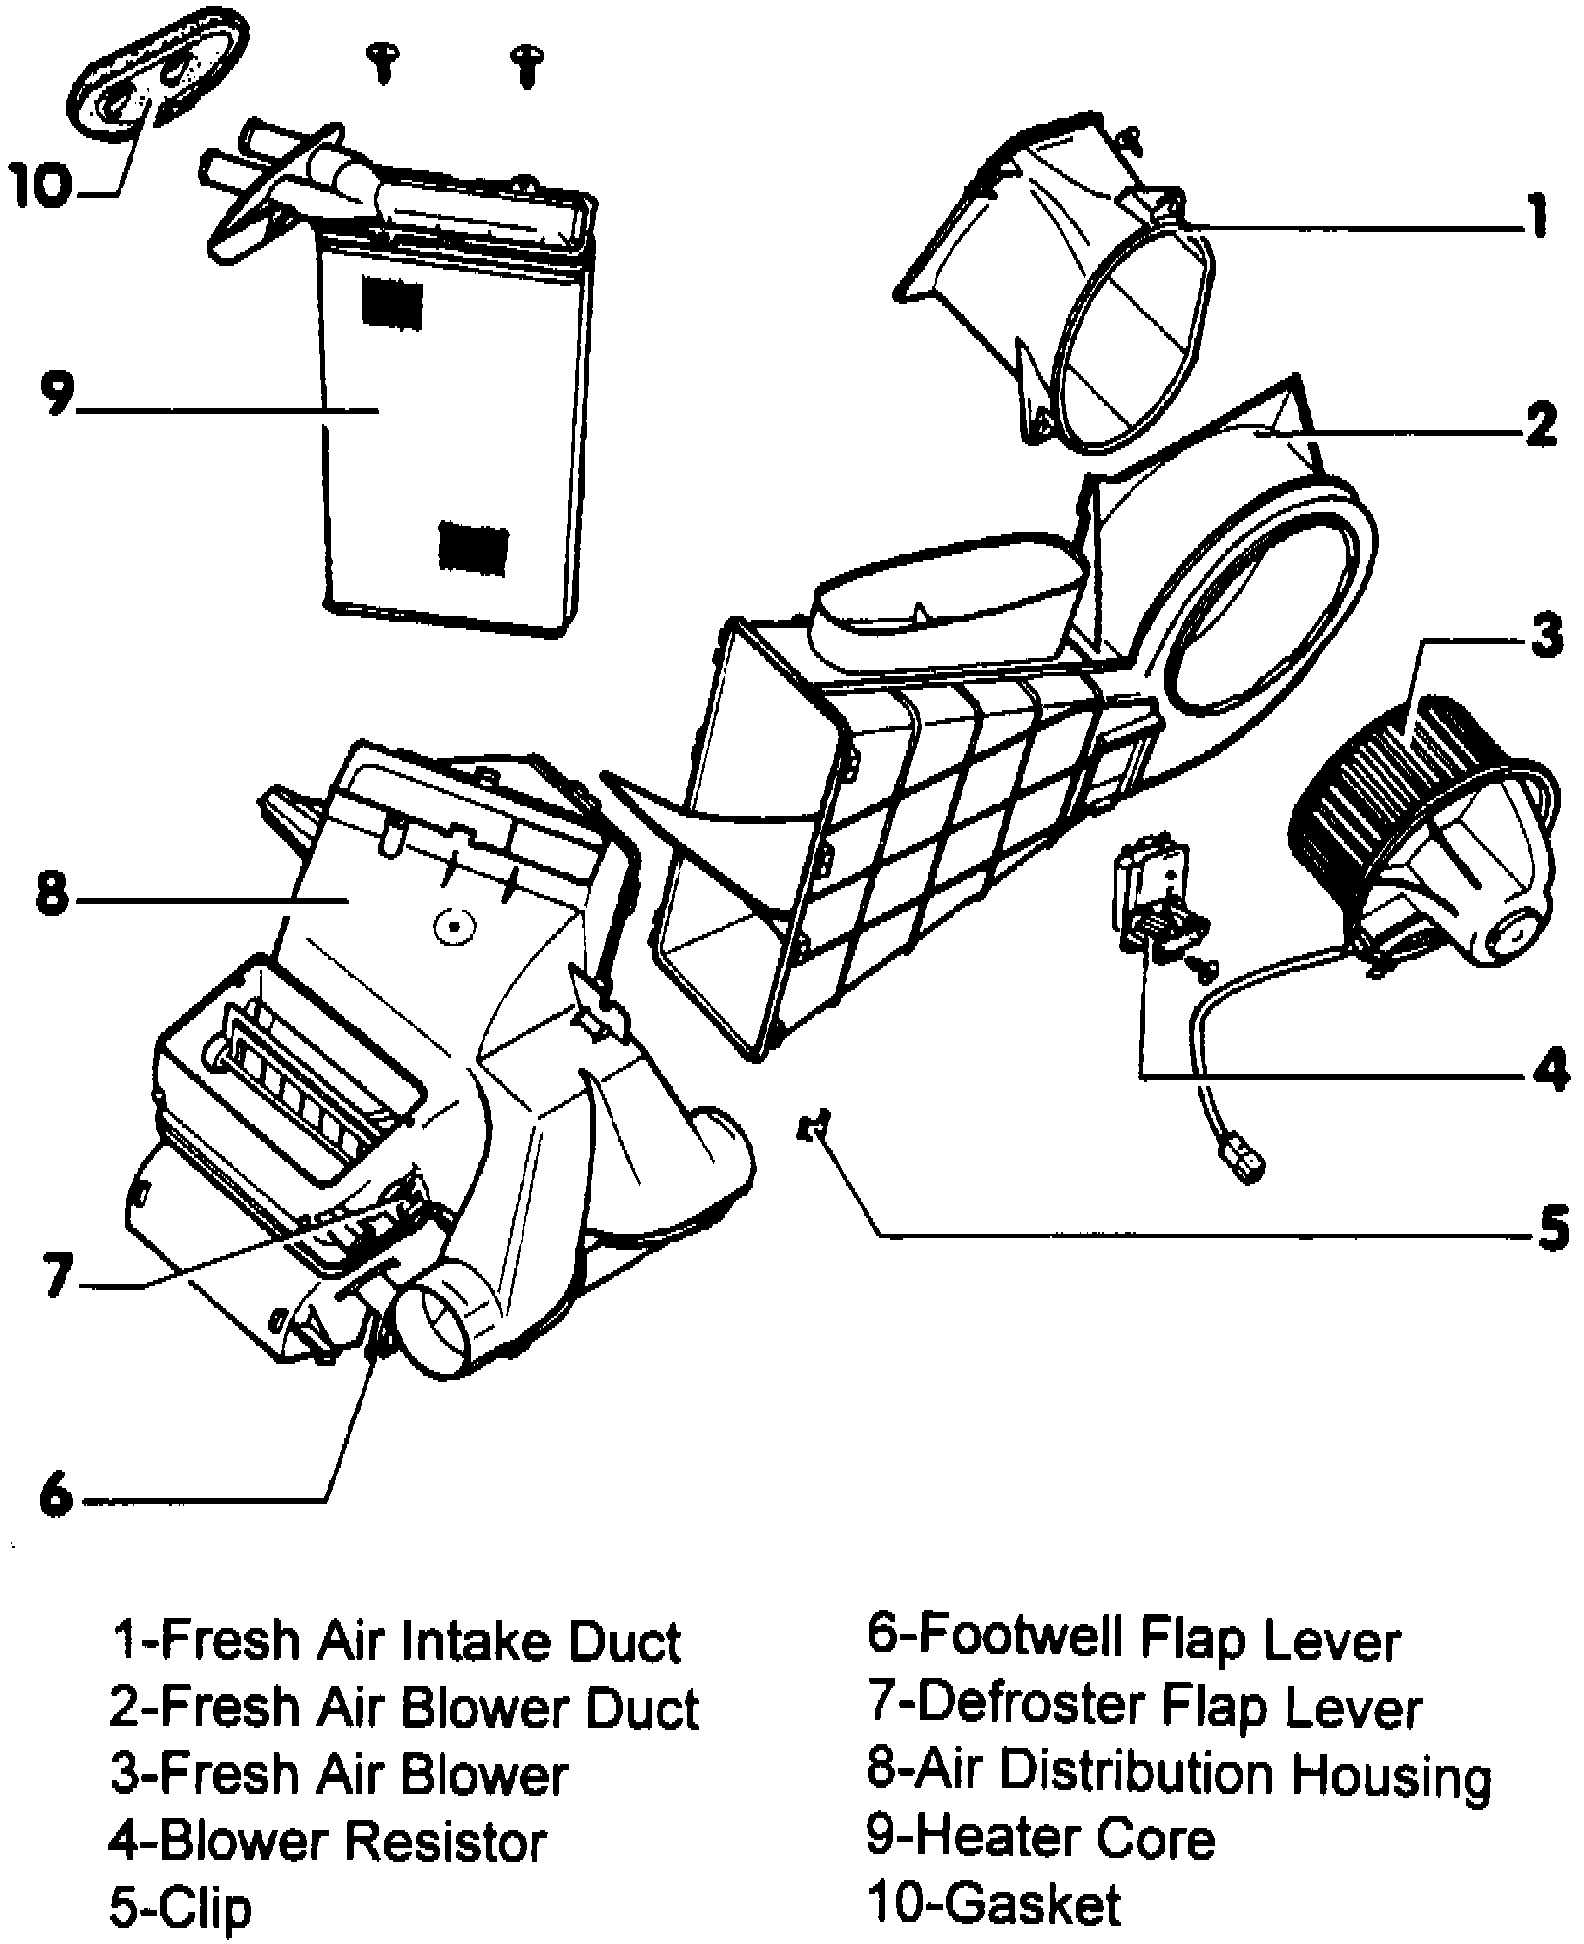
Fig. 39 Exploded View Of Front Heater:
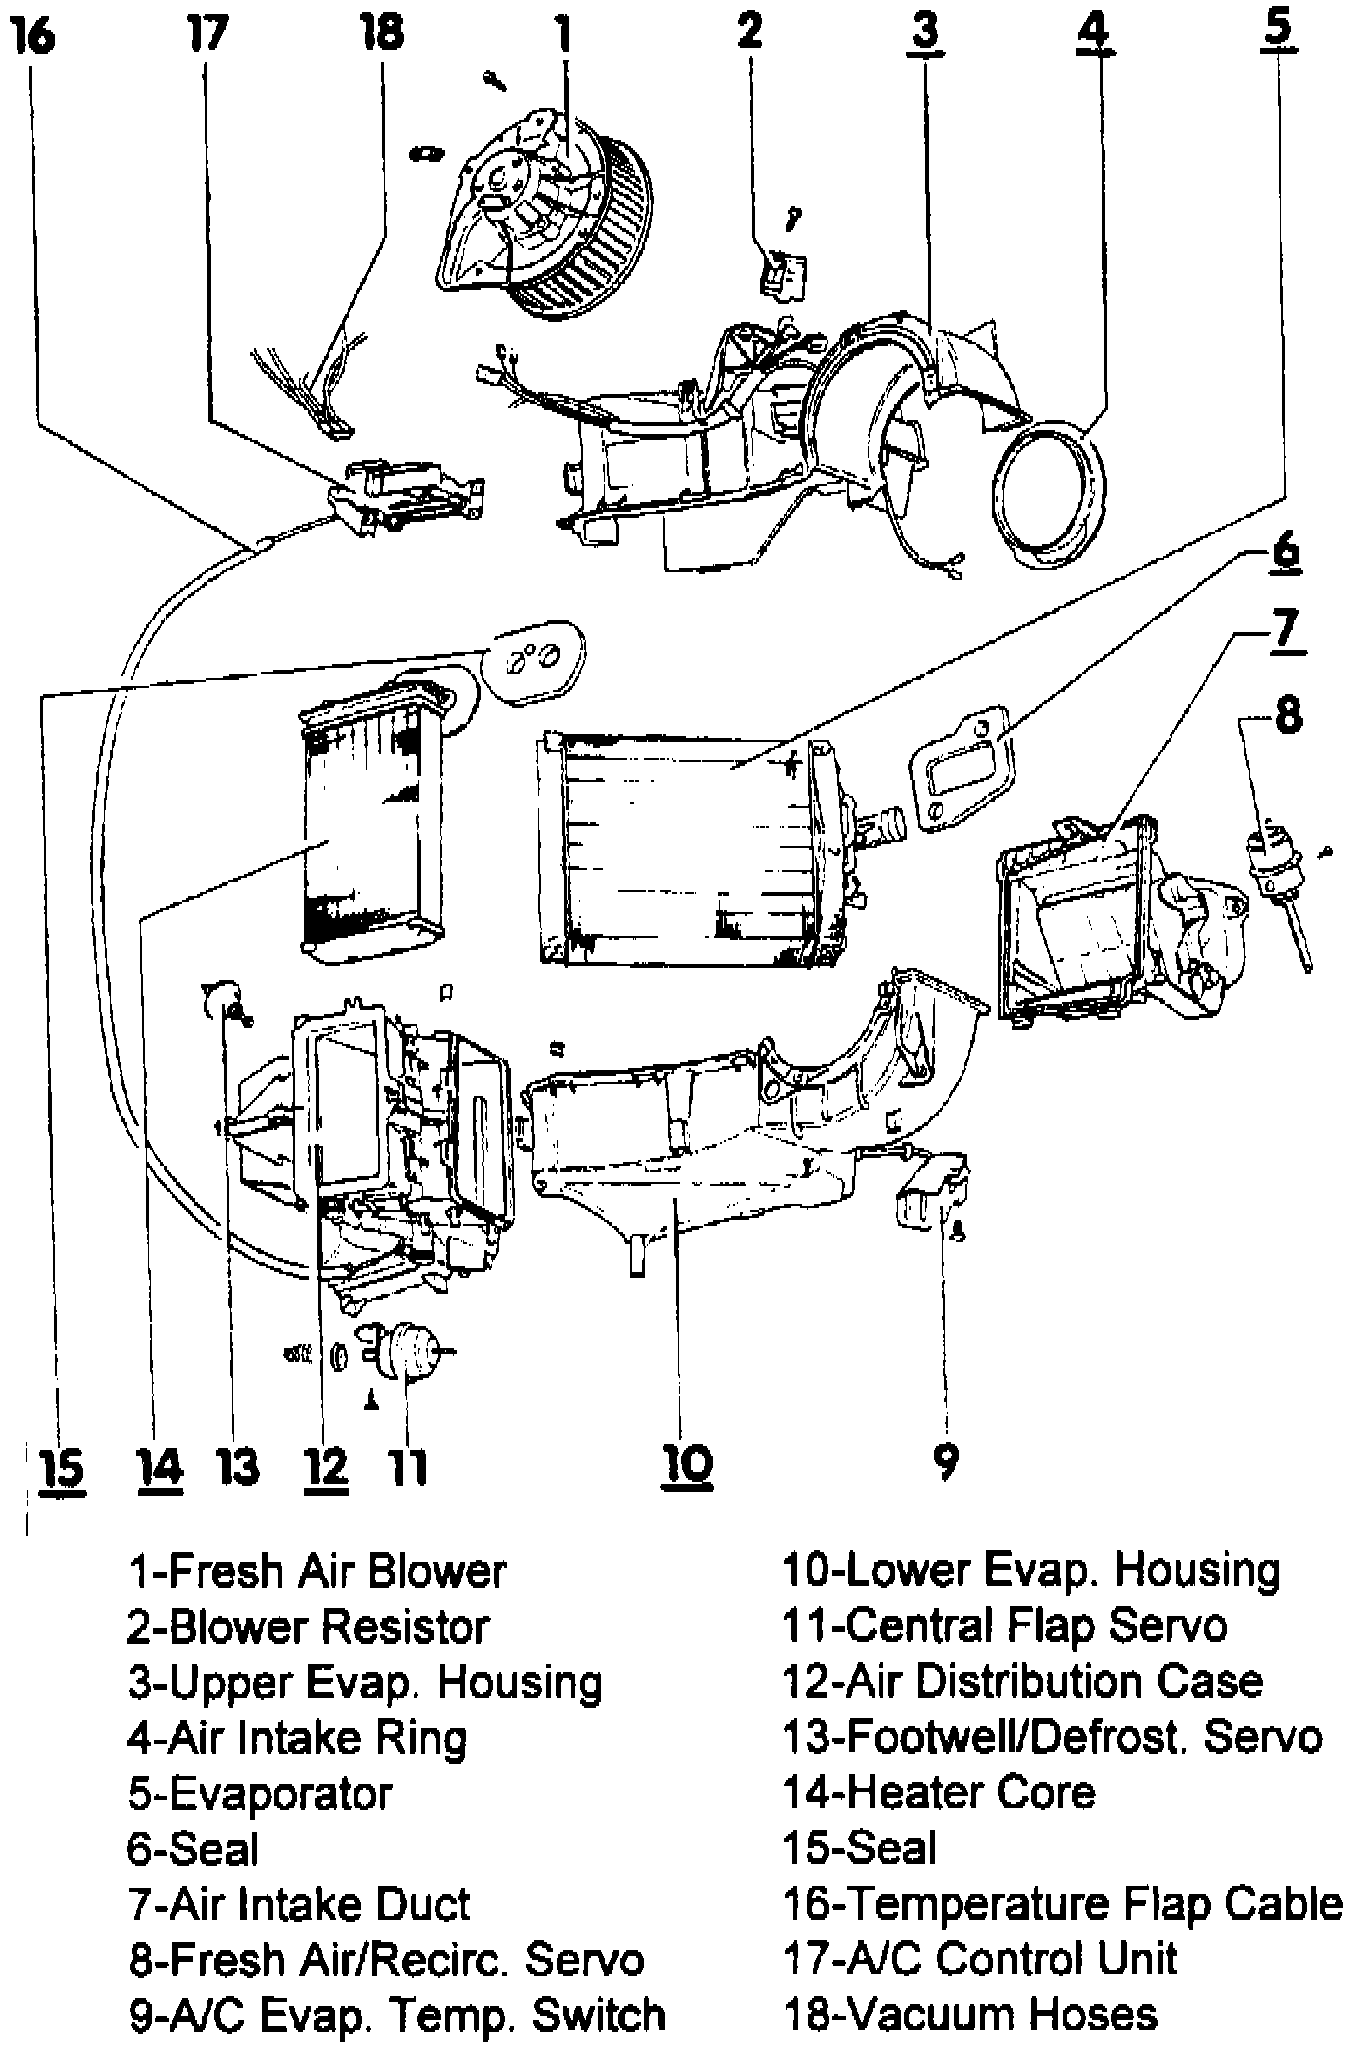
Ensure heater core outlets are securely plugged to prevent coolant spillage into interior during removal procedures.
1. Remove glove compartment, then remove right heater duct.
2. From engine compartment, remove screws from air intake duct.
3. Remove center air outlet and duct if equipped.
4. Disconnect blower electrical connector.
5. Disconnect all control cables, connectors and lines.
6. Remove footwell air outlet and cover.
7. On models with A/C, recover refrigerant using a suitable recovery station, then disconnect evaporator drain hose.
8. On models with A/C, disconnect refrigerant lines from expansion valve and evaporator, plug and cap all lines and fittings.
9. From engine compartment, disconnect coolant hoses and plug heater core outlets.
10. Remove two upper mounting screws.
11. Remove lower mounting screw found under engine compartment cover trim.
12. Remove housing, Fig. 38 & Fig. 39.
13. Remove clips or screws retaining core to assembly, then lift out core.
14. Reverse procedure to install. Ensure no air will leak past heater core seals.