October 30: LEMON manuals on a temporary server, it is slow and having issues, download the manuals you need! Later in November we will switch back to the fast server.
Remove, Overhaul & Install: ECM: Replacement
- DISCONNECT BATTERY NEGATIVE TERMINAL
- REMOVE GLOVE COMPARTMENT DOOR ASSY
)
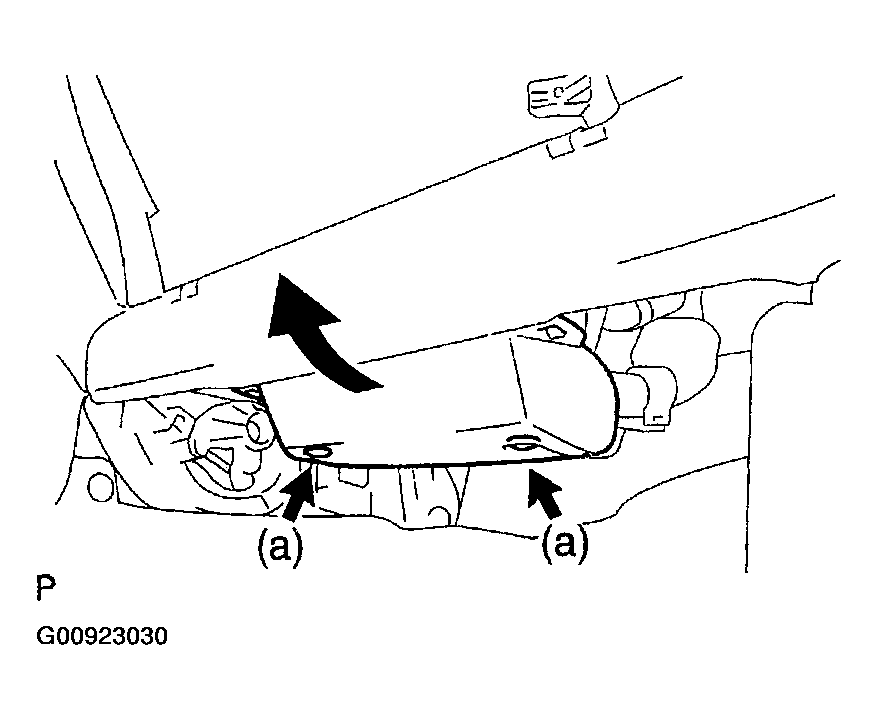
- REMOVE ECM
 Courtesy of © TOYOTA, LICENSE AGREEMENT TMS1002
- Remove the 2 clips using a clip remover. Then, open the cover.
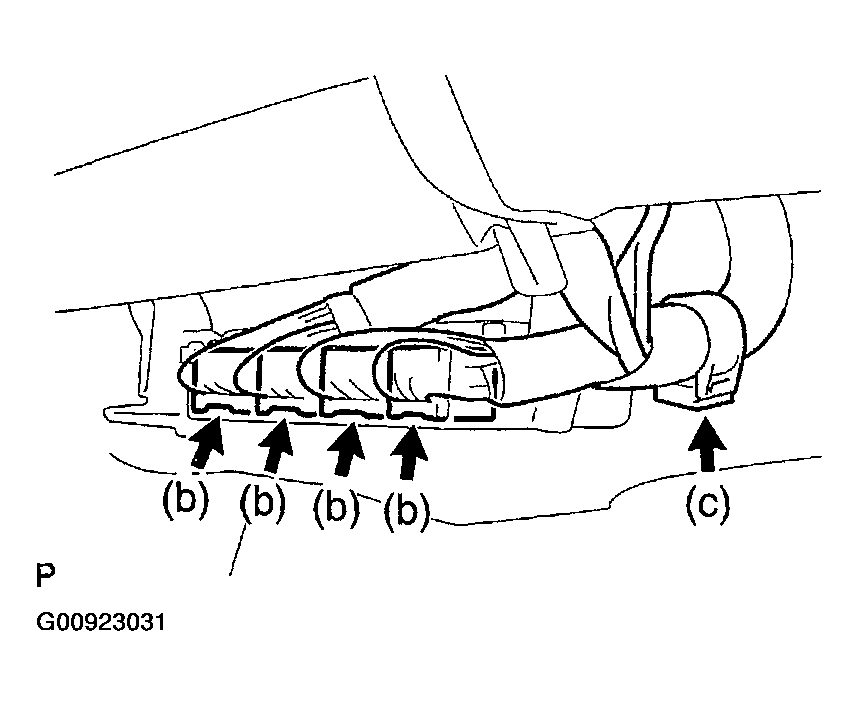
- Disconnect the 4 ECM connectors.
 Courtesy of © TOYOTA, LICENSE AGREEMENT TMS1002
- Remove the wire harness from the wire harness clamp.
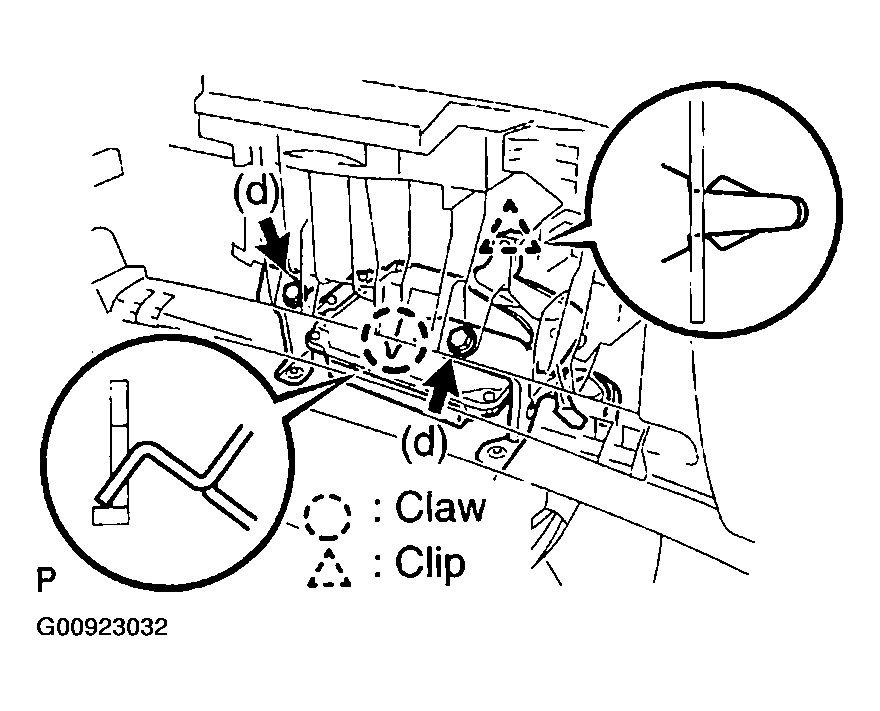
- Remove the 2 bolts.
- Unfasten the claw and clip, and then remove the ECM.
 Courtesy of © TOYOTA, LICENSE AGREEMENT TMS1002
- REMOVE ECM COVER
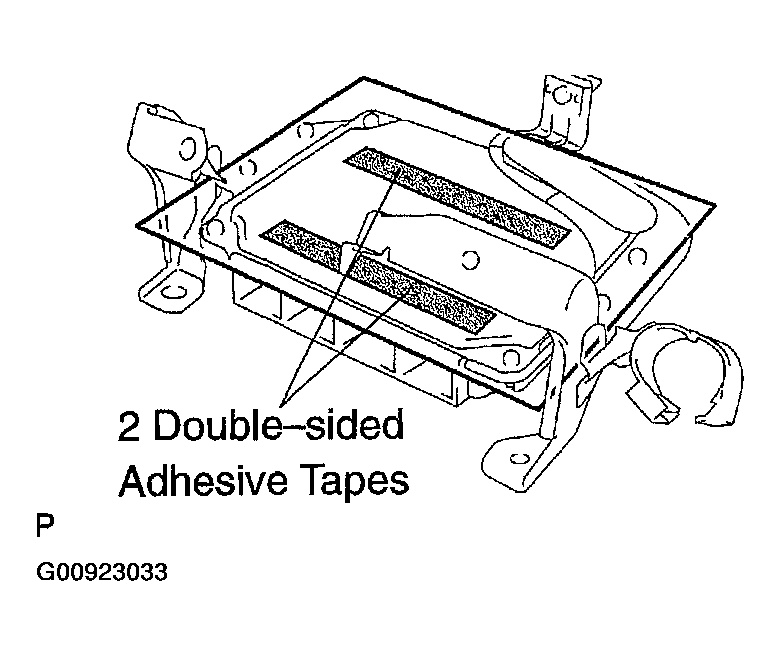
- Take the 2 double-sided adhesive tapes off the ECM, then remove the ECM cover.
 Courtesy of © TOYOTA, LICENSE AGREEMENT TMS1002
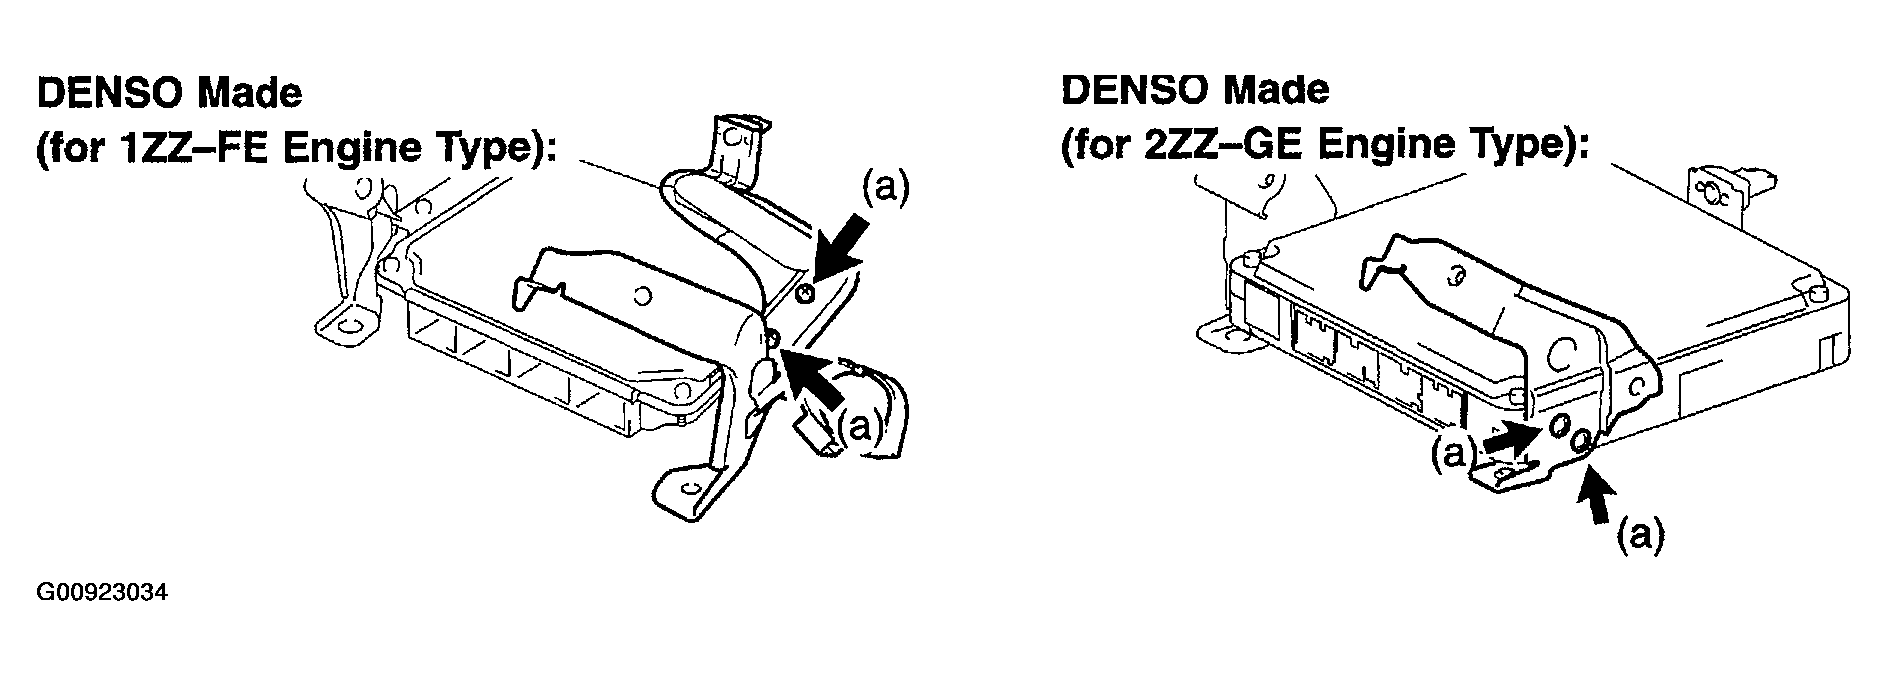
- REMOVE ECM BRACKET NO.2
 Courtesy of © TOYOTA, LICENSE AGREEMENT TMS1002
- Remove the 2 screws, then remove the ECM bracket No. 2.
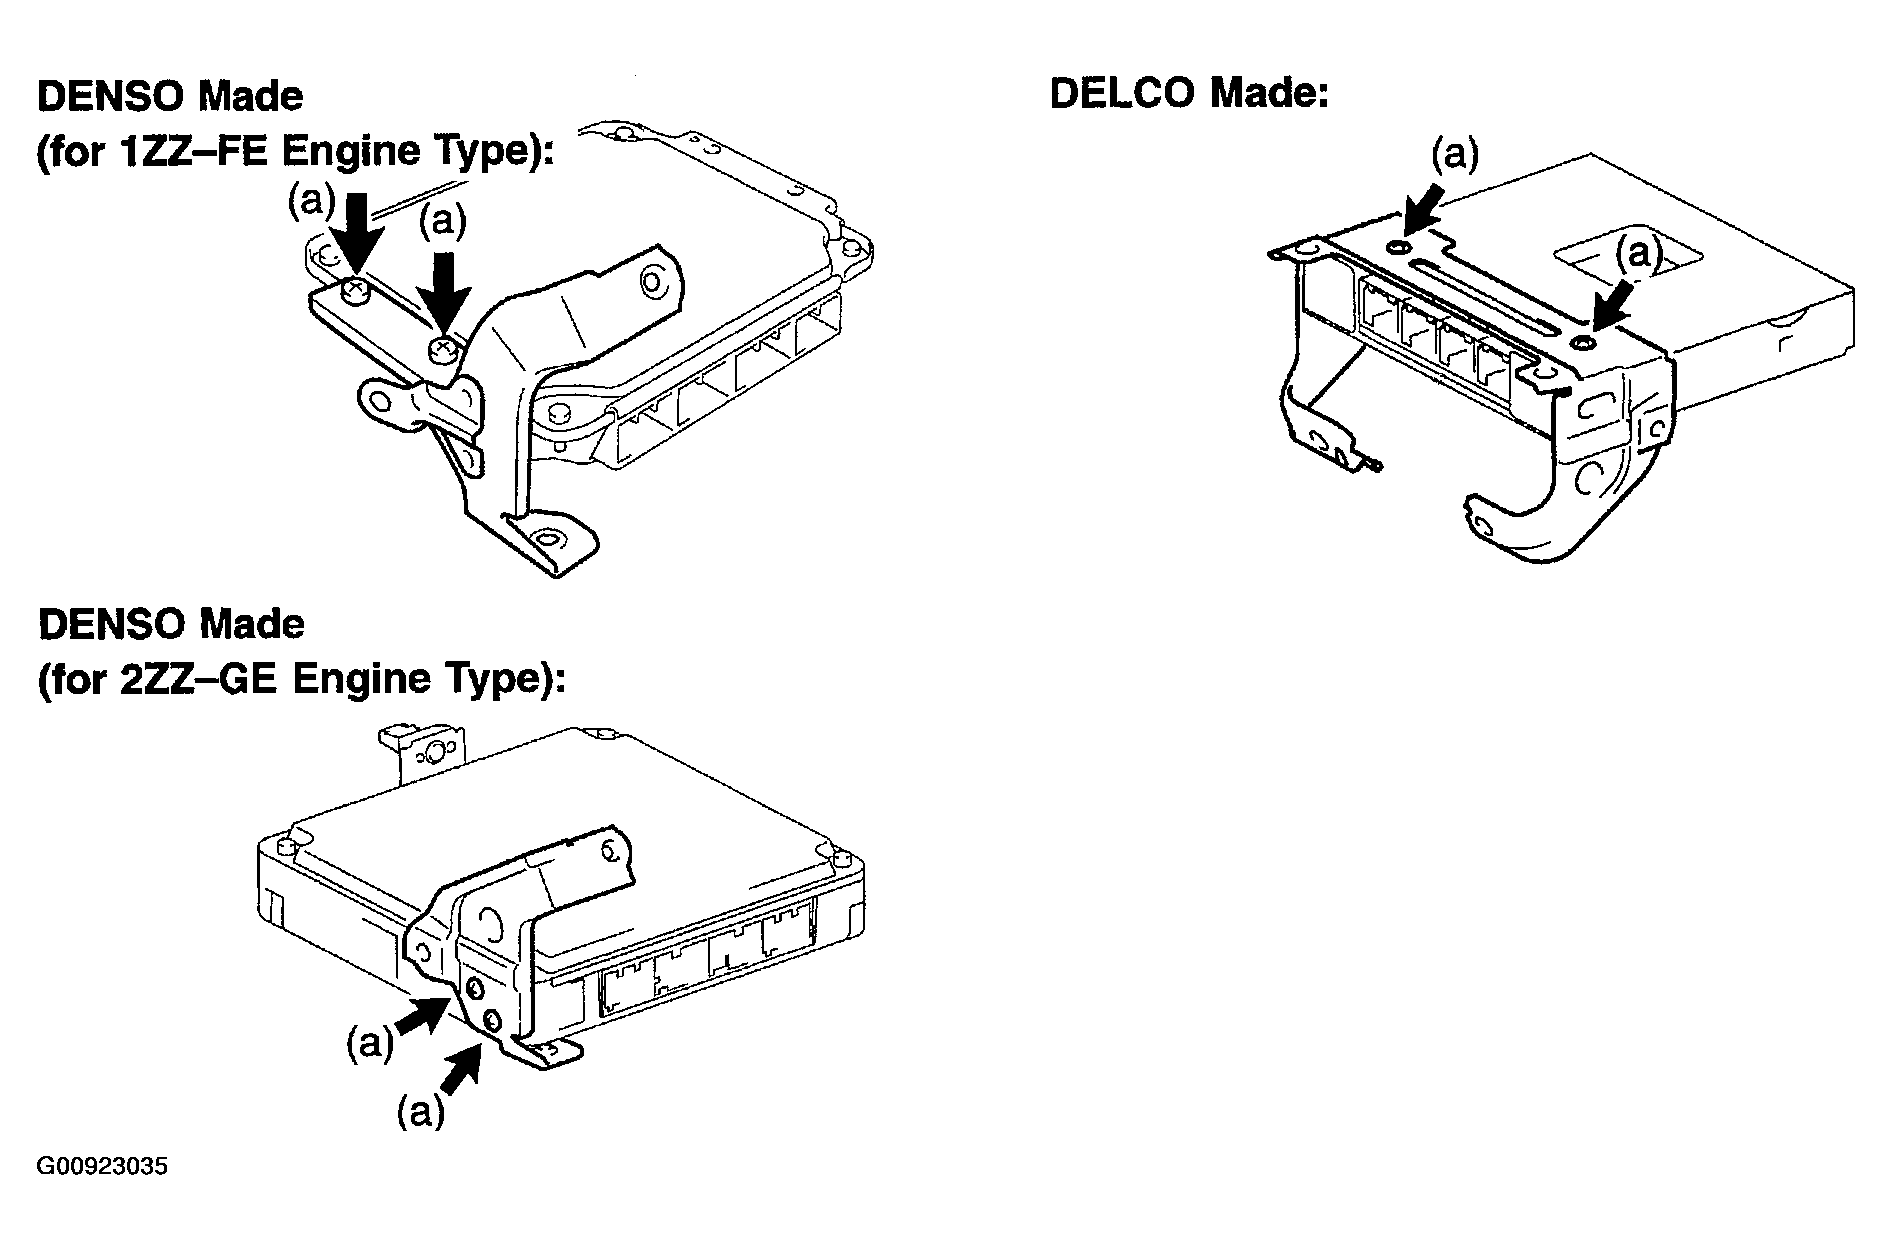
- REMOVE ECM BRACKET NO.1
 Courtesy of © TOYOTA, LICENSE AGREEMENT TMS1002
- Remove the 2 screws, then remove the ECM bracket No. 1.
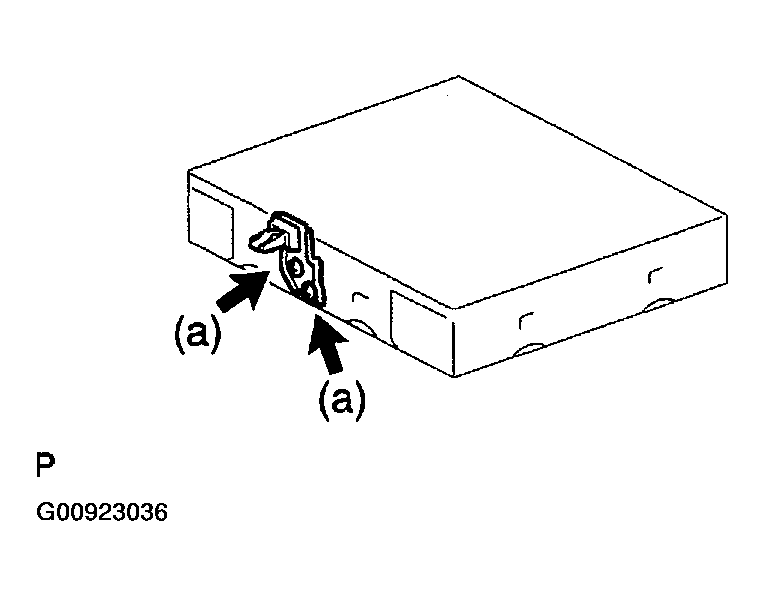
- REMOVE ECM BRACKET NO.3 (DELCO MADE, DENSO MADE (FOR 2ZZ-GE ENGINE TYPE))
- Remove the 2 screws, then remove the ECM bracket No. 3.
 Courtesy of © TOYOTA, LICENSE AGREEMENT TMS1002
- INSTALL ECM BRACKET NO.3 (DELCO MADE, DENSO MADE (FOR 2ZZ-GE ENGINE TYPE))
- Torque: 3.2 N.m (33 kgf.cm, 28 in.lbf)
- INSTALL ECM BRACKET NO.1
- Torque: 3.2 N.m (33 kgf.cm, 28 in.lbf)
- INSTALL ECM BRACKET NO.2
- Torque: 3.2 N.m (33 kgf.cm, 28 in.lbf)
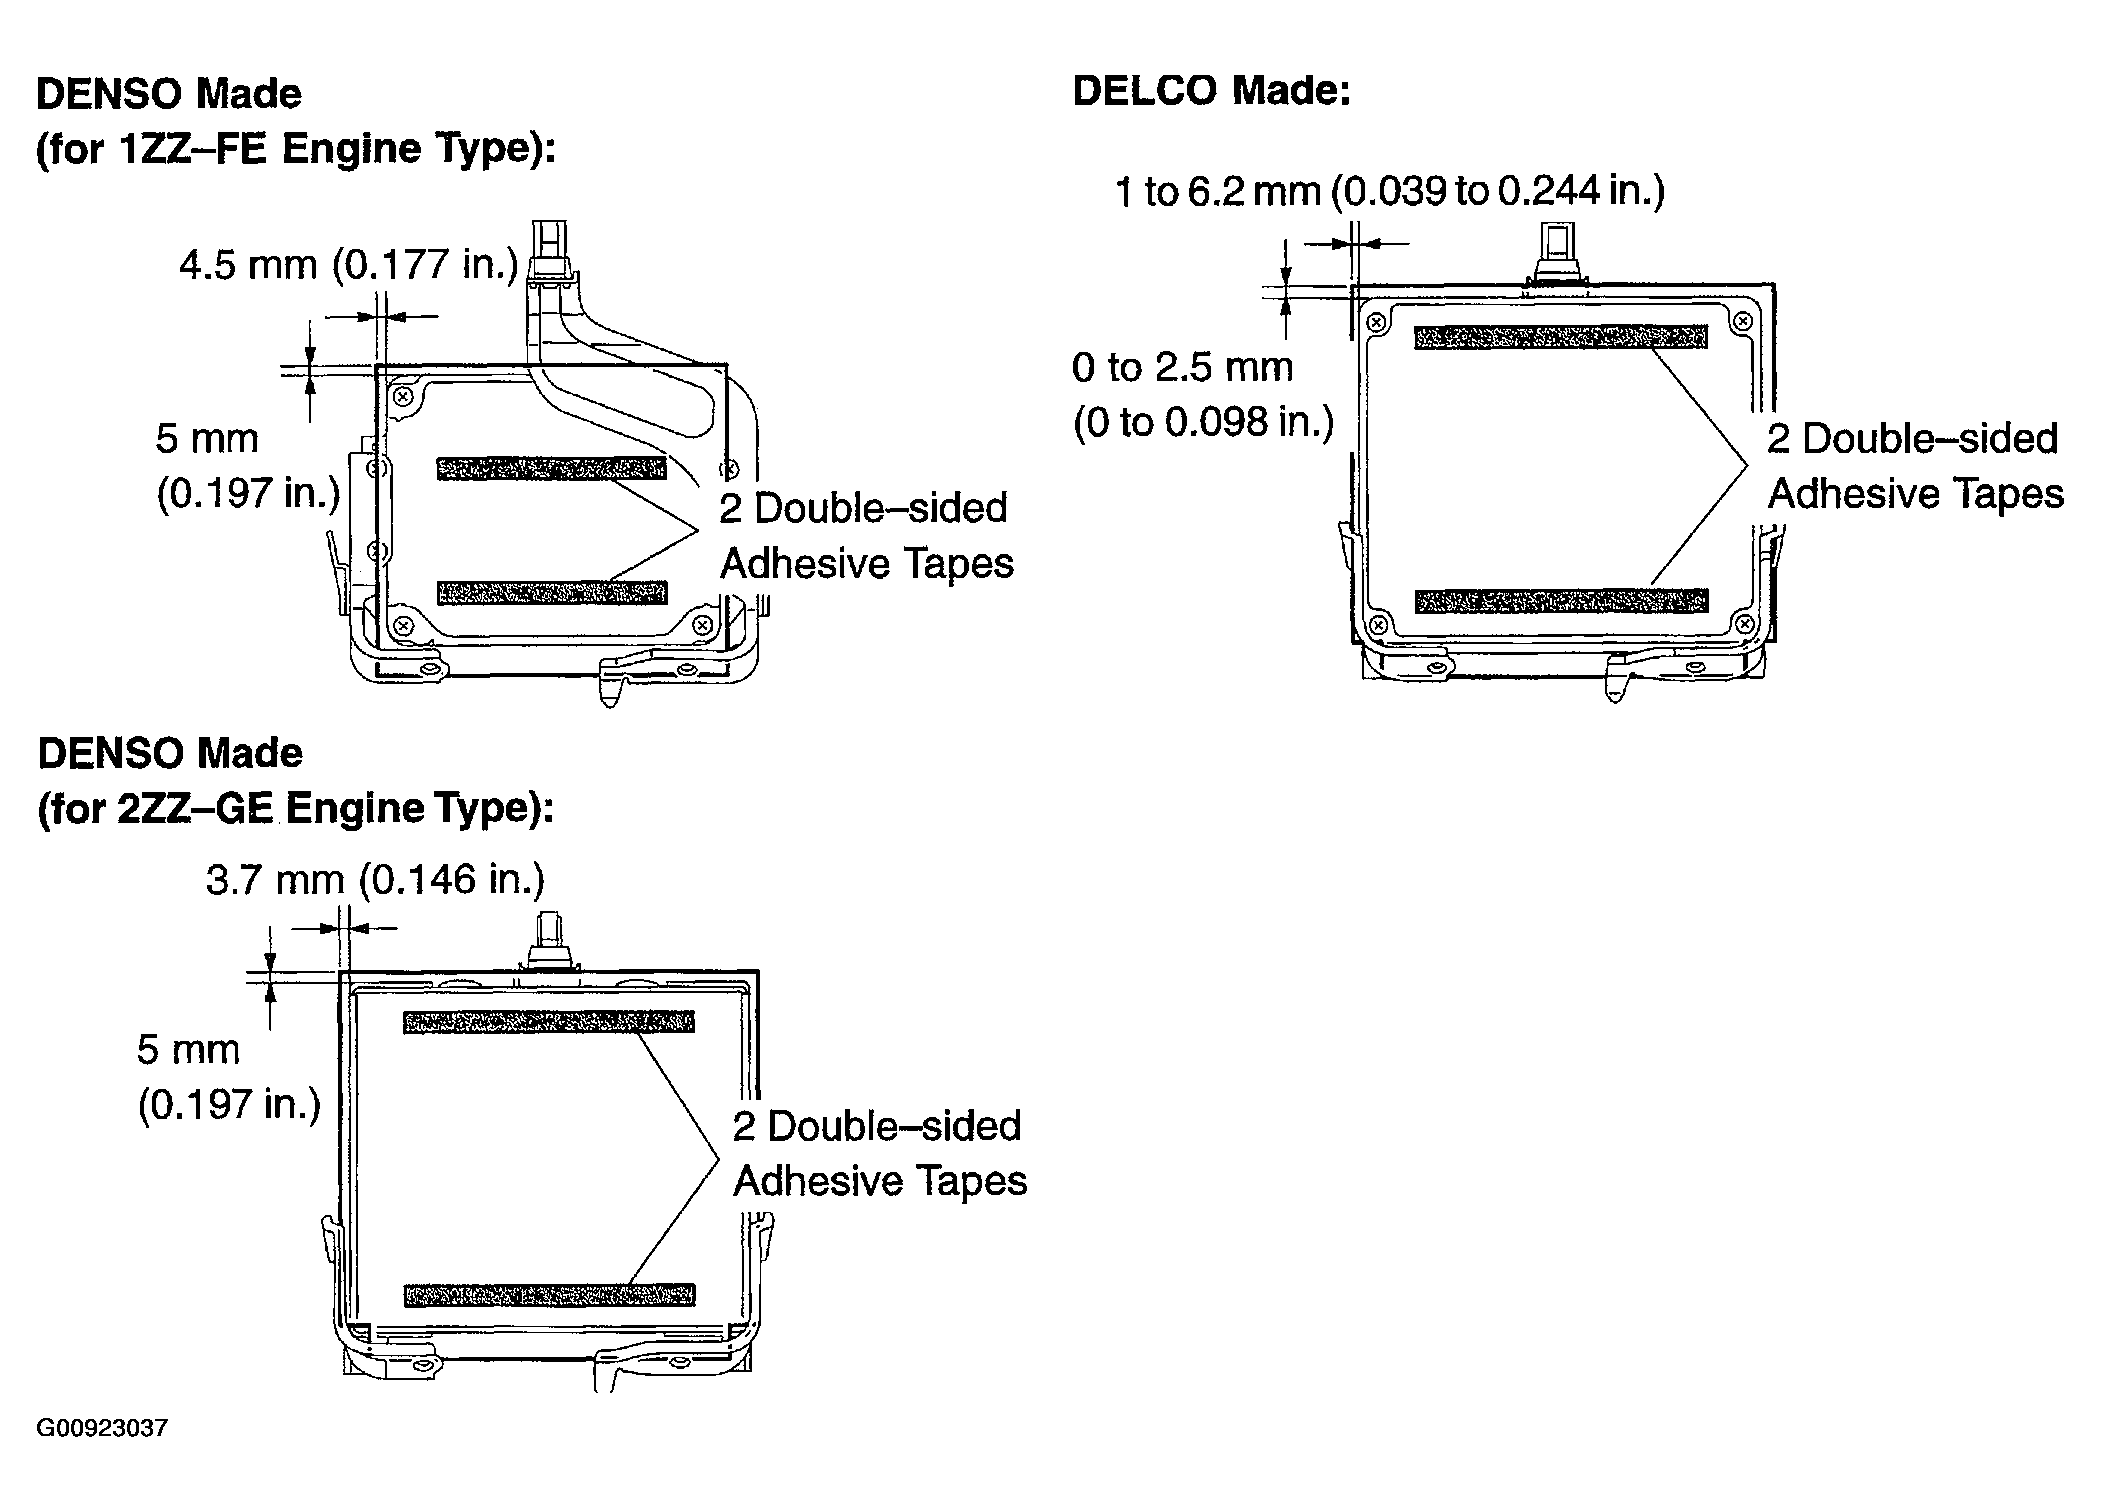
- INSTALL ECM COVER
- Install a new ECM cover to the ECM as shown in the illustration.
 Courtesy of © TOYOTA, LICENSE AGREEMENT TMS1002
- INSTALL ECM
- Torque: 3.0 N.m (31 kgf.cm, 27 in.lbf)
- INSTALL GLOVE COMPARTMENT DOOR ASSY
- CONNECT BATTERY NEGATIVE TERMINAL
- Torque: 5.4 N.m (55 kgf.cm, 48 in.lbf)
- RESET MEMORY (A/T TRANSAXLE)
CAUTION:
Perform the RESET MEMORY (AT initialization) when replacing the ECM, engine assembly or automatic transaxle assembly.
- The hand-held tester only.
- Connect the hand-held tester to the DLC3.
- Turn the ignition switch ON.
- Perform the RESET MEMORY procedure from the ENGINE menu.
CAUTION:
After performing the RESET MEMORY, be sure to perform the ROAD TEST described earlier.