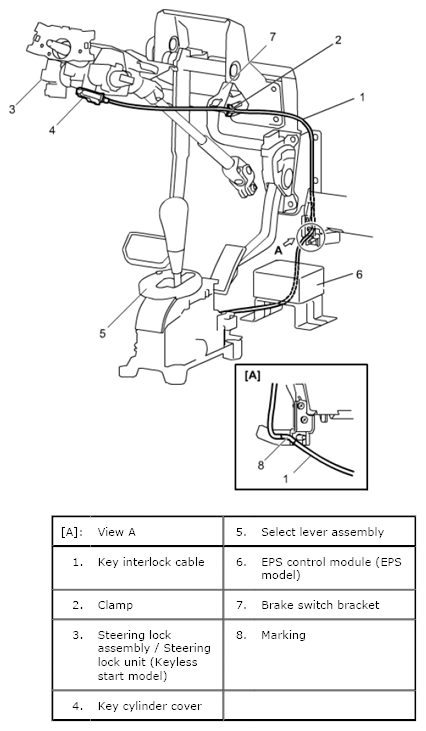
Key Interlock Cable Removal and Installation: Installation
- Lay interlock cable to its original cabling route.
 Courtesy of SUZUKI OF AMERICA CORP.
- Turn ignition switch to "ACC" position.
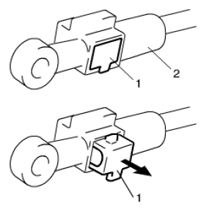
- Insert cable casing cap (1) into key cylinder cover (2) securely.
 Courtesy of SUZUKI OF AMERICA CORP.
- Pull out lock button (1) of selector side cable end (2).
 Courtesy of SUZUKI OF AMERICA CORP.
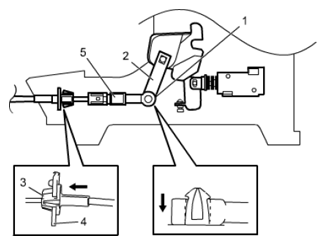
- Shift selector lever to "N" position.
- Install cable casing cap (3) to selector bracket (4).
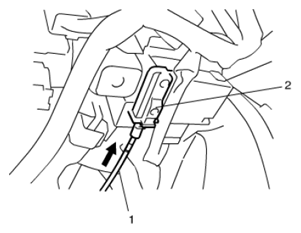
- Turn ignition switch to "ACC" position and connect cable end (1) to interlock cam (2).
- Drive lock button (5) in cable end until it locks cable expansion and contraction.
 Courtesy of SUZUKI OF AMERICA CORP.
- Check key interlock system. See Brake and Key Interlock System Inspection
- Install knee protector to steering column (if removed).
- Install steering column cover. See STEERING WHEEL AND COLUMN COMPONENTS
- Install steering column hole cover.
- Enable air bag system.