- Hoist vehicle and remove rear wheels.
- Dismount rear differential (4WD model) referring to REAR DIFFERENTIAL DISMOUNTING AND REMOUNTING
.
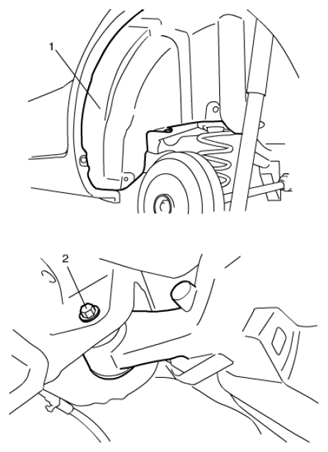
- Remove rear fender lining (1) and then loosen rear axle bolt (2) a little.
CAUTION:
The rear axle bolt is pre-coated with friction stabilizer. If the bolt is reused, it may work loose. Never reuse the rear axle bolt.
 Courtesy of SUZUKI OF AMERICA CORP.
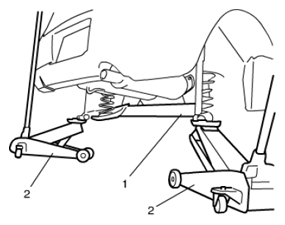
- Support both ends of rear axle (1) by using two floor jacks (2).
 Courtesy of SUZUKI OF AMERICA CORP.
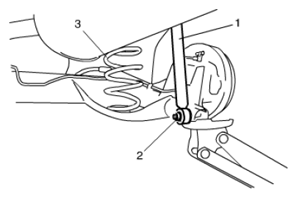
- Detach each lower end (2) of shock absorbers (1) (right and left) from rear axle.
NOTE:
The rear shock absorber lower nut is pre-coated with friction stabilizer. If the nut is reused, it may work loose. Never reuse the rear shock absorber lower nut.
- Lower rear axle gradually as far down as the coil spring can be removed.
CAUTION:
Lowering the rear axle too much may cause damage to the flexible brake hose, wheel speed sensor lead wire and parking brake cable. Be sure to limit the distance that you lower the rear axle to the minimum distance necessary.
- Remove coil spring (3).
 Courtesy of SUZUKI OF AMERICA CORP.
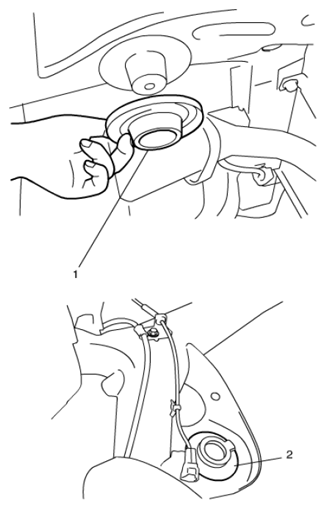
- Remove spring upper seat (1) from vehicle body and lower seat (2) from rear axle.
 Courtesy of SUZUKI OF AMERICA CORP.