Oil Pan and Oil Pump Strainer Removal and Installation: Removal
- Drain engine oil. See ENGINE OIL AND FILTER CHANGE .
- Remove right and left side engine under covers.
- Remove front bumper. See FRONT BUMPER AND REAR BUMPER COMPONENTS
.
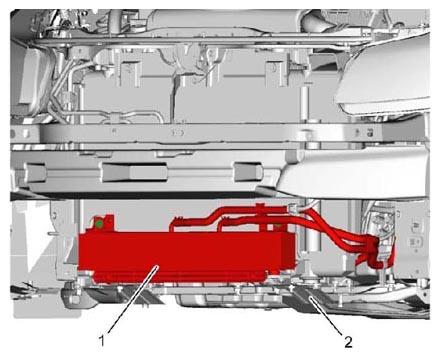
- For CVT model, detach CVT fluid cooler (1) from engine front mounting member (2), with CVT fluid cooler hose connected.
 Courtesy of SUZUKI OF AMERICA CORP.
- Fix radiator, A/C condenser and CVT fluid cooler (CVT model) to vehicle body with rope so that they do not fall off while lowering engine front mounting member.
- Remove front suspension frame.
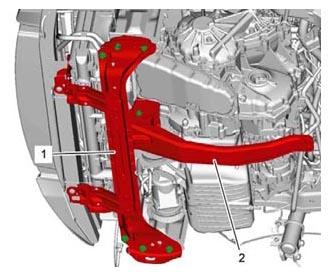
- Remove engine front mounting member (1) and mounting member (2).
 Courtesy of SUZUKI OF AMERICA CORP.
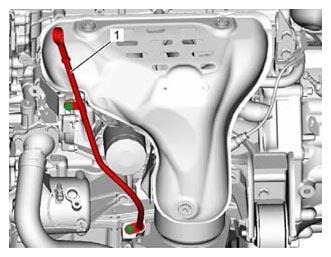
- Remove oil level gauge and oil level gauge guide (1).
 Courtesy of SUZUKI OF AMERICA CORP.
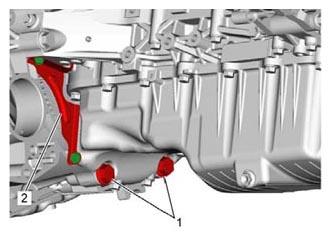
- Remove transaxle bolts (1), then remove drive plate cover (2) for CVT model, or clutch housing lower plate (2) for M/T model.
 Courtesy of SUZUKI OF AMERICA CORP.
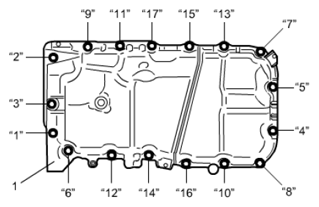
- Loosen oil pan bolts in numerical order ("1" - "17") evenly and gradually and then remove oil pan (1) from lower crank case.
 Courtesy of SUZUKI OF AMERICA CORP.
- Remove oil pump strainer from oil pump assembly.