Transmission Range Sensor Removal and Installation
Transmission Range Sensor Removal and Installation
Removal
1) Disconnect negative cable from battery.
2) Remove air cleaner assembly. Air Cleaner Assembly Removal and Installation
3) Remove clip of select cable and disconnect select cable from manual select lever. Select Cable Components
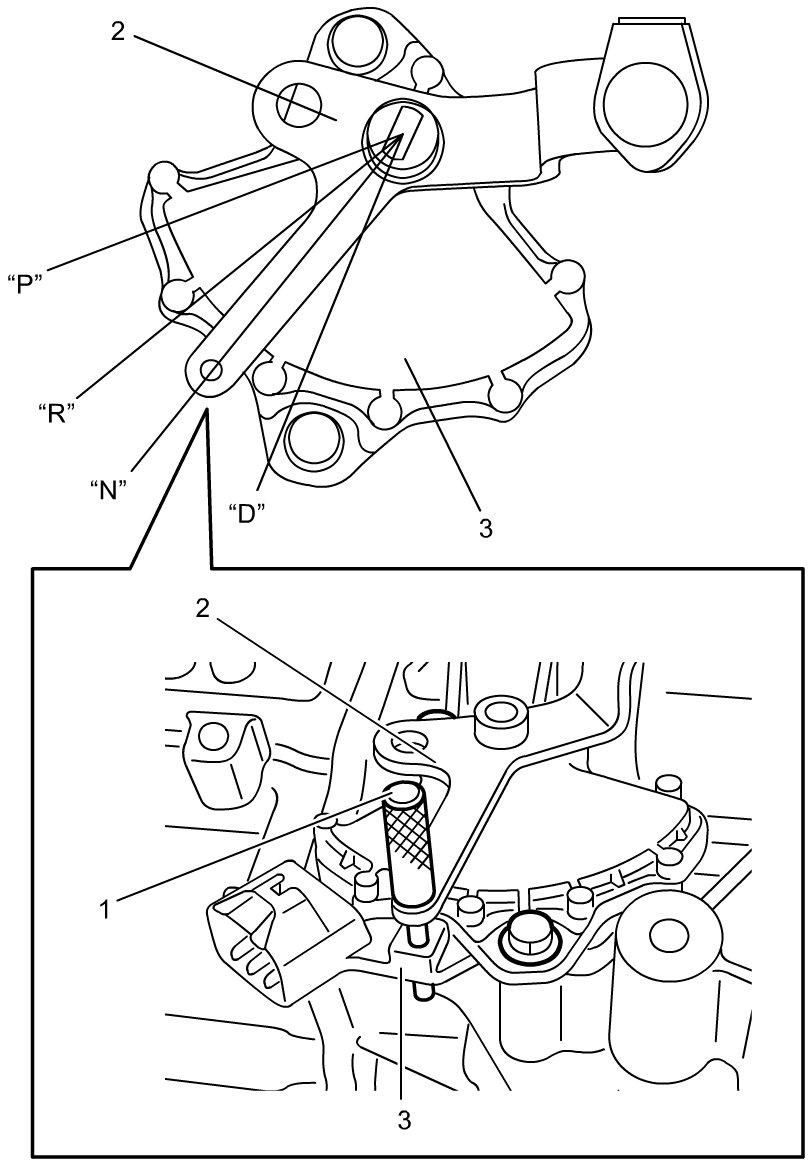
4) Shift manual select lever (2) to "N" position.
Insert pin remover (4 mm) (1) to aligning hole on manual select lever (2) and check that the position of aligning hole on transmission range sensor (3) as shown in figure.
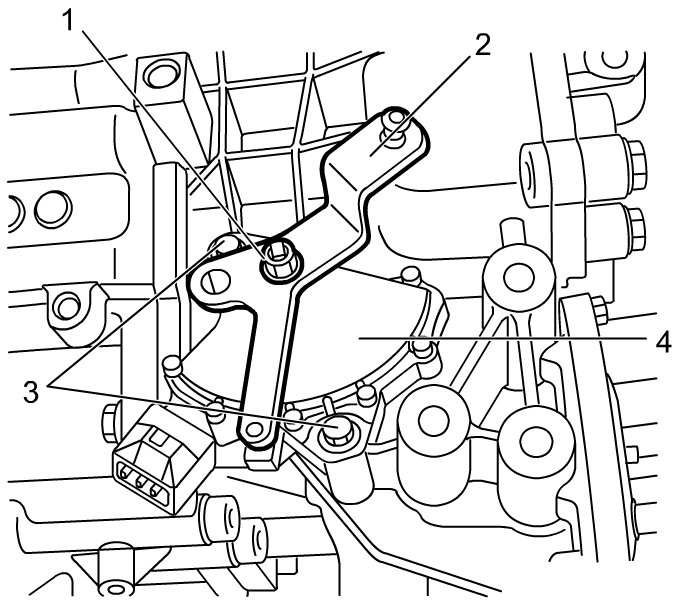
5) Disconnect transmission range sensor connector.
6) Remove manual select lever nut (1) and manual select lever (2).
7) Remove transmission range sensor bolts (3) and transmission range sensor (4).
Installation
Transmission Range Sensor Inspection and Adjustment
NOTE:
If the transmission range sensor is removed and reinstalled, a gap will be created between the sensor and the manual select lever shaft. This gap prevents the transmission range sensor from correctly identifying the selected transaxle range.
Do not reuse any removed transmission range sensor.
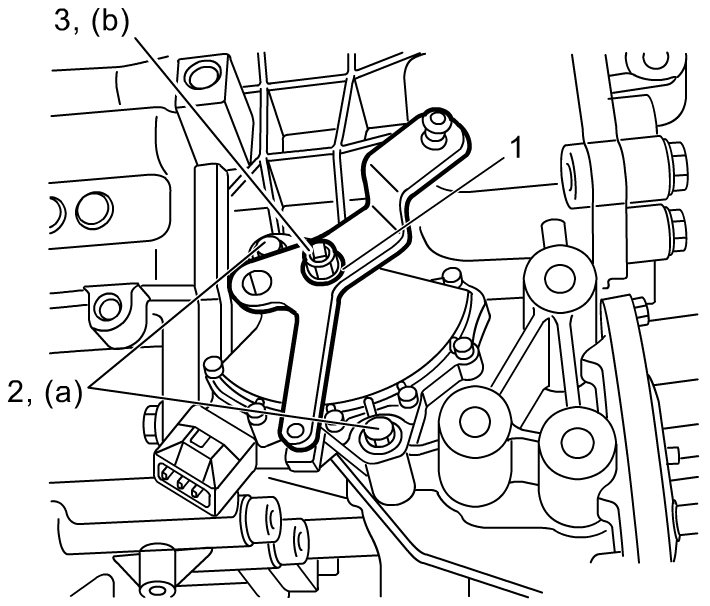
Reverse removal procedure noting the following.
- Adjust select cable. Procedures
- Use new washer (1).
- Adjust transmission range sensor Transmission Range Sensor Inspection and Adjustment
- Tighten transmission range sensor bolts (2) and new manual select lever nut (3) to specified torque.
Tightening torque
Transmission range sensor bolt (a): 5.9 Nm (0.60 kgf-m, 4.5 lbf-ft)
Manual select lever nut (b): 17 Nm (1.7 kgf-m, 12.5 lbf-ft)