Brake Pedal Removal and Installation
Brake Pedal Removal and Installation
Brake Pedal Components
Removal
1) Remove instrument panel. Removal and Replacement
2) Remove steering column. Steering Column Removal and Installation
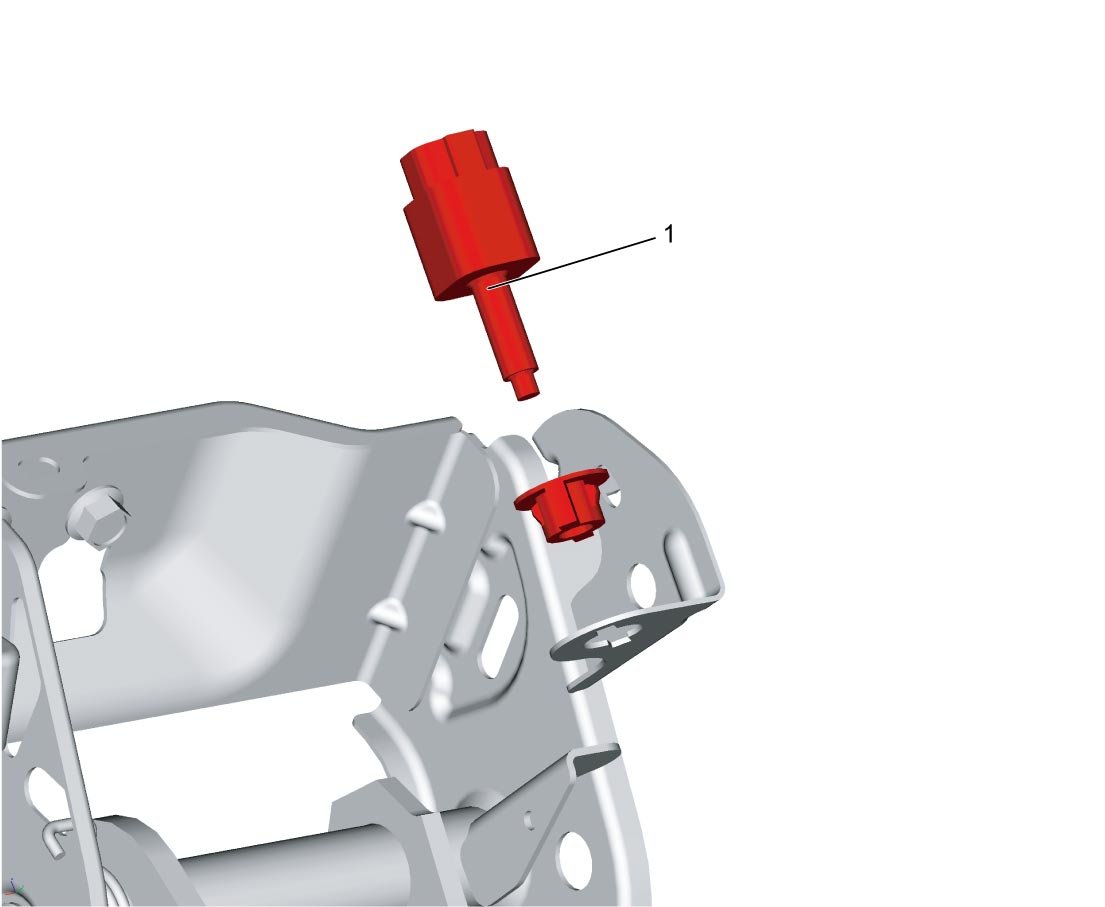
3) Disconnect brake light switch connector (1).
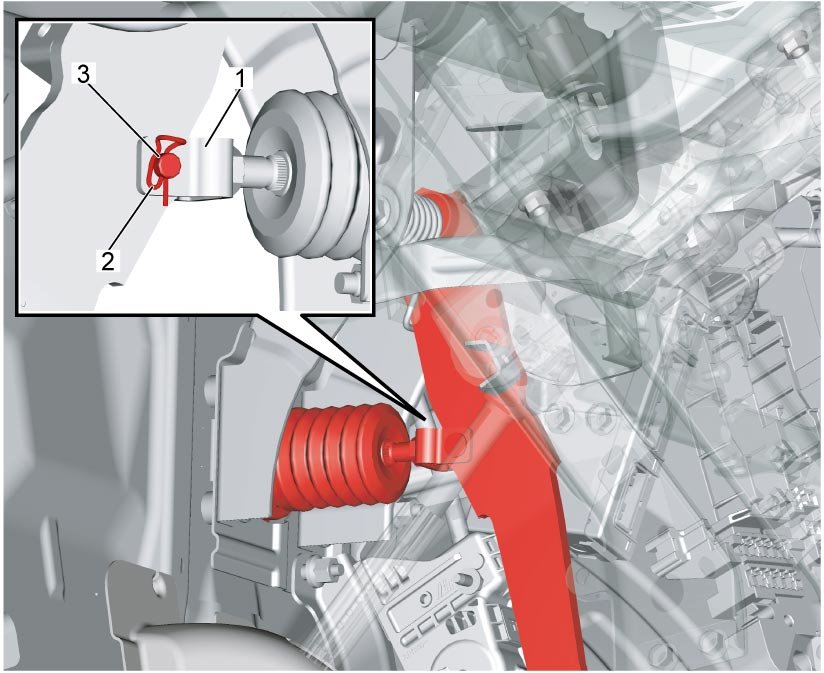
4) Remove clip (2) and clevis pin (3) from cylinder push rod clevis (1).
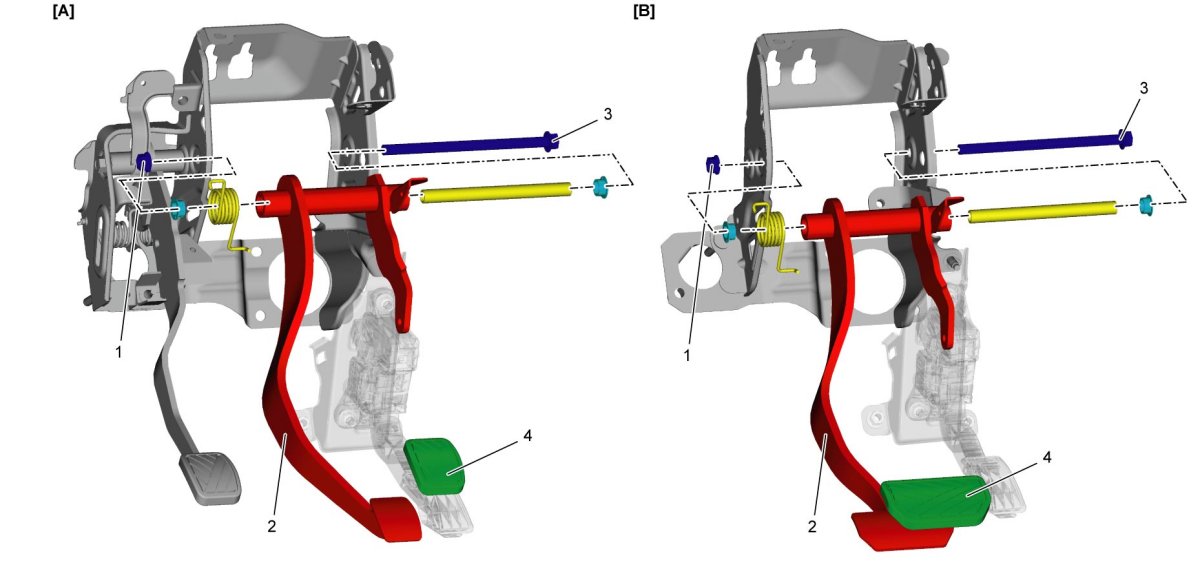
5) Loosen pedal shaft nut (1).
6) Remove brake pedal (2) by pulling out pedal shaft (3).
7) Remove pedal pad (4) from brake pedal, if necessary.

Installation
Reverse removal procedure noting the following points.
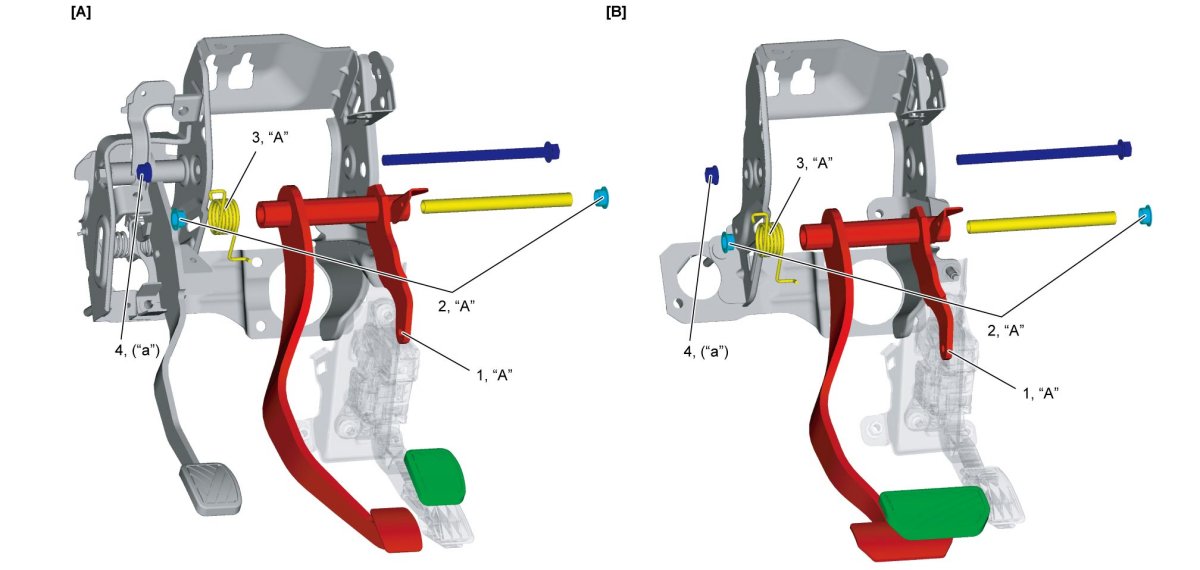
- Apply grease to inside of clevis hole in brake pedal (1), cylindrical side face of both pedal bushings (2), and brake pedal spring (3).
"A" Grease: 99000-25050 (SUZUKI Super Grease E)
- Tighten pedal shaft nut (4) to specified torque.
Tightening torque
Pedal shaft nut (a): 23 Nm (2.3 kgf-m, 17.0 lbf-ft)

- Insert clevis pin into holes in the clevis and brake pedal from right side.
- Check brake pedal free height and brake pedal play.
- Brake pedal free height: Brake Pedal Free Height Inspection
- Brake pedal play: Brake Pedal Play Inspection
- Adjust installation position of brake light switch. Brake Light Switch Inspection