Suspension Control Arm Removal and Installation: Removal
- Hoist vehicle and remove wheel.
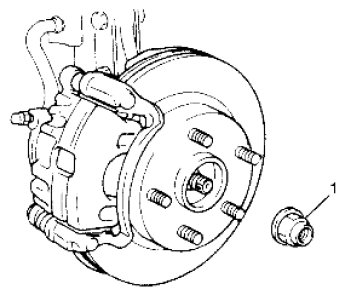
- Uncaulk drive shaft nut (1).
- Depress foot brake pedal and hold it. Remove drive shaft nut (1).
 Courtesy of SUZUKI OF AMERICA CORP.
- Disconnect tie-rod end from steering knuckle. Refer to TIE-ROD END REMOVAL AND INSTALLATION
.
.
- For headlight auto leveling model, remove front height sensor. Refer to HEIGHT SENSOR REMOVAL AND INSTALLATION (IF EQUIPPED)
.
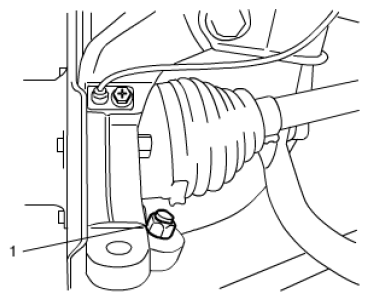
- Loosen ball joint nut (1).
 Courtesy of SUZUKI OF AMERICA CORP.
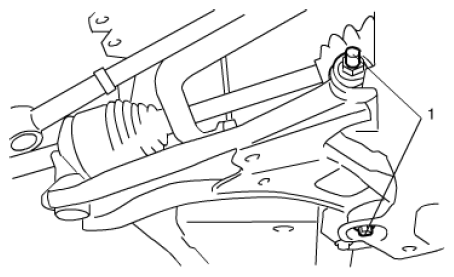
- Remove suspension control arm bolts (1).
 Courtesy of SUZUKI OF AMERICA CORP.
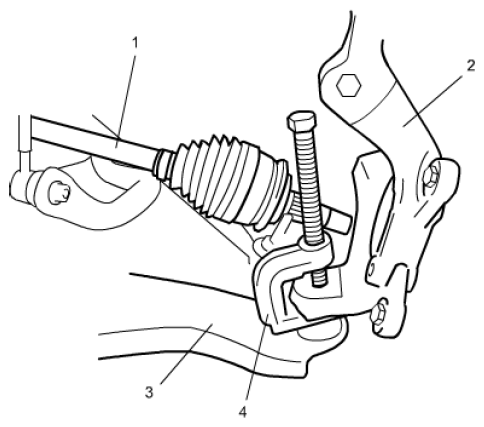
- Disconnect drive shaft (1) from steering knuckle (2).
- Remove steering knuckle (2) from control arm (3) using puller (4) and then remove control arm (3).
 Courtesy of SUZUKI OF AMERICA CORP.