Brake Fluid Reservoir: Service and Repair
Master Cylinder Reservoir Removal and Installation
NOTE:
Brake fluid is extremely damaging to painted surfaces.
If brake fluid contacts a painted surface, immediately wipe it off and flush the surface thoroughly with water.
NOTE:
Brake master cylinder cannot be disassembled in principle. Should primary piston have come off from cylinder while dismounting or handling it, wash it in the same specified fluid as that in reservoir and place it back in cylinder.
Removal
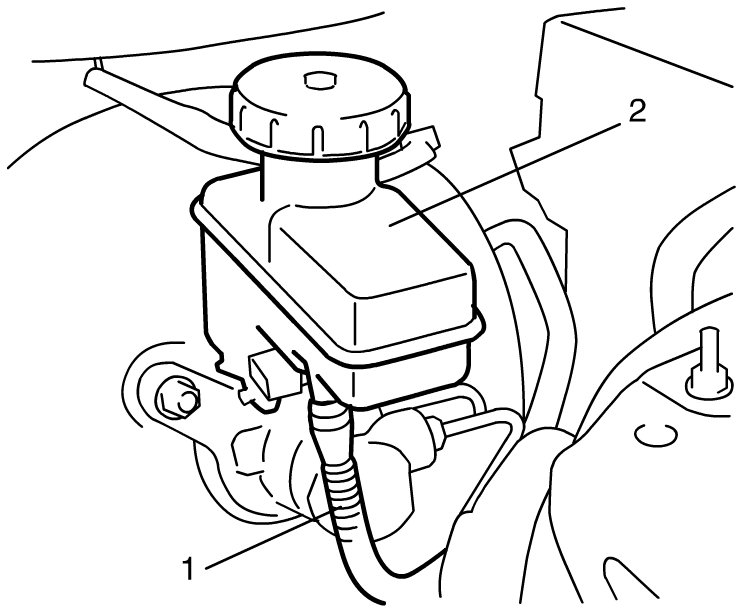
1) Disconnect reservoir lead wire at connector (1).
2) Clean outside of reservoir (2) and master cylinder (3).

3) Take out fluid with syringe or such.
4) Disconnect clutch reservoir hose (1) from reservoir (2) (M/T model).
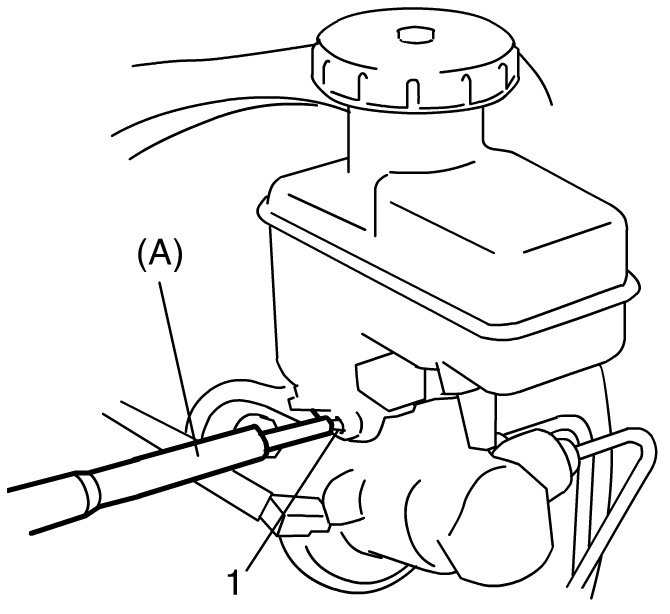
5) Remove reservoir connector pin (1) by using special tool and then reservoir.
Special Tool
(A): 09916-44310
Installation
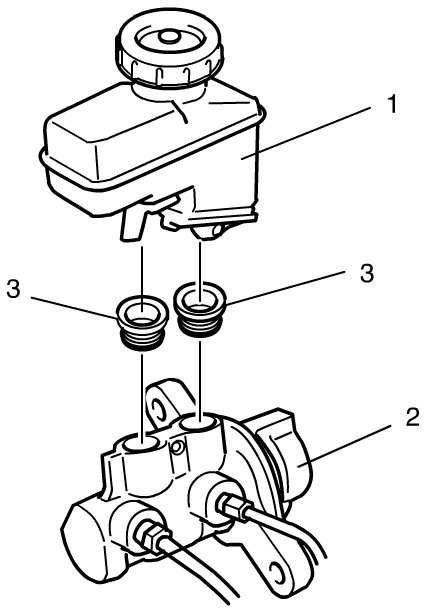
1) Lubricate new grommets with the same fluid as the one to fill reservoir (1) with. Then press-fit grommets (3) to master cylinder (2). Grommets (3) must be seated in place.
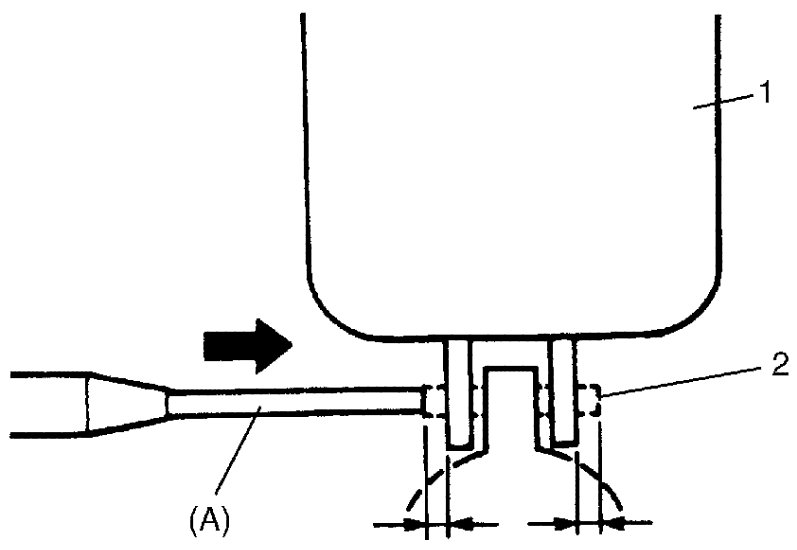
2) Install reservoir (1) and drive in reservoir connector pin (2) by using special tool (A). Till both of its ends at the right and left of reservoir becomes the same length.
Special Tool
(A): 09916-44310
3) Connect clutch reservoir hose (1) to reservoir (2) (M/T model).
4) Connect reservoir lead wire at coupler.
5) Fill reservoir with specified fluid.
6) After installing, bleed air from brake system, referring to Service and Repair Air Bleeding of Brake System
and bleed air from clutch system, referring to Service and Repair Air Bleeding of Clutch System
(M/T model).
7) Upon completion of installation, check for fluid leakage.