Removal and Replacement
Trailing Rod Removal and Installation
Removal
1) Hoist vehicle and remove rear wheels.
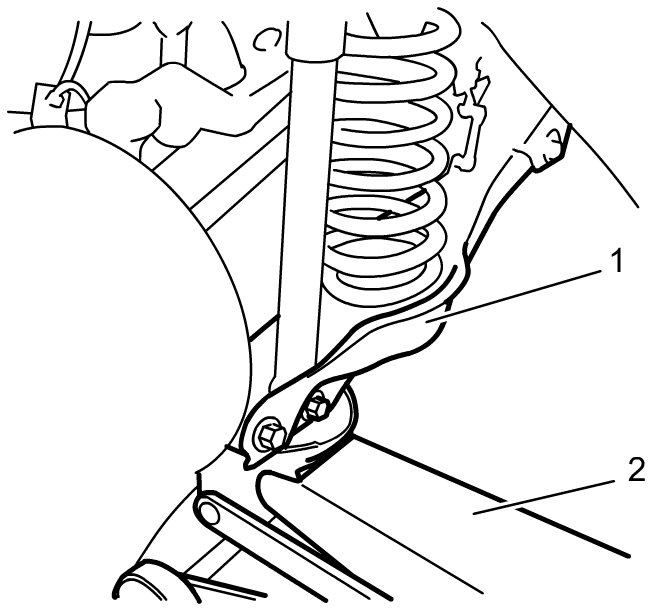
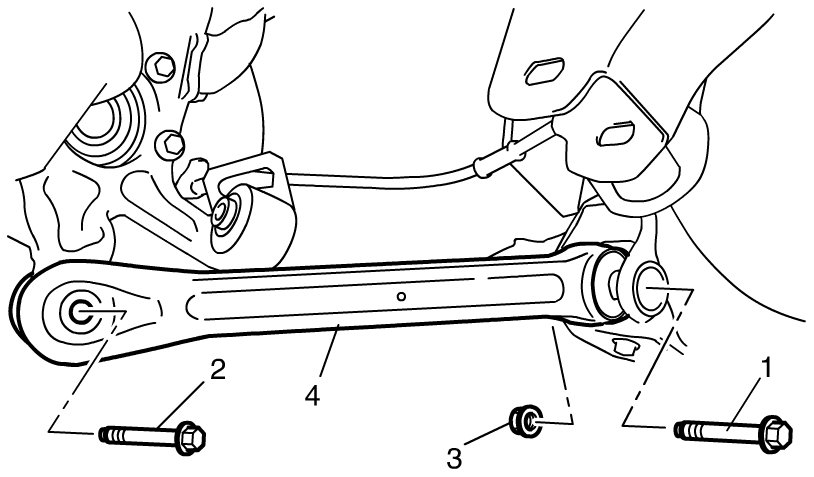
2) Support lower arm (1) with jack (2).
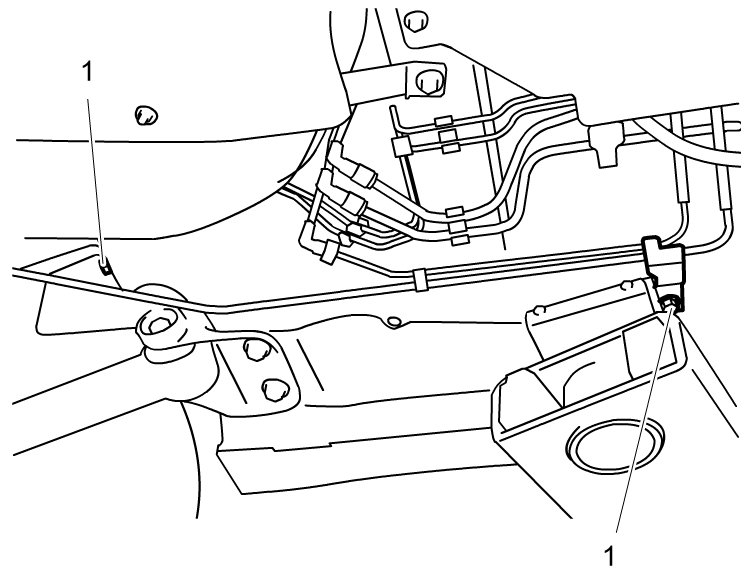
3) Remove air suction pipe bolts (1).
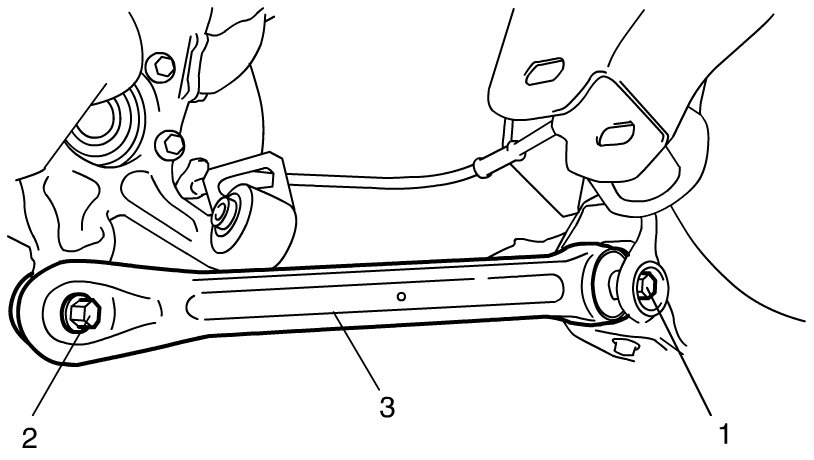
4) Remove trailing rod front bolt (1) and trailing rod rear bolt (2) and then trailing rod (3).
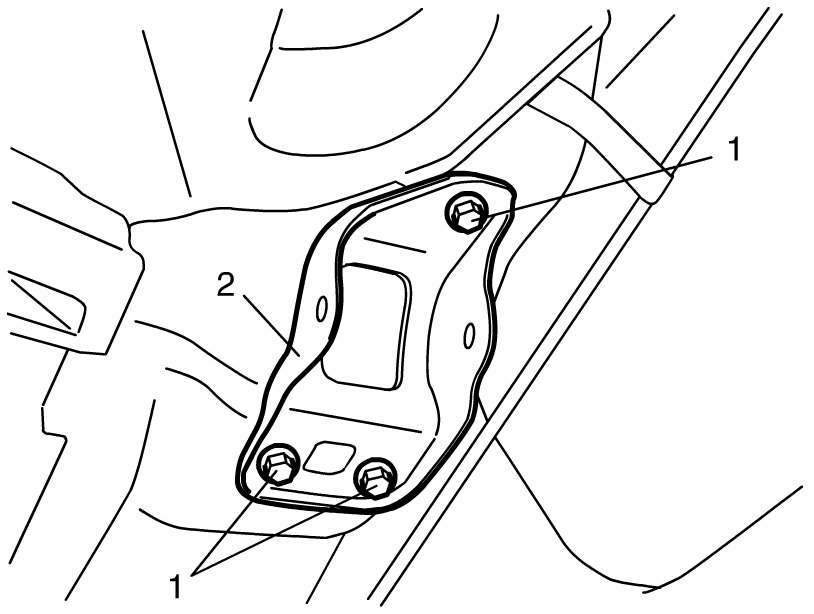
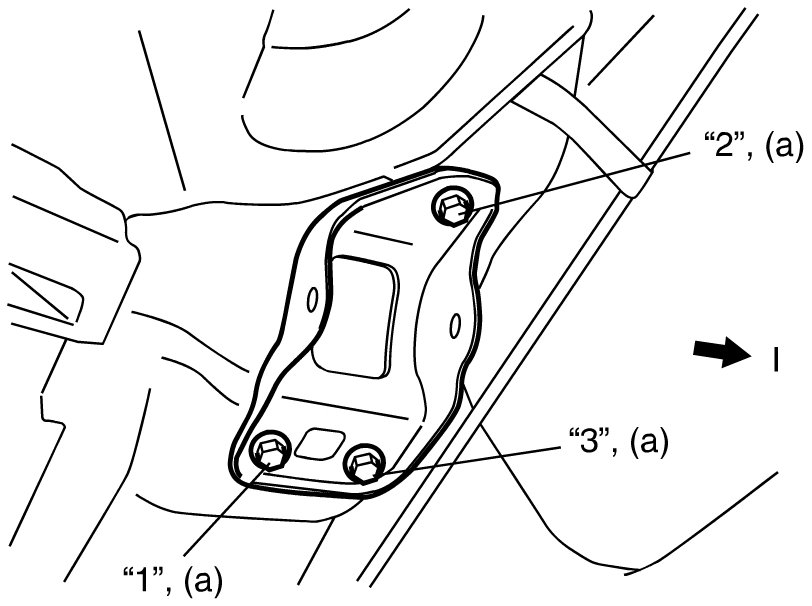
5) Remove trailing rod mount bracket bolt (1) and then trailing rod mount bracket (2).
Installation
1) Install trailing rod mount bracket and then tighten trailing rod mount bracket bolt in numerical order ("1" - "3") to specified torque.
NOTE:
If trailing rod mount bracket bolt is reused, they may work loose.
Be sure to replace the trailing rod mount bracket bolt with new ones whenever they are removed.
Tightening torque
Trailing rod mount bracket bolt (a): 105 Nm (10.5 kgf-m, 76.0 lbf-ft)

2) Install trailing rod (4).
a) Install trailing rod and insert trailing rod front bolt (1) from the body inside.
b) Insert trailing rod rear bolt (2).
c) Tighten trailing rod rear bolt (2) and trailing rod mount nut (3) temporarily by hand.
NOTE:
The trailing rod rear bolt and trailing rod mount nut are pre-coated with friction stabilizer. If these bolts are reused, they may work loose.
Be sure to replace the trailing rod rear bolt and trailing rod mount nut with new ones whenever they are removed.
3) Tighten air suction pipe bolts (1).
4) Remove floor jack from lower arm.
5) Install rear wheels and lower hoist. Removal and Replacement
6) Tighten trailing rod mount nut and trailing rod rear bolt to specified torque with vehicle weight on suspension.
NOTE:
It is the most desirable to have vehicle off hoist and in non-loaded condition when tightening them.
Tightening torque
Trailing rod mount nut 128 Nm (13.1 kgf-m, 94.5 lbf-ft)
Trailing rod rear bolt 128 Nm (13.1 kgf-m, 94.5 lbf-ft)
7) Check rear toe and camber adjust it as necessary. For check and adjustment procedures, refer to Rear Suspension Rear Wheel Alignment Inspection and Adjustment.