Intake Manifold Removal and Installation
Intake Manifold Removal and Installation
Throttle Body and Intake Manifold Components
Removal
1) Disconnect negative (-) cable from battery.
2) Remove engine cover.
3) Remove air cleaner outlet hose and air cleaner upper case. Air Cleaner Filter Removal and Installation
4) Remove throttle body assembly. Throttle Body Assembly Removal and Installation
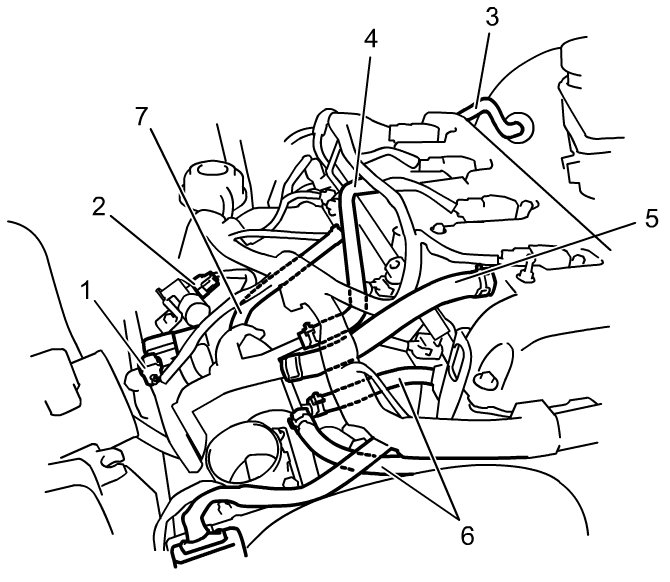
5) Disconnect the following connectors and hoses.
- EVAP canister purge valve connector (1)
- IMT vacuum solenoid valve connector (2)
- Brake booster hose (3)
- PCV valve hose (4)
- Breather hose (5)
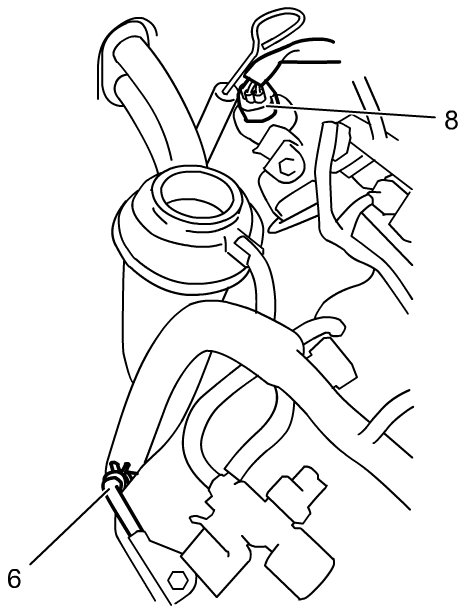
- Engine coolant hoses (6)
- Purge hose (7)
- IMRC valve actuator connector (8)
- A/T oil filler tube (A/T model): Oil Cooler Hose and Pipe Components
- Engine harness clamps
- Brake vacuum pipe. Brake Booster Components
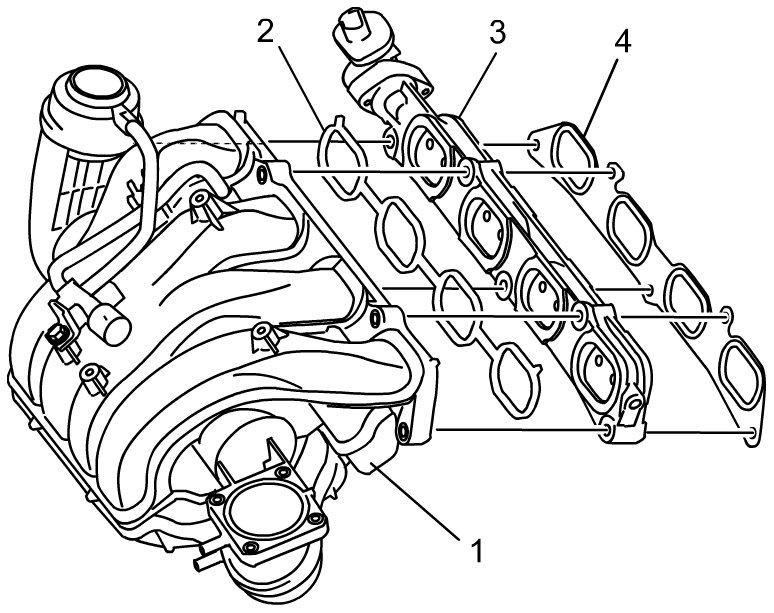
6) Remove intake manifold (1), intake manifold gasket (2), IMRC valve (3) and IMRC valve gasket (4) from cylinder head.
Installation
Reverse removal procedure for installation noting the following.
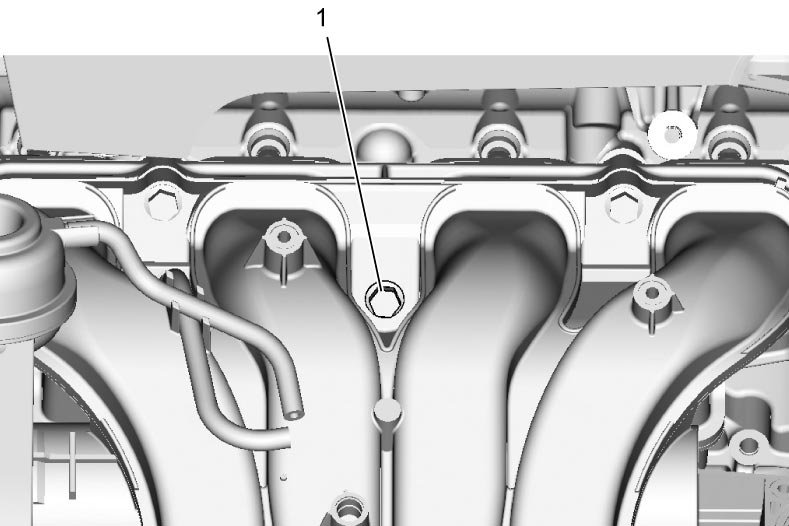
- Use new intake manifold bolt for position (1) in figure, because it is not reusable.
- Use new gaskets
- Refill cooling system. Refilling
- Check for coolant leaks. Initial Inspection and Diagnostic Overview