Front Disc Brake Pad Removal and Installation
Front Disc Brake Pad Removal and Installation
Front Disc Brake Pad On-Vehicle Inspection
NOTE:
Failure to take proper precautions during brake pad removal may cause damage to the brake flexible hose and/or the brake piston.
- Be careful not to damage the brake flexible hose during brake pad removal.
- Avoid depressing the brake pedal during the brake disc removal procedure to prevent the brake piston from being forced out of the cylinder.
NOTE:
When replacing brake pad, replace it on both side caliper as the set.
Removal
1) Hoist vehicle and remove front wheels.
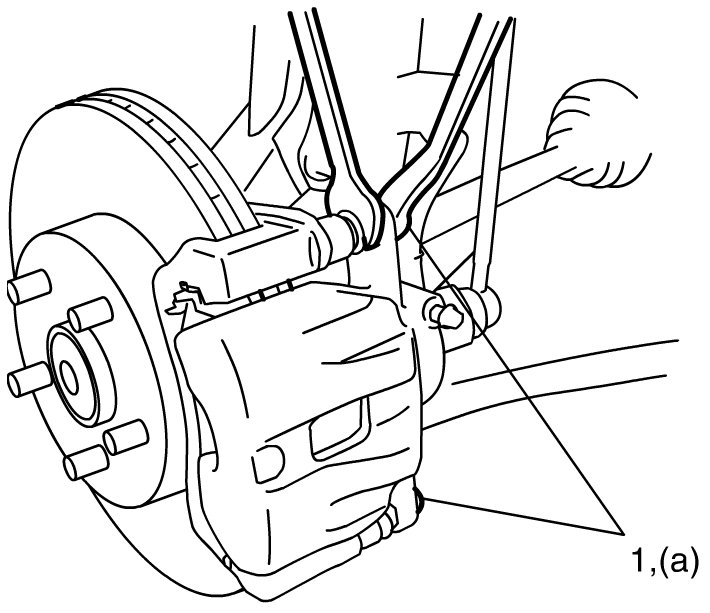
2) Remove caliper pin bolts (2).
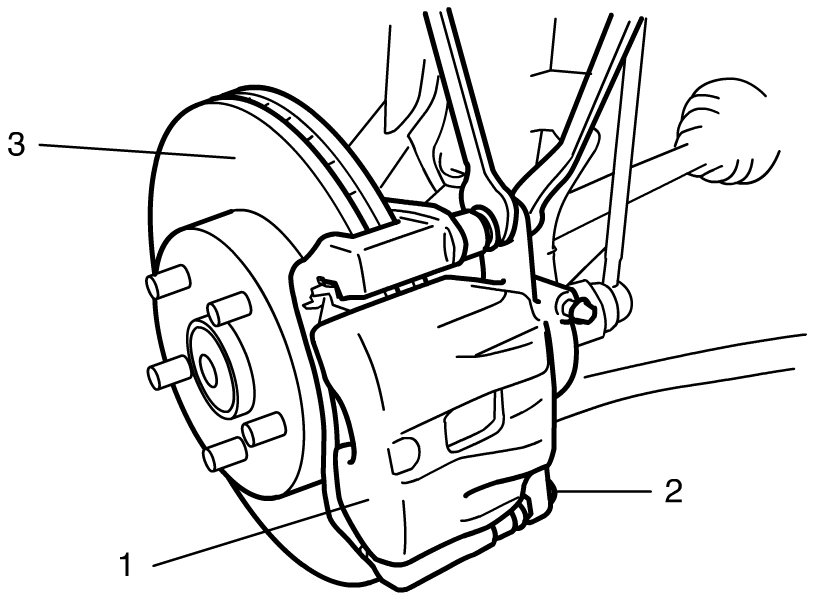
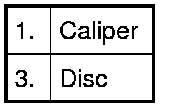
3) Remove caliper (1) from caliper carrier.
NOTE:
If the removed brake caliper (1) is left hung by the brake hose, the brake hose may be damaged due to the tension caused by the caliper's weight.
Hang a removed brake caliper with a wire hook (2) or the like to relieve the brake hose of the tension.
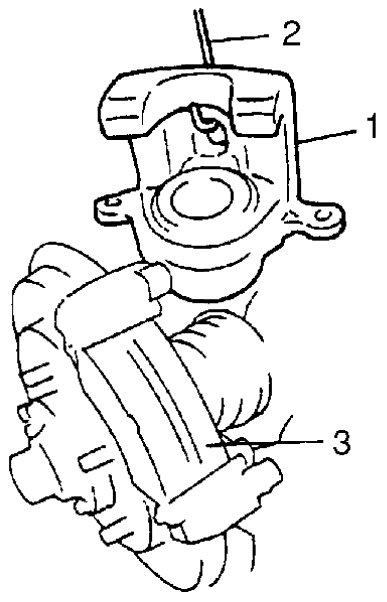
4) Remove pads (3).
Installation
Front Brake Disc and Pad Inspection
1) Install pad spring (1) and pads (2).
NOTE:
Install brake pad with wear indicator (5) to vehicle center side on right wheel brake.
2) Install caliper and tighten caliper (slide) pin bolts (1) to specification.
NOTE:
Make sure that boots are fit into groove securely.
Tightening torque
Caliper pin bolt (a): 36 Nm (3.6 kgf-m, 26.0 lbf-ft)
3) Install front wheel and tighten front wheel nuts to specified torque. Removal and Replacement
4) Upon completion of installation, perform brake test.