Coil Spring and Shock Absorber: Removal and Installation: Removal
- Remove the wheel and tire using power tool.
- Support the lower link using a suitable jack.
- Remove connecting rod upper joints from stabilizer bar using power tool. Refer to
[FRONT SUSPENSION ASSEMBLY: COMPONENT ].
- Swing stabilizer bar down, repositioning it out of the way to access shock absorber lower mount.
- Remove the shock absorber lower bolt and nut using power tool.
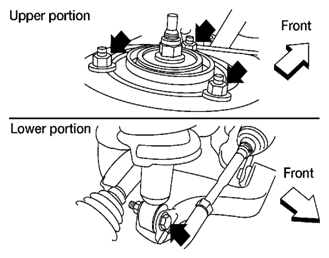 Courtesy of SUZUKI OF AMERICA CORP.
- Remove the three shock absorber upper mounting nuts using power tool.
- Remove the coil spring and shock absorber assembly.
- Turn steering knuckle out to gain enough clearance for removal.