CVT Oil Pan Removal and Installation
CVT Oil Pan Removal and Installation
NOTE:
The oil pan bolts are pre-coated with adhesive. If these bolts are reused, CVT fluid may leak.
Be sure to replace the oil pan bolts with new ones whenever they are removed.
Removal
1) Hoist vehicle.
2) Remove left side engine undercover.
3) Drain CVT fluid. Removal and Replacement
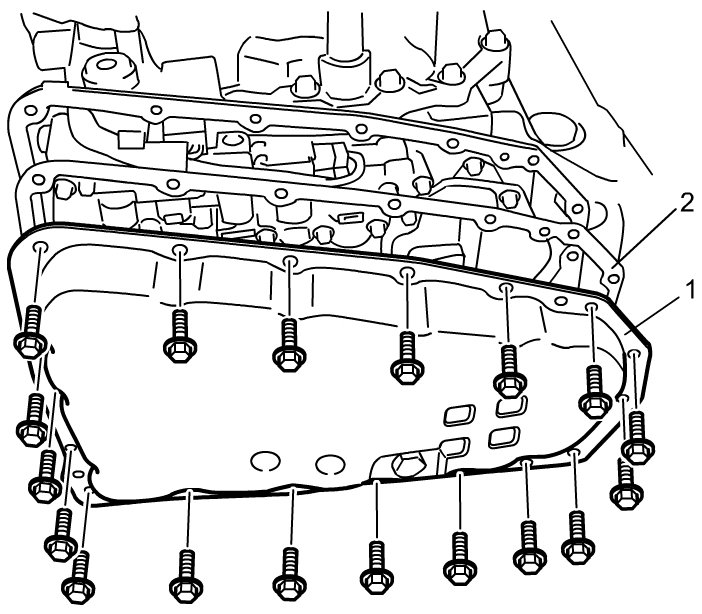
4) Remove CVT oil pan (1) and oil pan gasket (2).
Installation
CVT Oil Pan Inspection
Reverse removal procedure noting the following points.
- Clean matching surface of CVT case and CVT oil pan. Remove CVT fluid, old gasket and dust from matching surface.
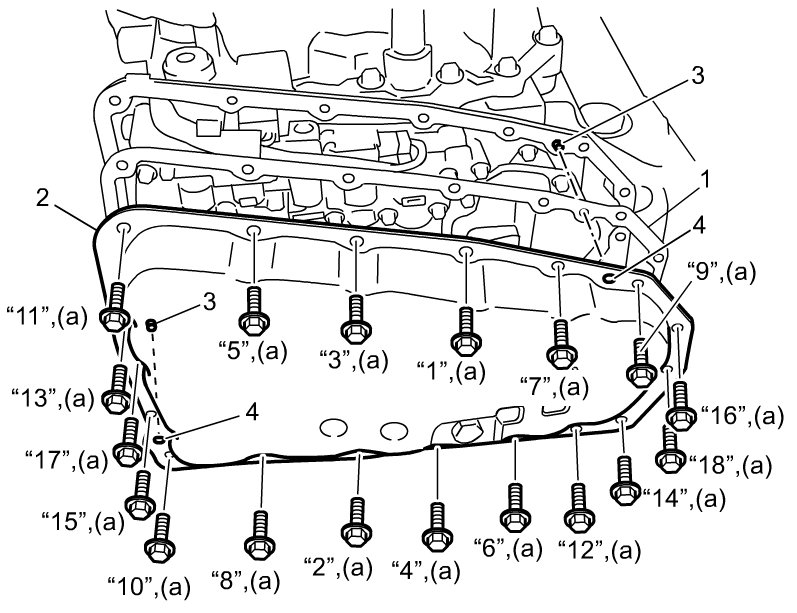
- Use new gasket (1) and new bolts for CVT oil pan (2).
- Align the dowel pin (3) of CVT case and the dowel pin hole (4) of CVT oil pan, and then install CVT oil pan.
- Tighten CVT oil pan bolts in numerical order ("1" - "18") evenly and gradually to specified torque.
Tightening torque
CVT oil pan bolt* (a): 7.9 Nm (0.81 kgf-m, 6.0 lbf-ft)
- Replenish CVT fluid. Removal and Replacement
- Check CVT fluid level. Procedures
- Check for CVT fluid leakage after warming up CVT.