Water Control Valve Removal and Installation
Water Control Valve: Removal and Installation
WARNING:
Never remove the radiator cap when the engine is hot. Serious burns could occur from high pressure engine coolant escaping from the radiator. Wrap a thick cloth around the cap. Slowly turn it a quarter of a turn to release built-up pressure. Carefully remove radiator cap by turning it all the way.
Removal
CAUTION:
Perform when the engine cold.
1) Remove air ducts and resonator assembly.
2) Partially drain the engine coolant from the radiator. Refer to [Changing Engine Coolant] Service and Repair.
3) Remove radiator hose (upper) from the water outlet.
4) Remove the heater outlet.
5) Remove the water control valve.
Inspection after Removal
- Place a thread so that it is caught in the valve of the water control valve. Immerse fully in a container filled with water. Heat while stirring.
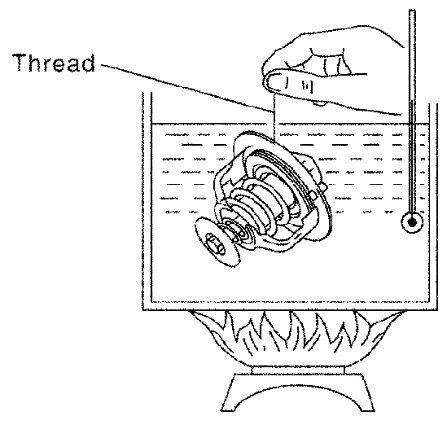
- The valve opening temperature is the temperature at which the valve opens and the falls from the thread.
- Continue heating. Check the full-open lift amount.
NOTE:
The full-open lift amount standard temperature for the water control valve is the reference value.
- After checking the full-open lift amount, lower the water temperature and check the valve closing temperature.
Standard values

Installation
Installation is in the reverse order of removal.
Water Control Valve
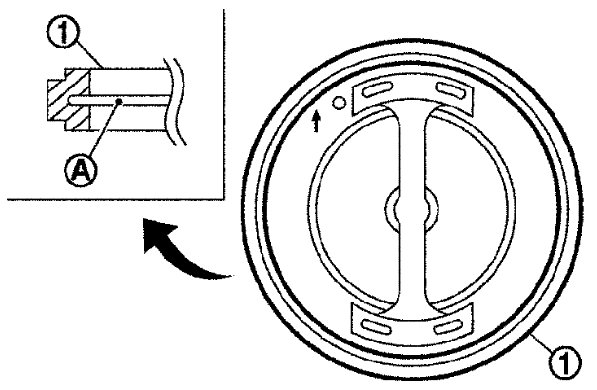
- Install water control valve by making rubber ring (1) groove fit to water control valve flange (A) around the whole circumference.
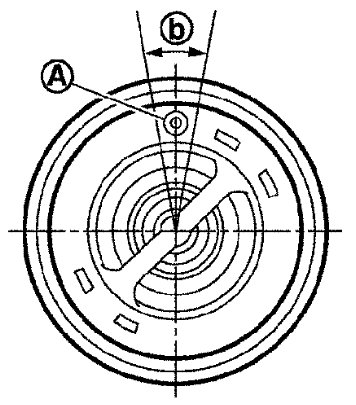
- Install water control valve with jiggle valve (A) facing upward. The position may deviate within the range of 20° (b).
- Install the engine coolant temperature sensor if removed.
Use Genuine RTV Silicone Sealant or equivalent. Refer to [Recommended Chemical Products and Sealants] Recommended Chemical Products and Sealants.