Gear Shift Lever Front Case Assembly Removal and Installation
Gear Shift Lever Front Case Assembly Removal and InstallationRemoval
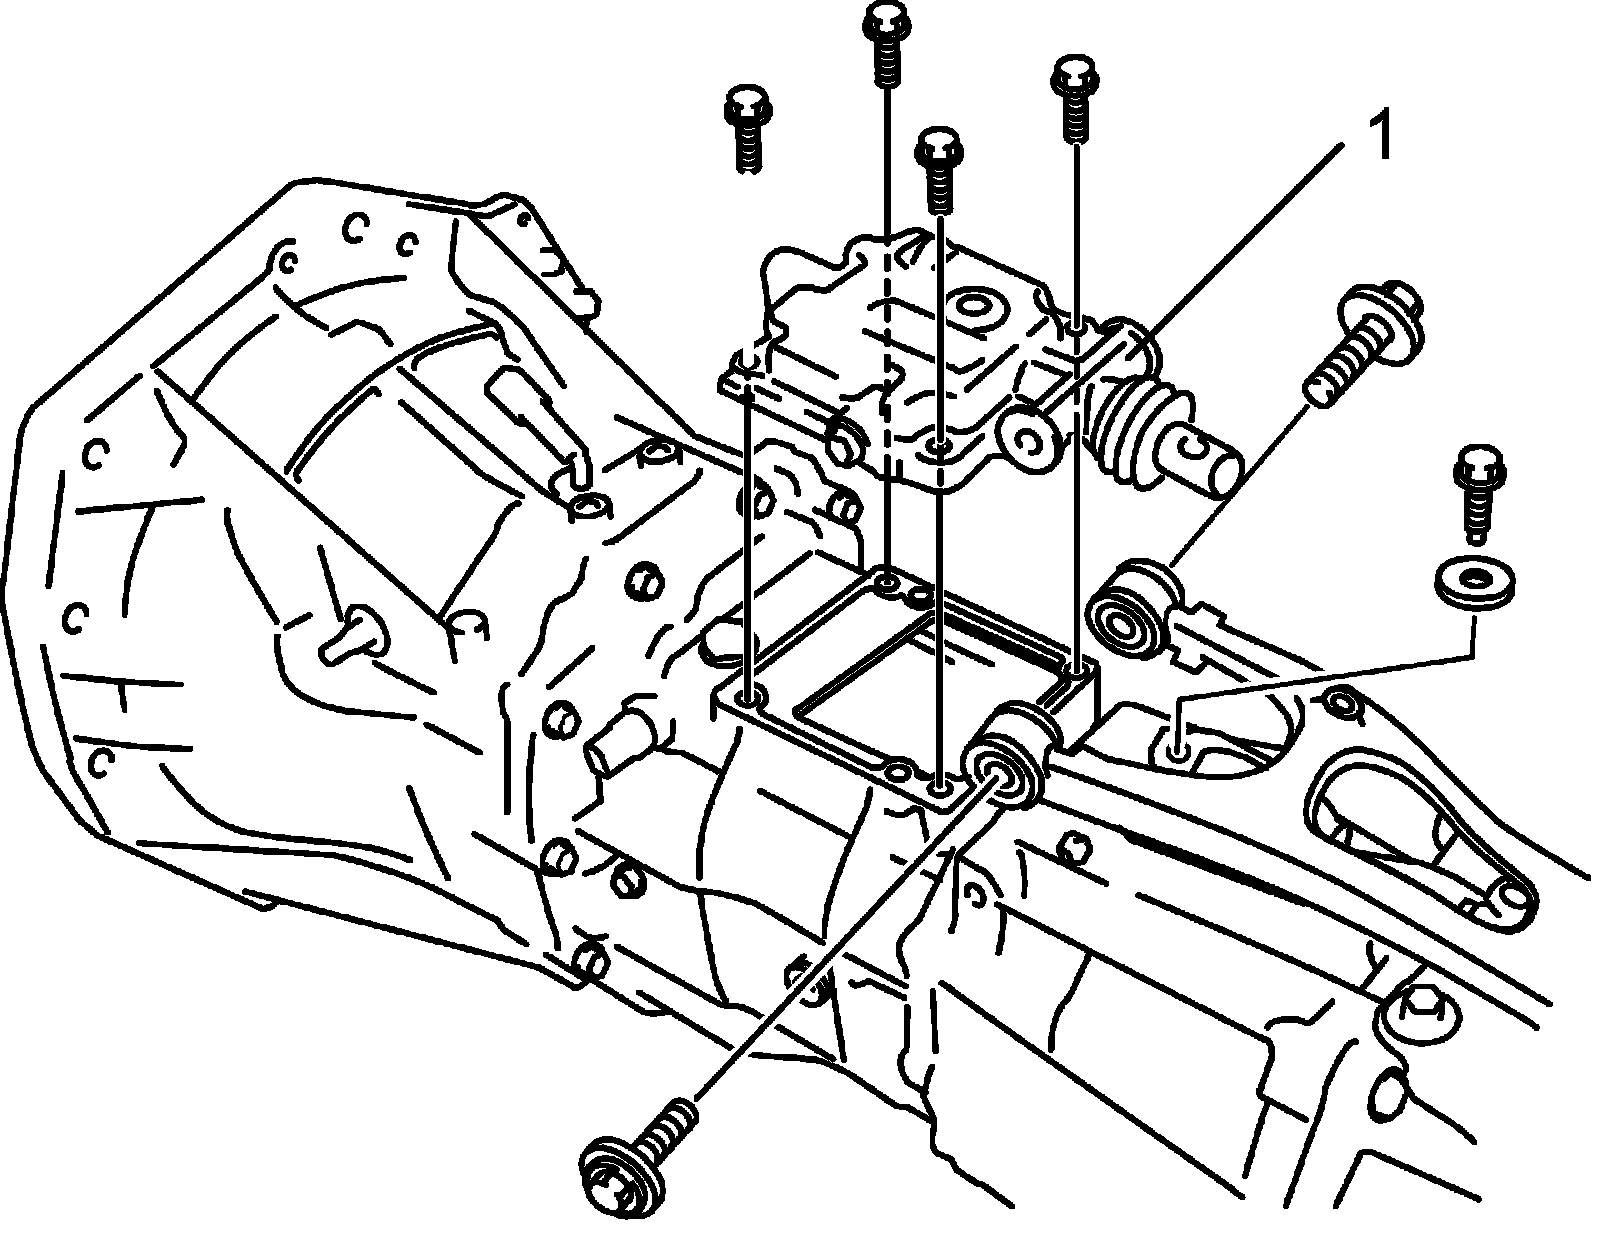
1) Dismount transmission assembly.
2) Remove gear shift lever front case assembly (1) from transmission rear case.
Installation
NOTE:
^ Install gear shift lever front case to transmission rear case without using sealant for functional check.
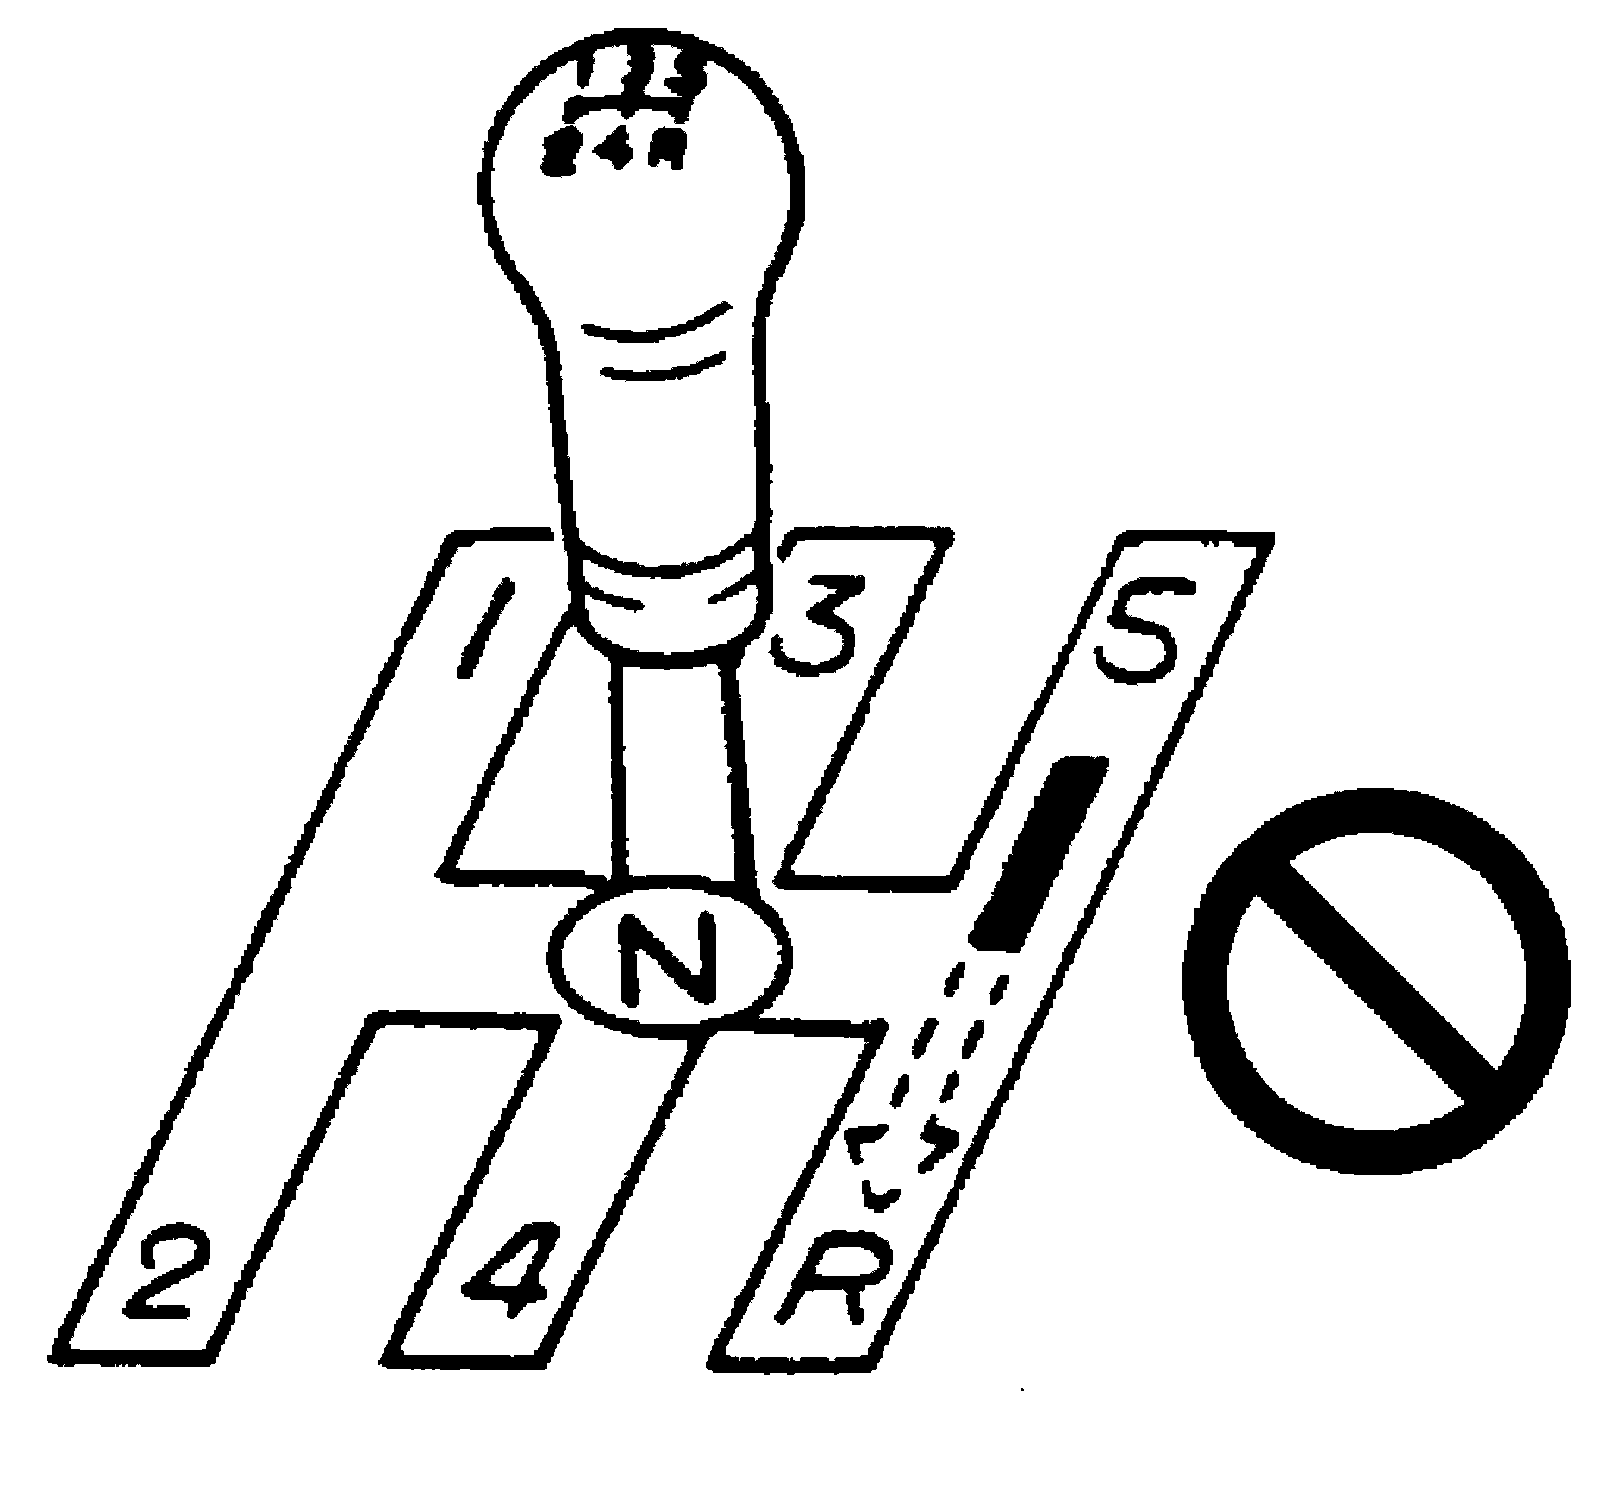
^ Install shift control lever and check to make sure that it shifts smoothly according to shift pattern as shown in figure.
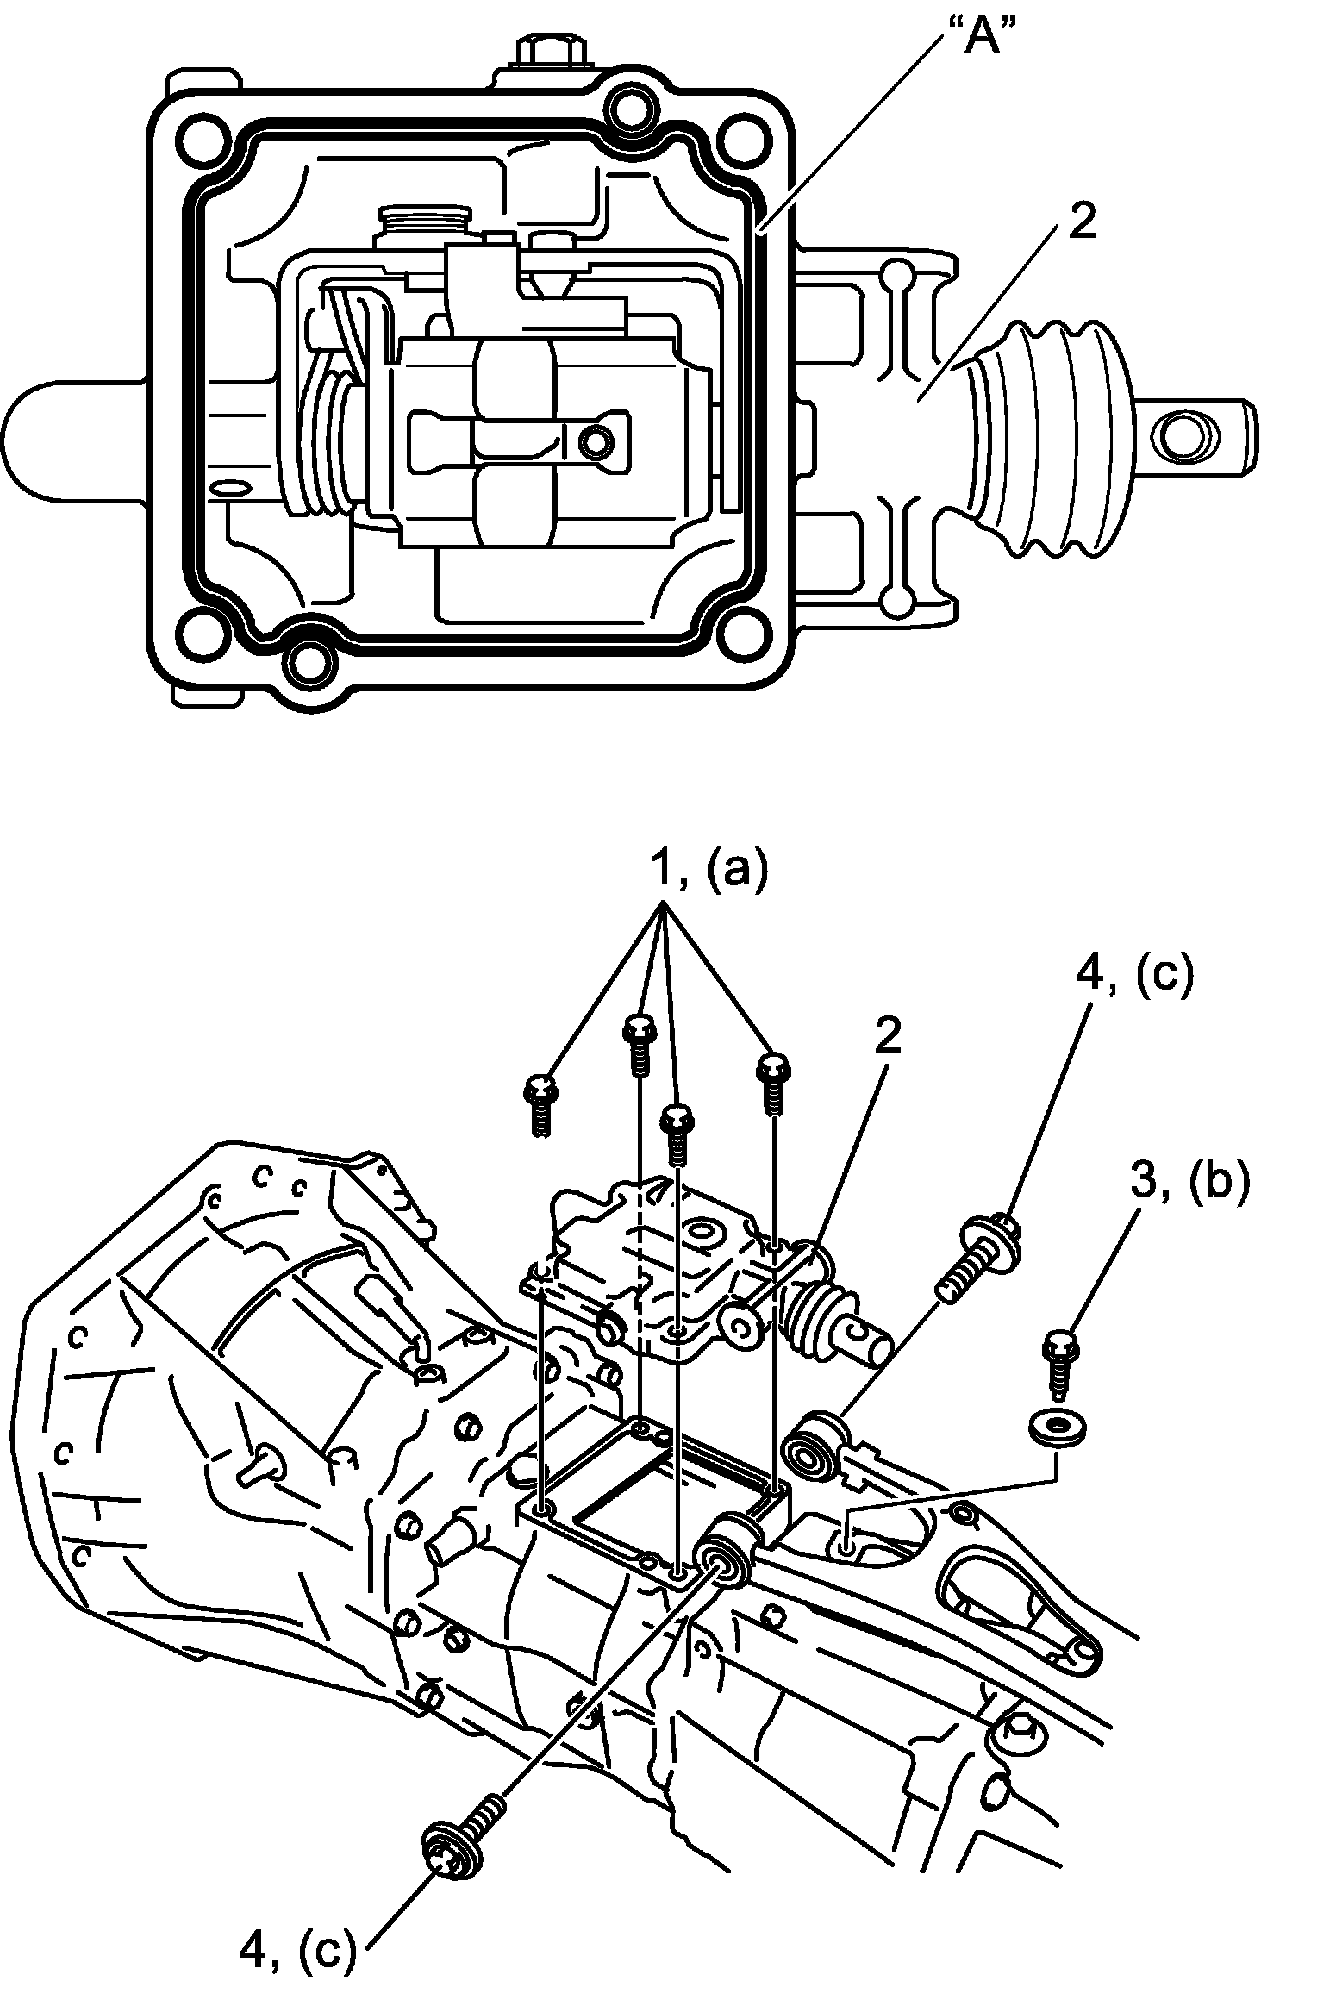
1) Clean mating surface of both rear case and gear shift lever front case (2), and uniformly apply sealant to lever case as shown in figure by such amount that its section is 1.2 mm (0.047 in.) in diameter, and then mate it with gear shift lever front case.
"A": Sealant 99000-31260 (SUZUKI Bond No.1217G)
2) Install lever case to rear case and then tighten new lever case bolts (1) to specified torque.
CAUTION:
Be sure to use new bolts with pre-coated adhesive. Otherwise, bolts may loosen.
Tightening torque
Gear shift lever front case bolt (a): 23 Nm (2.3 kg-m, 17.0 lbf-ft)
3) Tighten gear shift control shaft joint bolt (3) and gear shift control bush bolt (4) to specified torque.
Tightening torque
Control shaft joint bolt (b): 33 Nm (3.4 kg-m, 24.5 lbf-ft)
Control bush bolt (c): 13 Nm (1.3 kg-m, 9.5 lbf-ft)
4) Remount transmission assembly.