Fluid Pan: Service and Repair
Oil Pan: Removal and InstallationRemoval and Installation
Removal
1) Drain A/T fluid.
2) Remove oil pan bolts.
3) Remove oil pan and gasket.
4) Check for foreign materials in oil pan to help determine cause of malfunction. If the A/T fluid is very dark, has some burned smell, or contains foreign particles then friction material (clutches, band) may need replacement. A tacky film that will not wipe clean indicates varnish build up. Varnish can cause valves, servo, and clutches to stick and can inhibit pump pressure.
CAUTION:
If friction material is detected, flush the transmission cooler after repair. Refer to [A/T Fluid Cooler Cleaning].
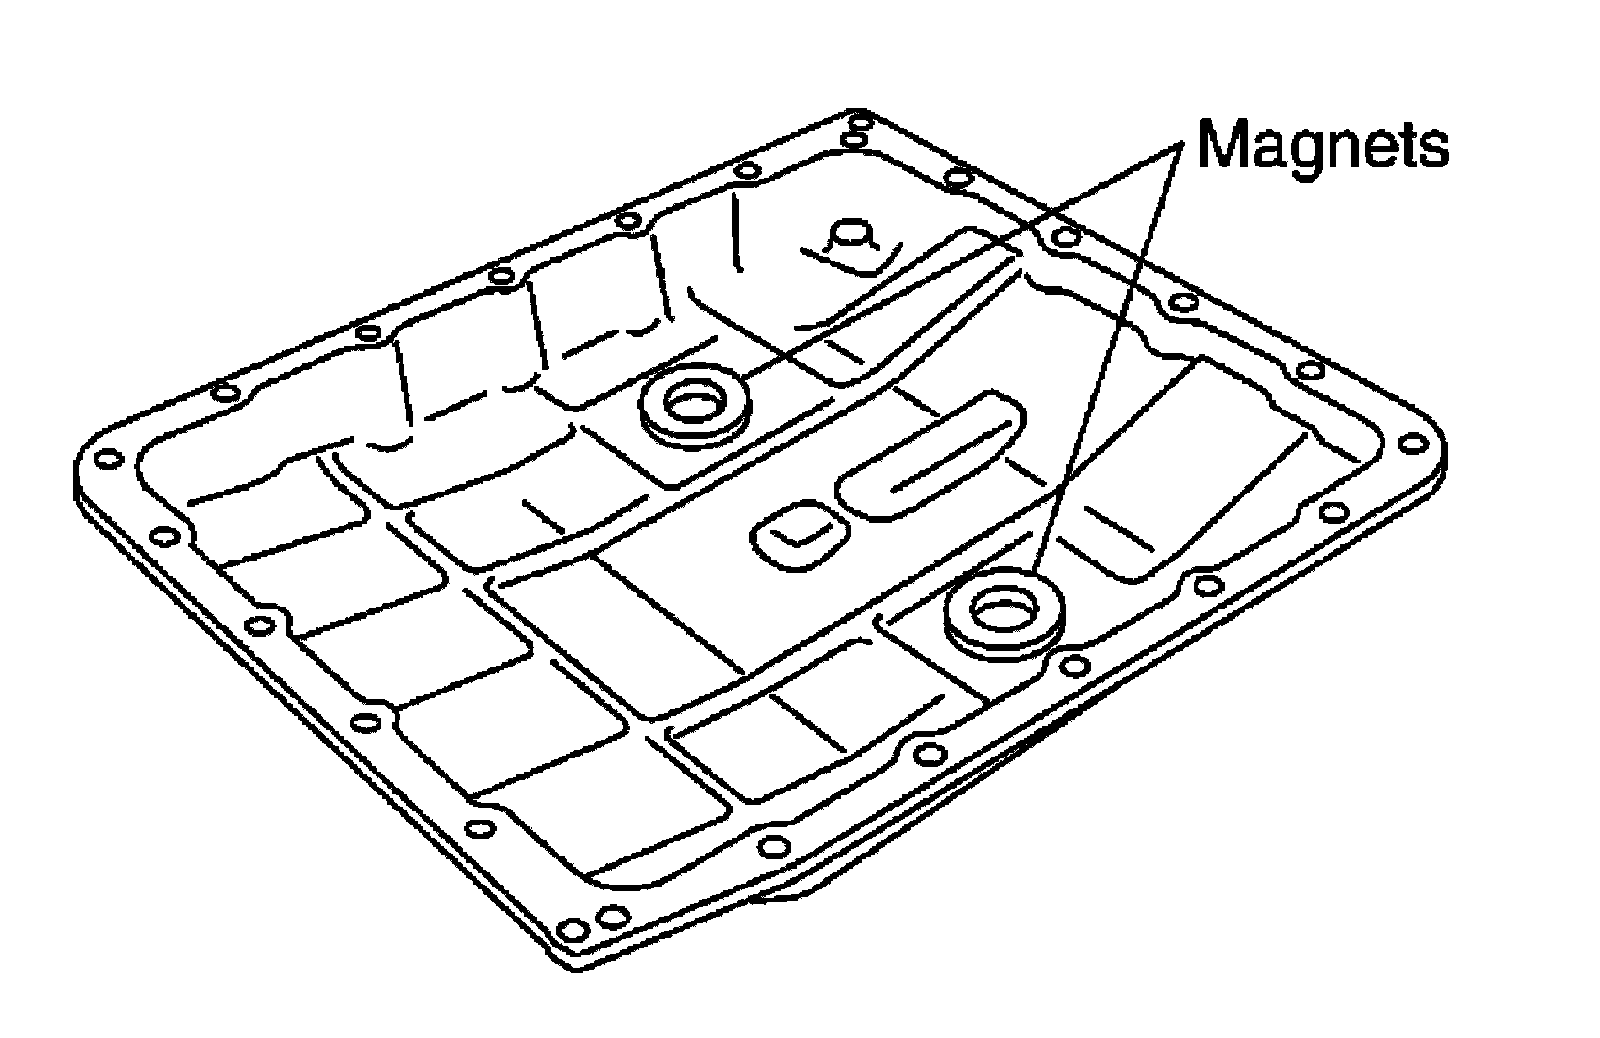
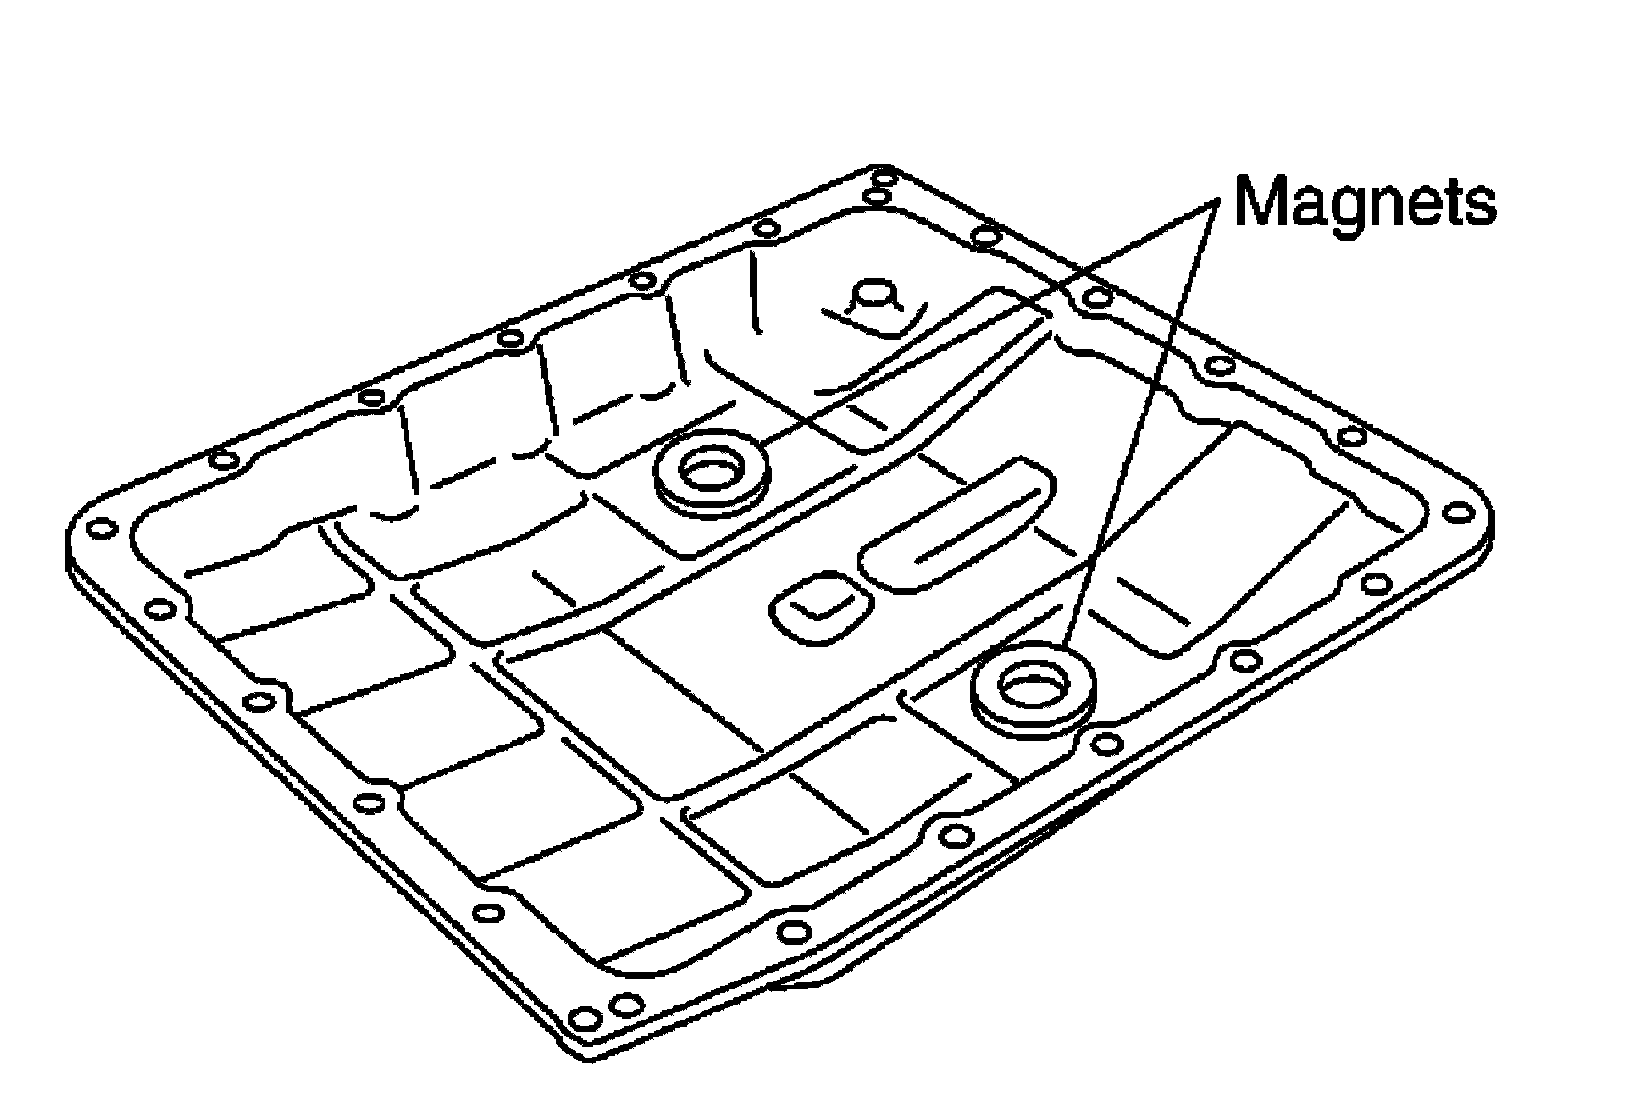
5) Remove magnets from oil pan.
Installation
1) Install the oil pan magnets as shown.
2) Install the oil pan with new oil pan gasket.
CAUTION:
^ Be sure the oil drain plug is located to the rear of the transmission assembly.
^ Before installing oil pan bolts, remove any traces of old sealant from the sealing surfaces and threaded holes.
^ Do not reuse old gasket, replace with a new one.
^ Always replace the oil pan bolts as they are self-sealing.
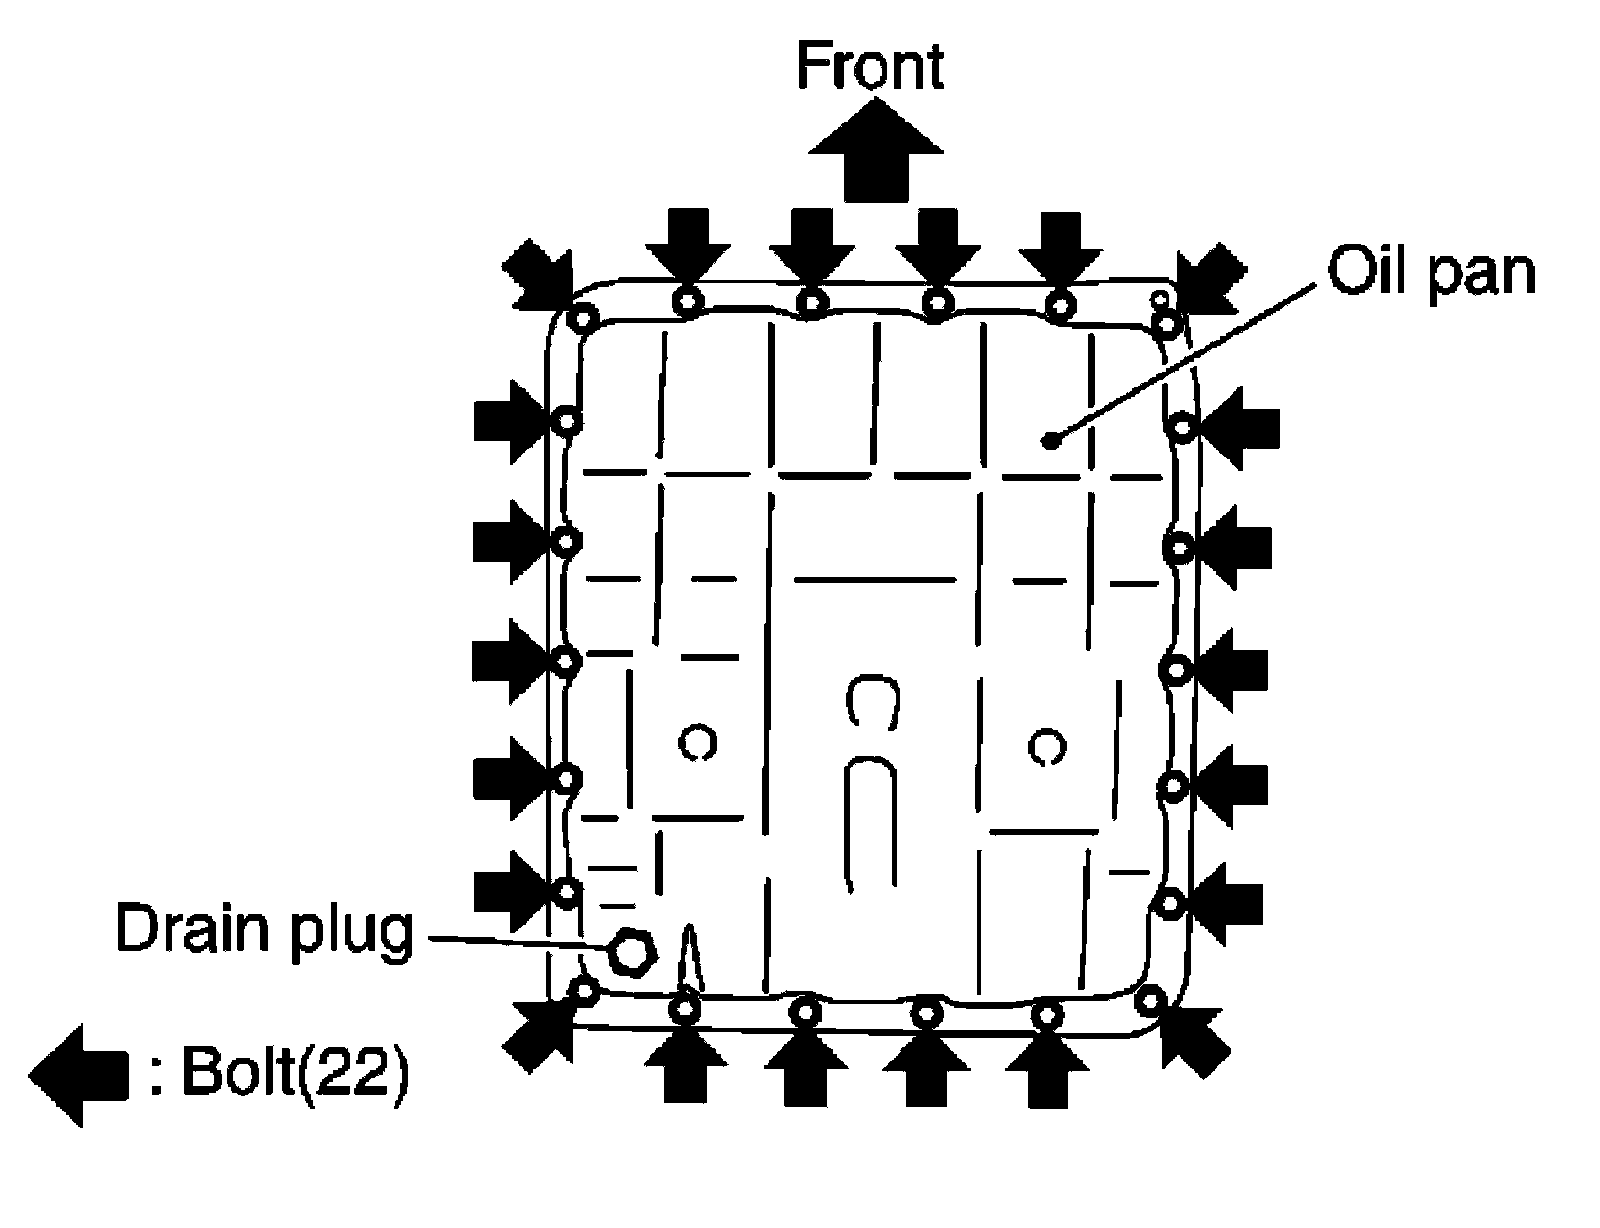
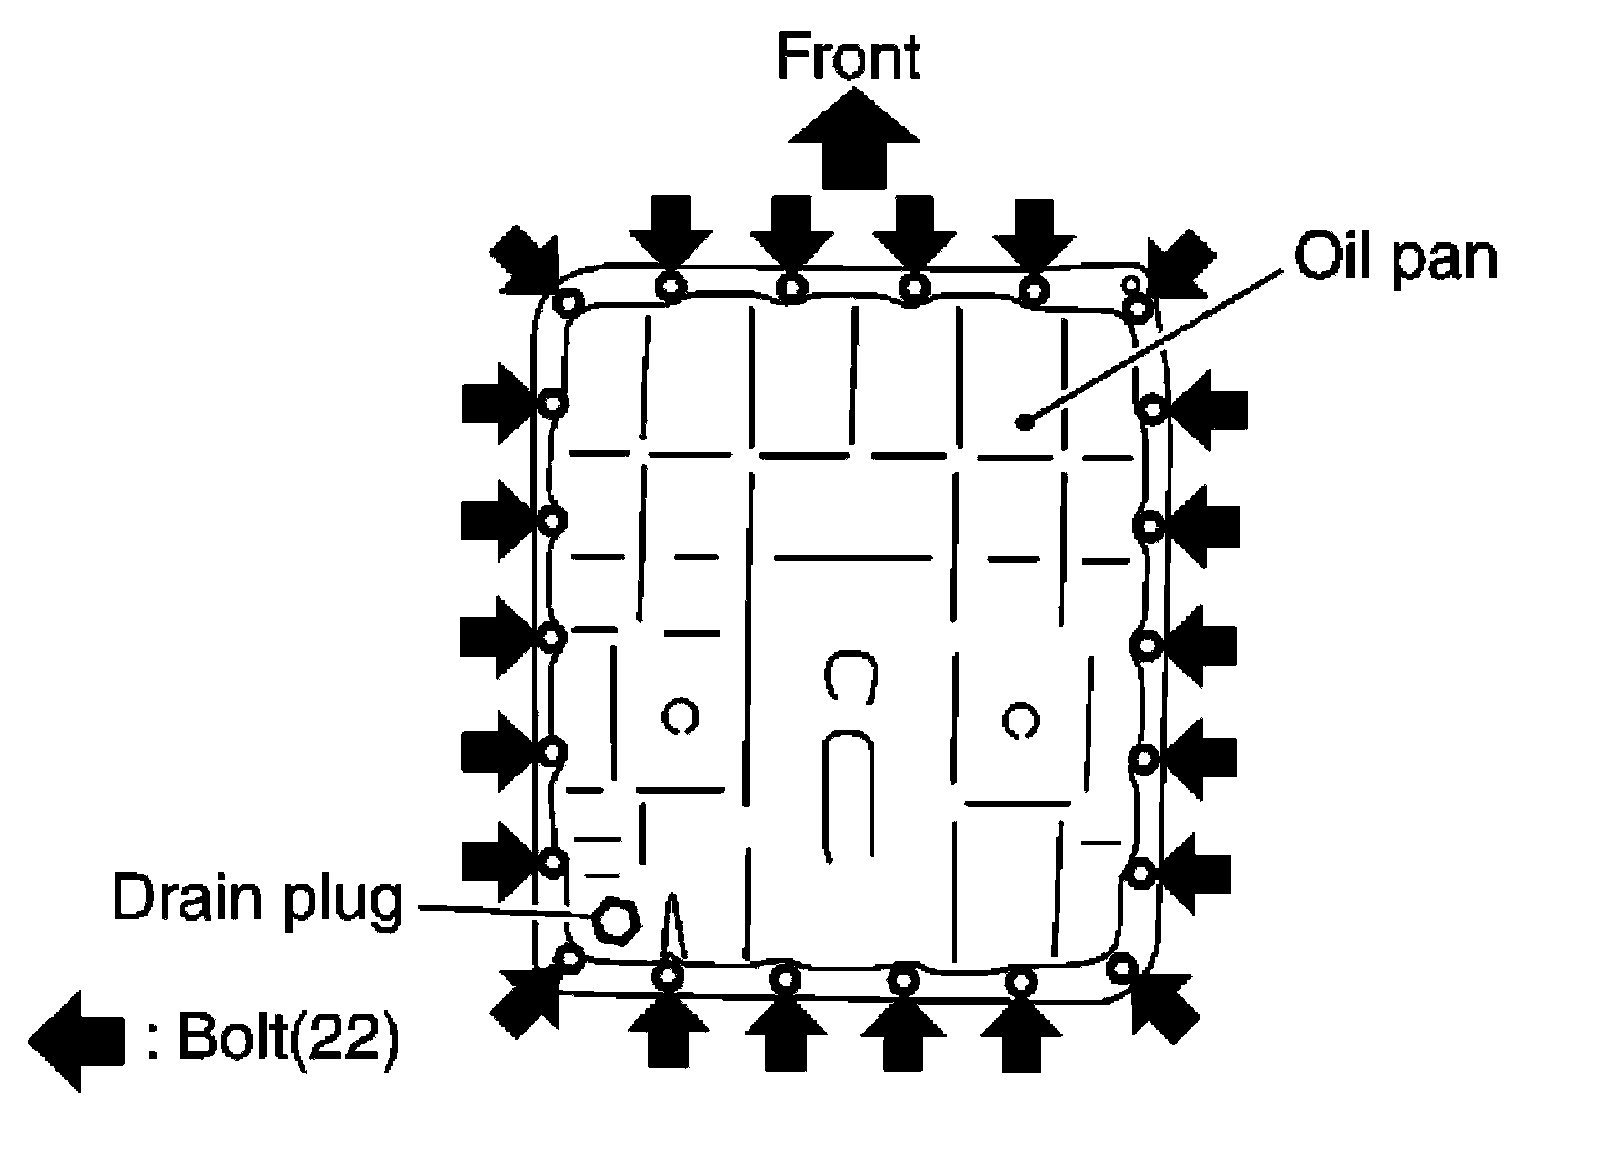
^ Partially install the oil pan bolts in a criss-cross pattern to prevent dislocation of the gasket.
3) Tighten oil pan bolts in numerical order as shown.
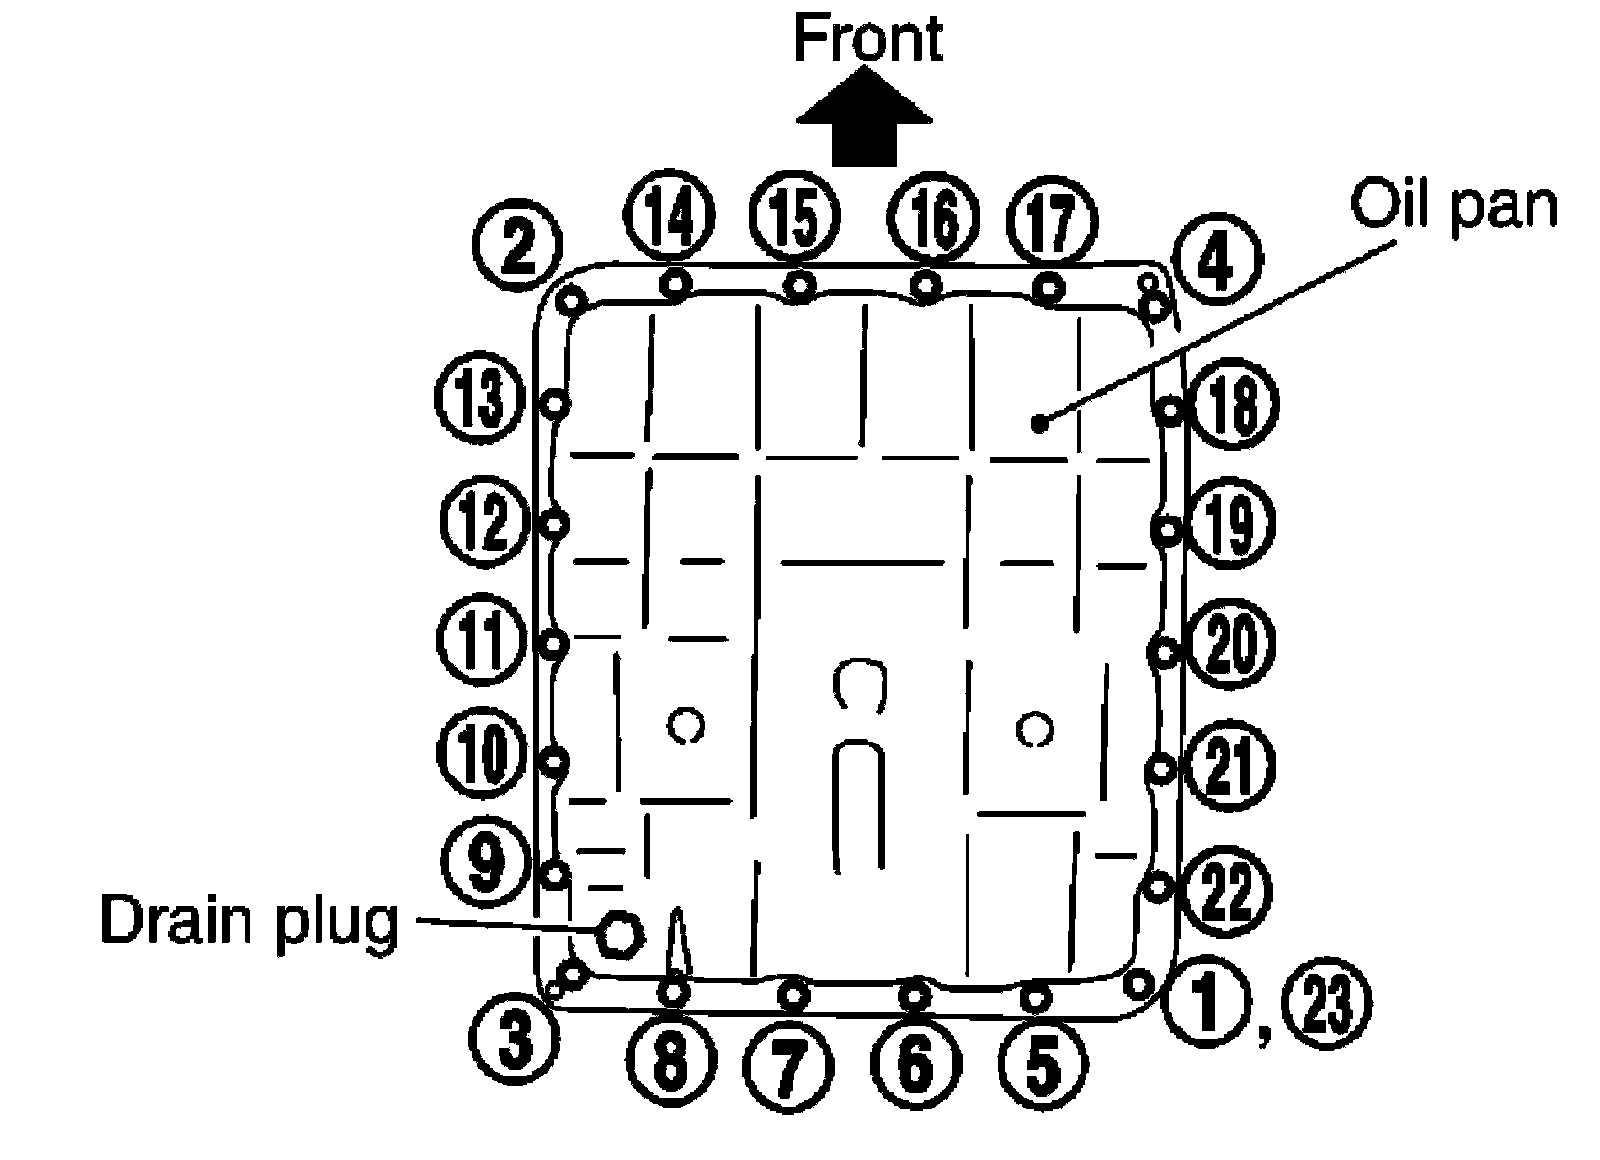
Oil pan bolts : 7.9 Nm (0.81 kg-m, 70 in-lb)
4) Refill the A/T with fluid and check for fluid leakage.