Recall NQ - Steering Column/Air Bag Bolt Torque
DIVISION: AUTOMOTIVECATEGORY: TECHNICAL
SECTION TITLE: RESTRAINTS
TSB NO: TS 01 03260
SUBJECT:
SAFETY RECALL CAMPAIGN NQ, INSTRUMENT PANEL BOLT TORQUE INSPECTION.
MODEL(S):
EQUATOR (A61640)
YEAR:
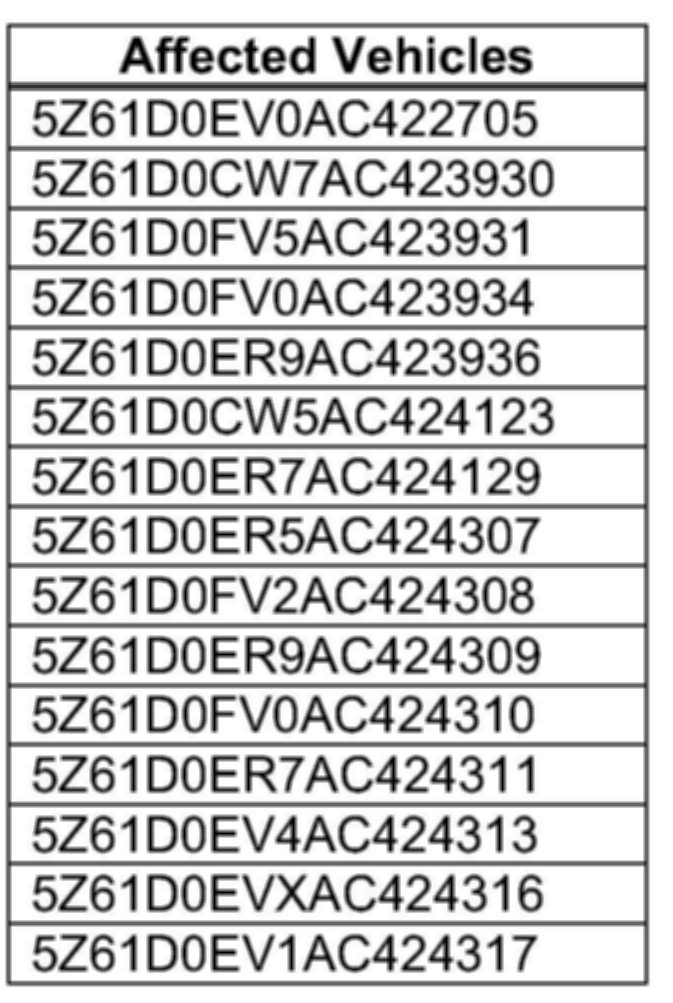
2010 (ONLY APPLIES TO THOSE VEHICLES IDENTIFIED IN THE VIN LIST SHOWN IN THIS BULLETIN)
CONDITION:
Suzuki is conducting a limited Dealer Inventory Inspection on certain MY 2010 Equator vehicles. Bolts/Nuts used to secure passenger airbag and steering column may be either under torqued or missing. A rattle noise may occur. In a worse case, the airbag system may not work as designed.
CAUSE:
Fastening torque software was updated 2/22/2010. However, the DC fastening tool interlock capability was not initiated for the passenger airbag and steering column fasteners UNTIL 3/13/2010.
CORRECTION:
Inspect and torque the affected nuts and bolts, and install any nut(s) or bolt(s) found missing.
According to federal law, all affected in-dealer stock inventory, if any, subject to this Safety Recall campaign must be completed prior to the retail sale or lease of the affected vehicle.
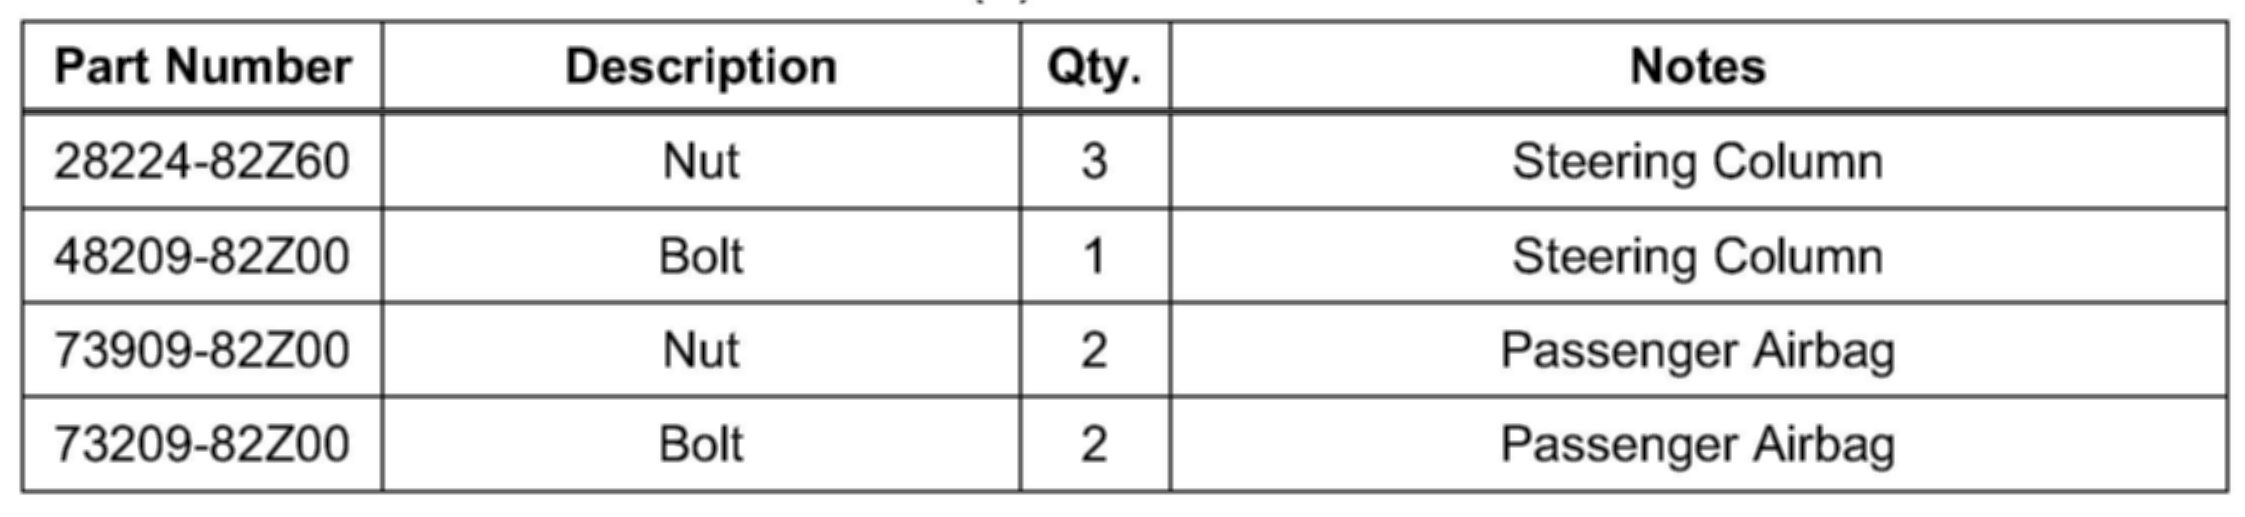

PART(S) INFORMATION
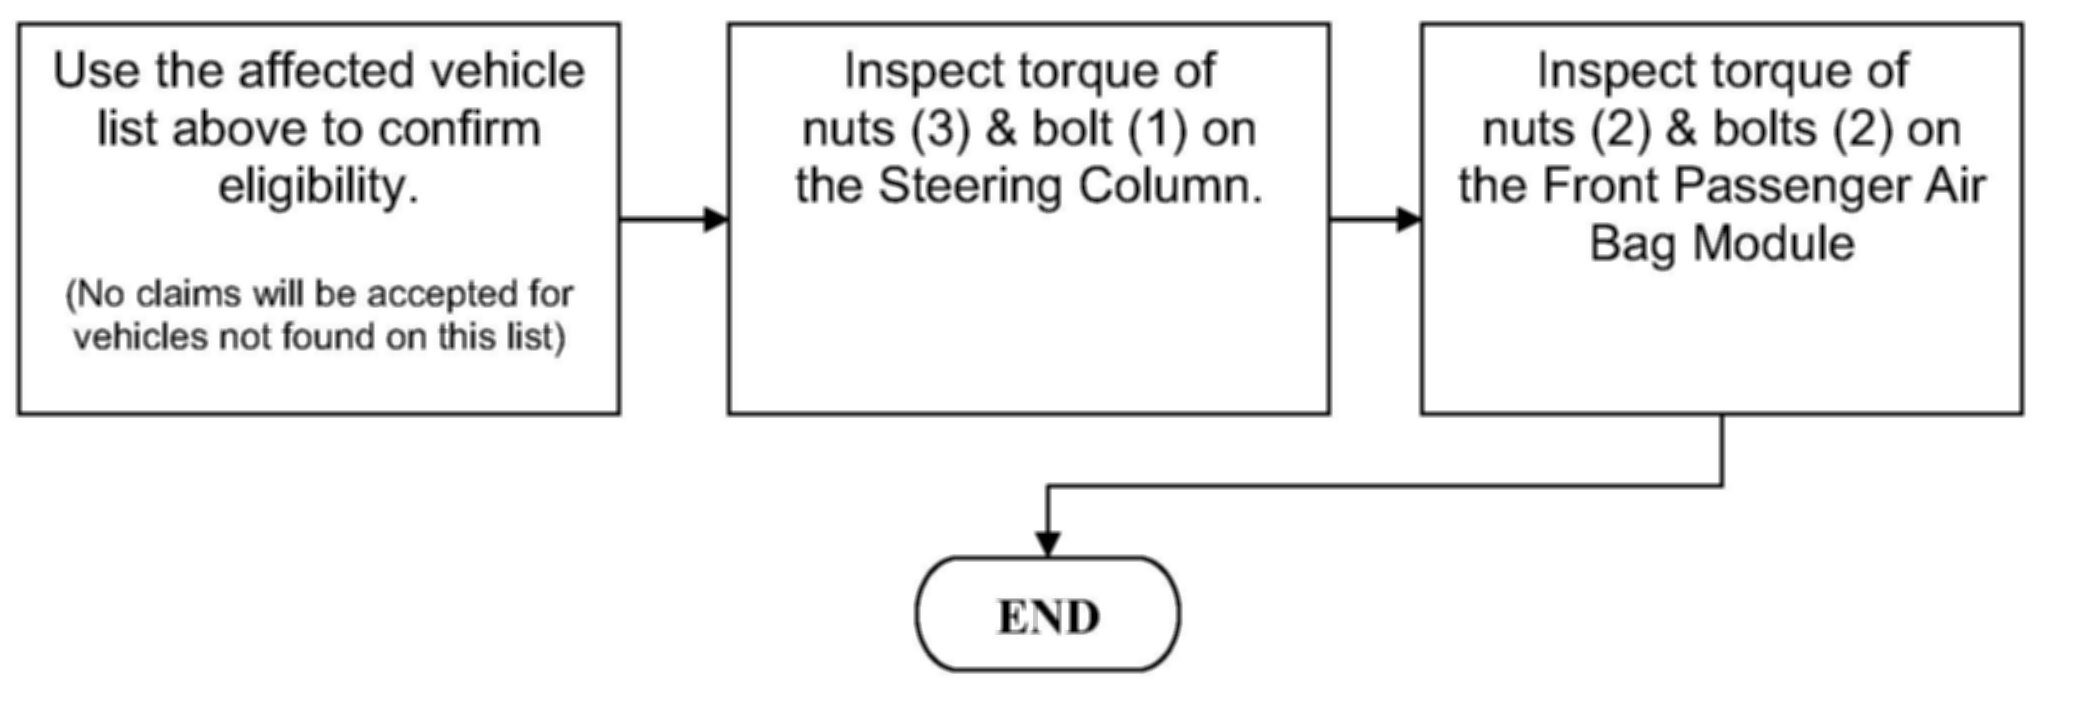
REPAIR OVERVIEW
SERVICE PROCEDURE
1. Open driver's door
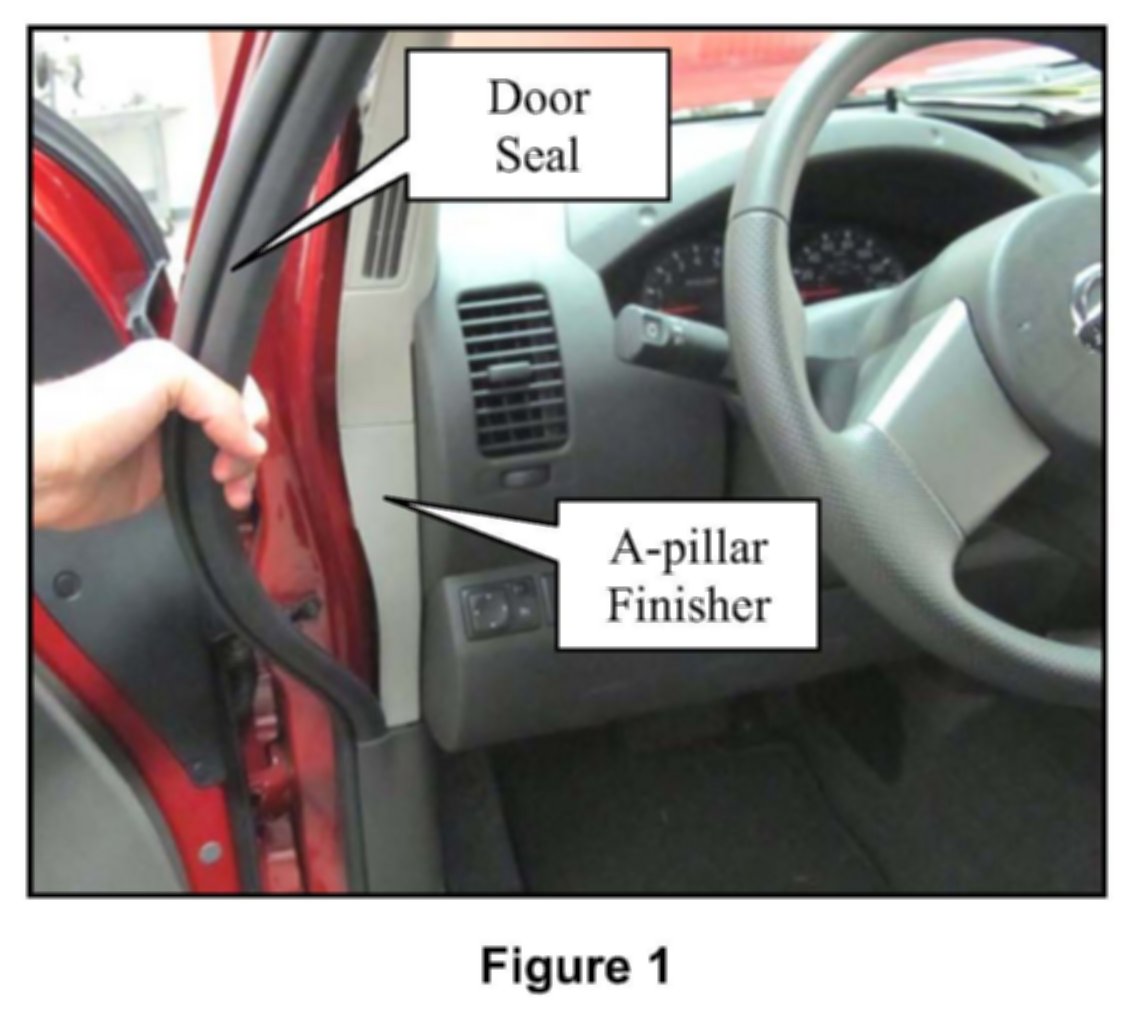
2. Loosen door seal (see Figure 1)
3. Remove A-pillar finisher (see Figure 1)
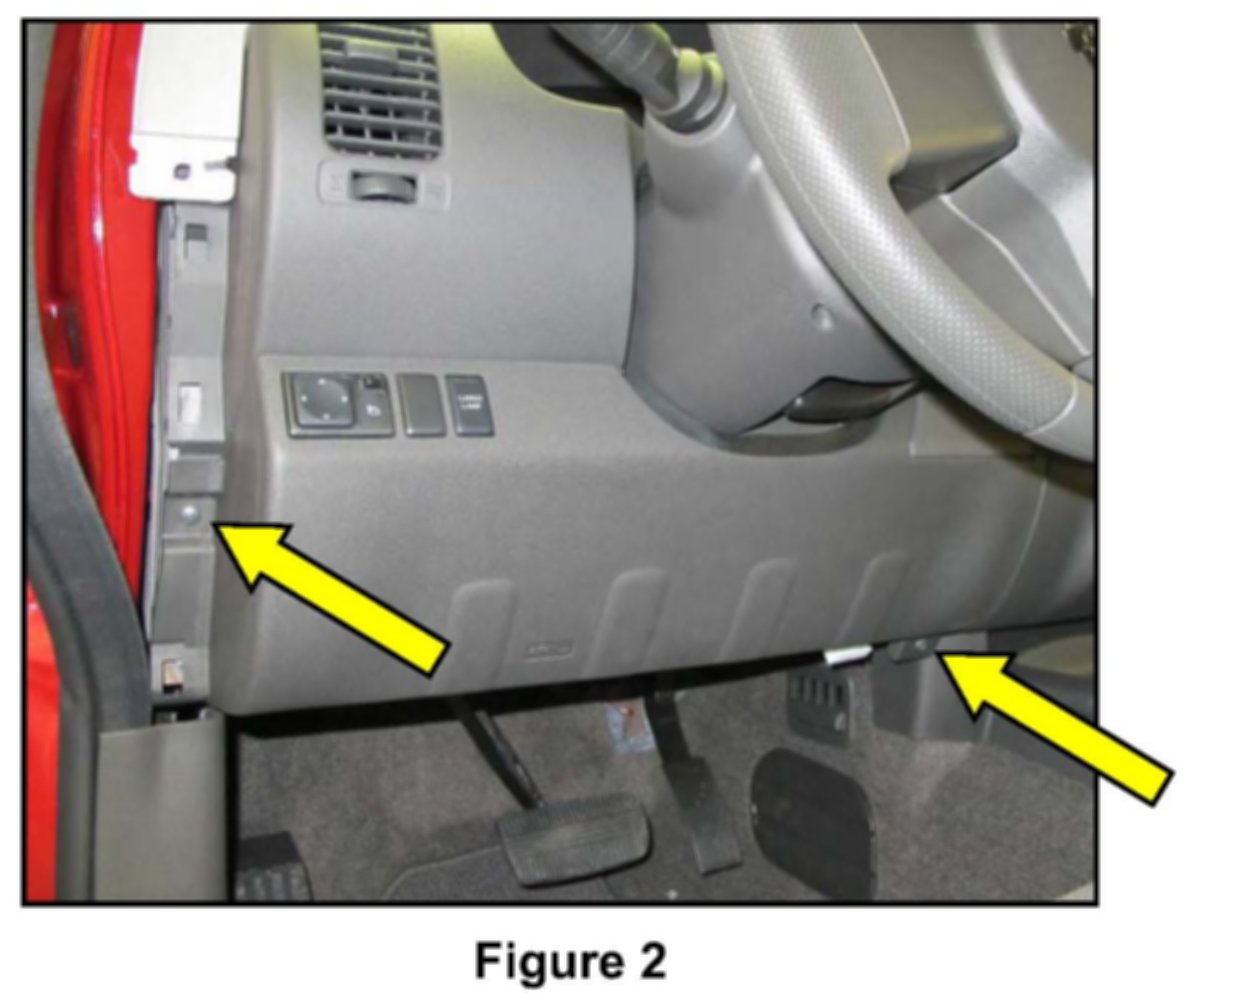
4. Remove lower trim panel screws (2) (see Figure 2)
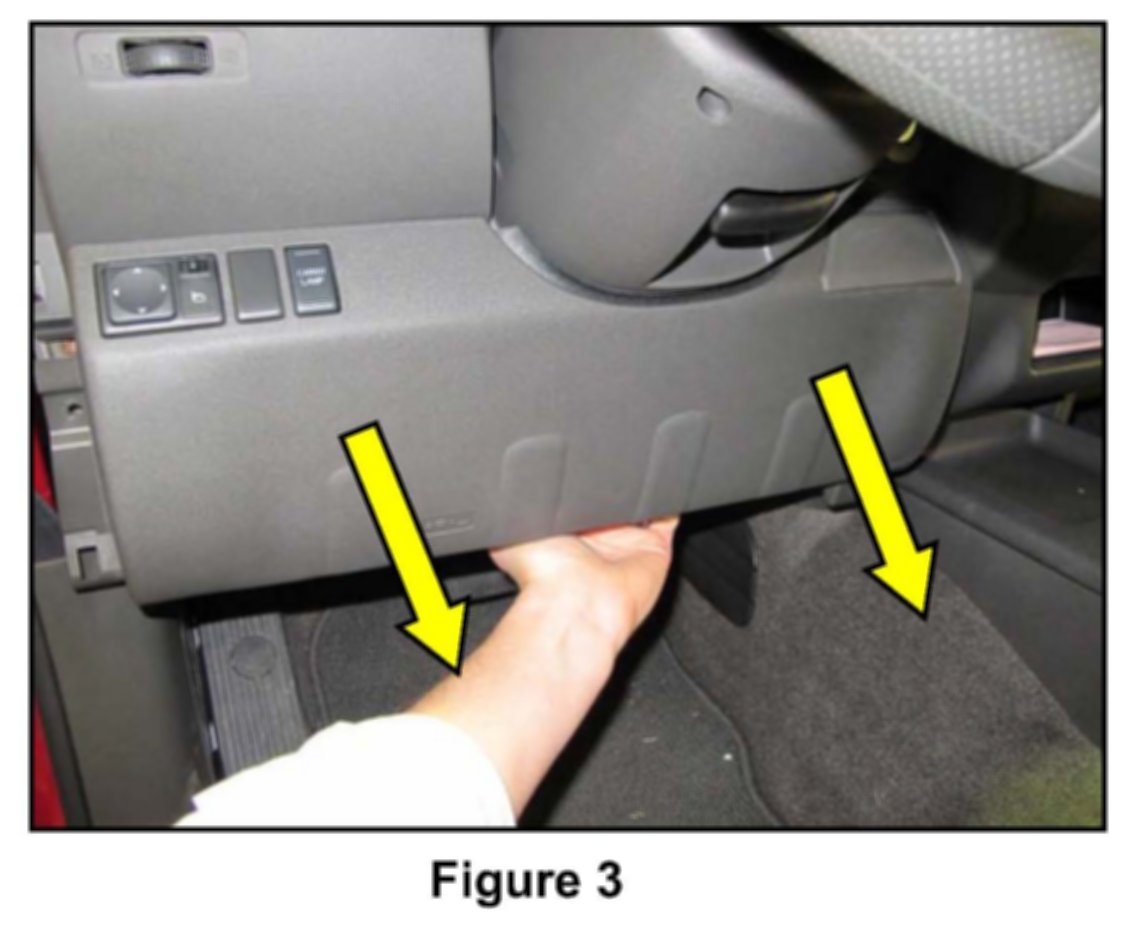
5. Pull lower trim panel forward to release (see Figure 3)
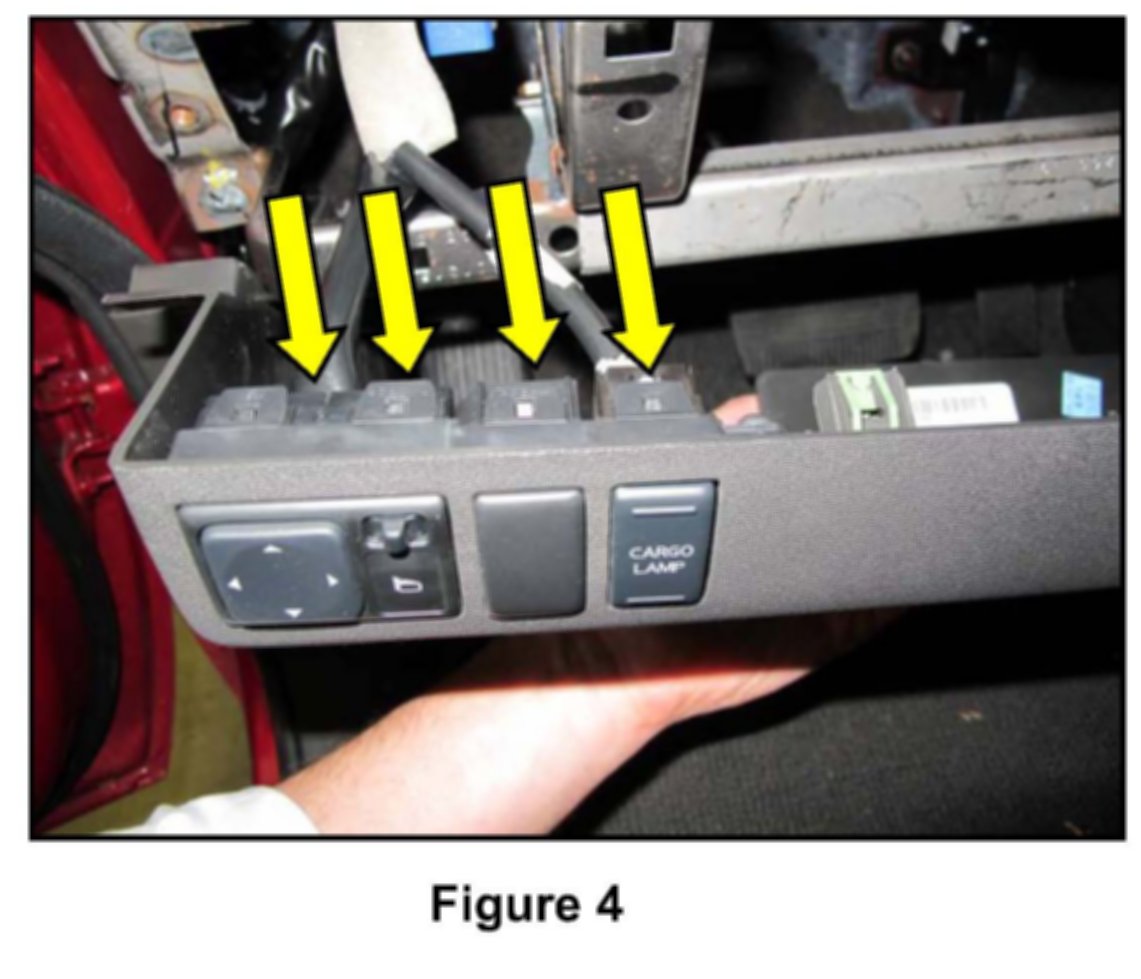
6. Disconnect electrical connectors on lower trim panel (see Figure 4)
7. Place lower trim panel in a clean, safe area
8. Inspect Steering Column fasteners:
a) Set torque wrench to 12 ft-lb (16.7 Nm)
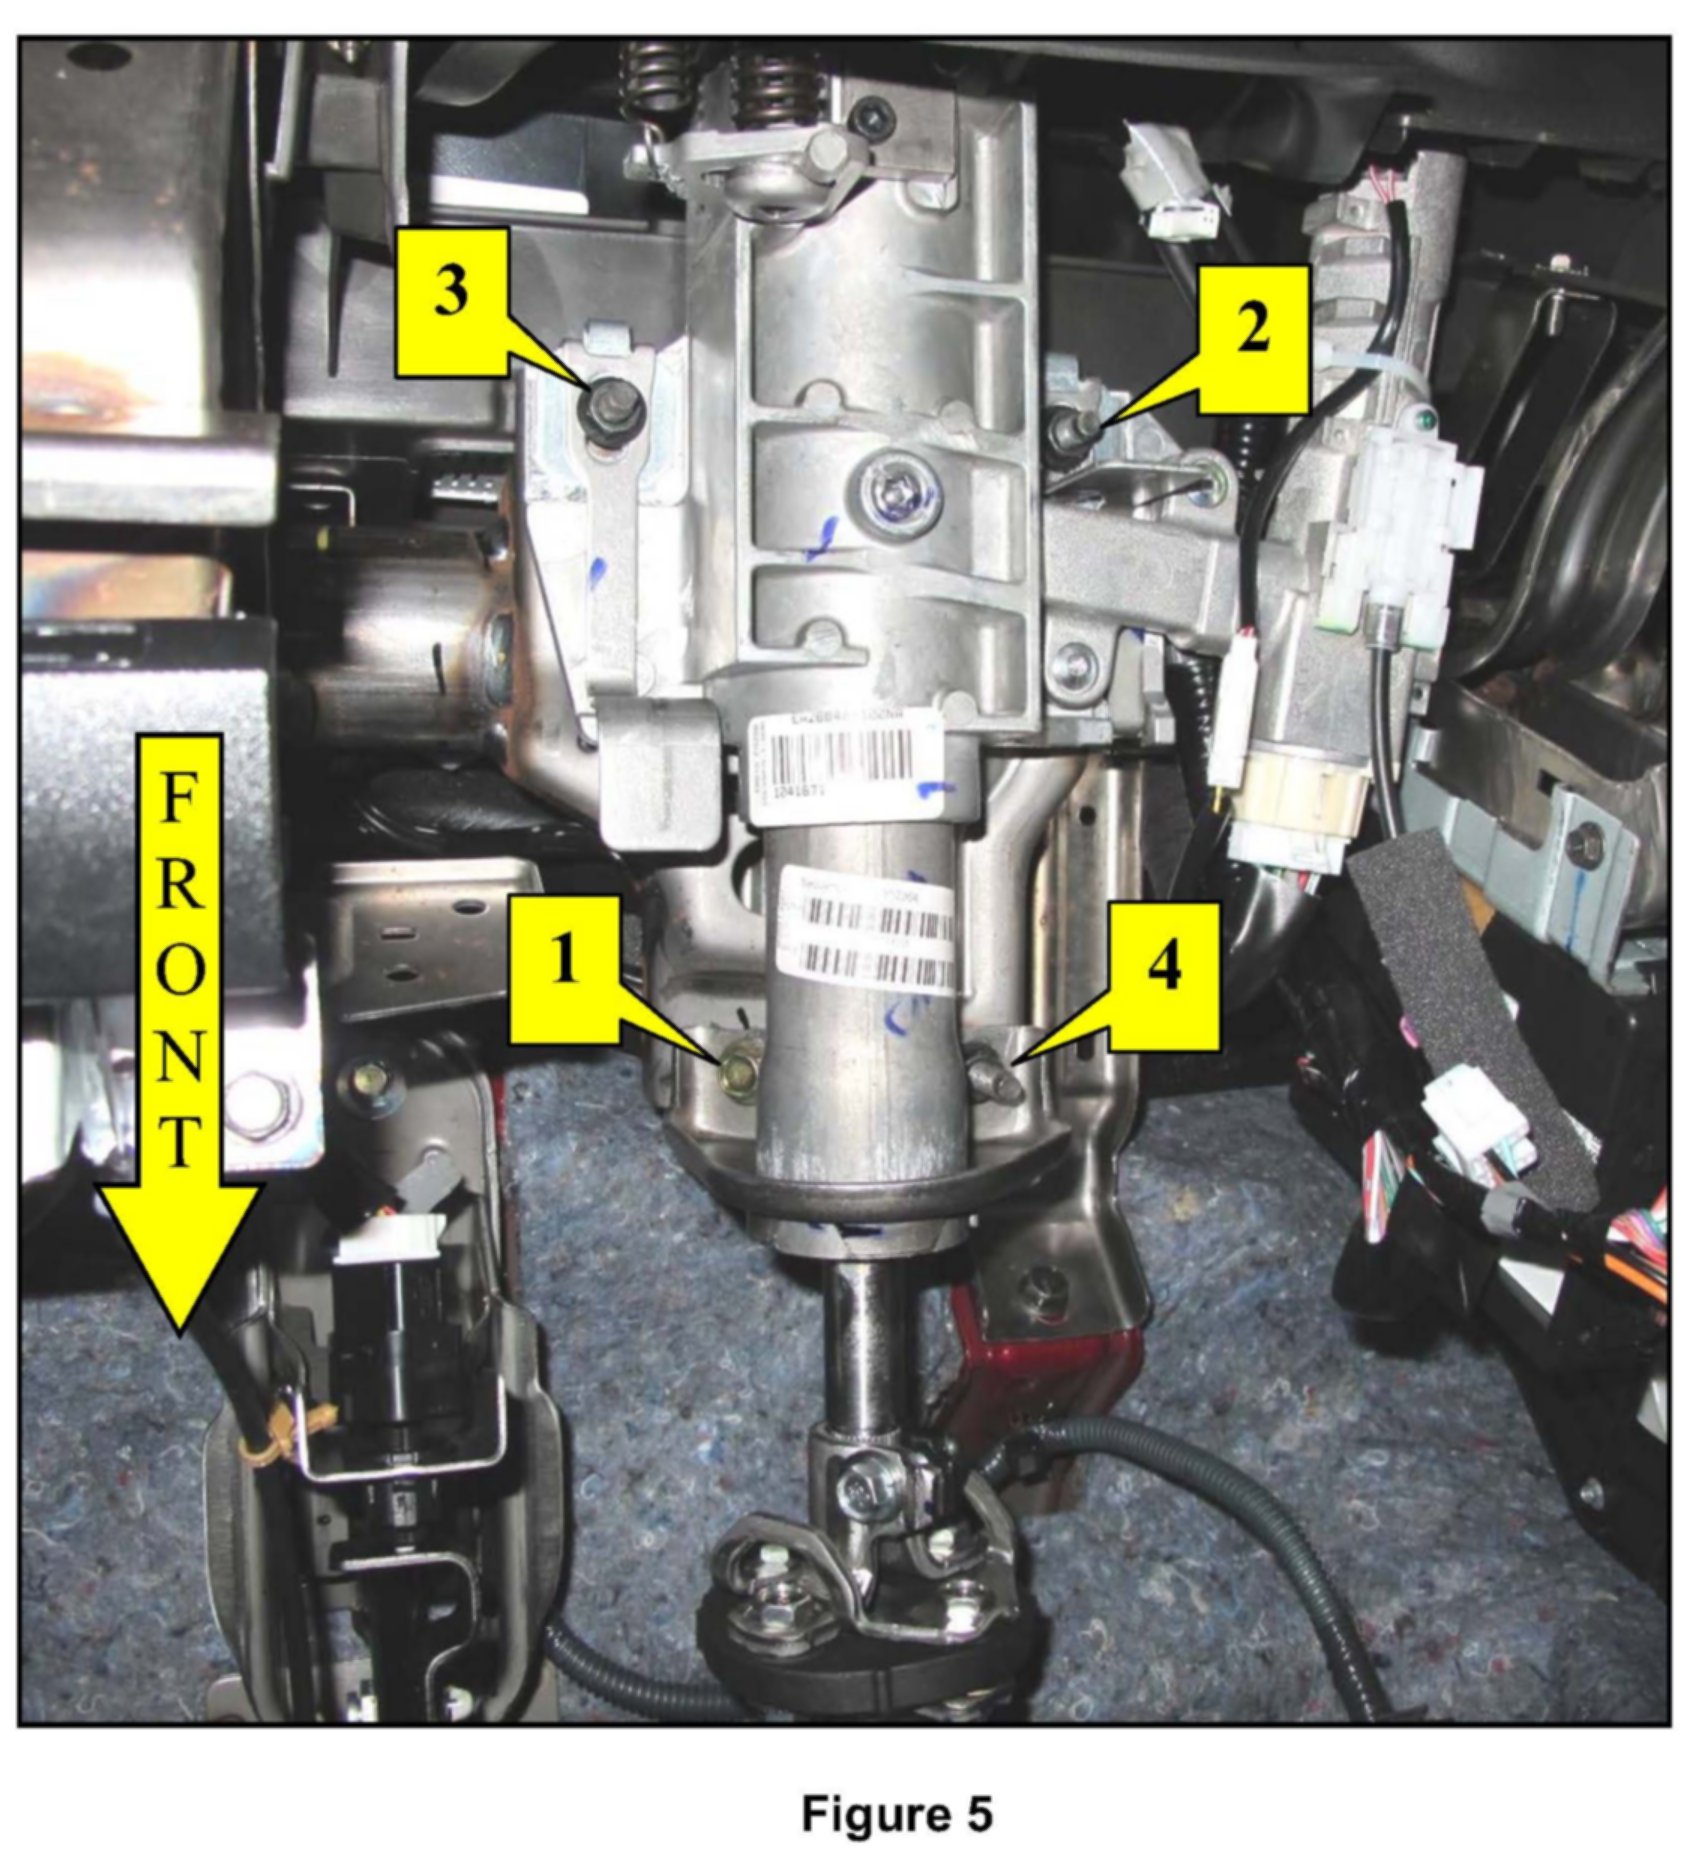
b) Torque Steering Column Nuts (3) & Bolt (1) in order shown (see Figure 5)
c) Apply torque confirmation mark on each fastener Figure 5
9. Re-assemble Driver's side trim components:
a) re-connect electrical connectors on lower trim panel
b) secure lower trim panel and install phillips screws (2)
c) Install finisher and secure door seal
10. Open passenger front door

11. Use trim tool to release clips on lower finisher (see Figure 6)
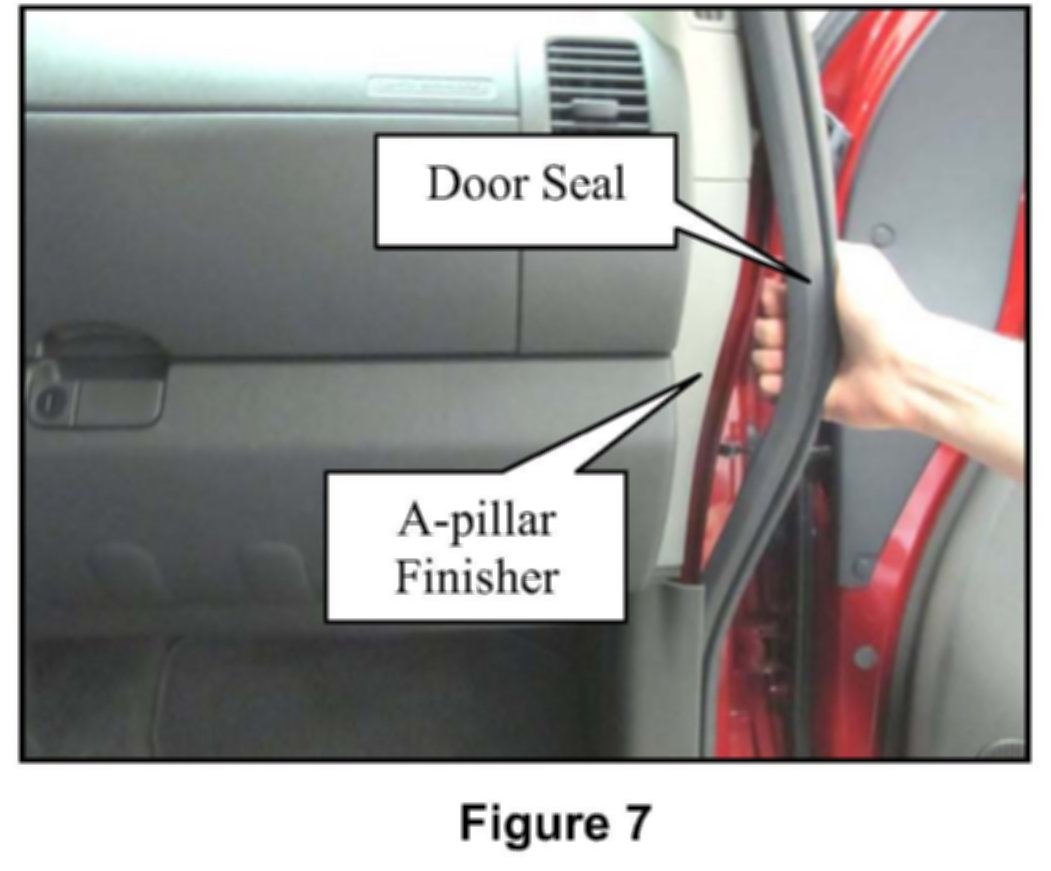
12. Loosen door seal (see Figure 7)
13. Remove A-pillar finisher (see Figure 7)
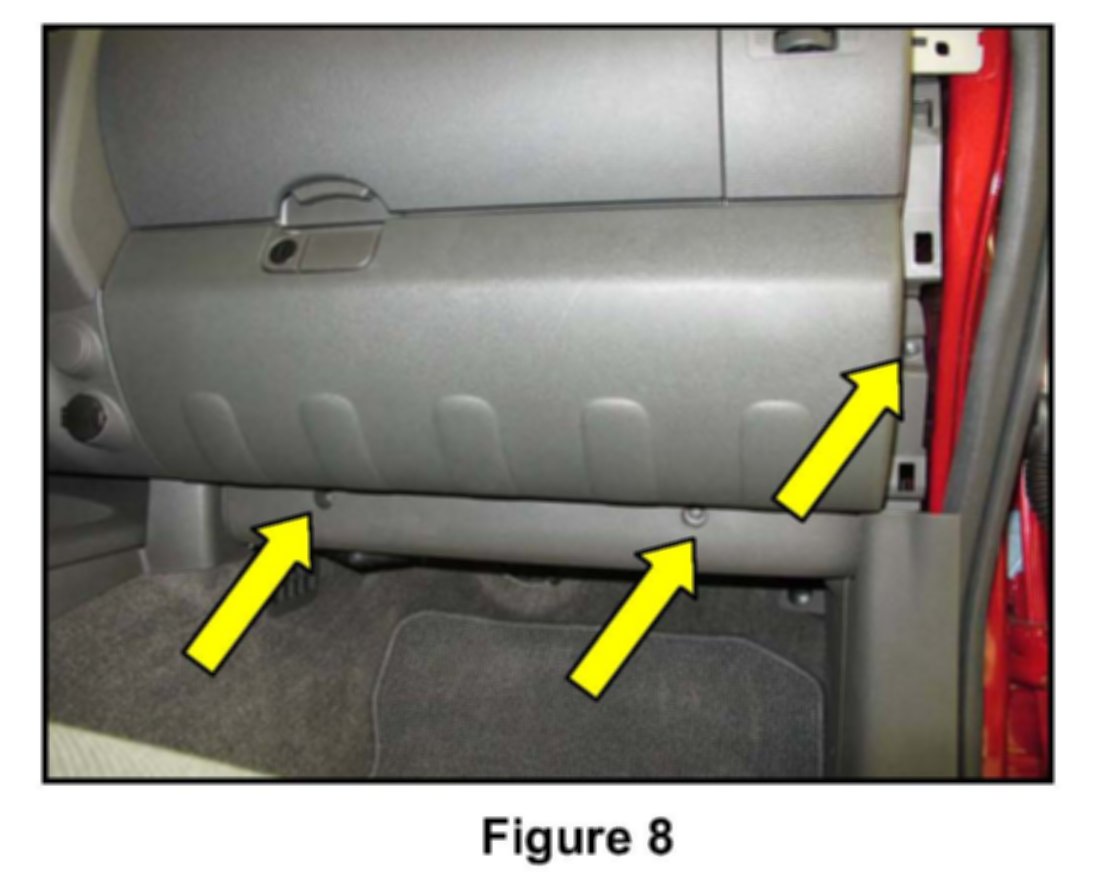
14. Remove lower glove box screws (3) (see Figure 8)
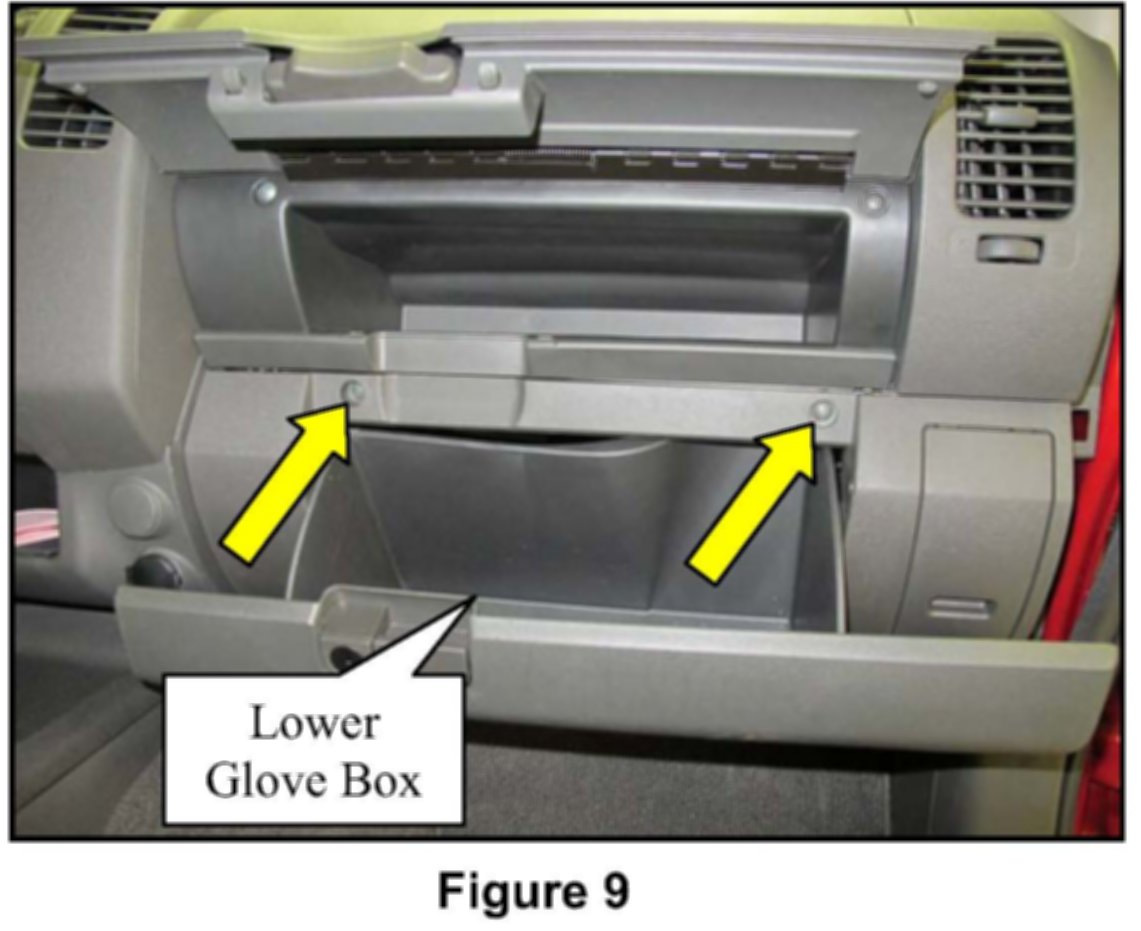
15. Open upper and lower glove box doors and remove screws (2) (see Figure 9)
16. Remove lower glove box and place in a clean, safe area Figure 9
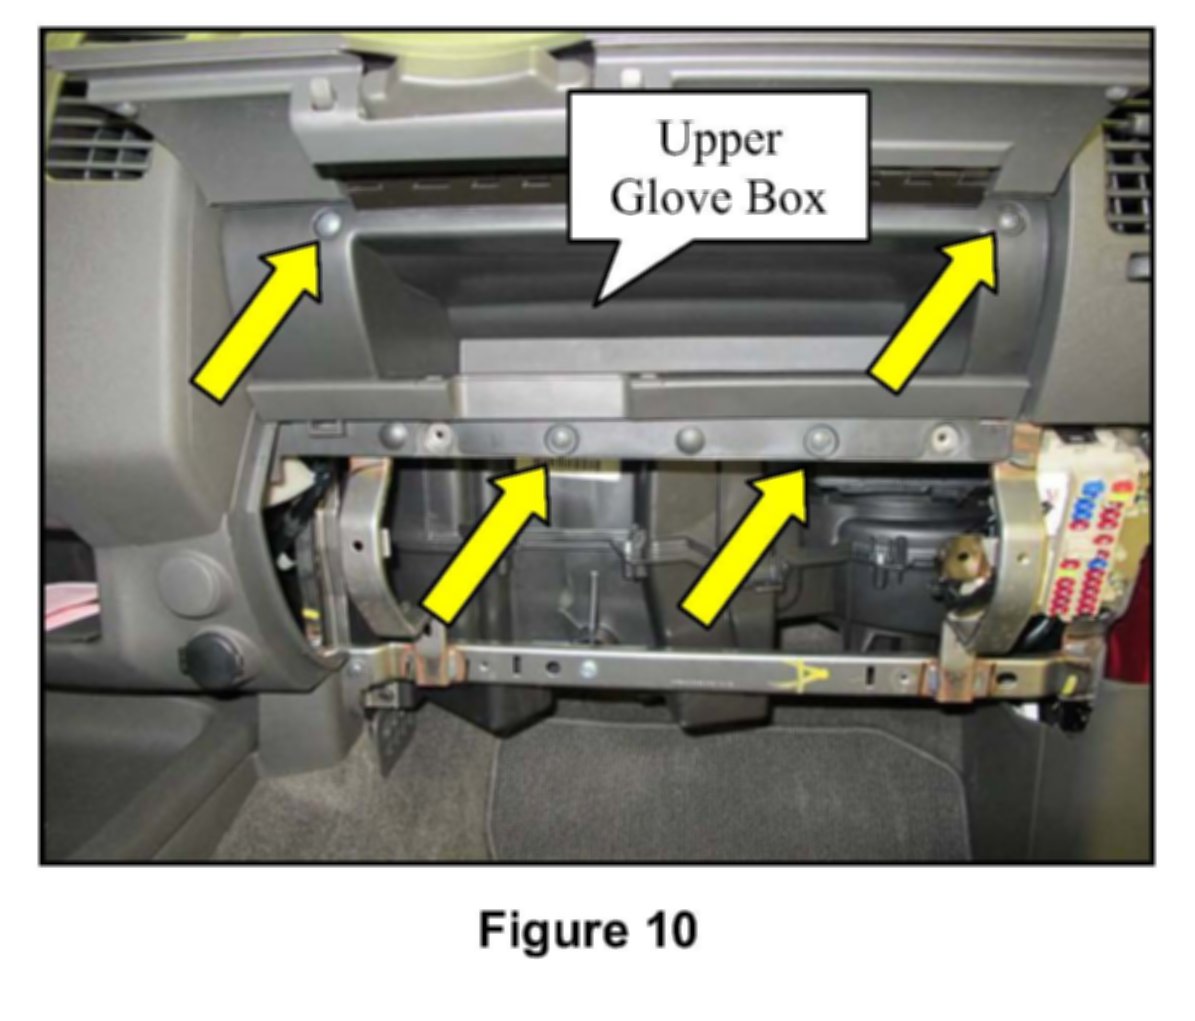
17. Remove upper glove box screws (4) (see Figure 10)
18. Remove upper glove box and place in a clean, safe area.
19. Inspect Front Passenger Air Bag Module fasteners:
a) Set torque wrench to 7 ft-lb (9.4 Nm)
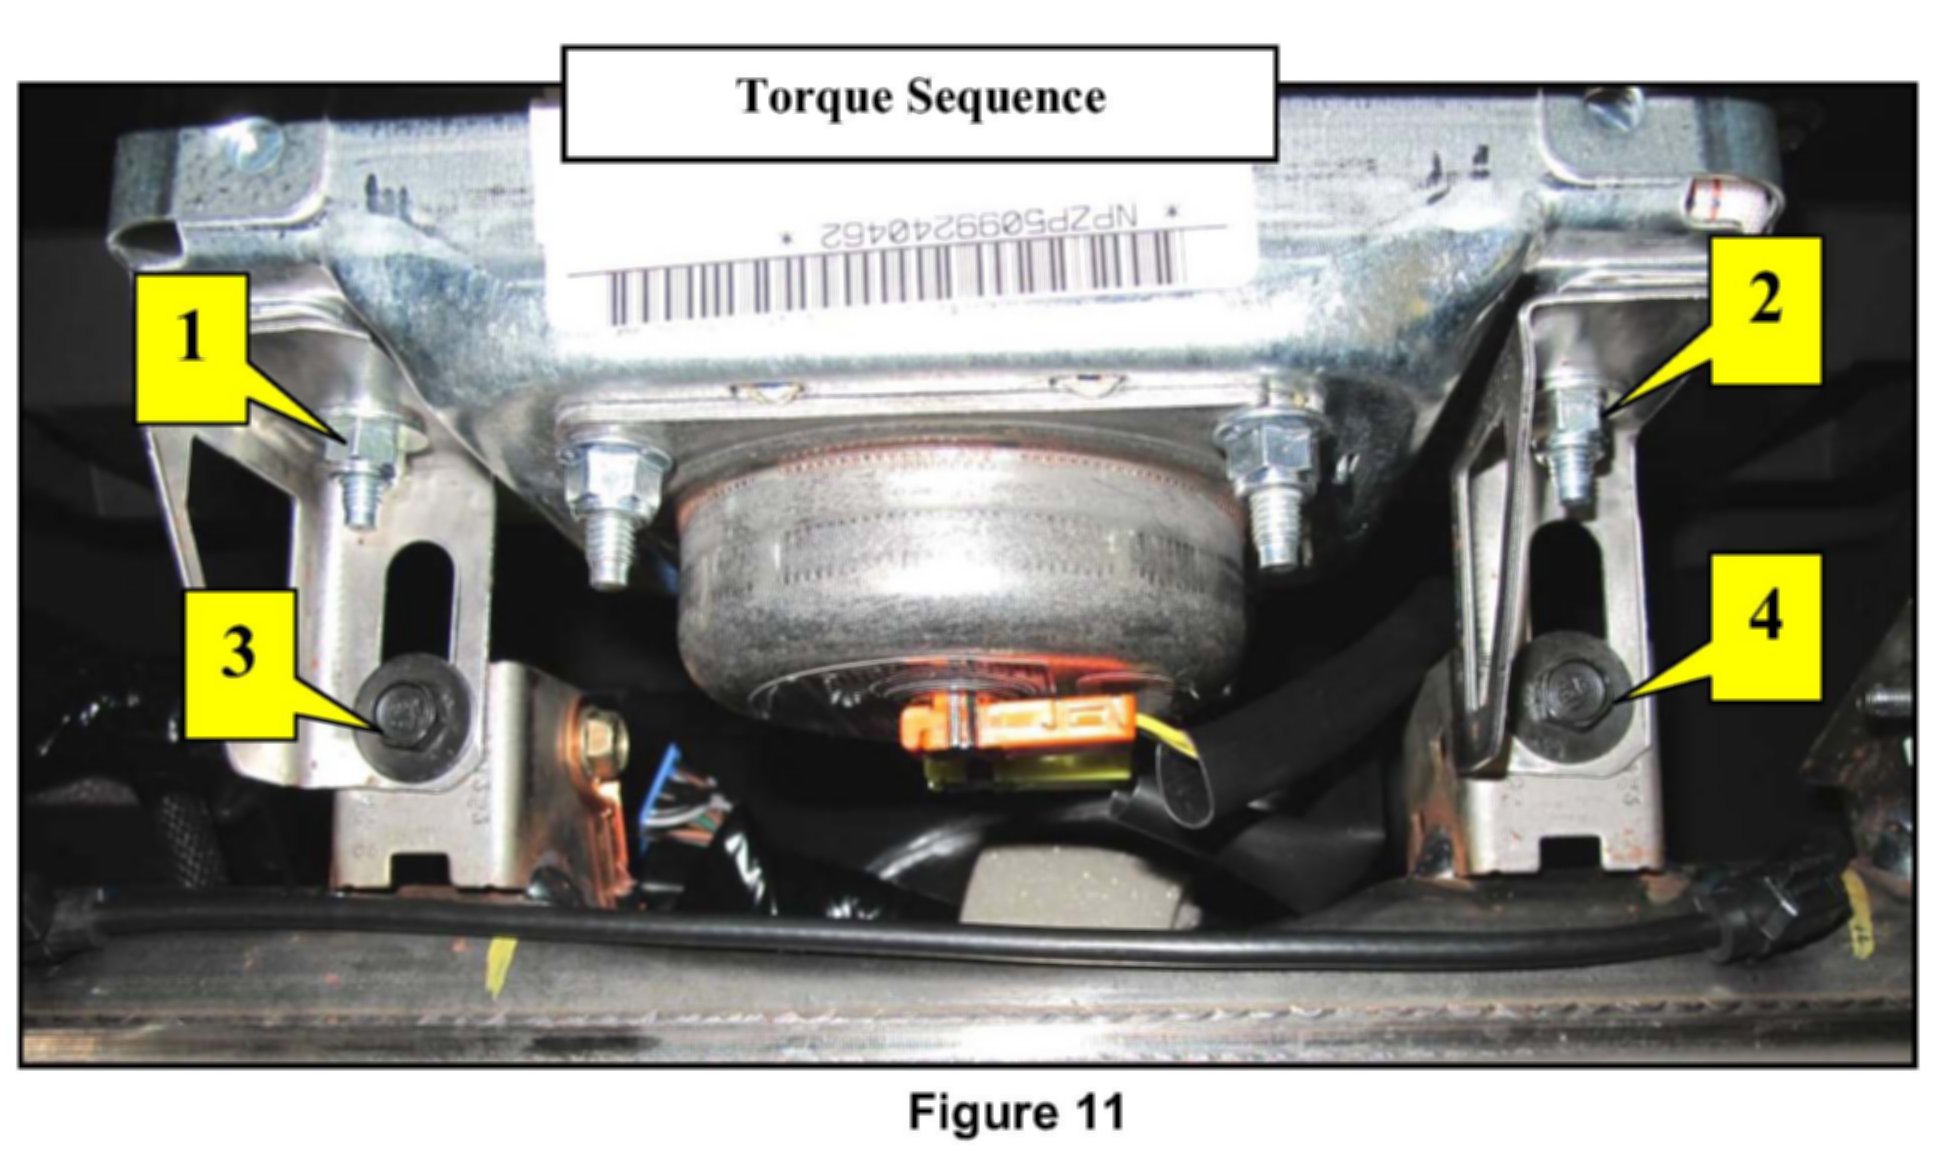
b) Check torque of Nuts 1 & 2 and Bolts 3 & 4 following sequence shown in Figure 11.
^ If NO nuts or bolts turn before wrench clicks, GO TO STEP 20
^ If ANY nut or bolt turns before wrench clicks, replace bolts 3 & 4, torque in sequence, then GO TO STEP 20
20. Apply torque confirmation mark on each fastener
21. Re-assemble Passenger side trim components:
a) Install upper glove box (4 screws)
b) Install lower glove box (5 screws)
c) Install finishers(2) and secure door seal

Disclaimer