Removal and Replacement
Brake Master Cylinder: Removal and InstallationBrake Master Cylinder
CAUTION:
Be careful not to splash brake fluid on painted areas; it may cause paint damage. If brake fluid is splashed on painted areas, wash it away with water immediately.
Removal
1) Drain the brake fluid.
2) Disconnect the harness connectors for the fluid level sensor and fluid pressure sensor.
3) Disconnect the brake pipes from the master cylinder assembly.
4) Remove brake pipes from the ABS actuator and electric unit (control unit).
5) Remove the master cylinder assembly nuts and discard.
CAUTION:
Discard the nuts, do not reuse.
6) Remove the master cylinder assembly.
7) Remove the fluid pressure sensor if required.
Installation
Installation is in the reverse order of removal.
^ Use new master cylinder assembly nuts for installation.
CAUTION:
Do not reuse the master cylinder assembly nuts.
^ Refill the brake fluid and bleed the air.
CAUTION:
^ Refill using recommended brake fluid.
^ Do not reuse drained brake fluid.
^ Adjust the brake pedal. Refer to [Brake Pedal: Inspection and Adjustment]. Adjustments
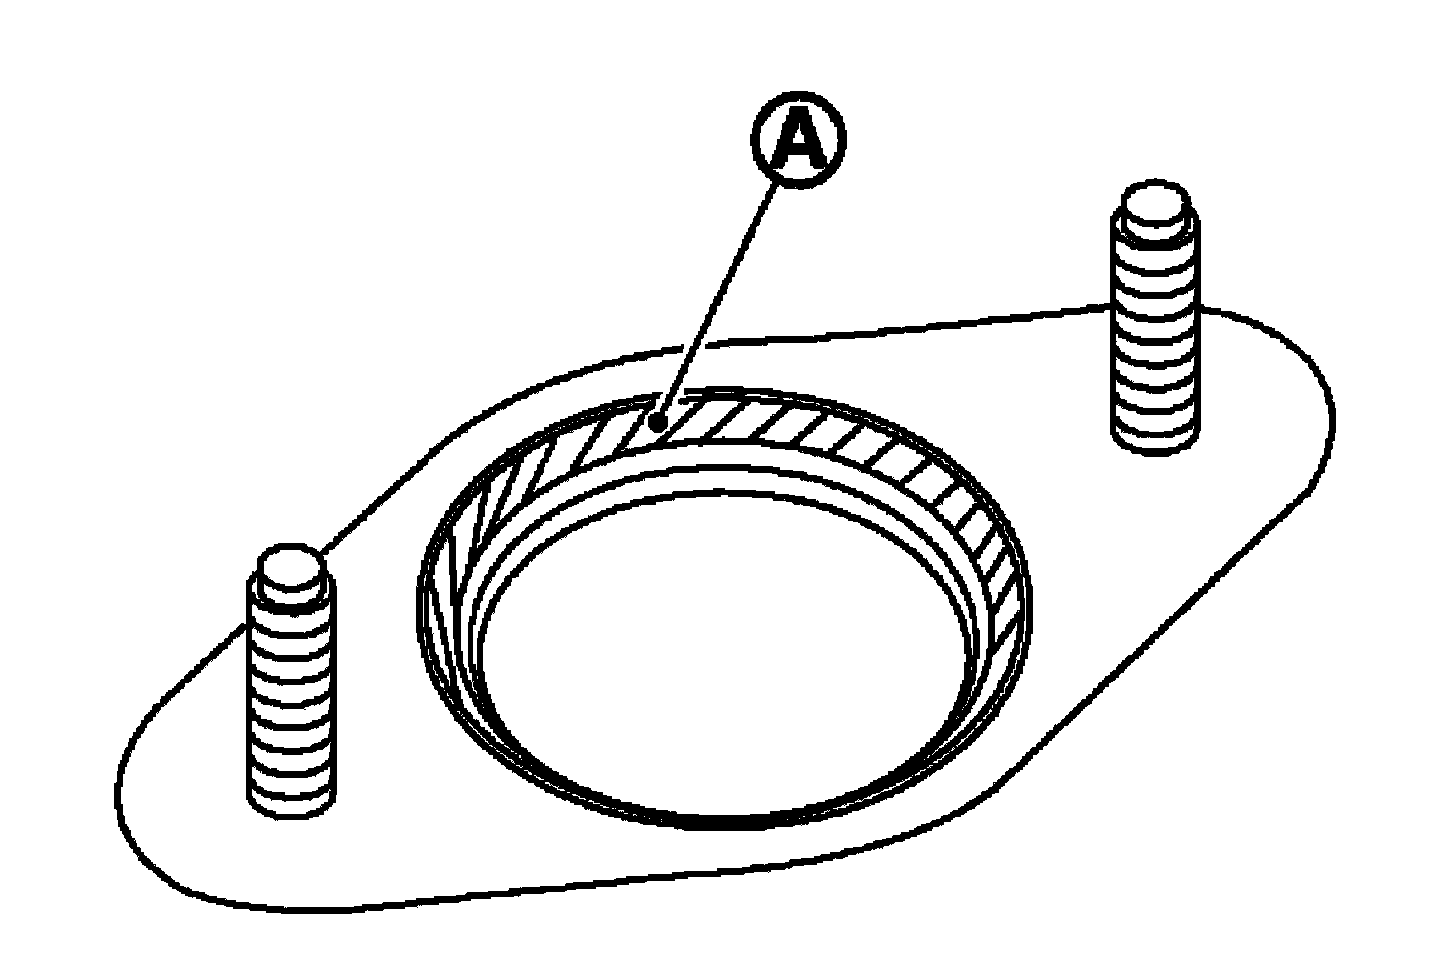
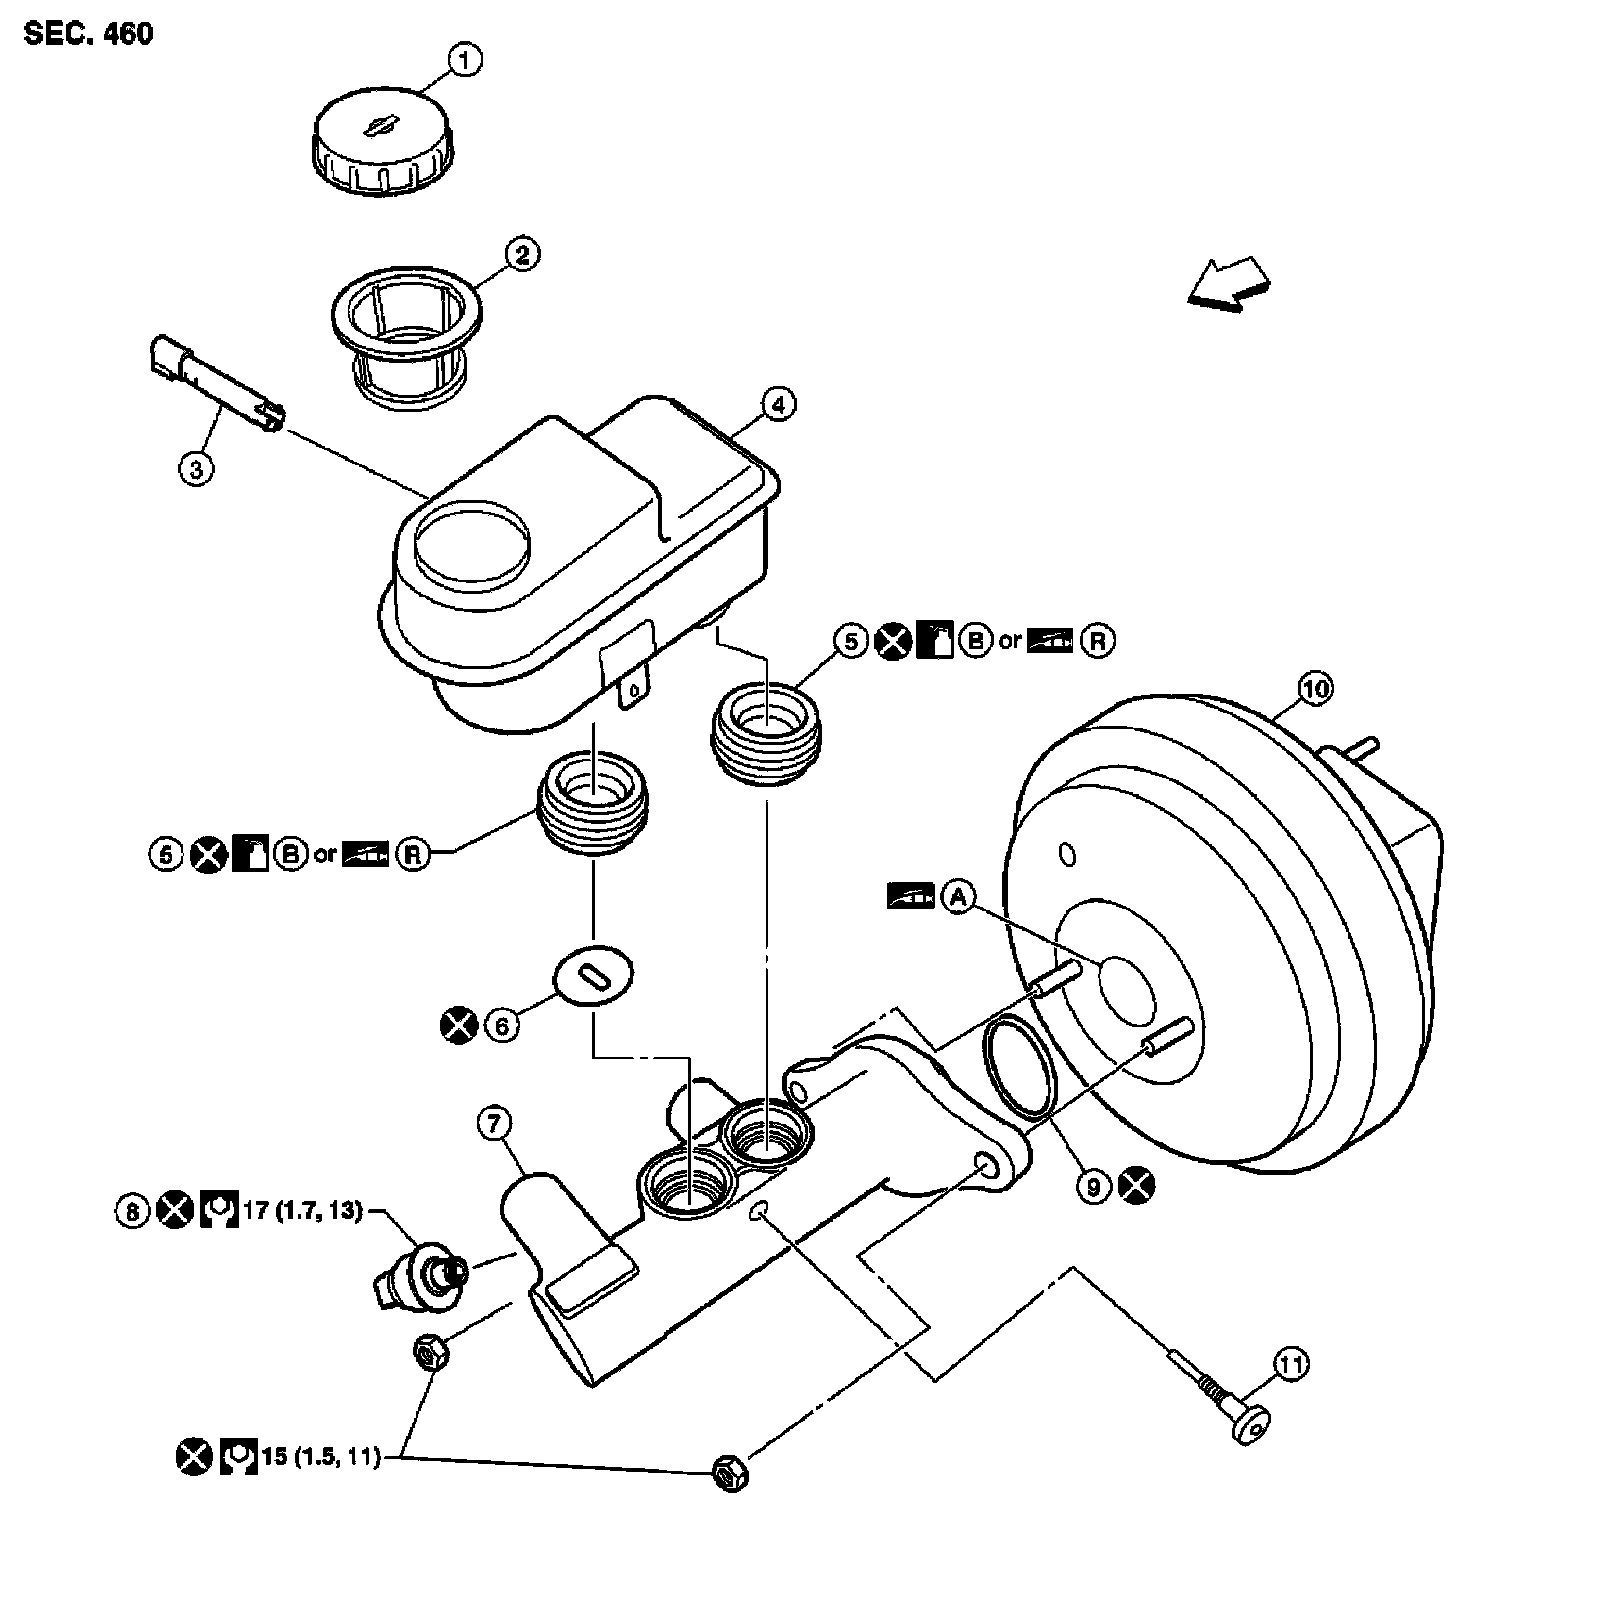
^ Apply silicon grease to the brake booster at position (A) as shown, be sure the 0-ring is in proper position when installing the master cylinder assembly to the brake booster.