Seat Back: Service and Repair
Front Seat: Seatback Assembly Removal and InstallationRemoval
NOTE: On vehicles equipped with side air bags, only complete seatback assemblies can be replaced.
1. Remove the front seat assembly. Refer to [Front Seat: Removal and Installation].
2. Remove the seatback board from the back of the seatback.
3. Remove the retainer.
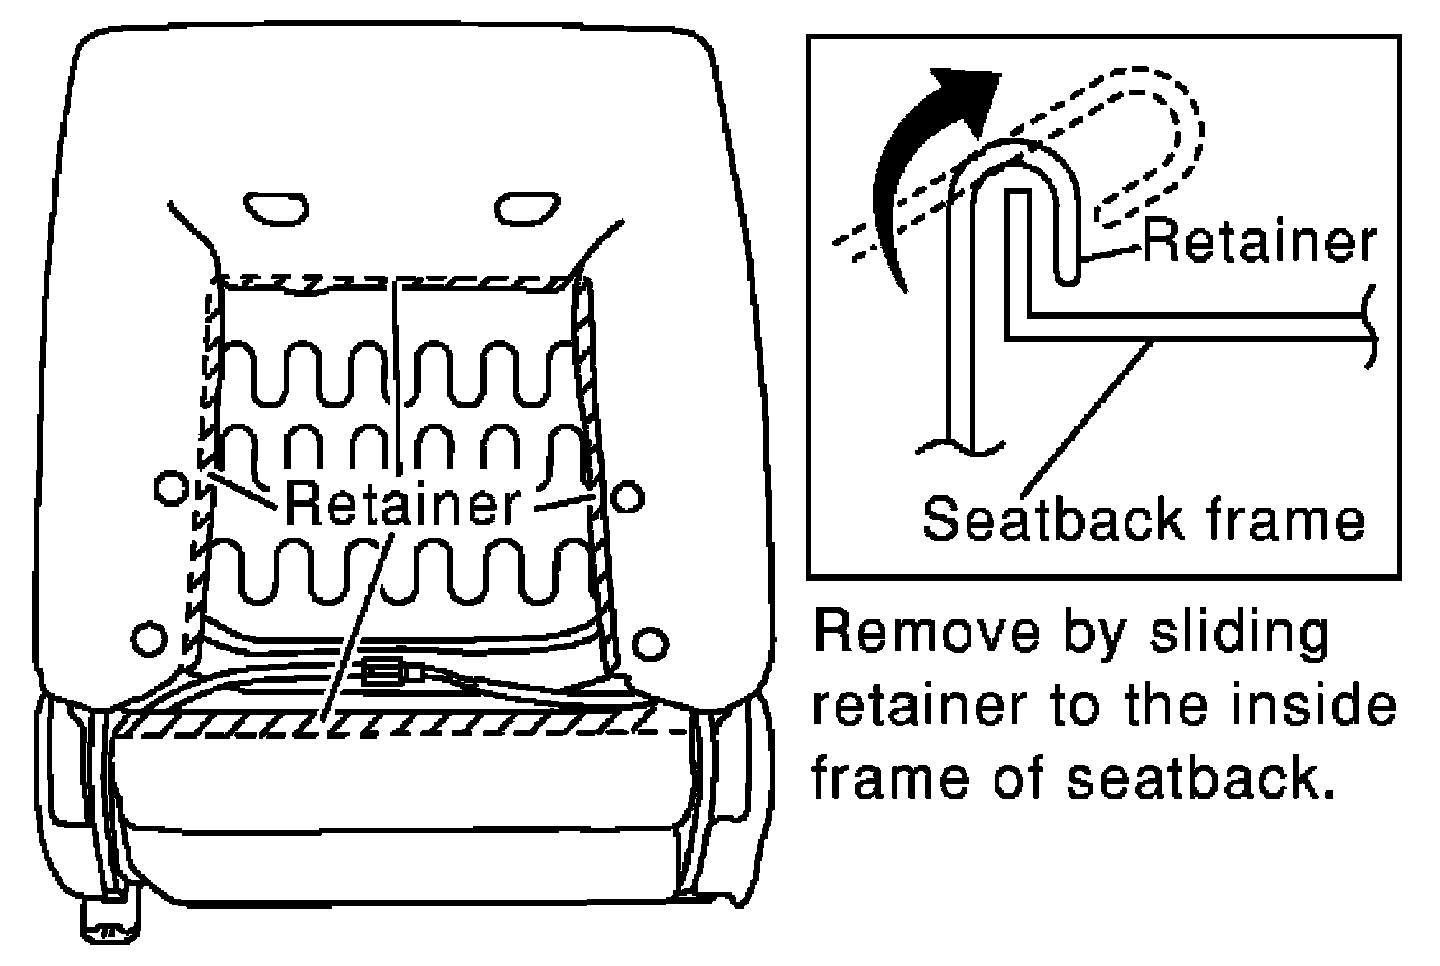
4. Disconnect the seatback heater harness.
5. Remove the seatback bolts (2 for each side) and seatback assembly.
Seatback Board - Soft Seatback
Removal
1. Remove the seatback assembly. Refer to [Front Seat: Removal and Installation].
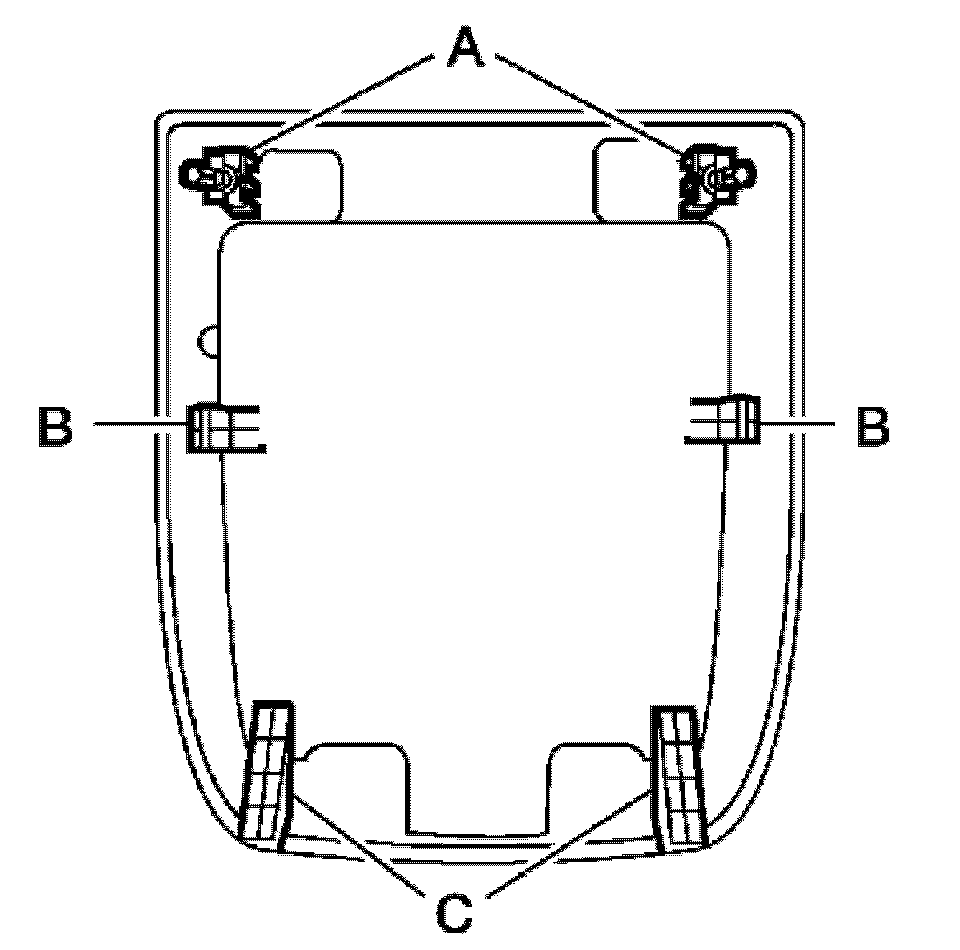
2. The seatback board is attached to the seat frame with the following:
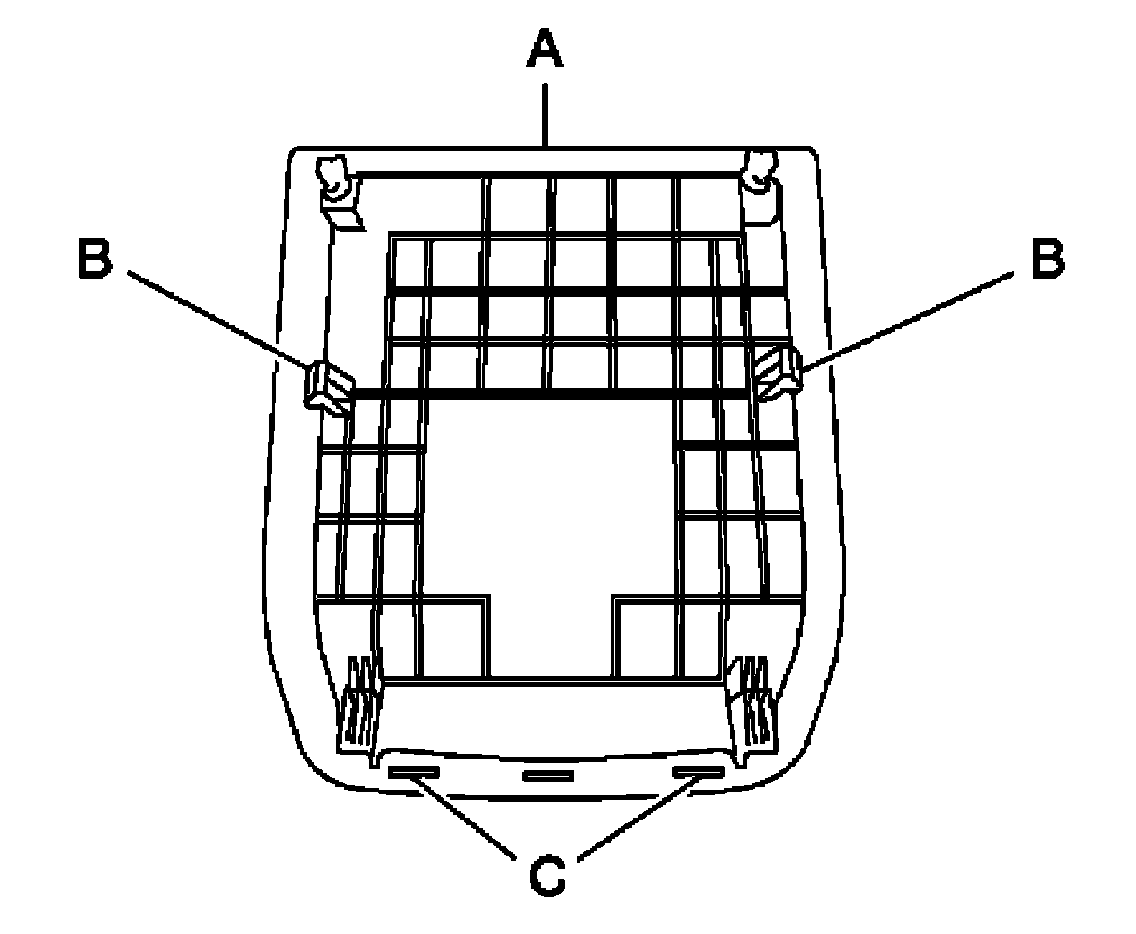
- 2 top tabs (A)
- 2 side tabs (B)
- 2 bottom clips (C) (must be replaced)
3. Move seat to forward position.
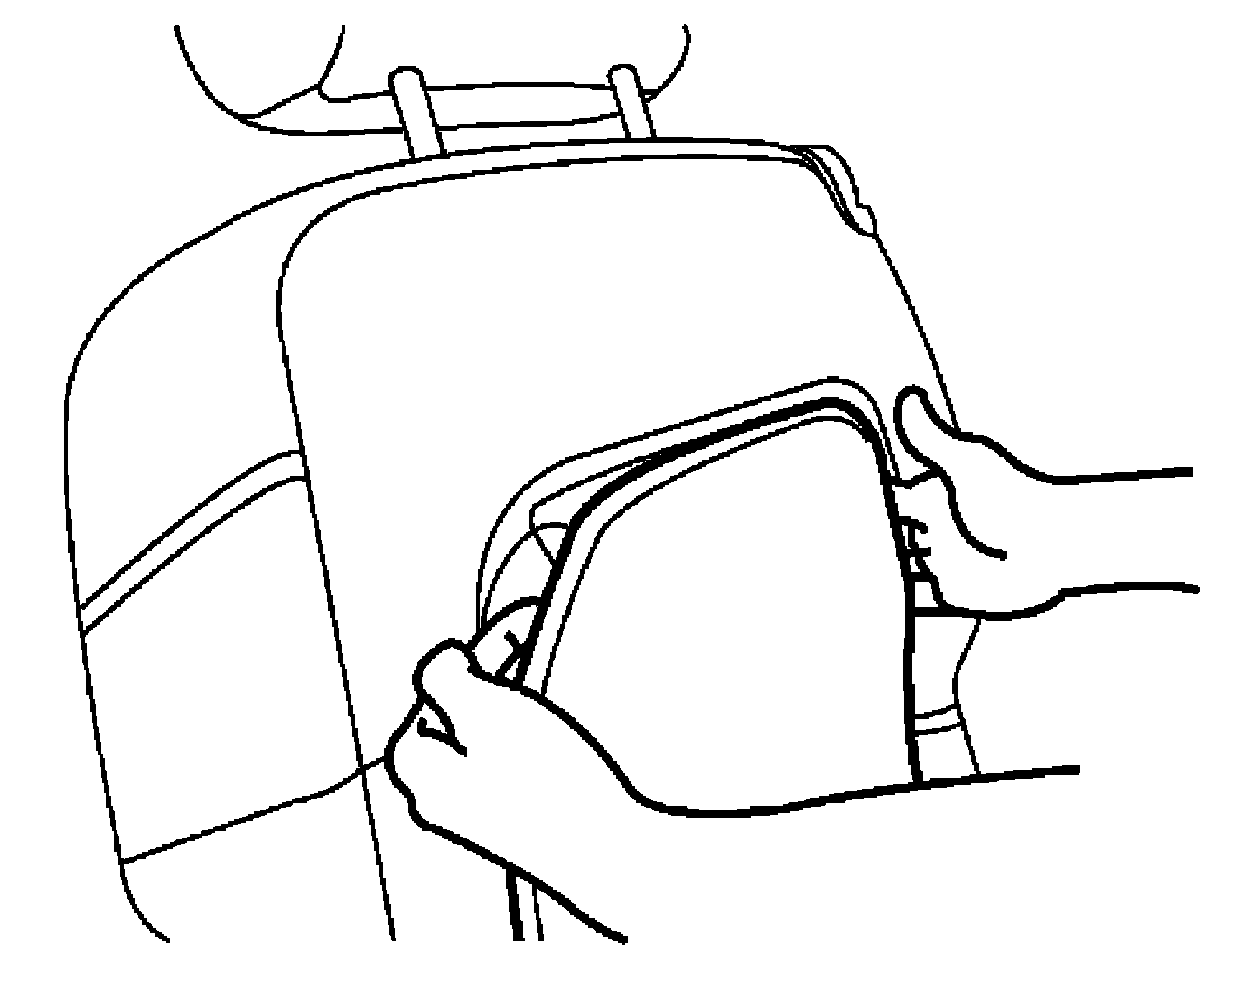
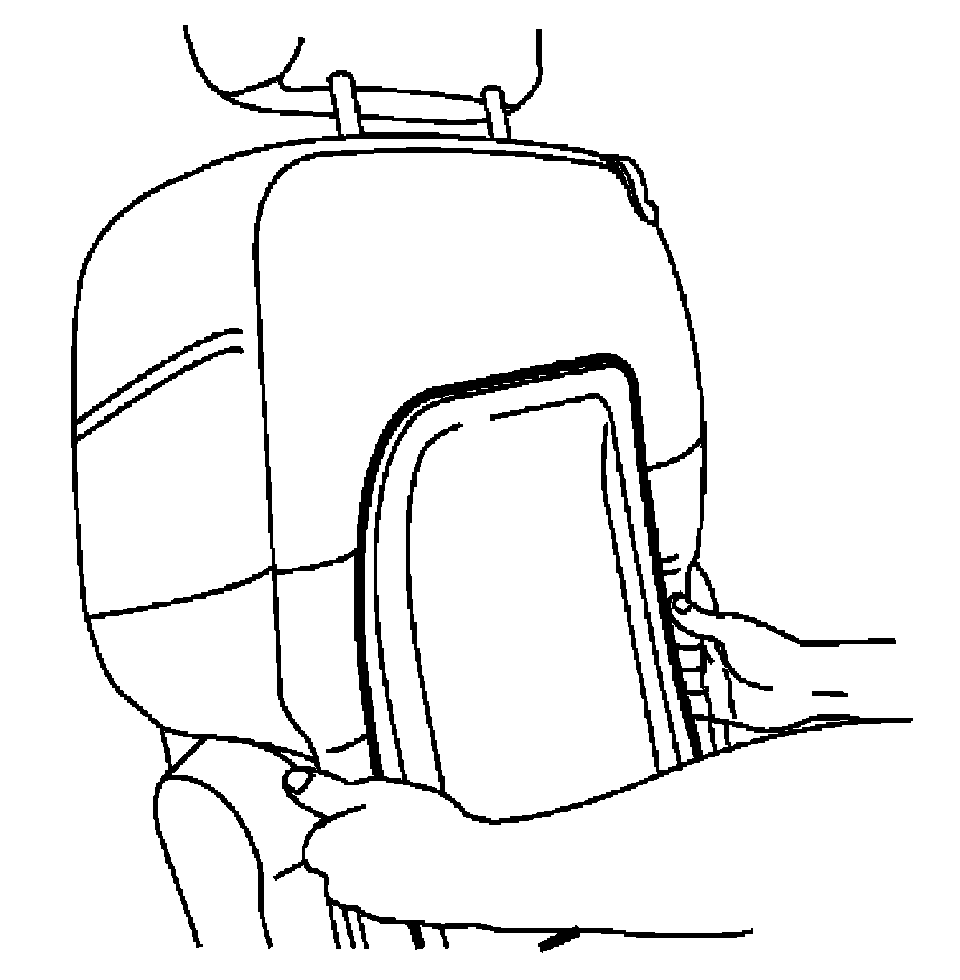
4. Hold the seatback board as shown and pull the top of the seatback board down and away from the seat back frame.
1. Pull the middle part of the seatback board to disengage the side tabs from the seatback frame.
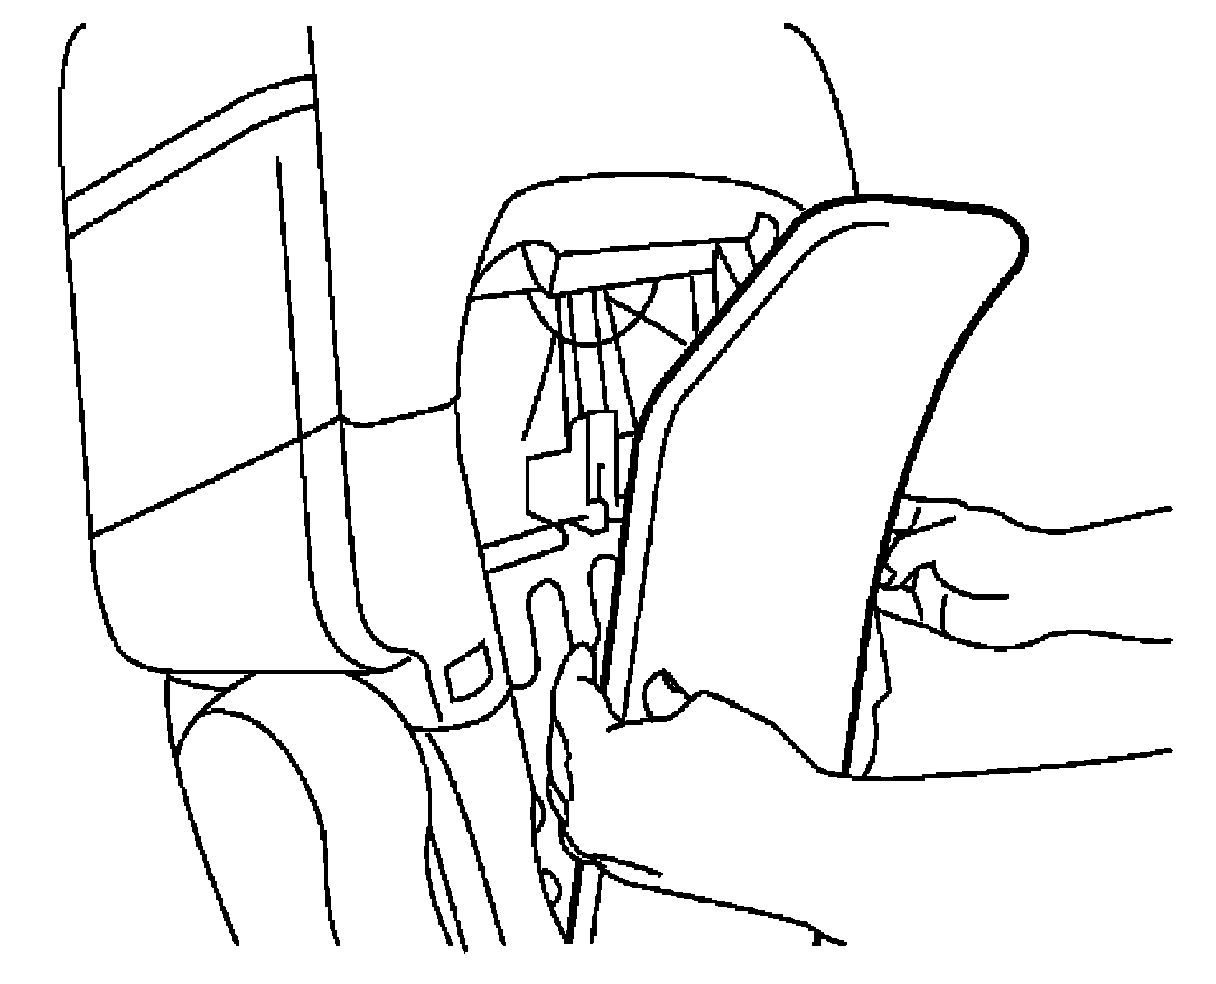
2. Pull the lower part of the seatback board to disengage the bottom clips from the seatback frame.
Installation
Installation is in the reverse order of removal.
- The two bottom clips must be replaced for installation
- Secure the side tabs last for installation
Seatback Board - Hard Seatback
Removal
1. Remove the seatback assembly. Refer to [Front Seat: Removal and Installation].
2. The seatback board is attached to the seat frame with the following:
- 2 top tabs (A)
- 2 side tabs (B)
- 2 bottom clips (C) (must be replaced)
3. Move seat to forward position.
4. Hold the seatback board as shown and pull the bottom of the seatback board away from the seat back frame.
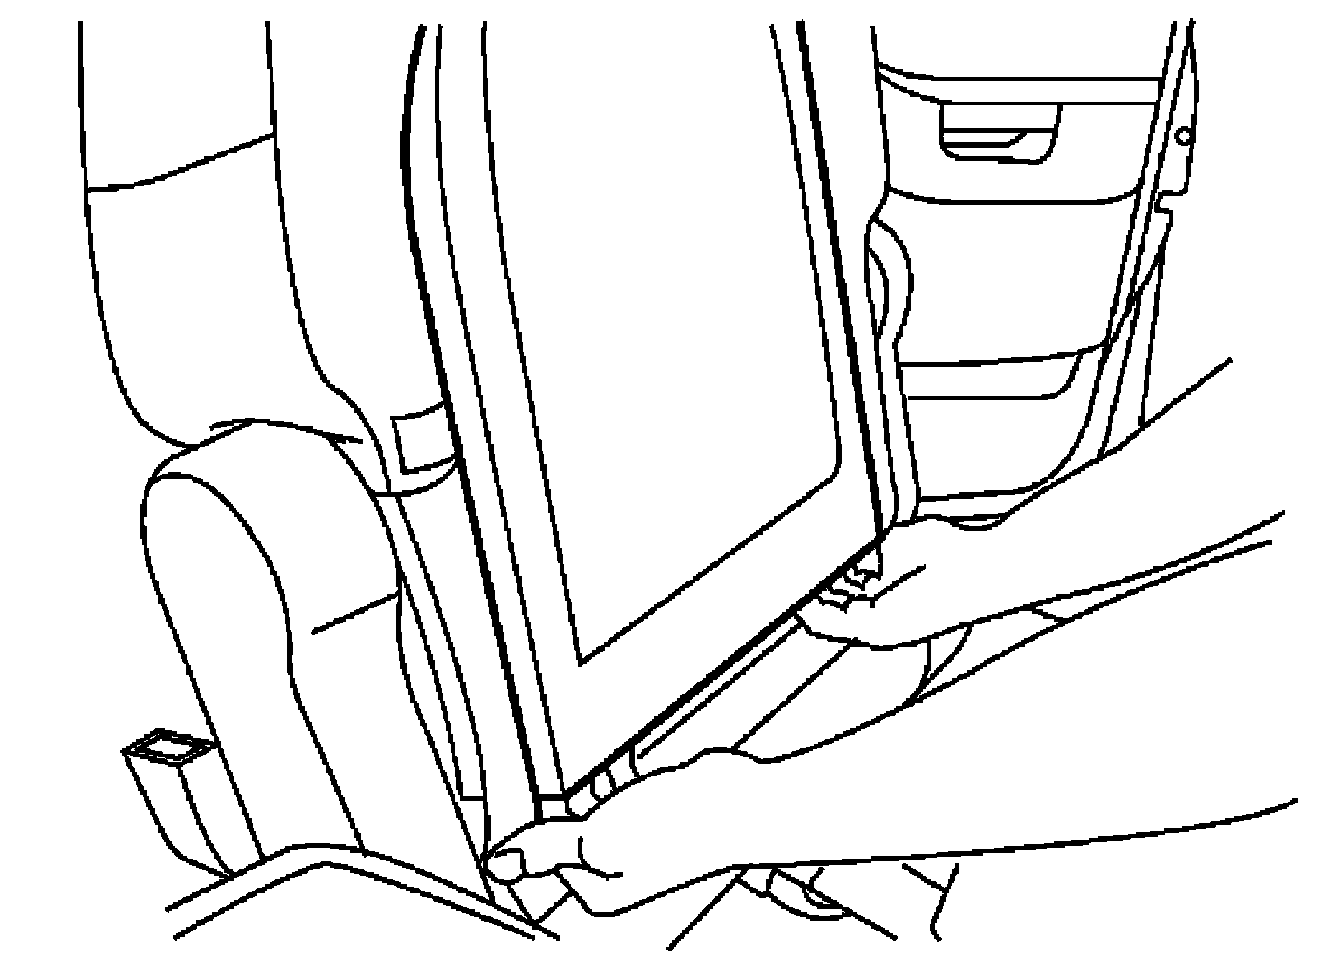
1. Pull the middle part of the seatback board up and away to disengage the side tabs from the seatback frame.
2. Lift the upper part of the seatback board to disengage the top tabs from the seatback frame.
Installation
Installation is in the reverse order of removal.
- The two bottom clips must be replaced for installation
- Secure the side tabs last for installation
Installation
Installation is in the reverse order of removal.