Instrument Panel Assembly: Removal and Installation
Instrument Panel Assembly: Removal and InstallationInstrument Panel
Removal
CAUTION: Before servicing, turn the ignition switch off, disconnect both battery terminals, then wait at least 3 minutes.
1. Disconnect the negative and positive battery negative terminals.
2. Remove the center console. Refer to CENTER CONSOLE in this section.
3. Remove the combination meter. Refer to [Combination Meter: Removal and Installation].
4. Remove front pillar upper finisher. Refer to [Body Side Trim: Removal and Installation].
5. Remove audio unit. Refer to [Audio Unit: Removal and Installation].
6. Remove cluster lid D. Refer to CLUSTER LID D (BASE or PUSH TYPE) in this section.
7. Remove the passenger air bag module. Refer to [Front Passenger Air Bag Module: Removal and Installation].
8. Remove the instrument stay RH/LH bolts.
9. Remove instrument panel and pad assembly.
- Disconnect all remaining harnesses.
Installation
Installation is in the reverse order of removal.
Cluster Lid C - Base
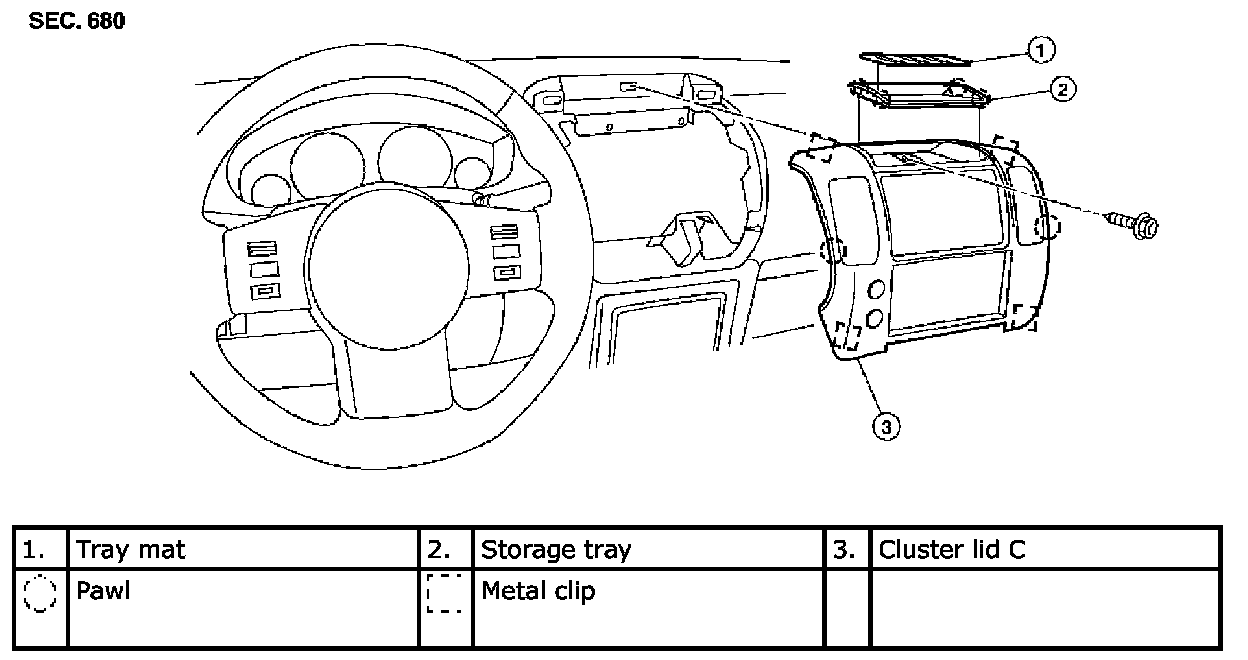
Removal
CAUTION: Before servicing, turn the ignition switch off, disconnect both battery terminals, then wait at least 3 minutes.
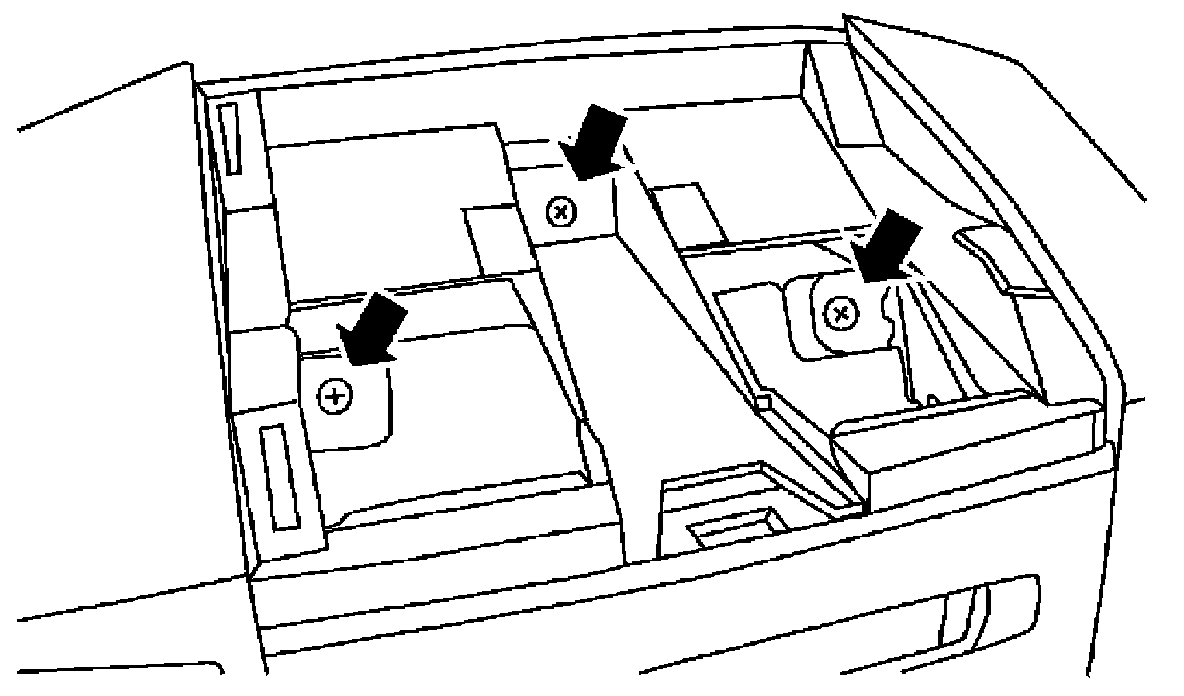
1. Remove tray mat, then release the clips and remove storage tray.
2. Remove the screw, then release the clips and remove cluster lid C from instrument panel and pad assembly.
3. Disconnect harness connectors and remove cluster lid C.
Installation
Installation is in the reverse order of removal.
Cluster Lid C - Push Type
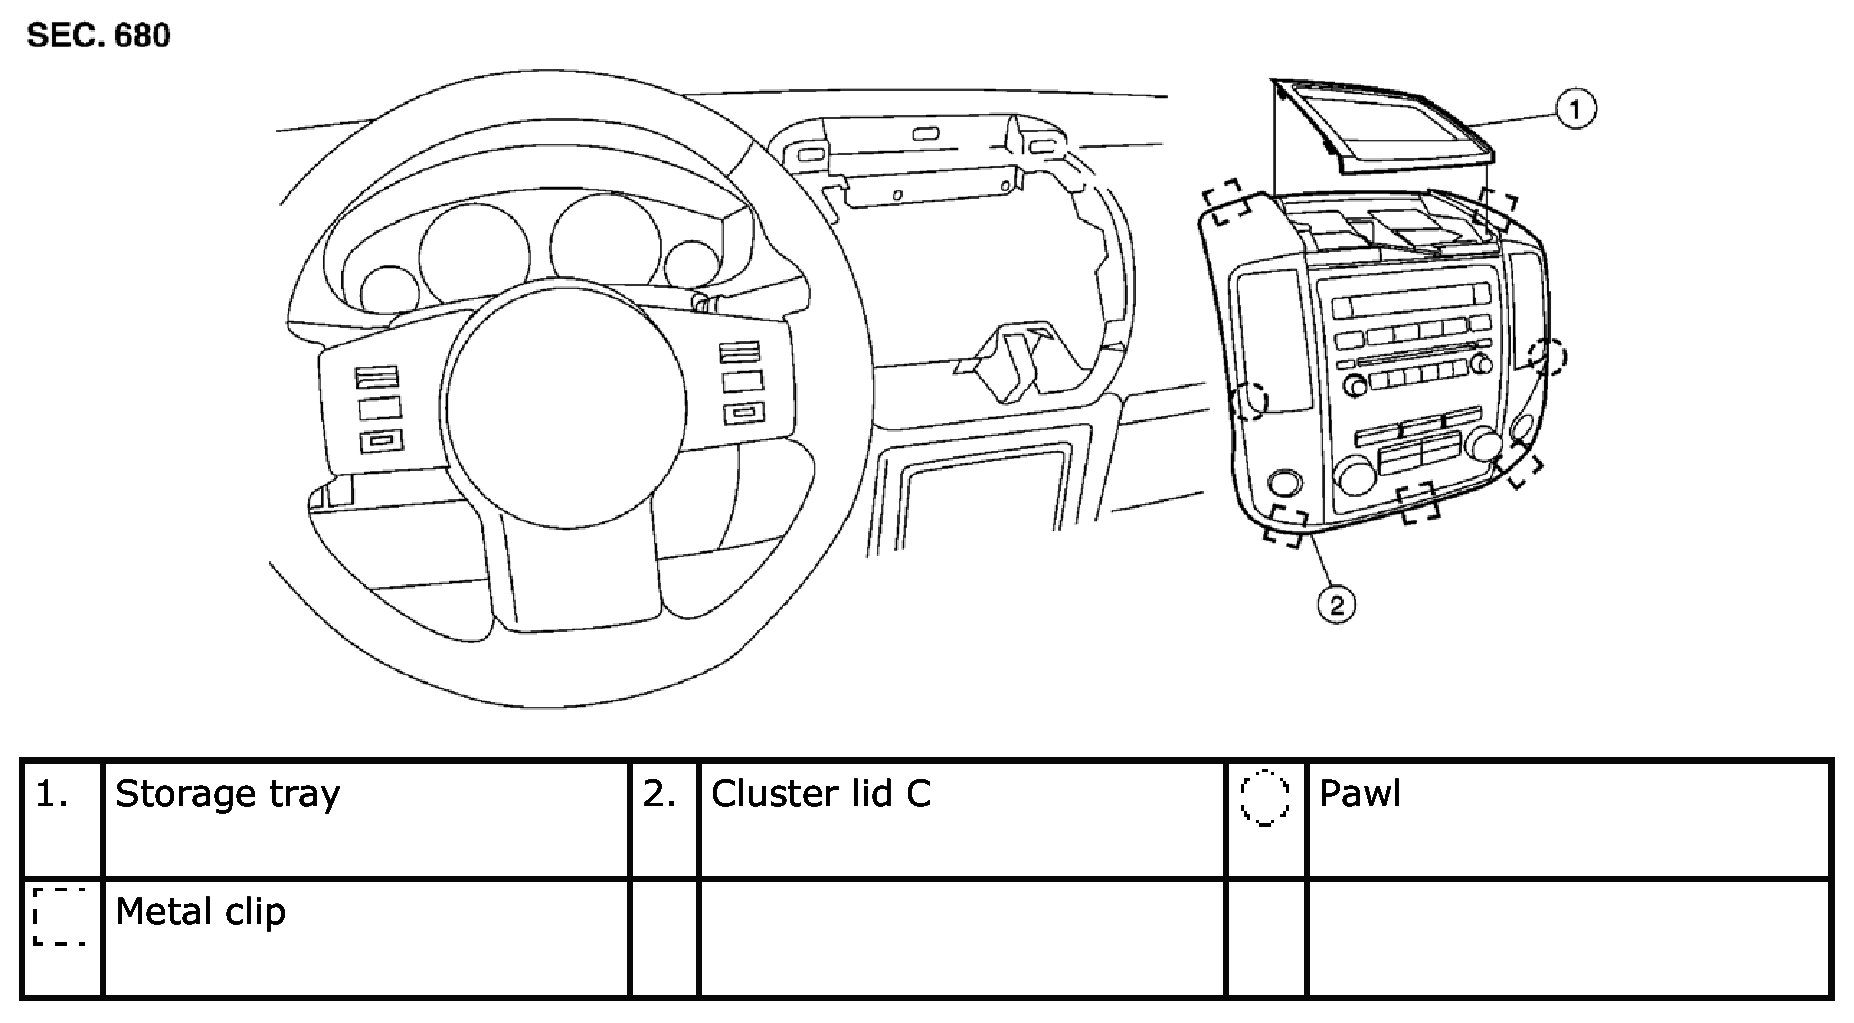
Removal
CAUTION: Before servicing, turn the ignition switch off, disconnect both battery terminals, then wait at least 3 minutes.
1. Release the clips and remove storage tray.
2. Remove the cluster lid C screws, then release the clips.
3. Disconnect harness connectors and remove cluster lid C.
Installation
Installation is in the reverse order of removal.
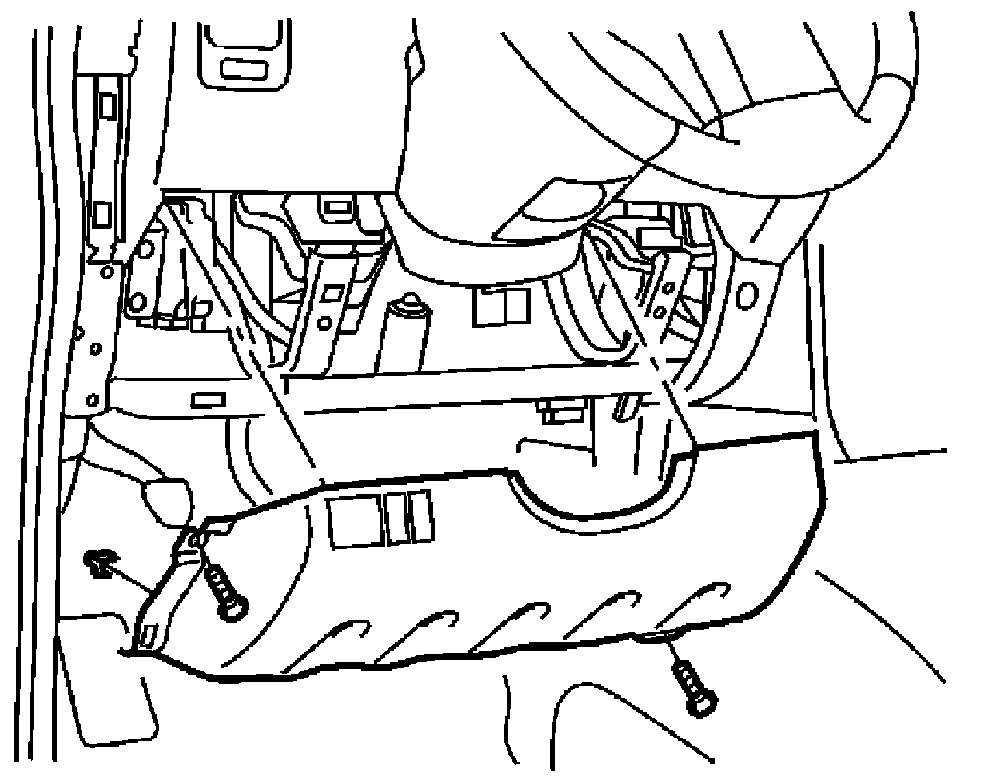
Cluster Lid D - Base
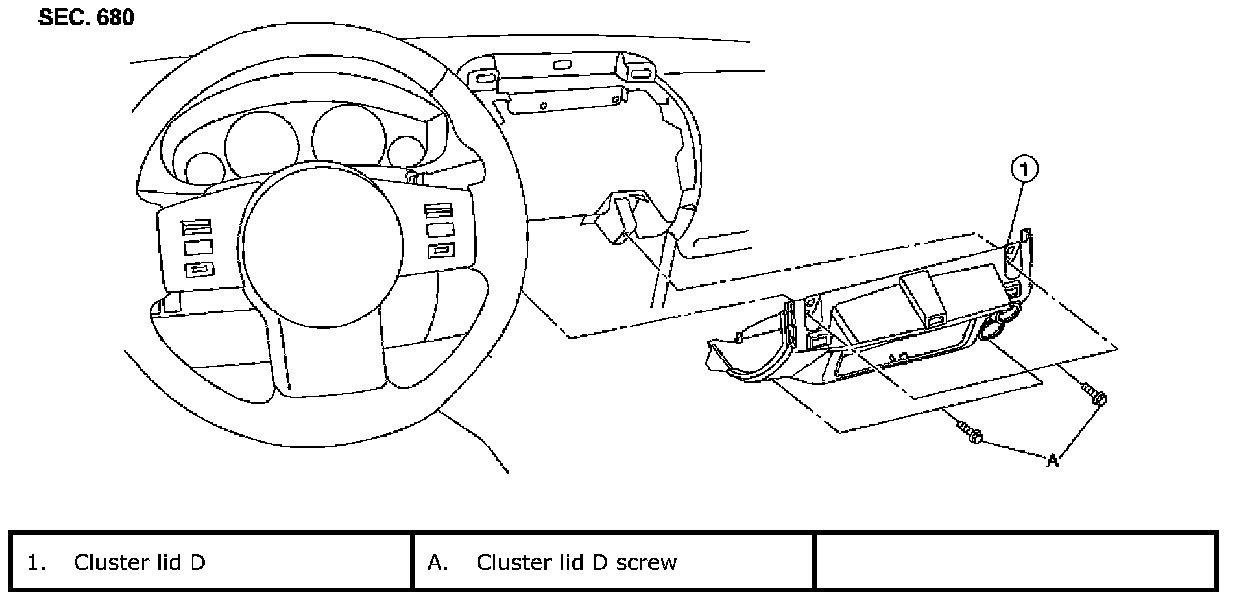
Removal
1. Remove center console. Refer to CENTER CONSOLE in this section.
2. Remove lower instrument panel LH. Refer to LOWER INSTRUMENT PANEL LH in this section.
3. Remove lower instrument panel RH and lower glove box. Refer to LOWER INSTRUMENT PANEL RH AND LOWER GLOVE BOX in this section.
4. Remove cluster lid C. Refer to CLUSTER LID C in this section.
5. Remove the screws, then disconnect the harness connectors and remove cluster lid D.
Installation
Installation is in the reverse order of removal.
Cluster Lid D - Push Type
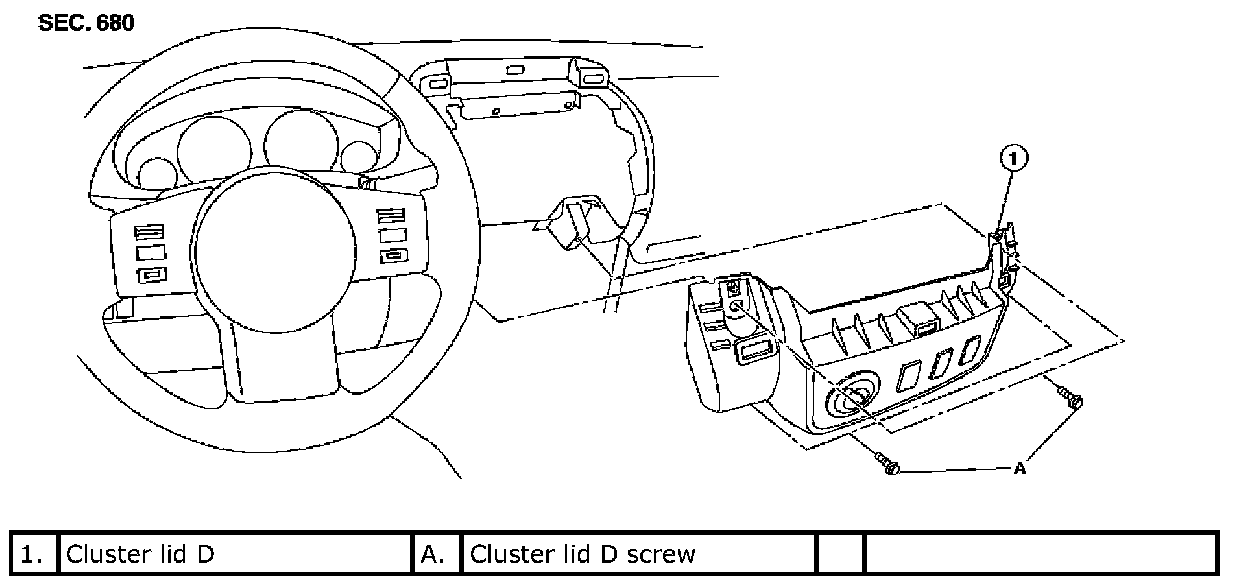
Removal
1. Remove center console. Refer to CENTER CONSOLE in this section.
2. Remove lower instrument panel LH. Refer to LOWER INSTRUMENT PANEL LH in this section.
3. Remove lower instrument panel RH and lower glove box. Refer to LOWER INSTRUMENT PANEL RH AND LOWER GLOVE BOX in this section.
4. Remove cluster lid C. Refer to CLUSTER LID C in this section.
5. Remove the screws, then disconnect the harness connectors and remove cluster lid D.
Installation
Installation is in the reverse order of removal.
Lower Instrument Panel LH
Removal
1. Remove front pillar lower finisher. Refer to [Body Side Trim: Removal and Installation].
2. Remove lower instrument panel LH screws, using power tool.
3. Pull rearward to release lower instrument panel LH.
4. Disconnect lower instrument panel LH harness connectors.
Installation
Installation is in the reverse order of removal.
Cluster Lid A
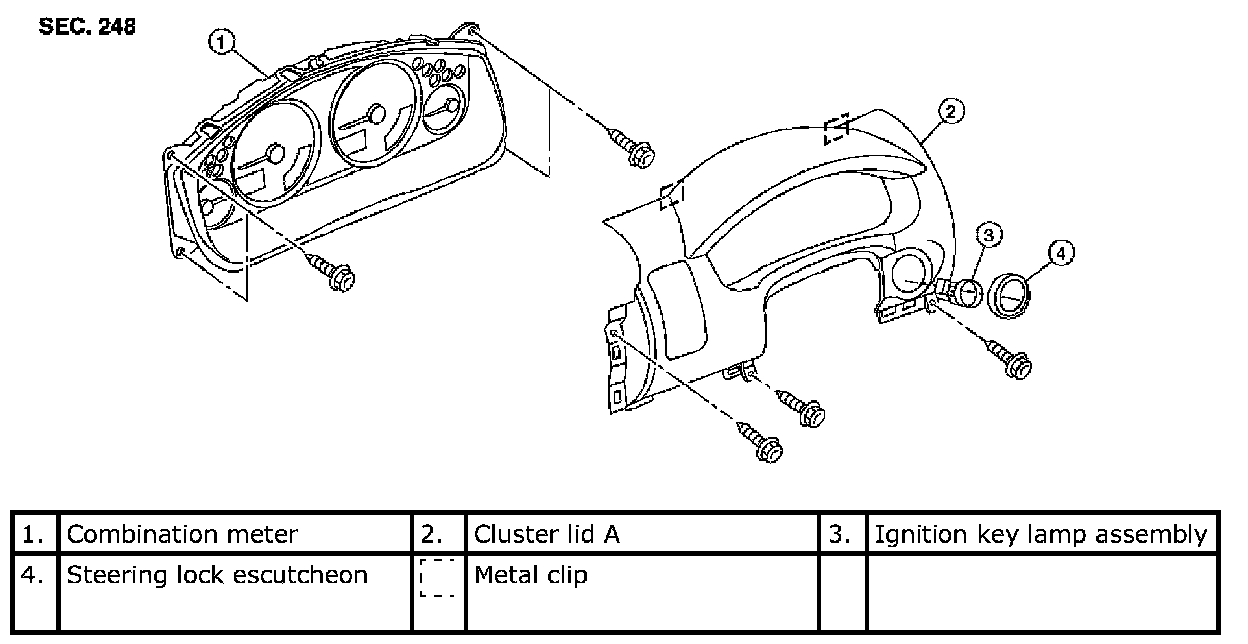
Removal
1. Remove front pillar upper finisher. Refer to [Body Side Trim: Removal and Installation].
2. Remove lower instrument panel LH. Refer to [Instrument Panel Assembly: Removal and Installation].
3. Remove steering lock escutcheon.
4. Remove the screws and clips, then lift cluster lid A rearward in vehicle away from the instrument panel.
Installation
Installation is in the reverse order of removal.
Steering Column Cover
Removal
1. Partially remove driver door weatherstrip and set aside.
2. Remove front pillar lower finisher. Refer to [Body Side Trim: Removal and Installation].
3. Remove lower instrument panel LH. Refer to LOWER INSTRUMENT PANEL LH in this section.
4. Remove the steering column cover screws, then remove both the upper and lower portions of the steering column cover.
Installation
Installation is in the reverse order of removal.
A/T Finisher
Removal
1. Remove cup holder finisher.
2. Pull up to release clips, then remove the A/T finisher.
Installation
Installation is in the reverse order of removal.
M/T Finisher
Removal
1. Remove cup holder finisher.
2. Rotate shift knob counterclockwise, then remove.
3. Pull up to release clips, then remove the M/T finisher.

Installation
Installation is in the reverse order of removal.
Lower Instrument Panel RH and Lower Glove Box
Removal
1. Remove front pillar lower finisher. Refer to [Body Side Trim: Removal and Installation].
2. Remove lower instrument panel RH screws, using power tool.
3. Remove lower instrument panel RH and lower glove box.
Installation
NOTE: Install upper glove box before installing lower glove box.
Installation is in the reverse order of removal.
Upper Glove Box
Removal
1. Remove lower instrument panel RH and lower glove box. Refer to LOWER INSTRUMENT PANEL RH in this section.
2. Remove upper glove box lid screws, using power tool.
3. Remove upper glove box.
Installation
Installation is in the reverse order of removal.
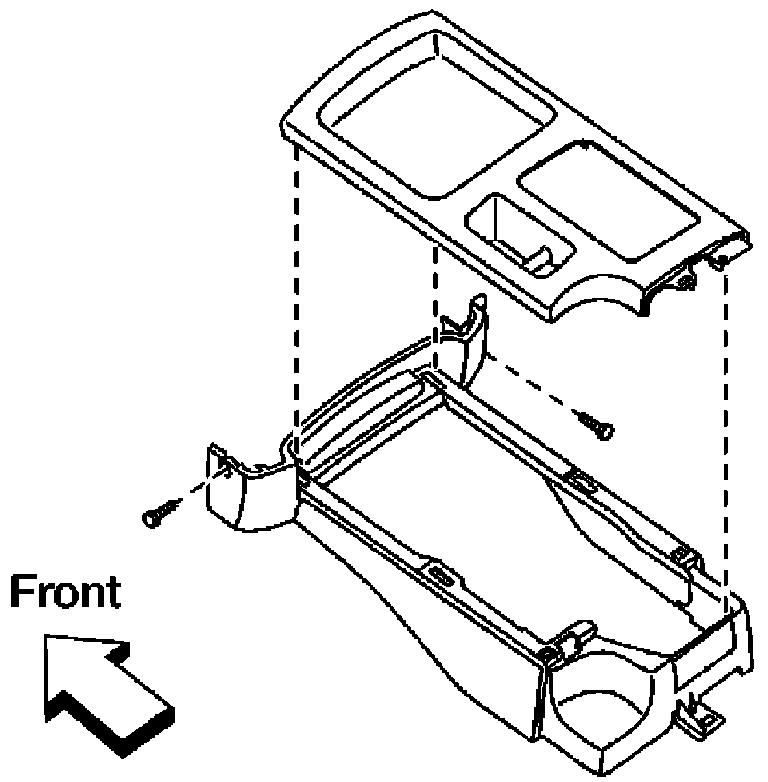
Center Console
Removal
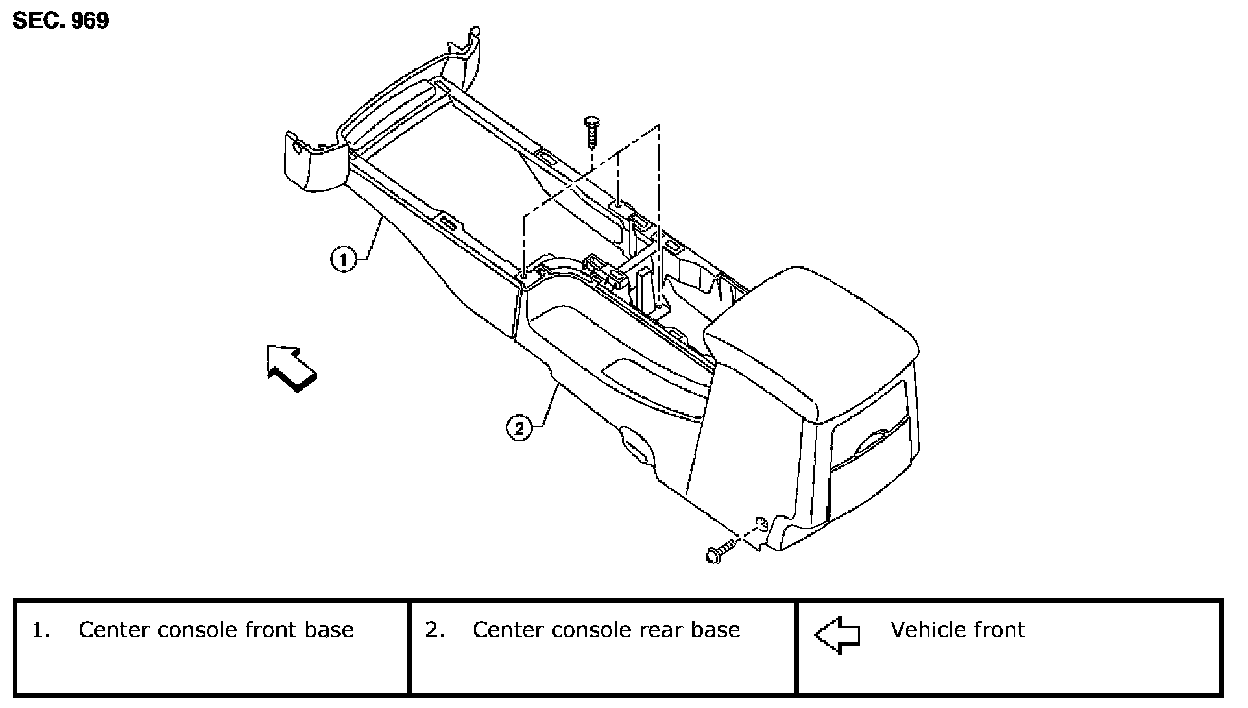
1. Remove lower instrument panel RH and glove box. Refer to LOWER INSTRUMENT PANEL RH AND GLOVE BOX in this section.
2. Remove cup holder finisher.
3. Remove A/T or M/T finisher. Refer to AT FINISHER or MT FINISHER in this section.
4. Remove center console screws, then lift center console rear base away from center console front base and disconnect harness connectors.
5. Disconnect harness connectors, then remove center console front base.
Installation
Installation is in the reverse order of removal.