Control Valve Body Cover Installation
Control Valve Body Cover Installation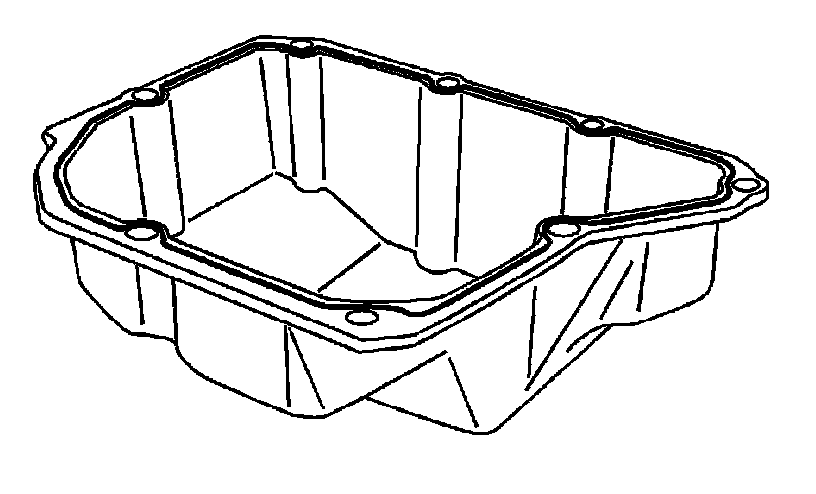
1. Clean any gasket material from the control valve body cover and inspect the gasket mounting surface.
2. Apply a 3 mm (1/8 in) bead of sealant GM P/N 89020326 (Canadian P/N 89021188), to the cover mounting surface.
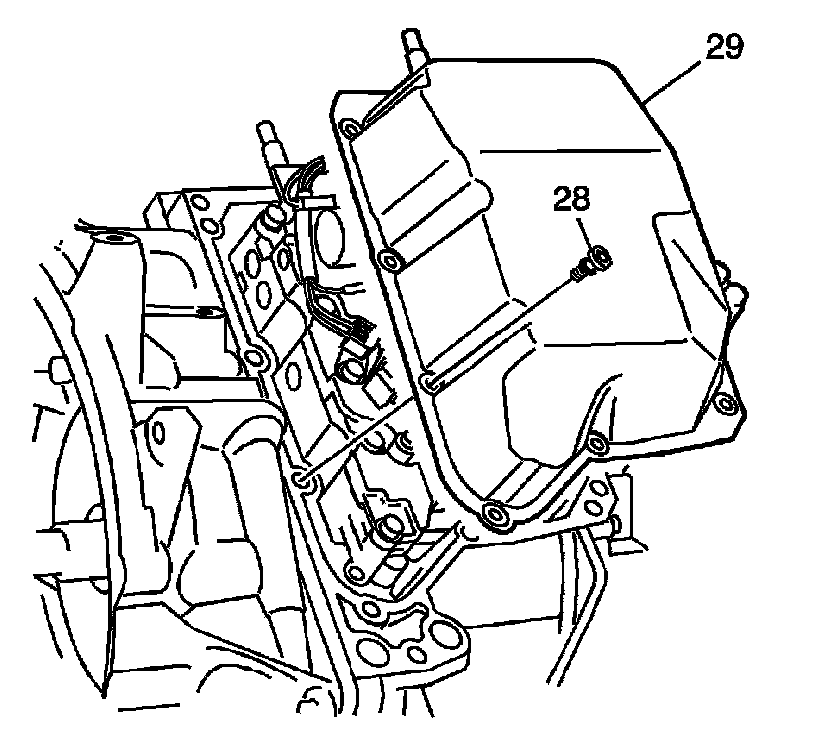
3. Install the control valve body cover (29) onto the transmission case assembly.
4. Apply threadlocker GM P/N 12345382 (Canadian P/N 10953489), to the threads of all of the cover bolts.
5. Install the 9 - M8 x 1.25 x 15.5 mm control valve body cover bolts (28).
CAUTION:
Refer to [Fastener Notice]
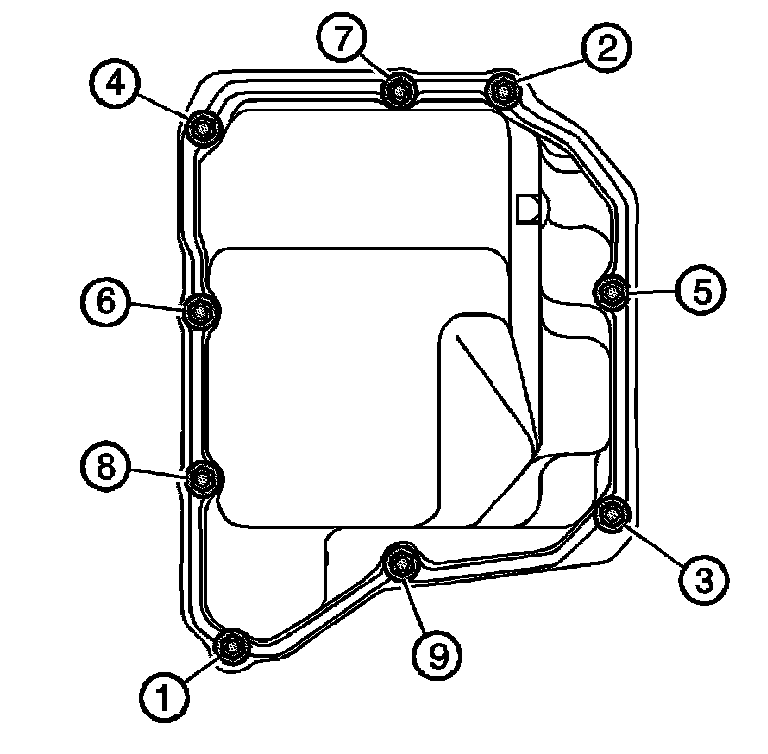
6. Tighten the 9 control valve body cover bolts in sequence.
Tightening torque
Tighten the control valve body cover bolts to 13 Nm (10 ft. lbs.).