Diagram Information and Instructions
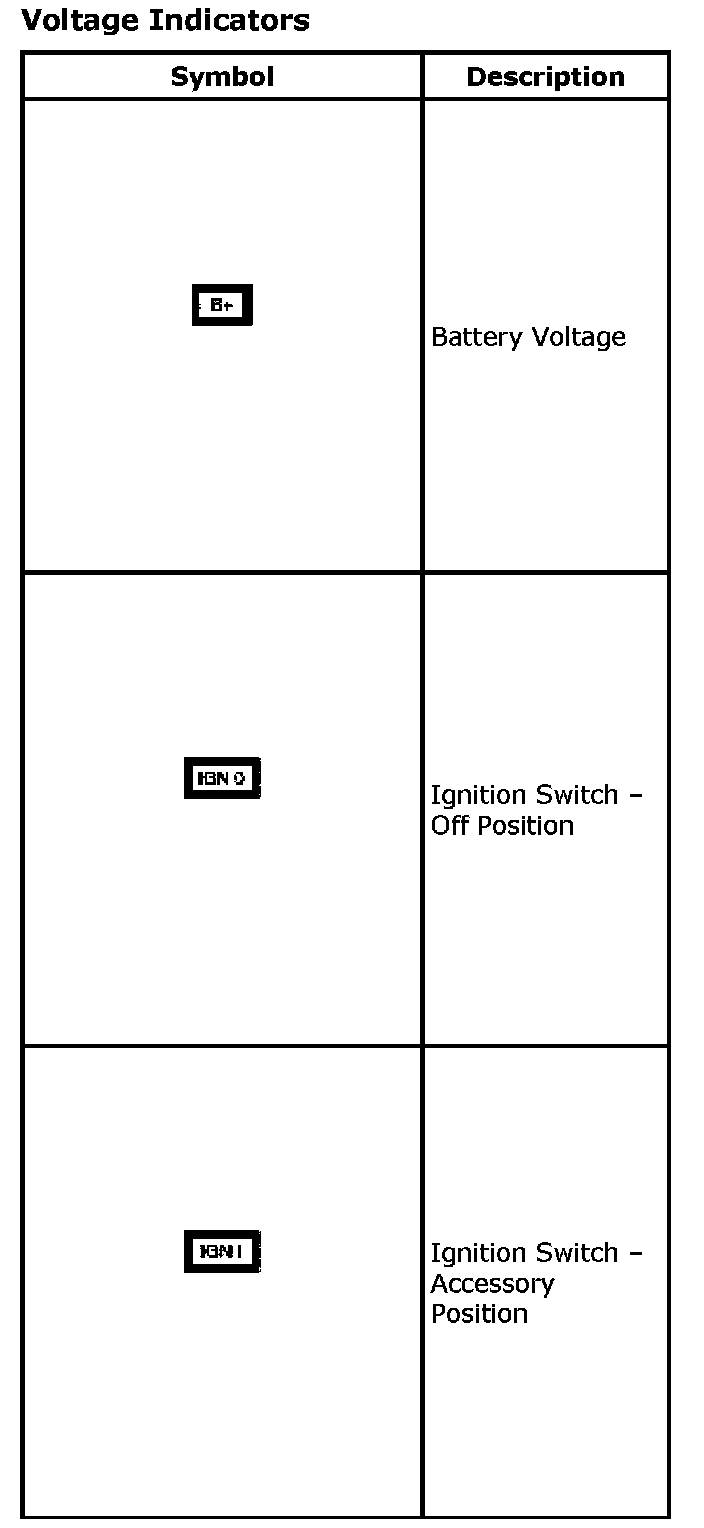
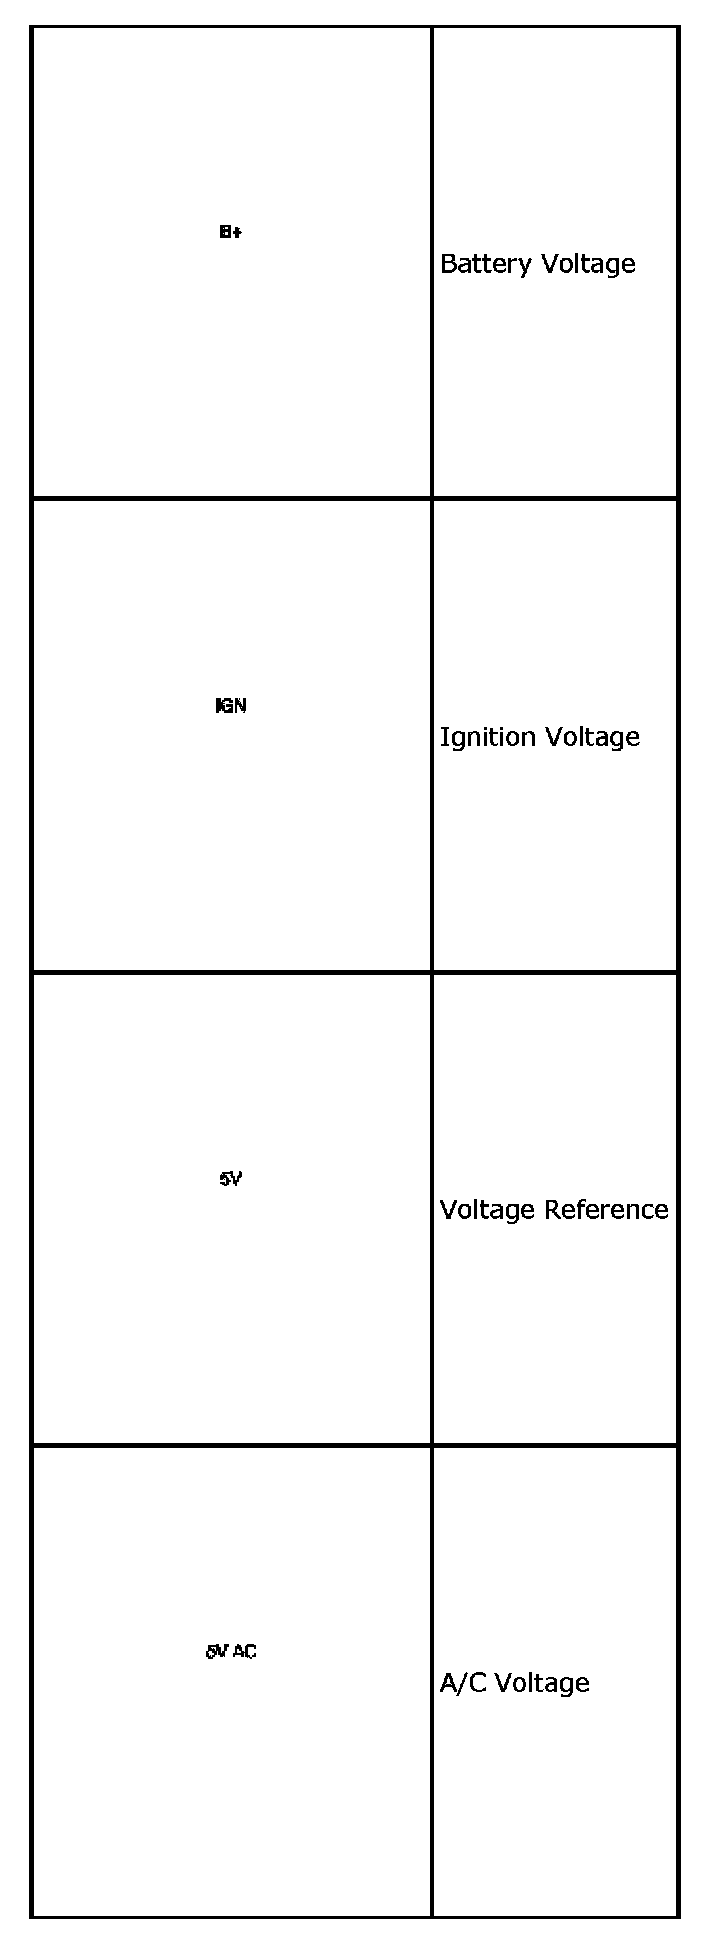
Voltage Indicators (Part 1):
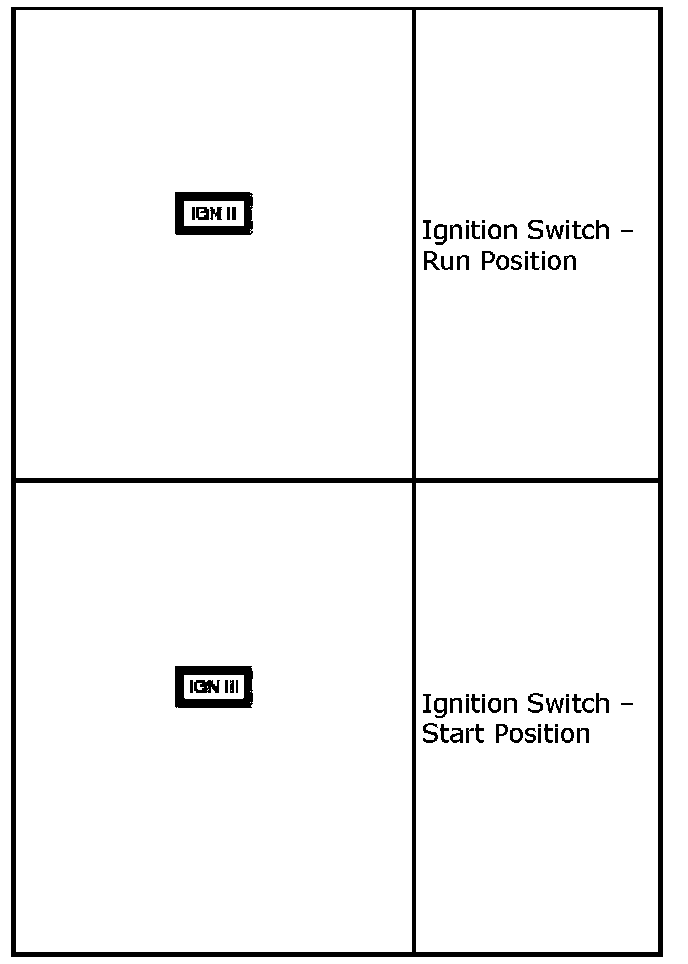
Voltage Indicators (Part 2):
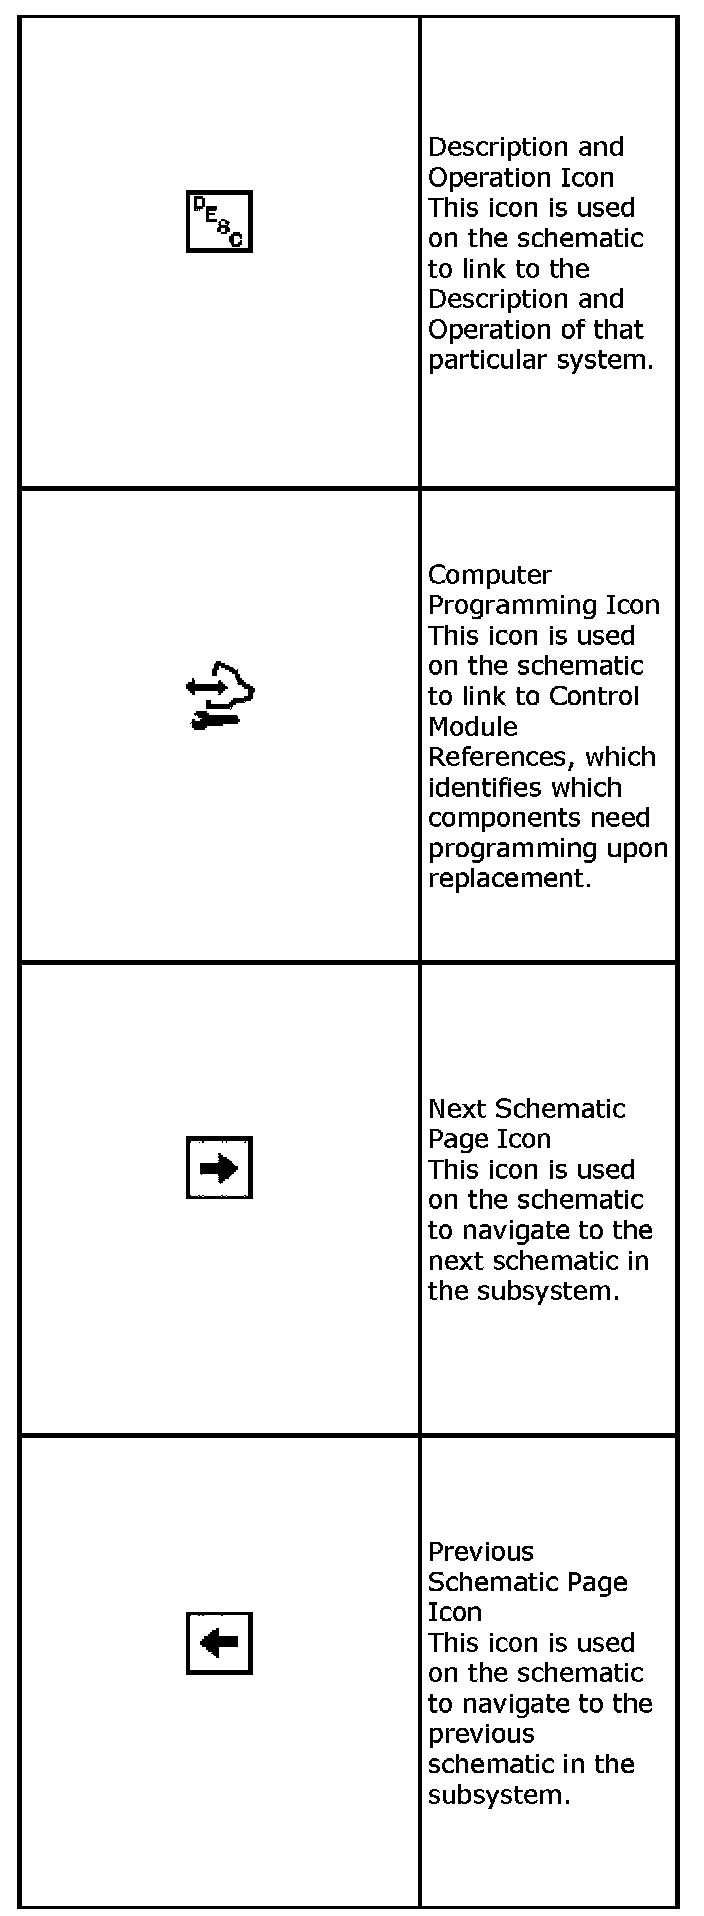
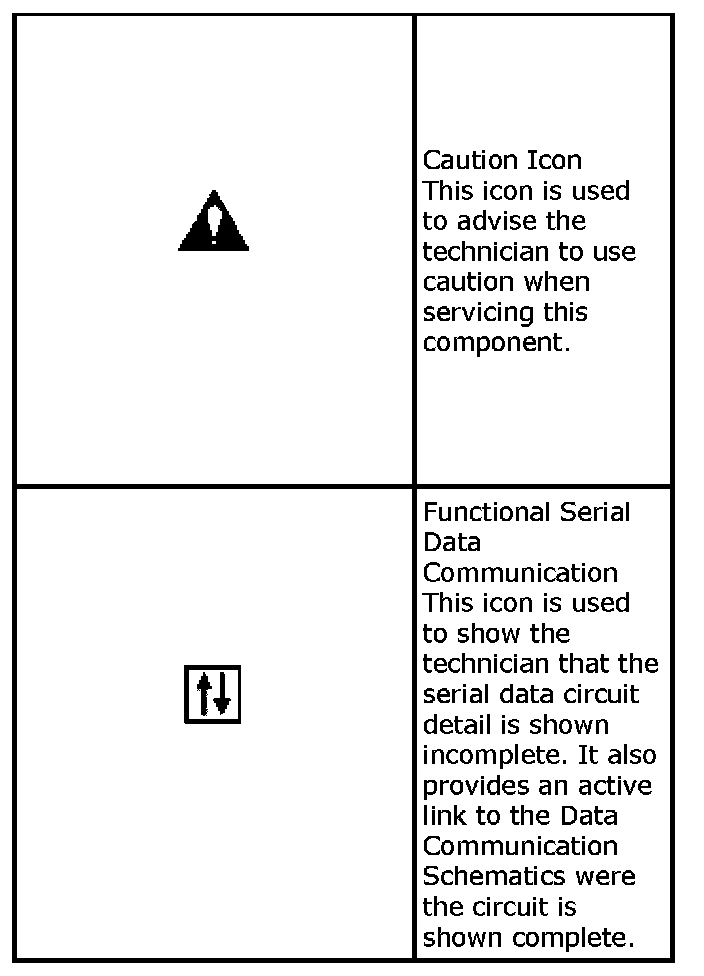
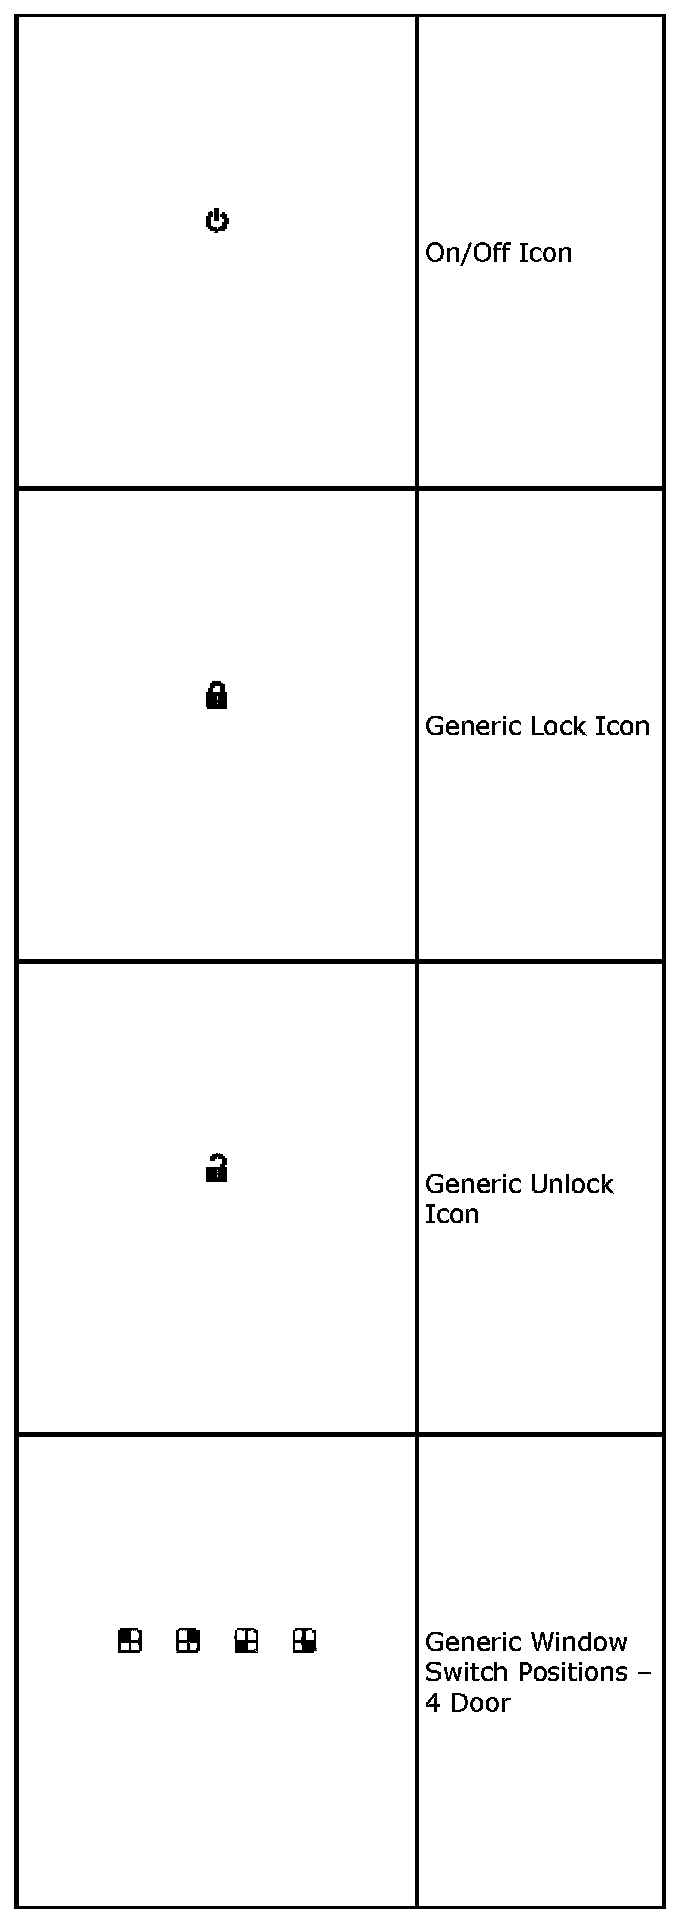
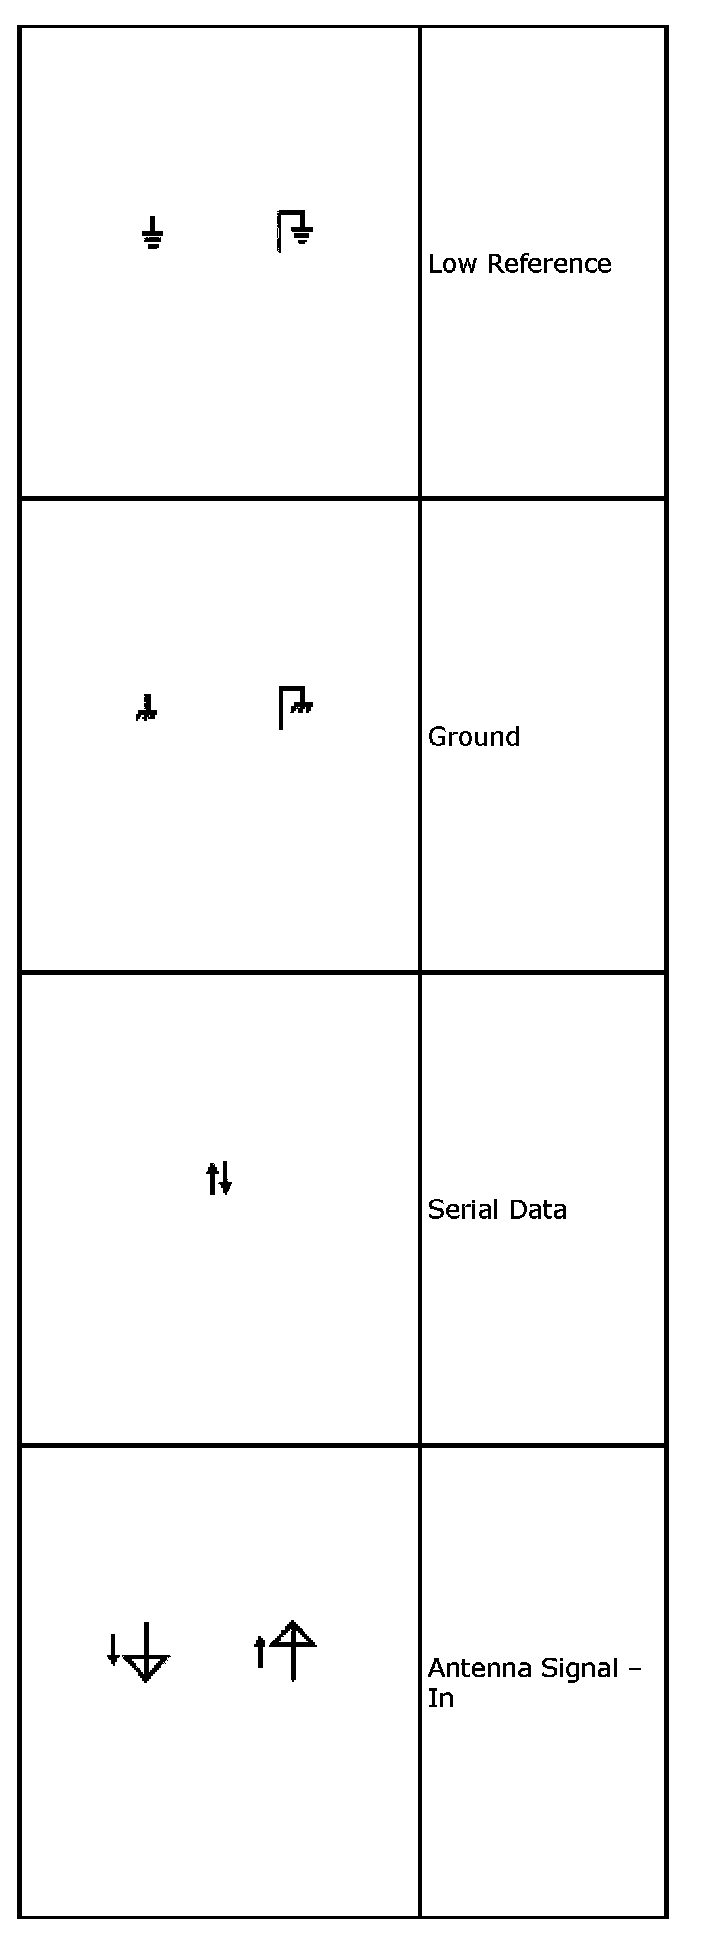
General Icons (Part 1):
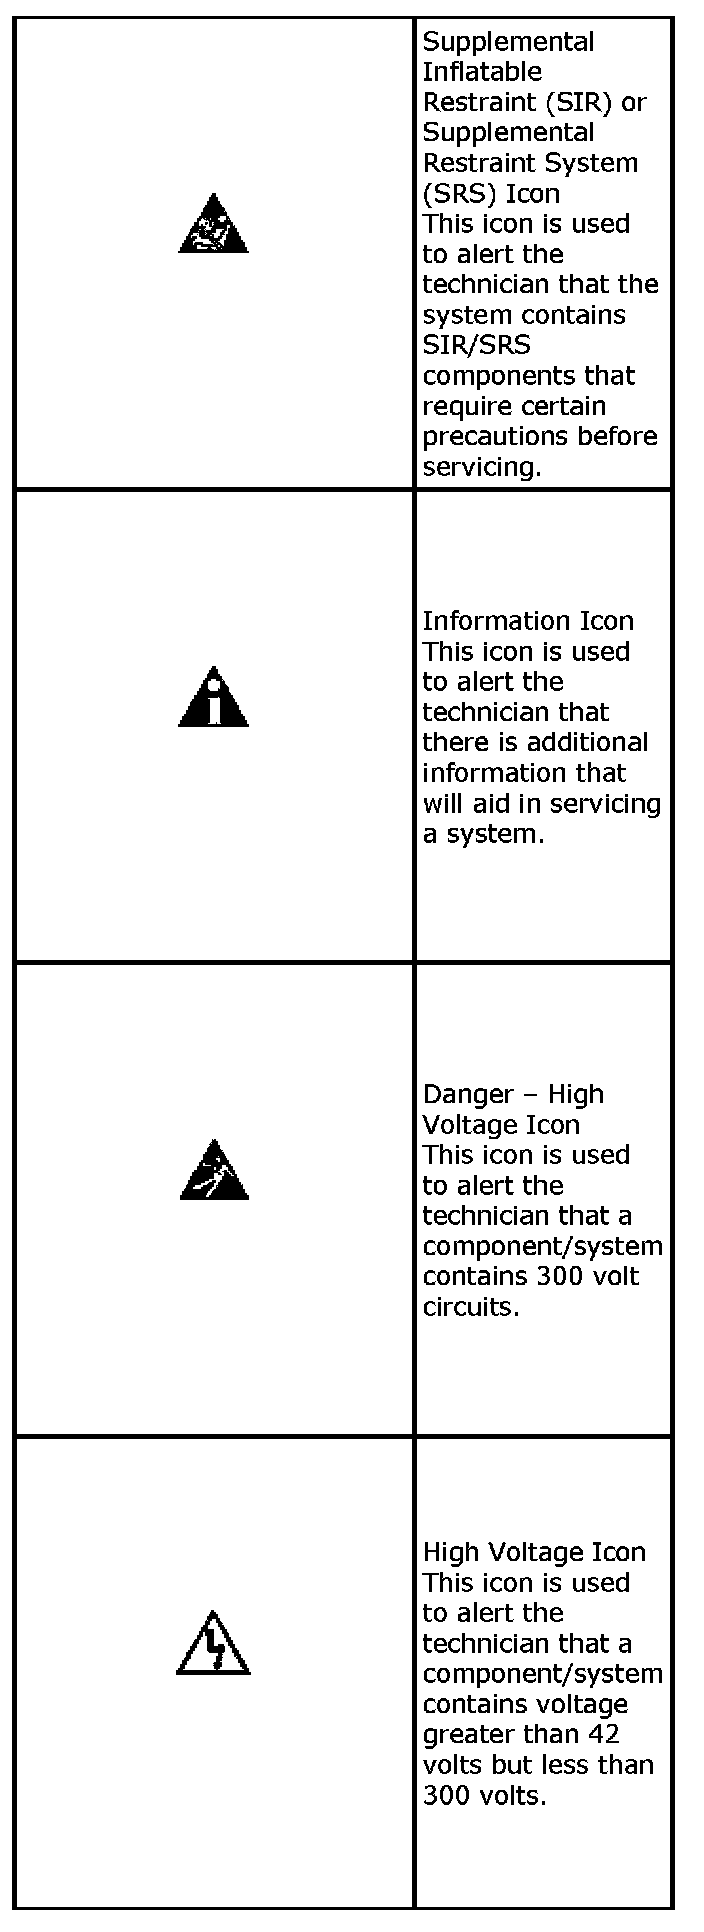
General Icons (Part 2):
General Icons (Part 3):
General Icons (Part 4):
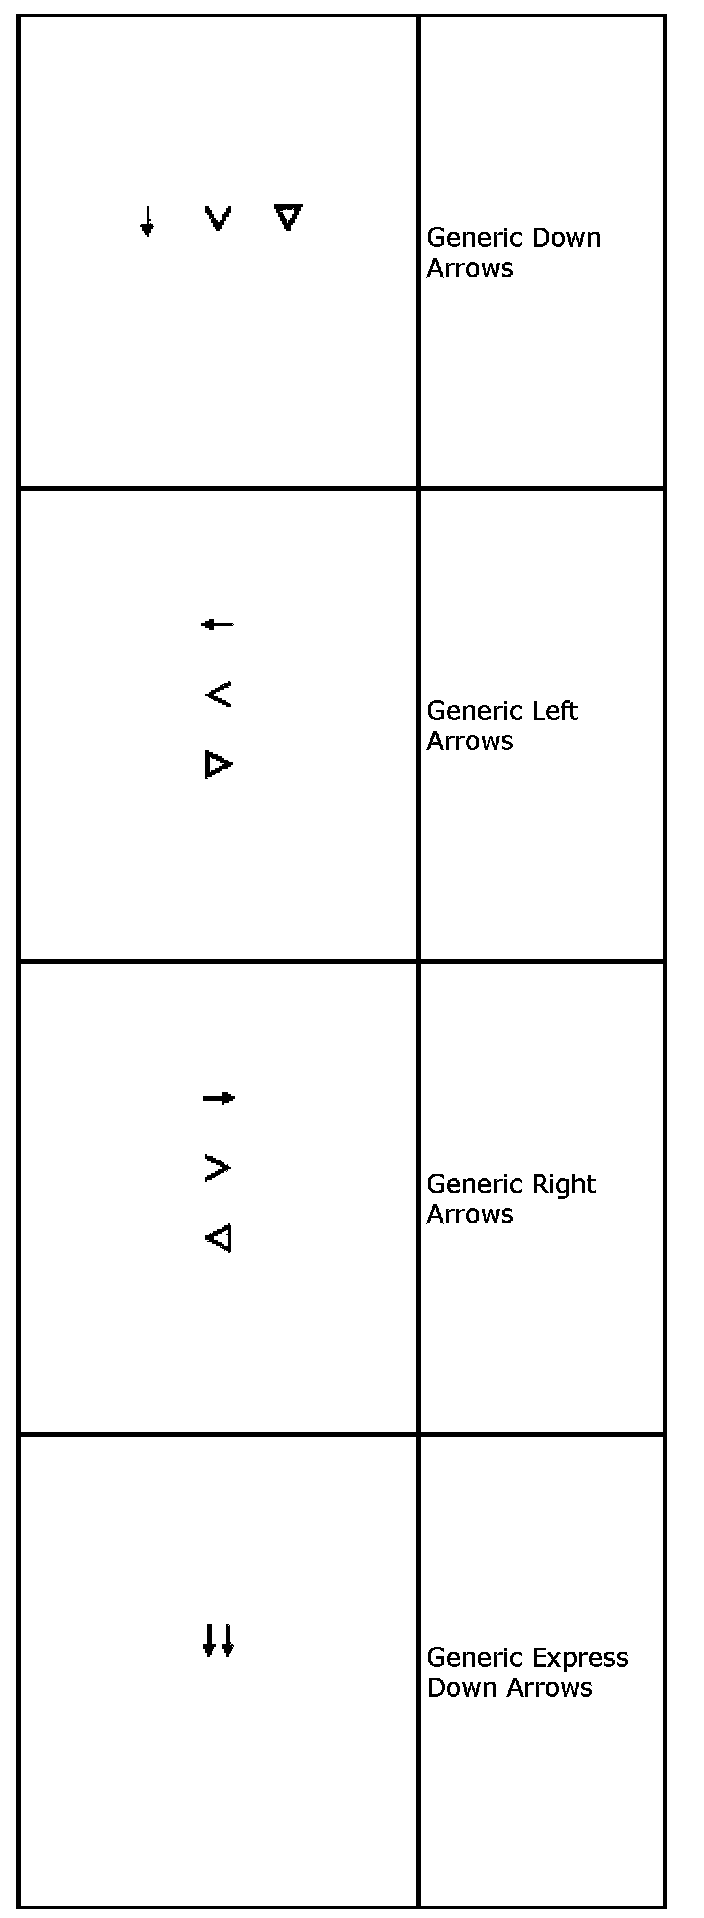
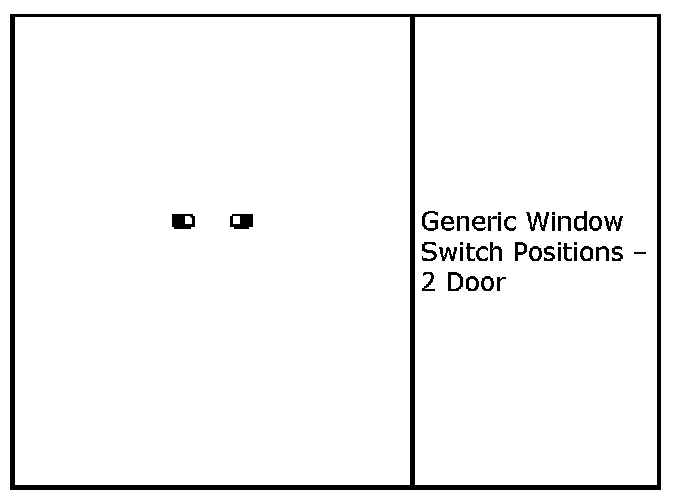
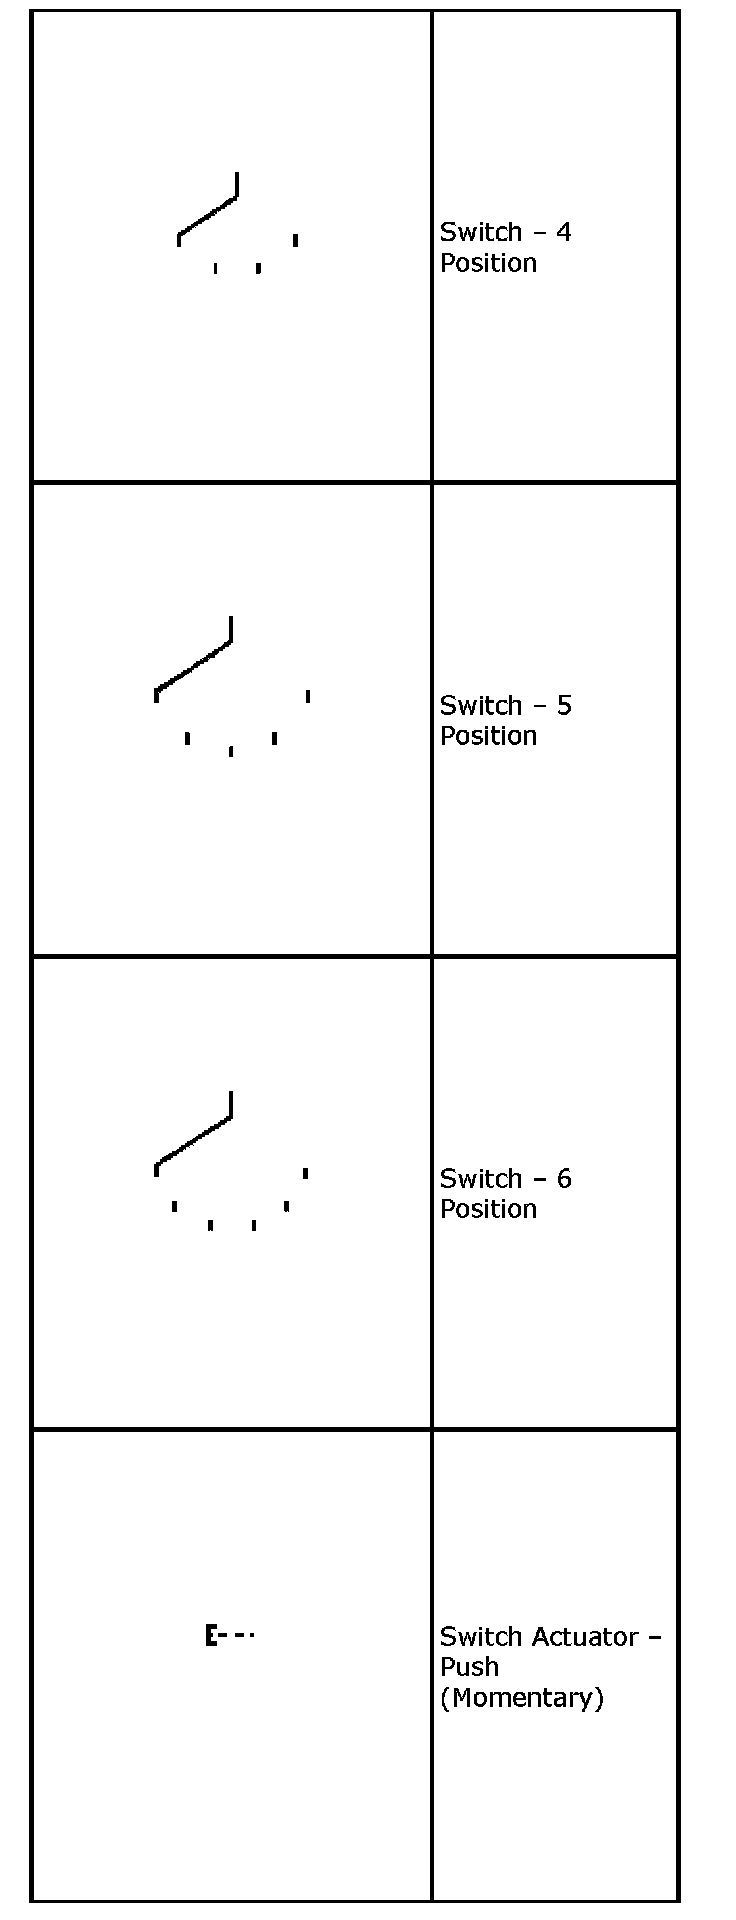
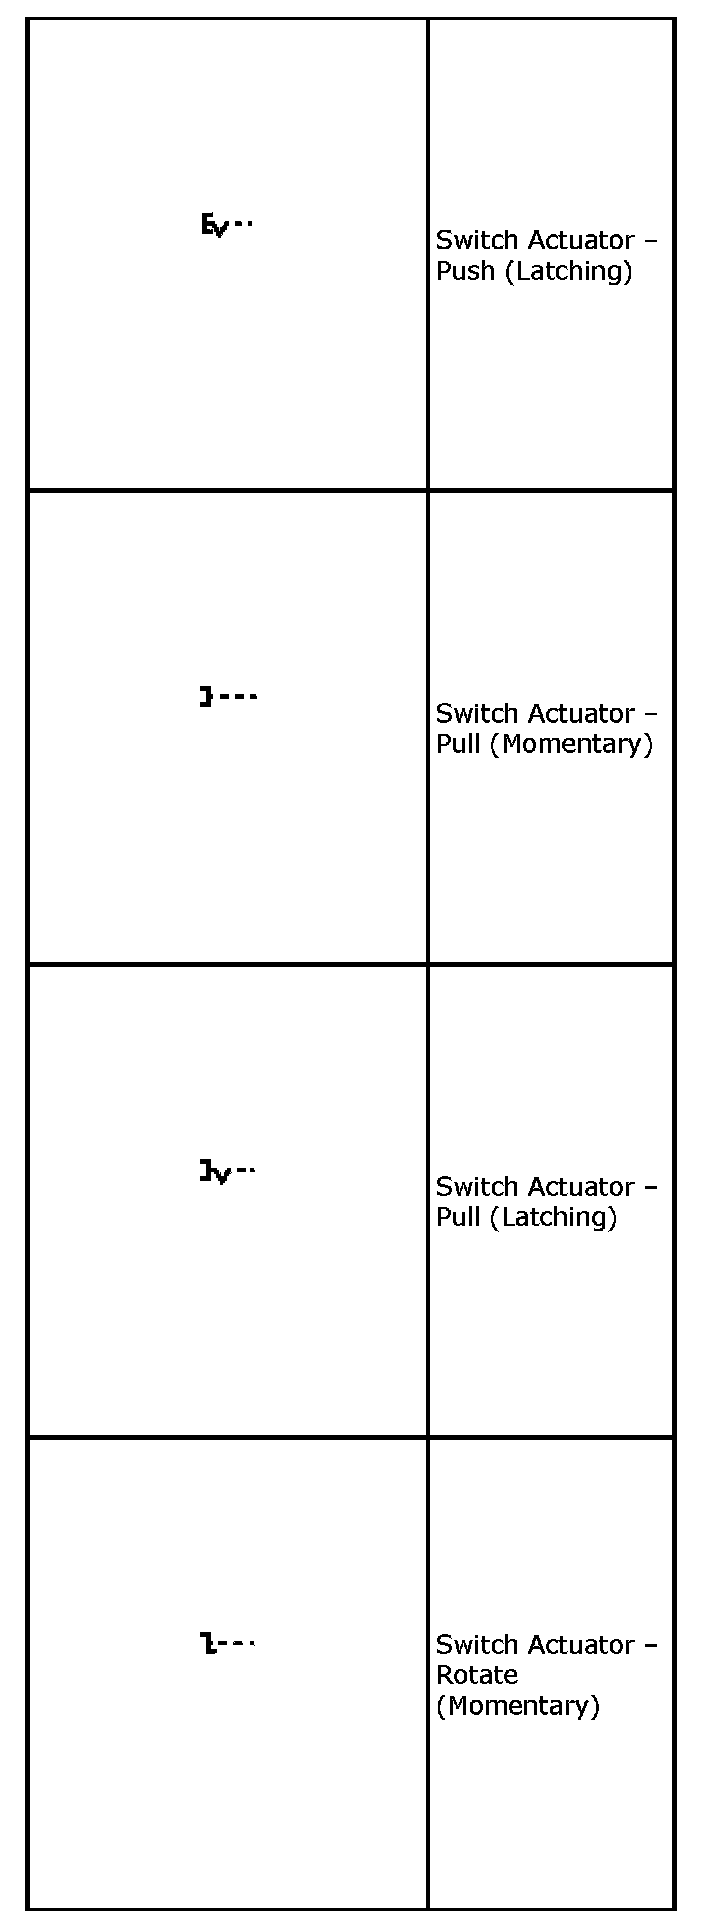
Switch Position Icons (Part 1):
Switch Position Icons (Part 2):
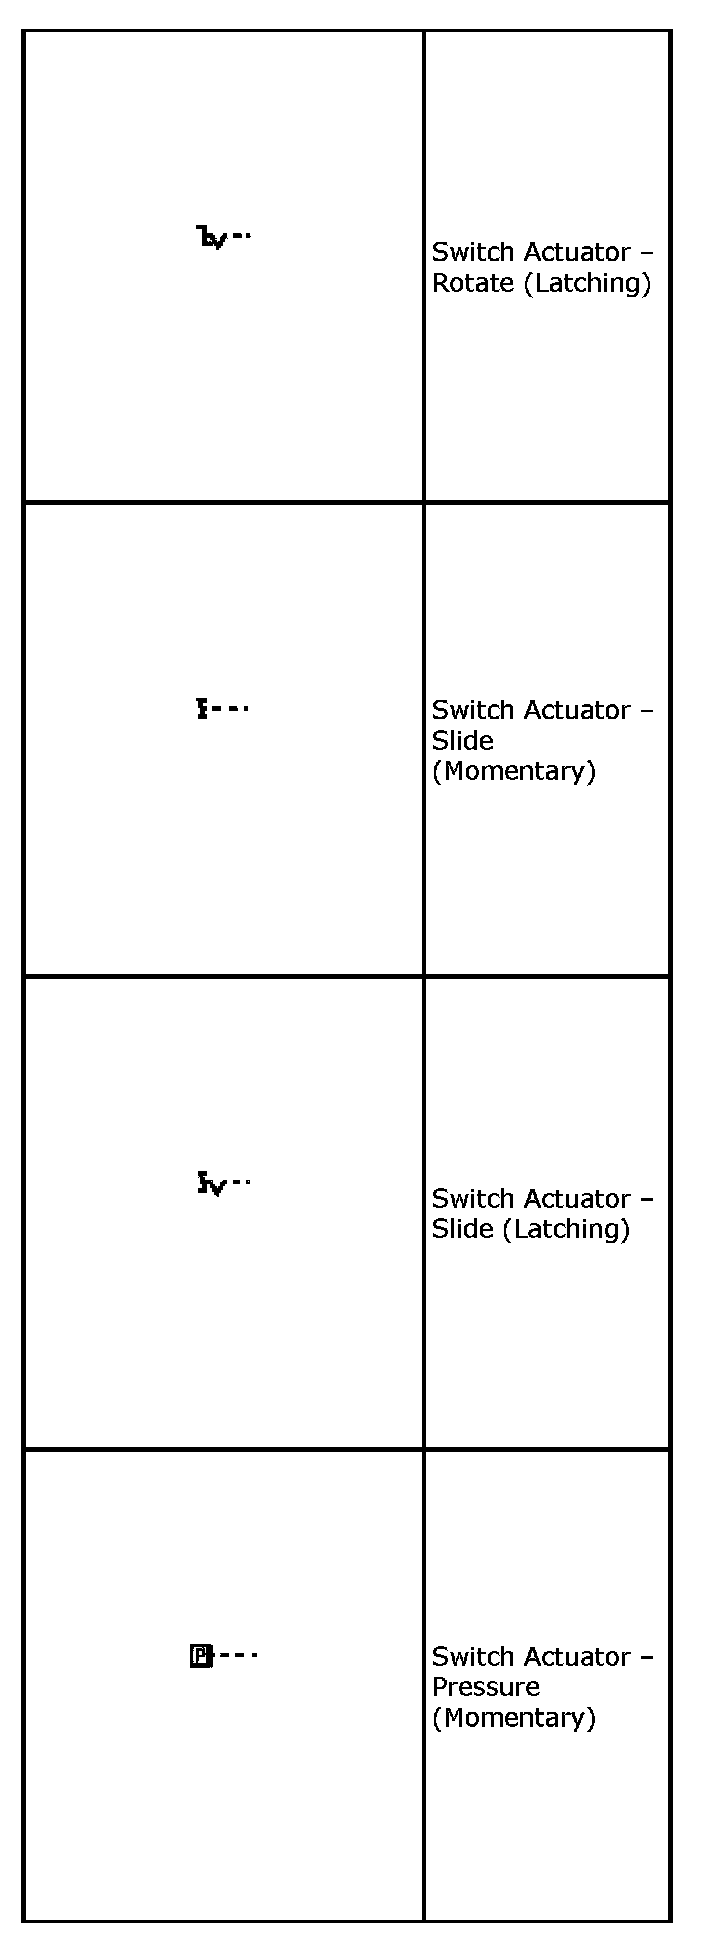
Switch Position Icons (Part 3):
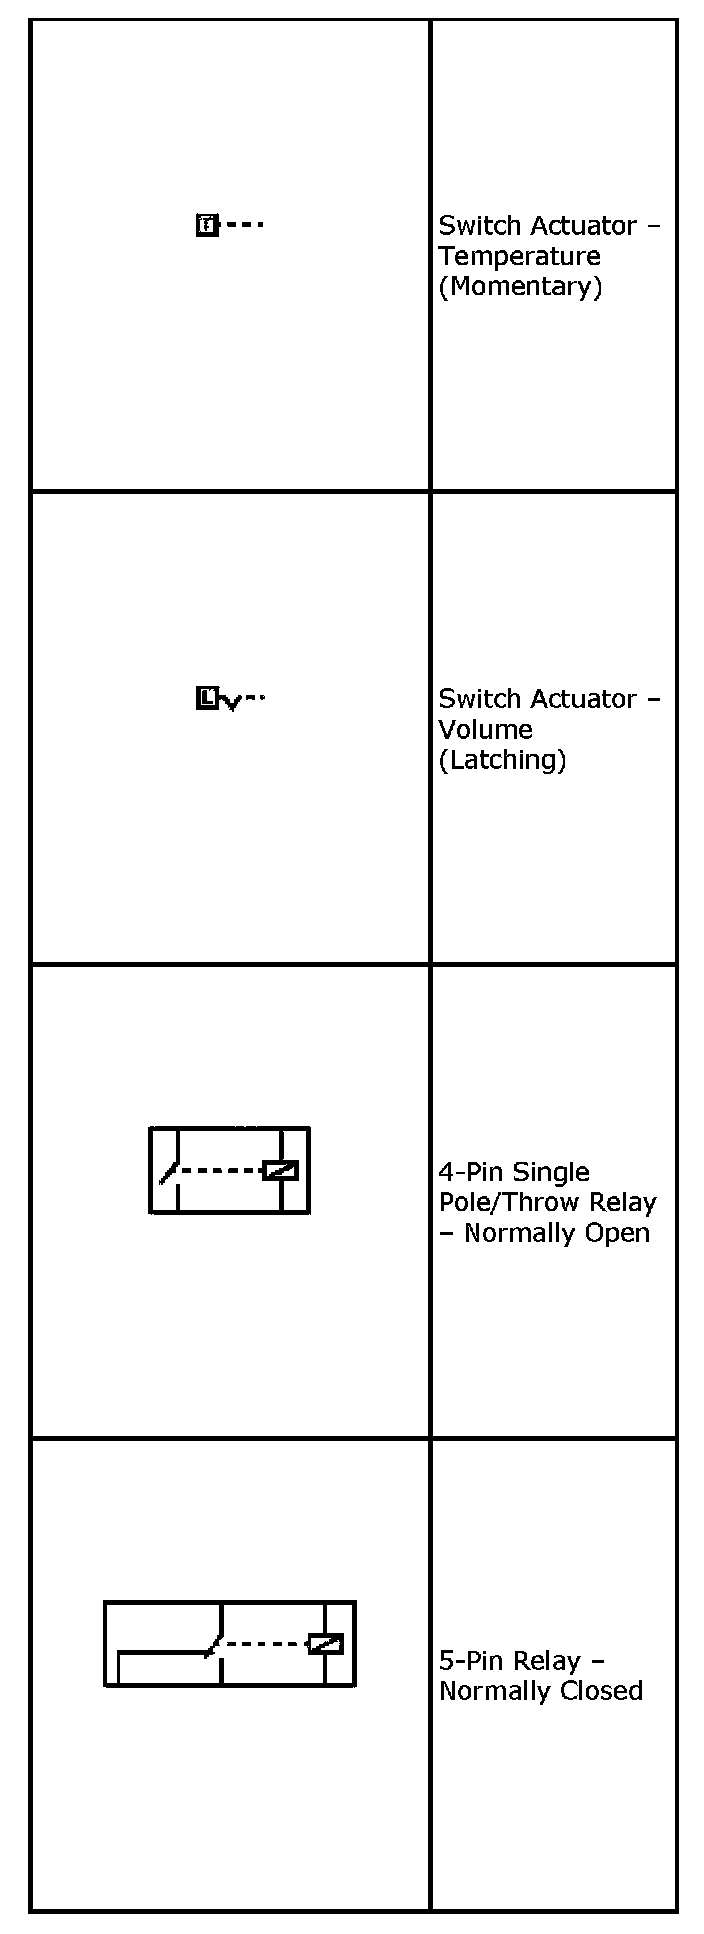
Switch Position Icons (Part 4):
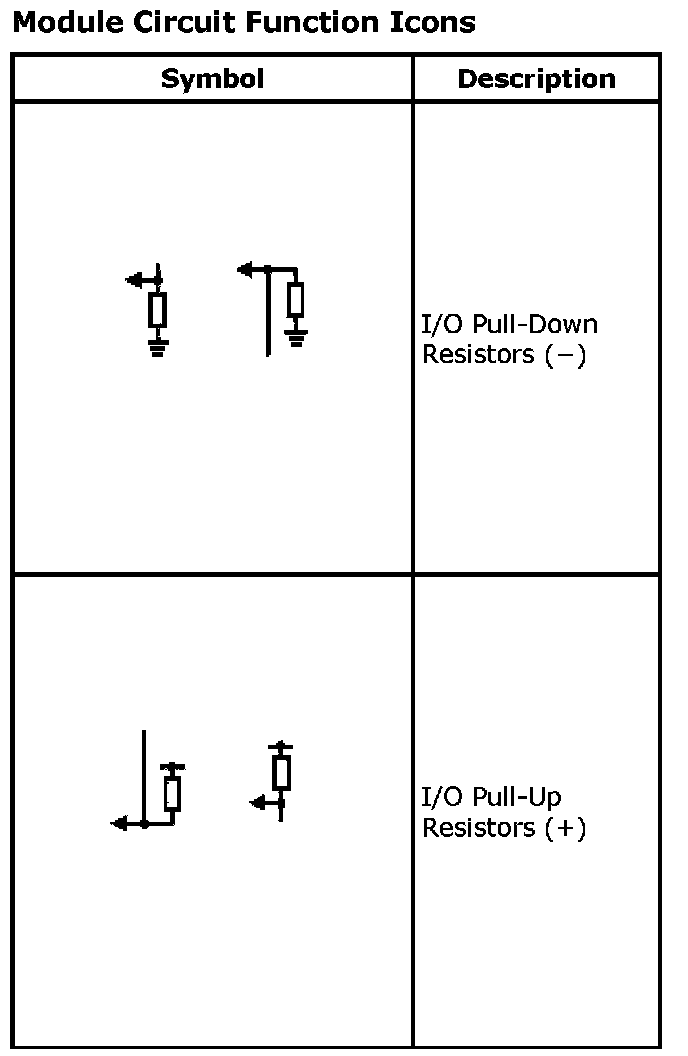
Module Circuit Function Icons (Part 1):
Module Circuit Function Icons (Part 2):
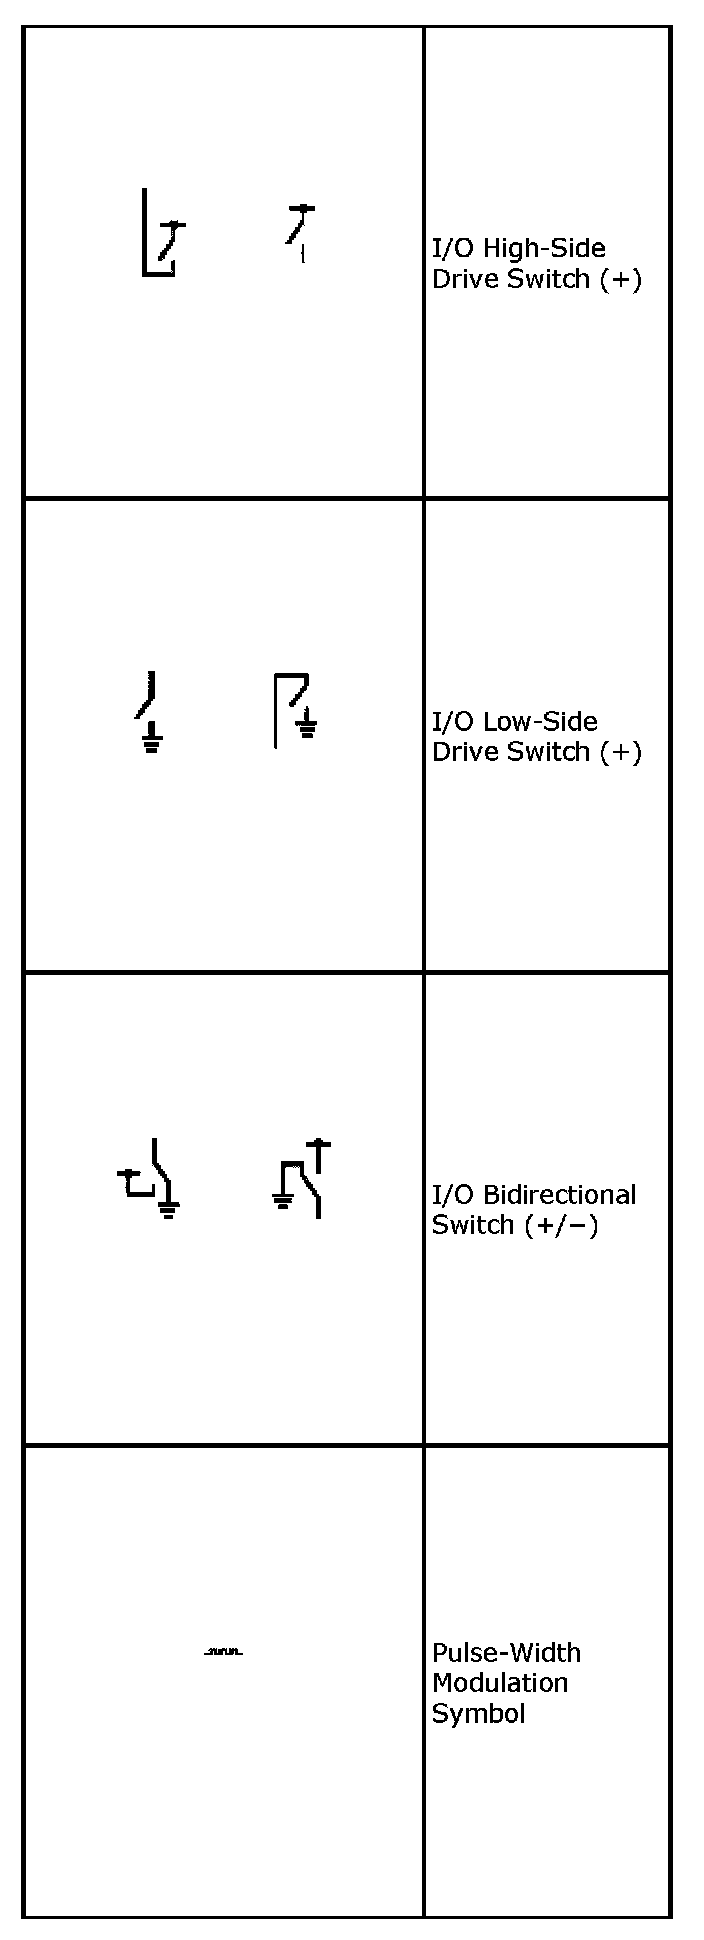
Module Circuit Function Icons (Part 3):
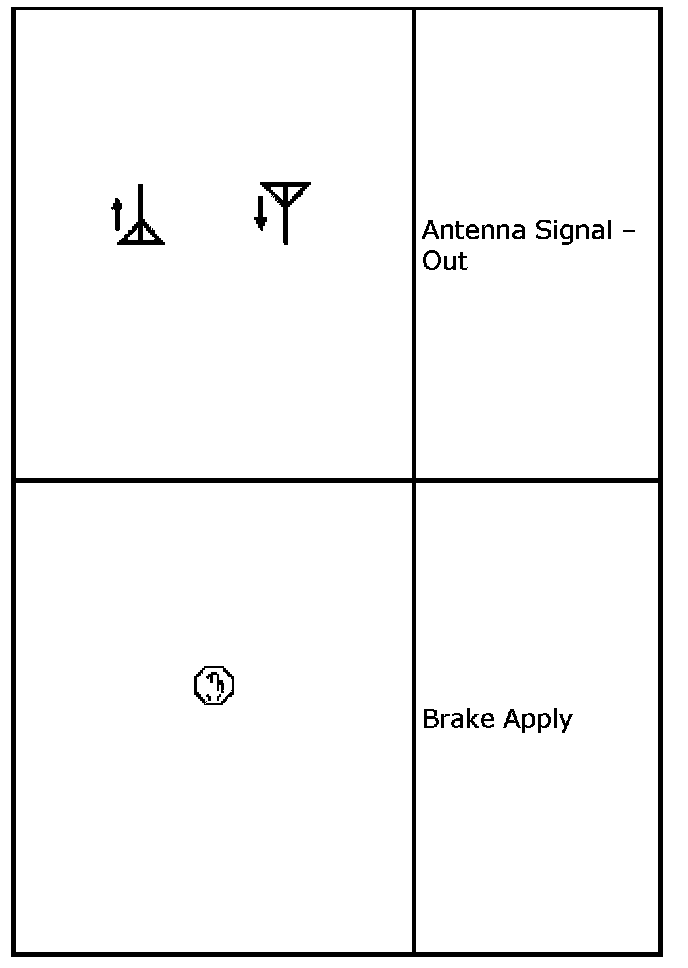
Module Circuit Function Icons (Part 4):
Module Circuit Function Icons (Part 5):
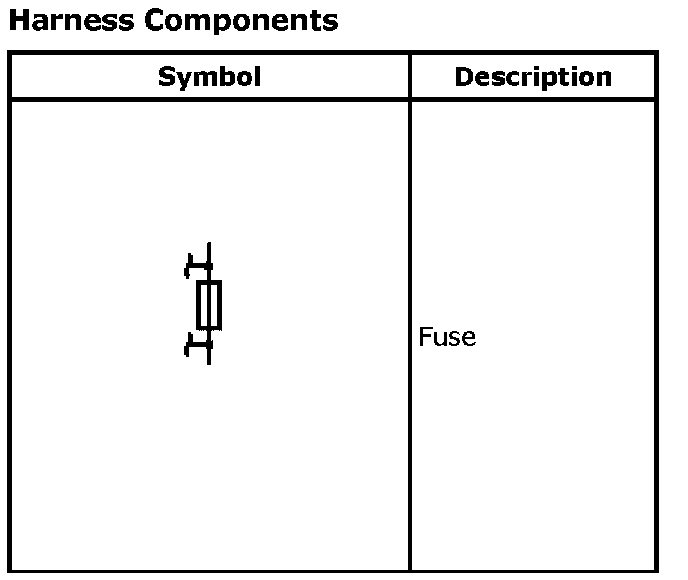
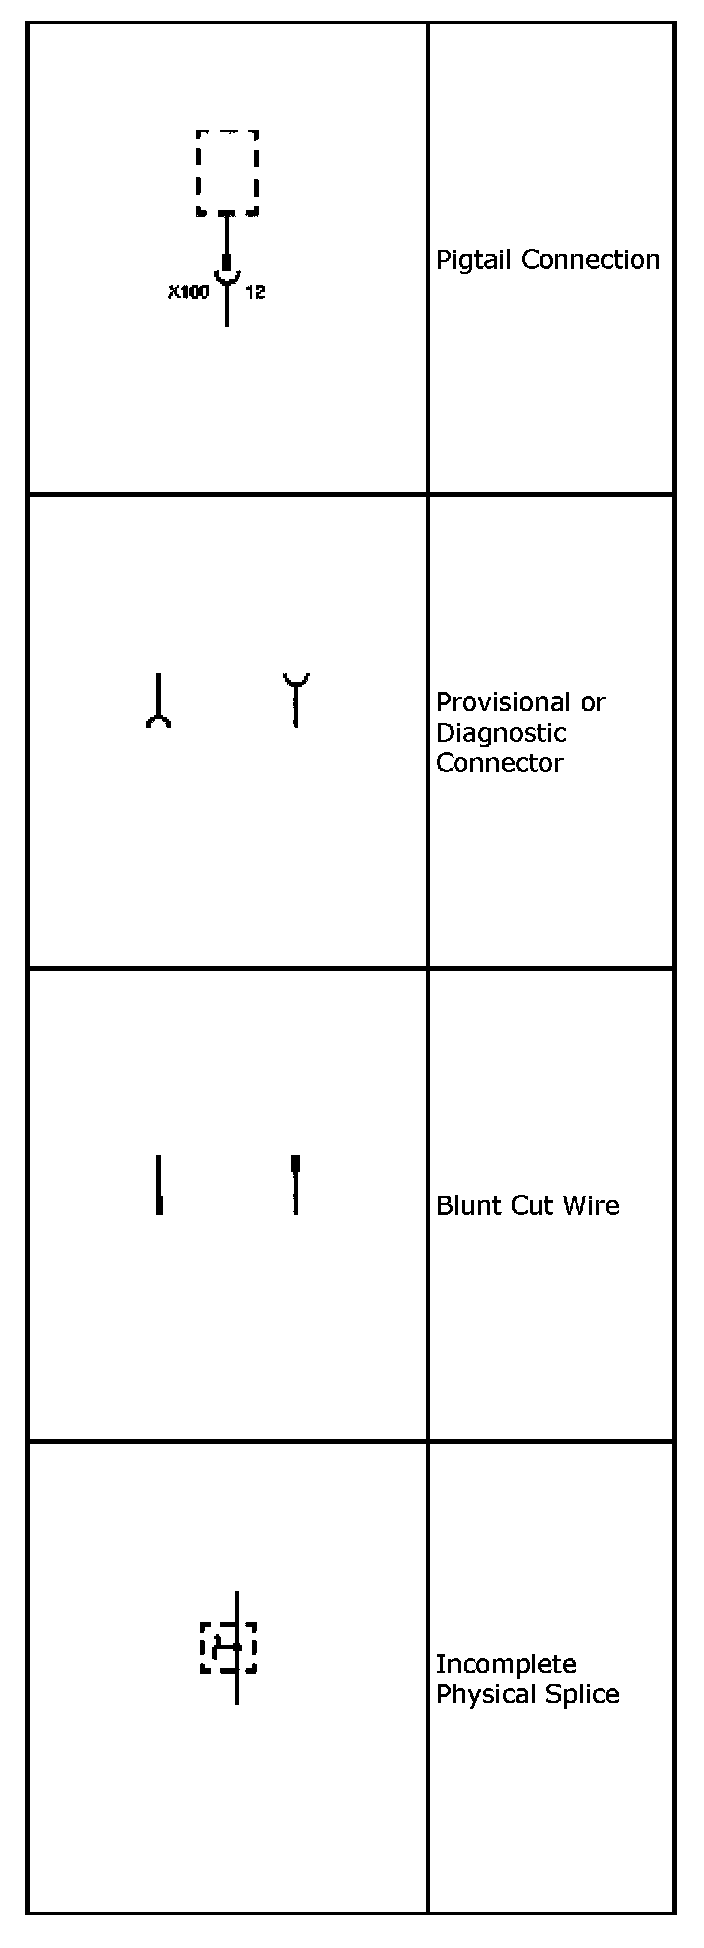
Harness Components (Part 1):
Harness Components (Part 2):
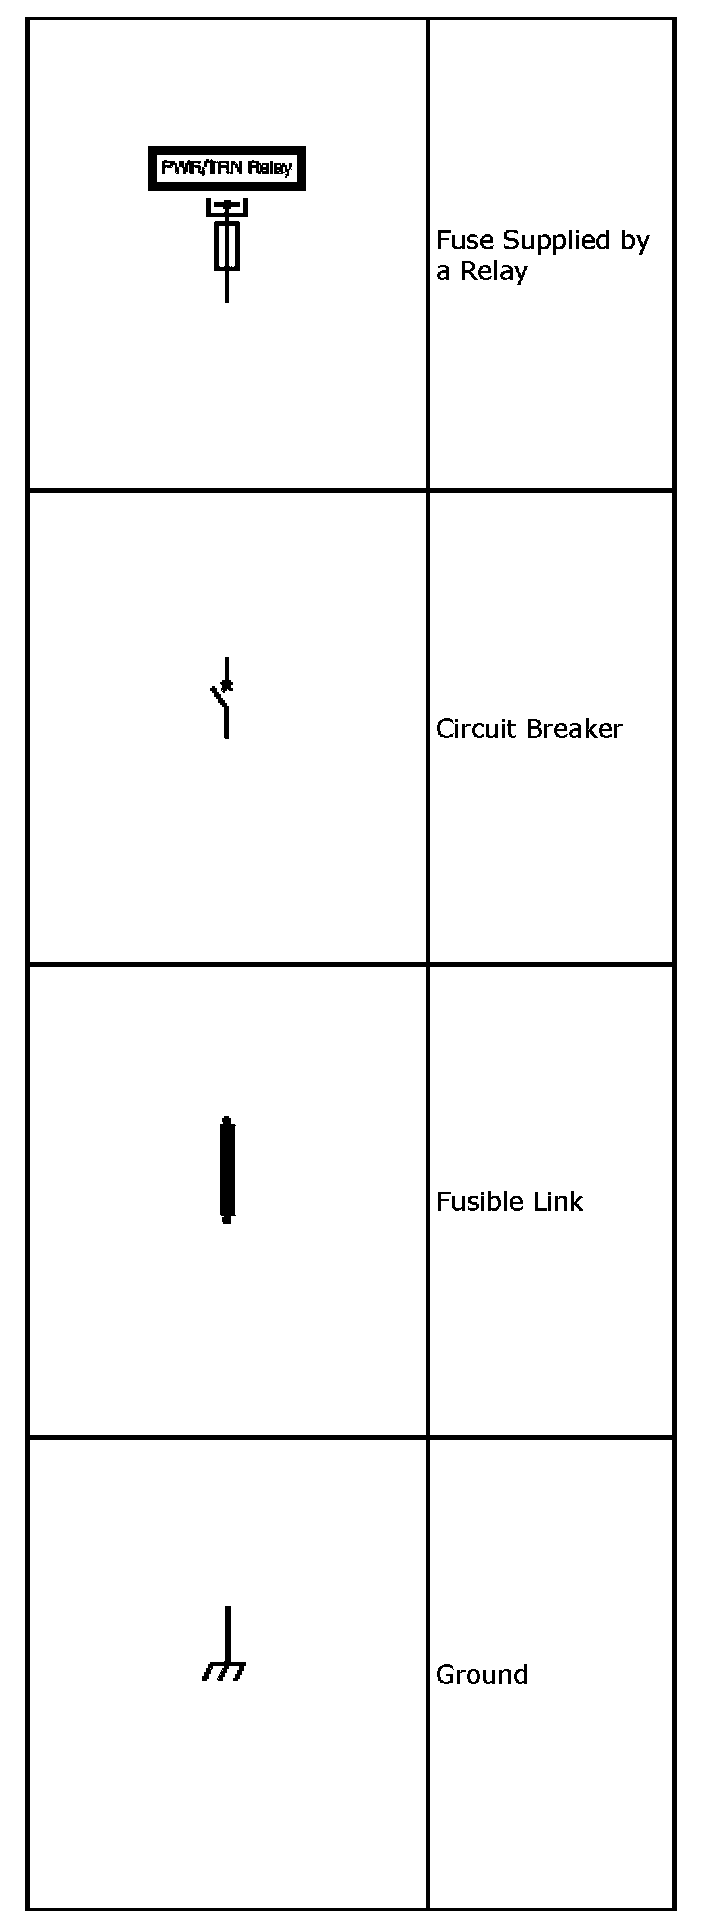
Harness Components (Part 3):
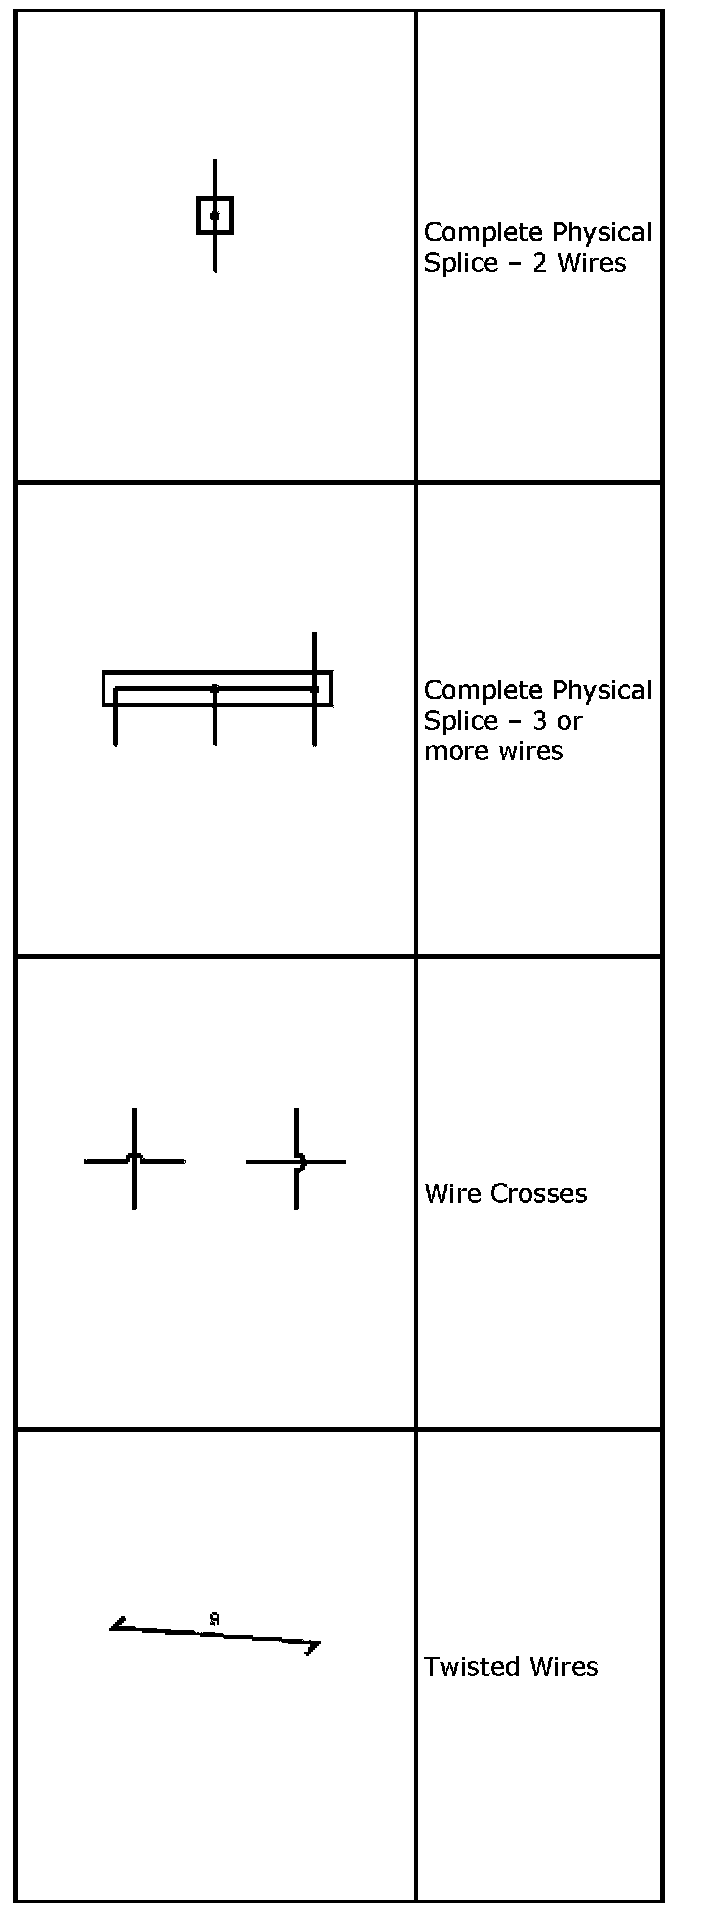
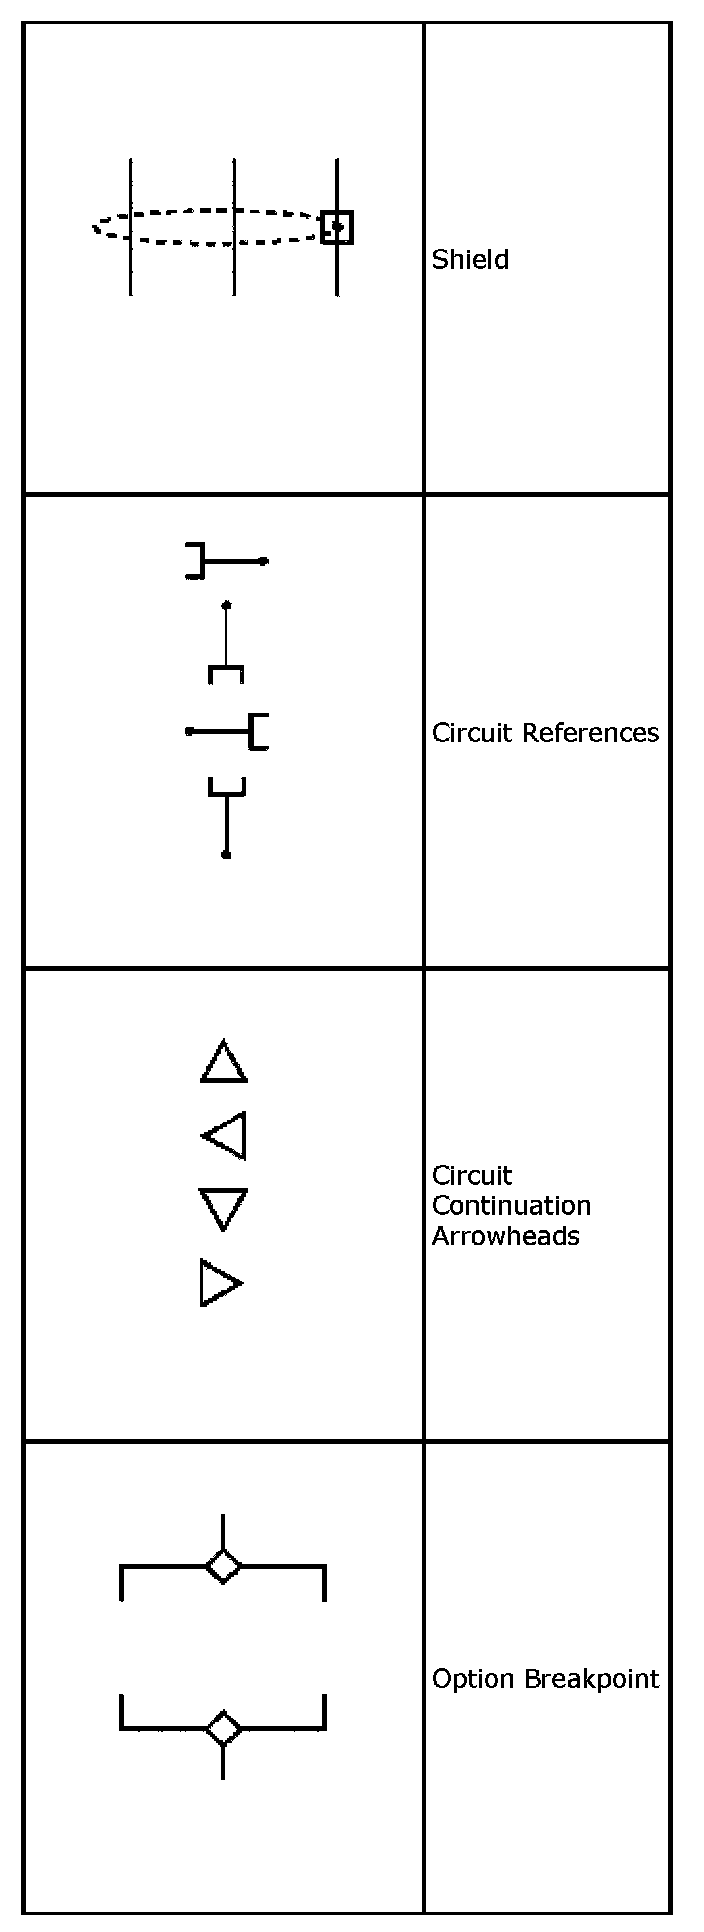
Harness Components (Part 4):
Harness Components (Part 5):
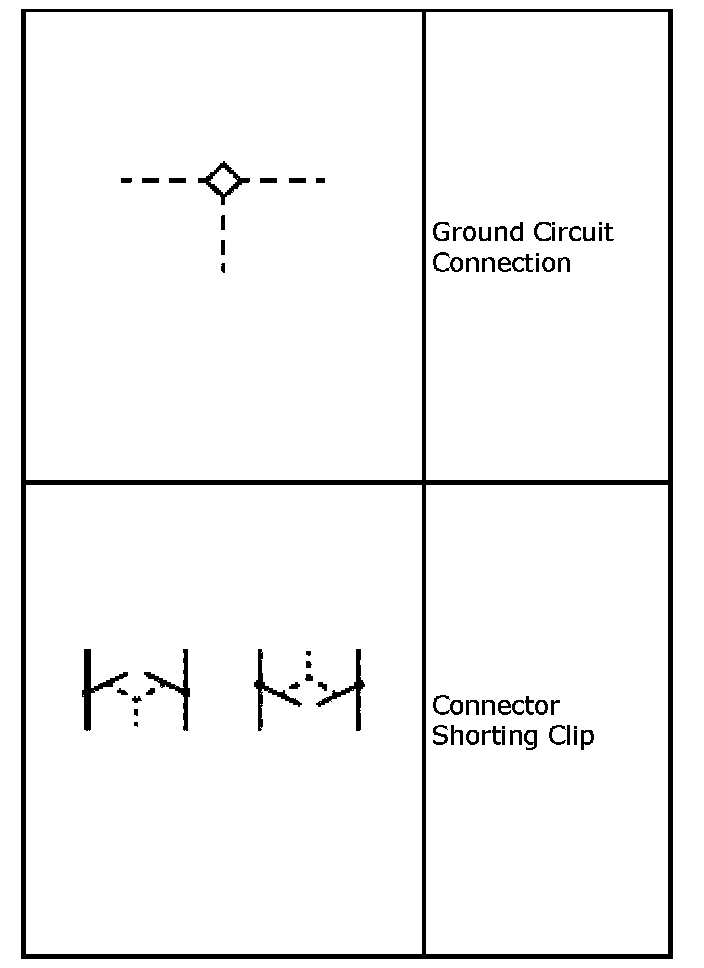
Harness Components (Part 6):
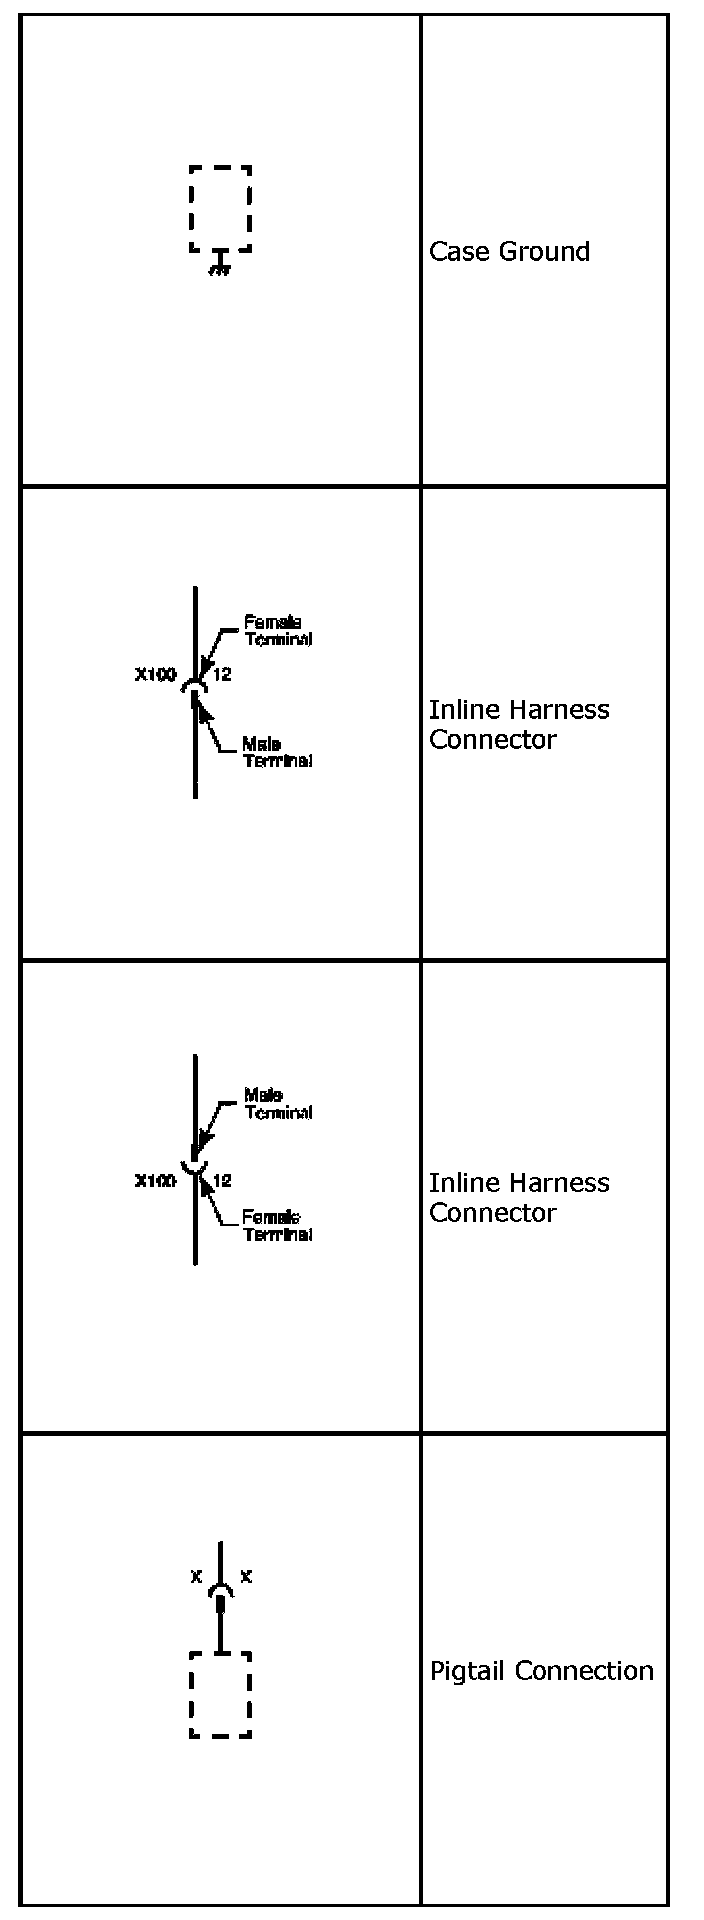
Harness Components (Part 7):
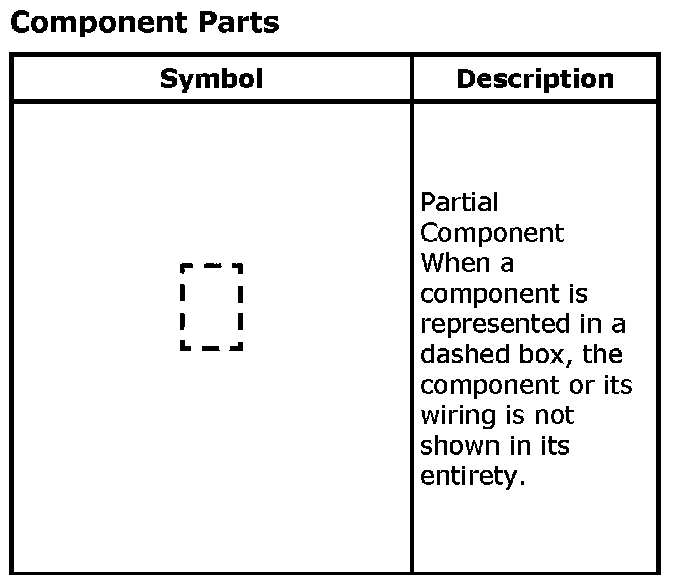
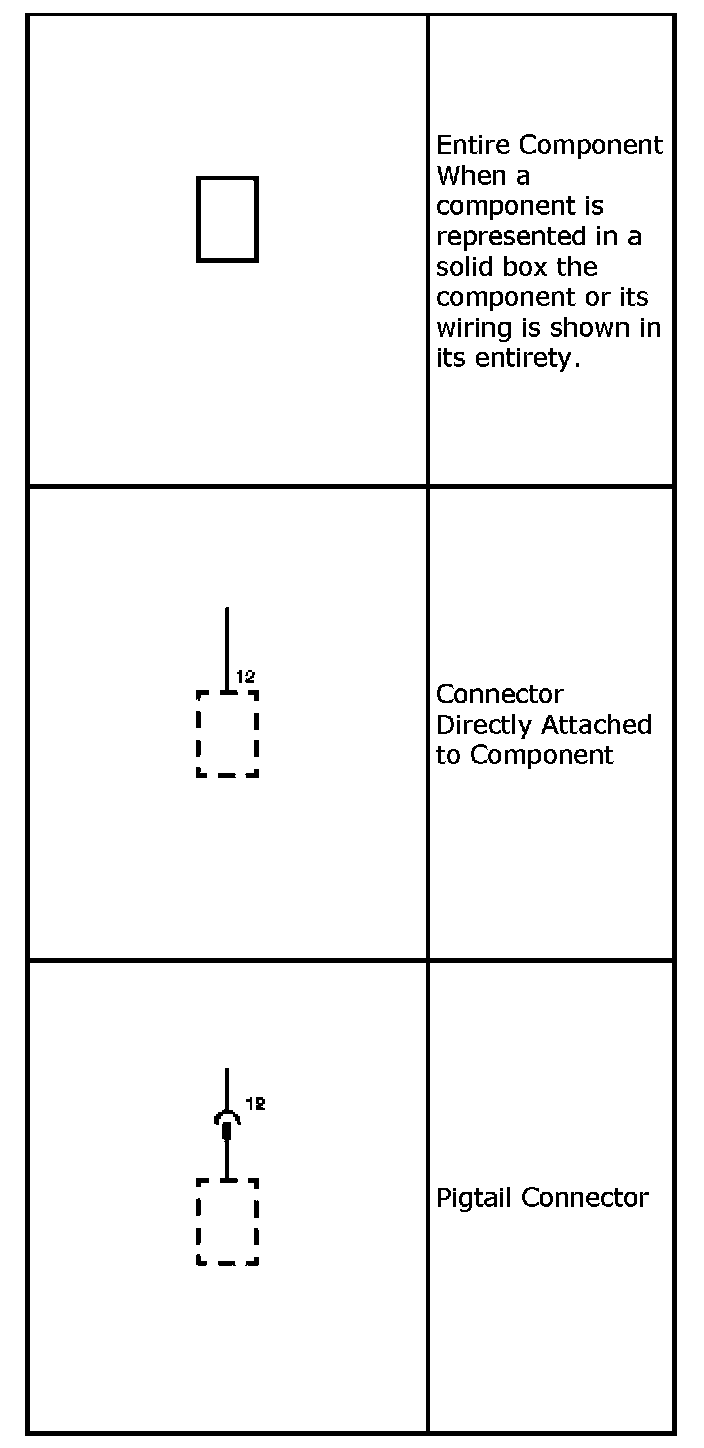
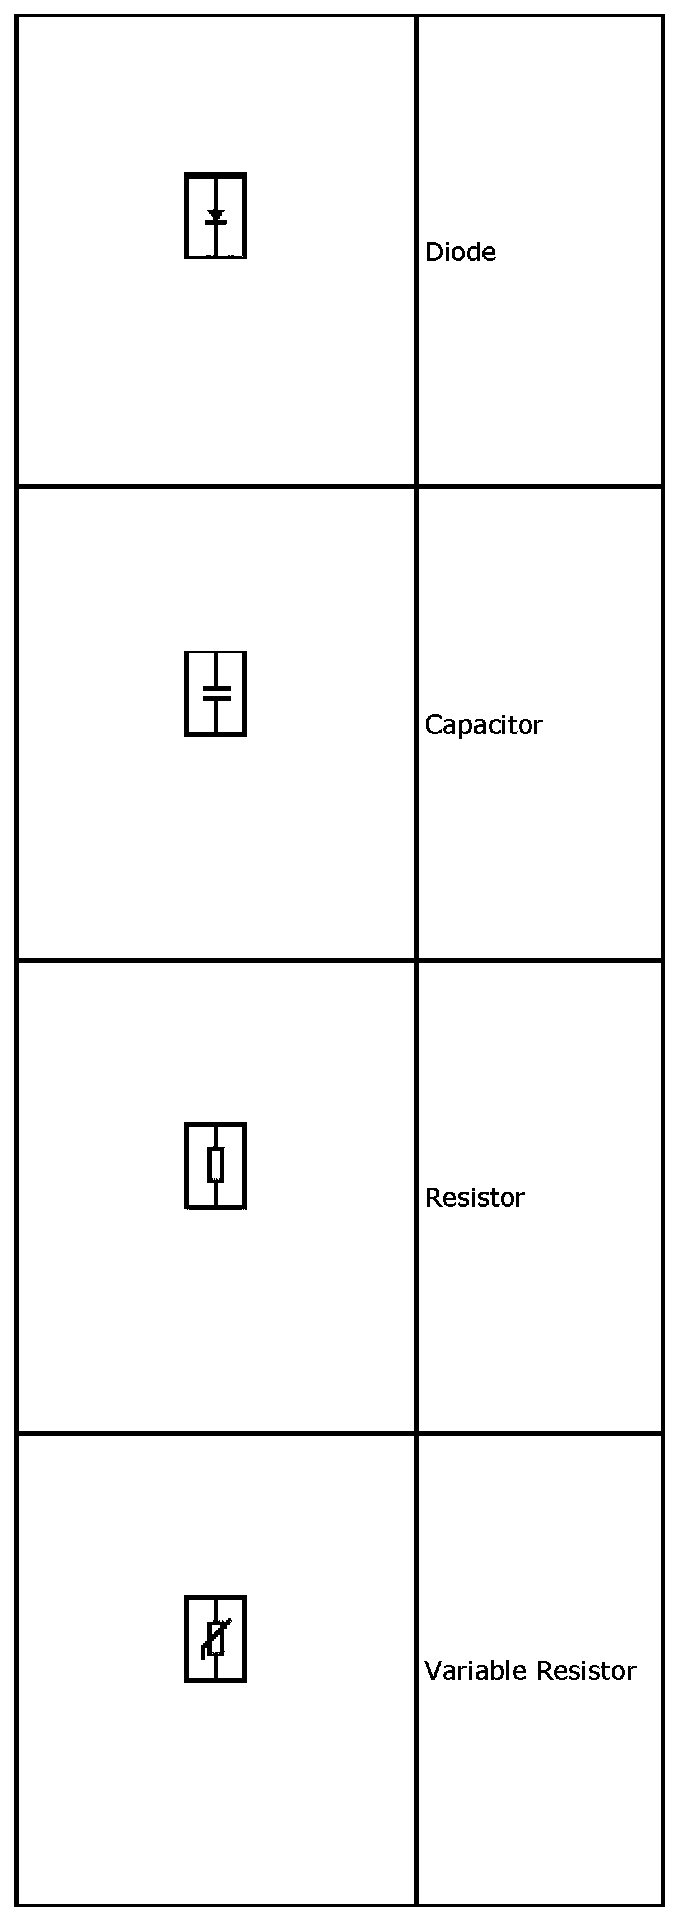
Component Parts (Part 1):
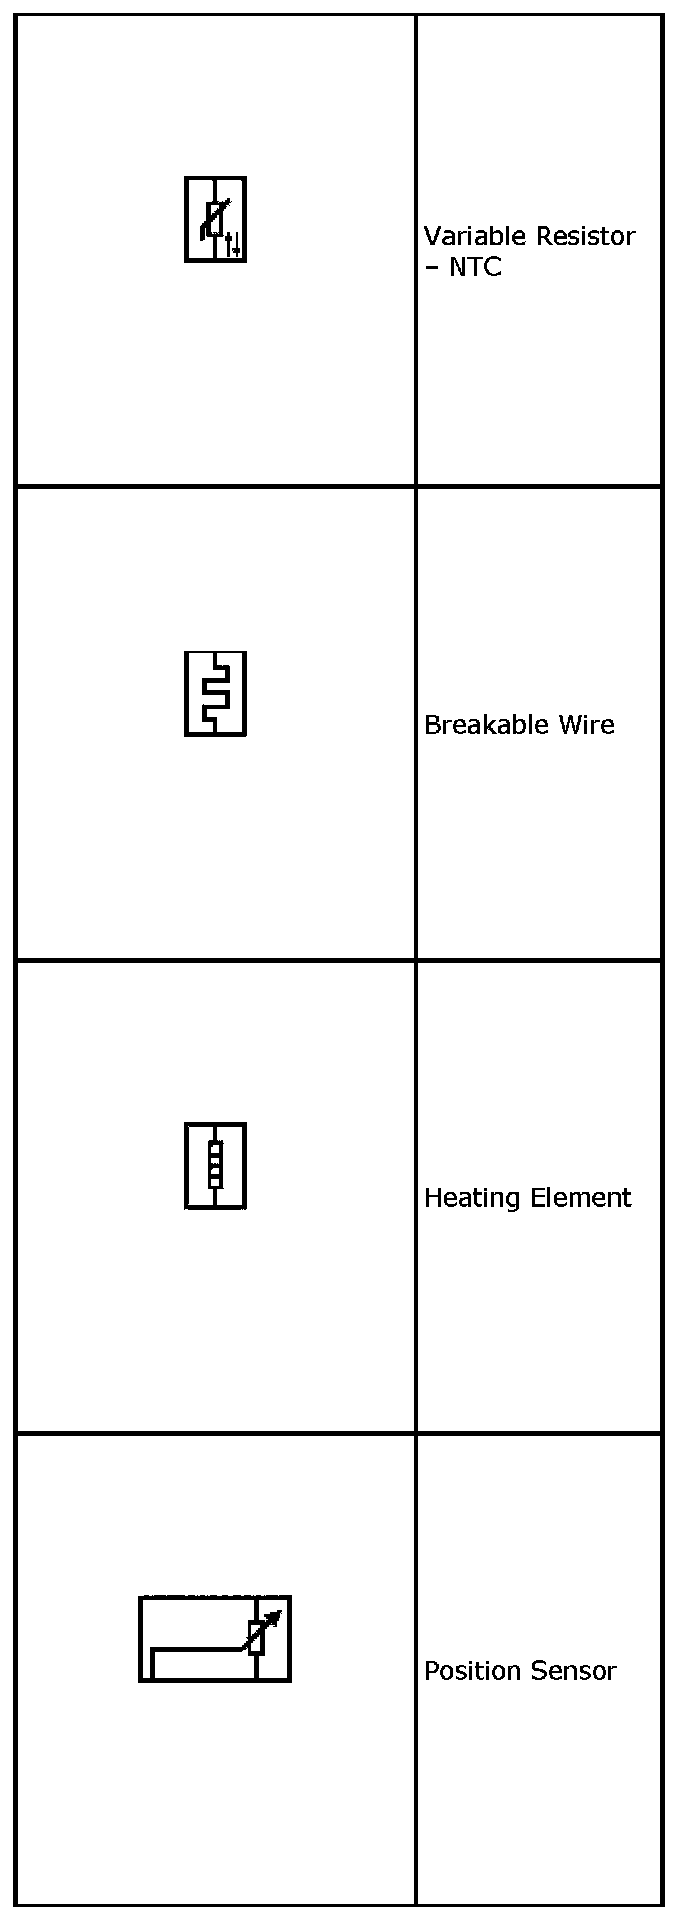
Component Parts (Part 2):
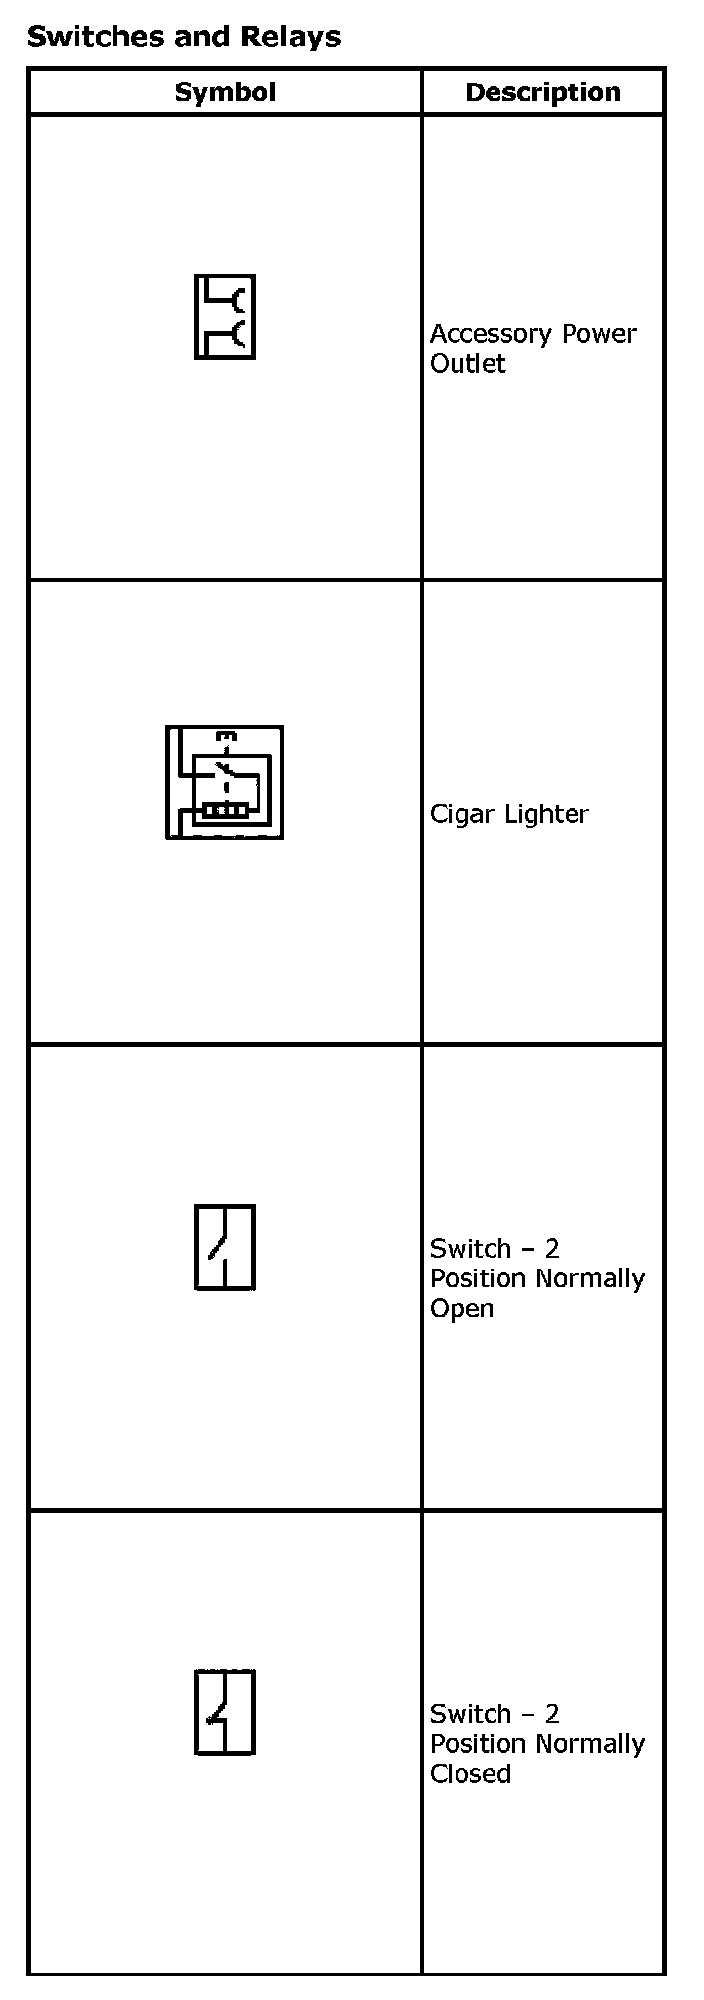
Switches and Relays (Part 1):
Switches and Relays (Part 2):
Switches and Relays (Part 3):
Switches and Relays (Part 4):
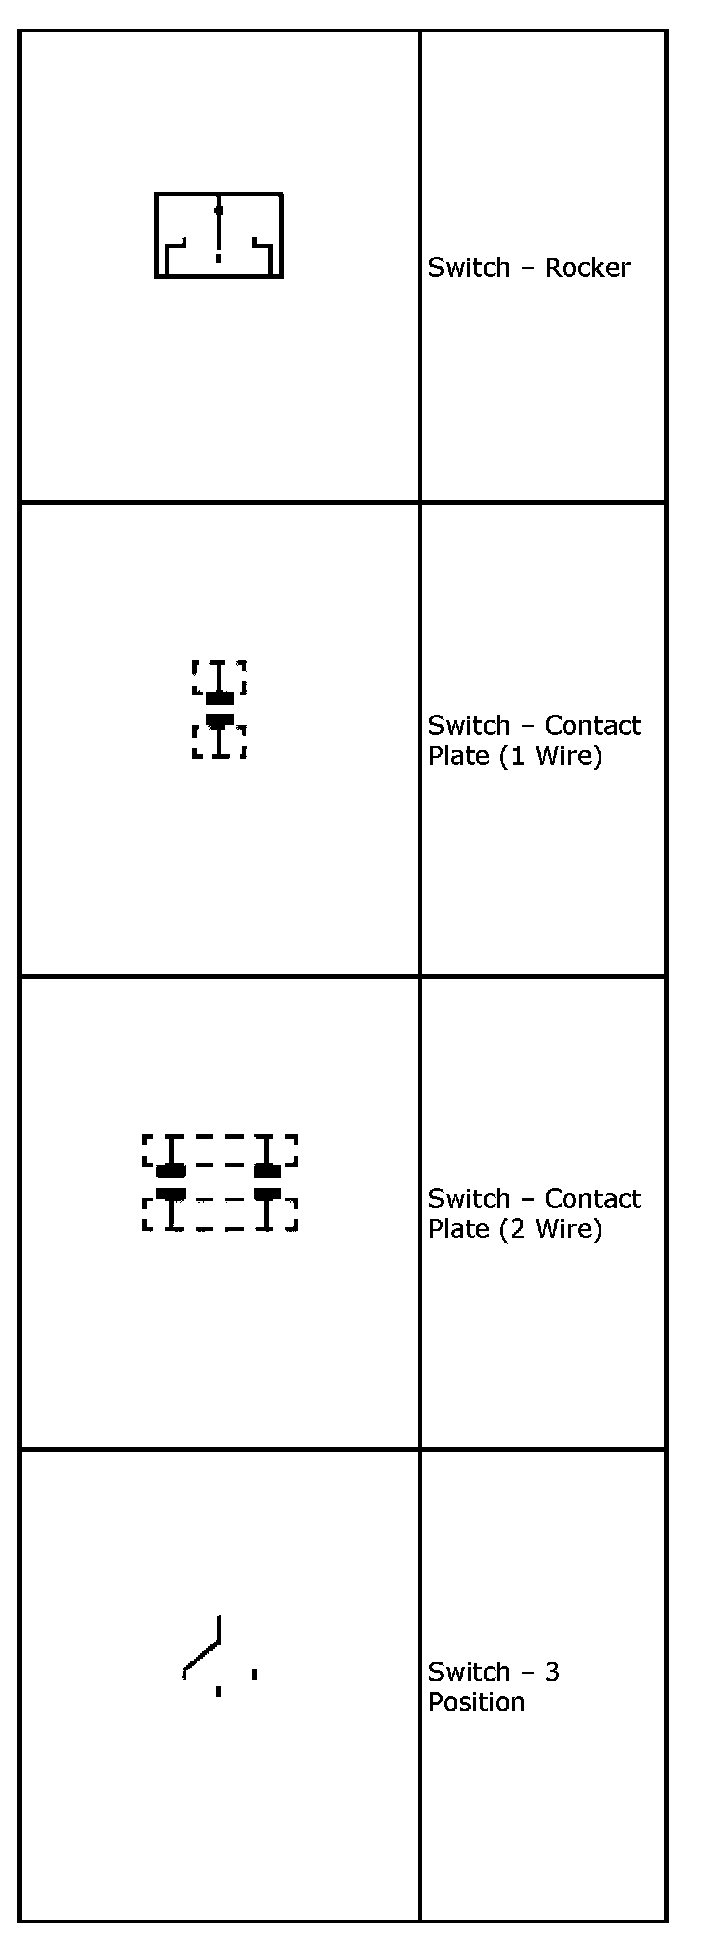
Switches and Relays (Part 5):
Switches and Relays (Part 6):
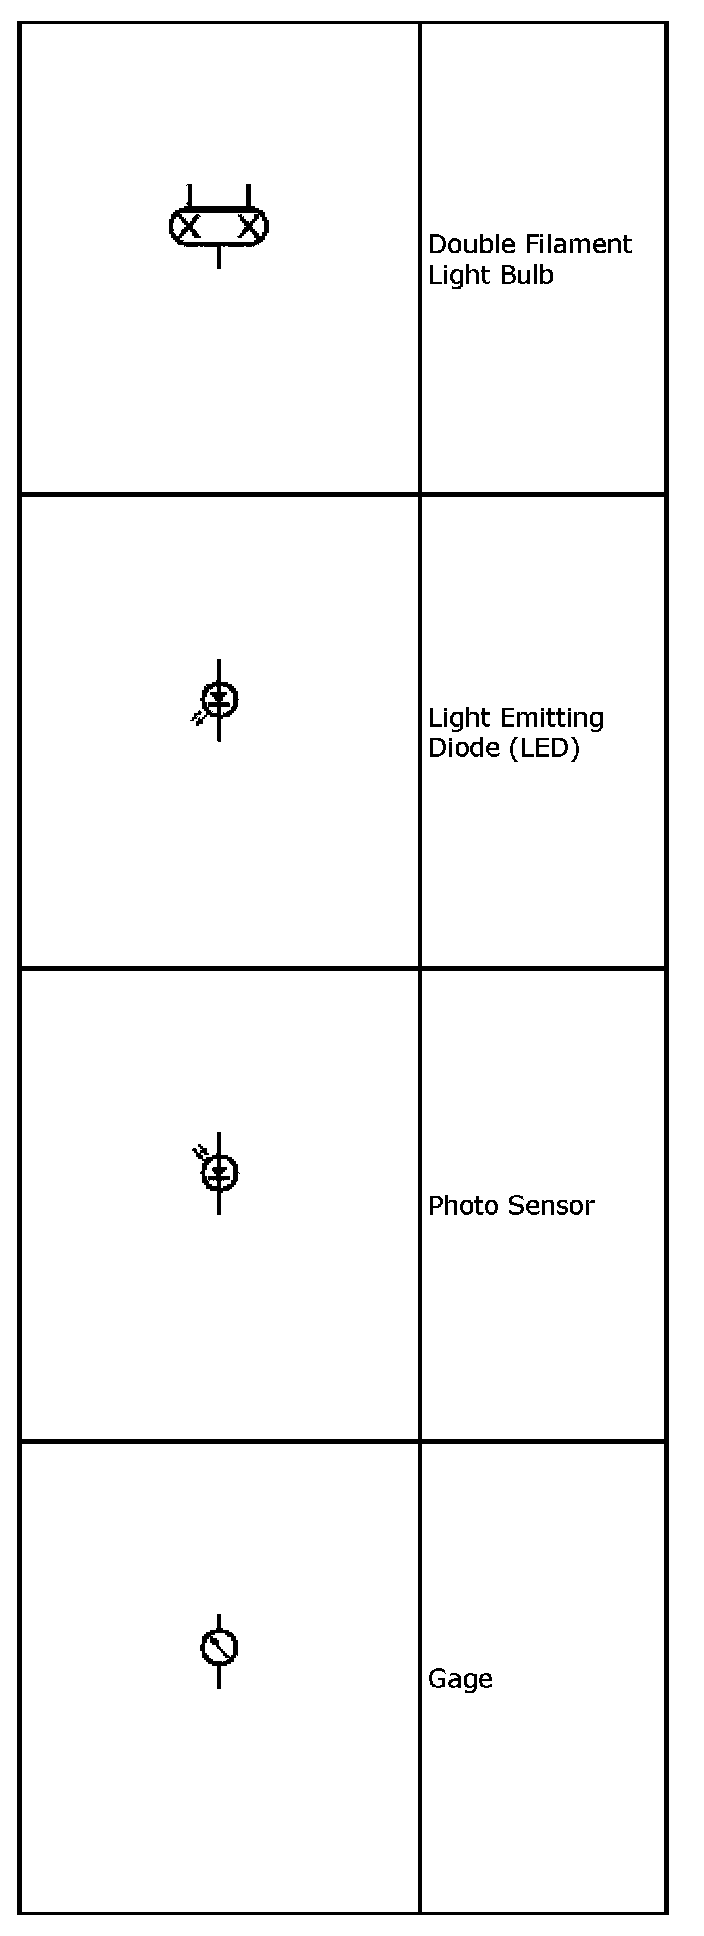
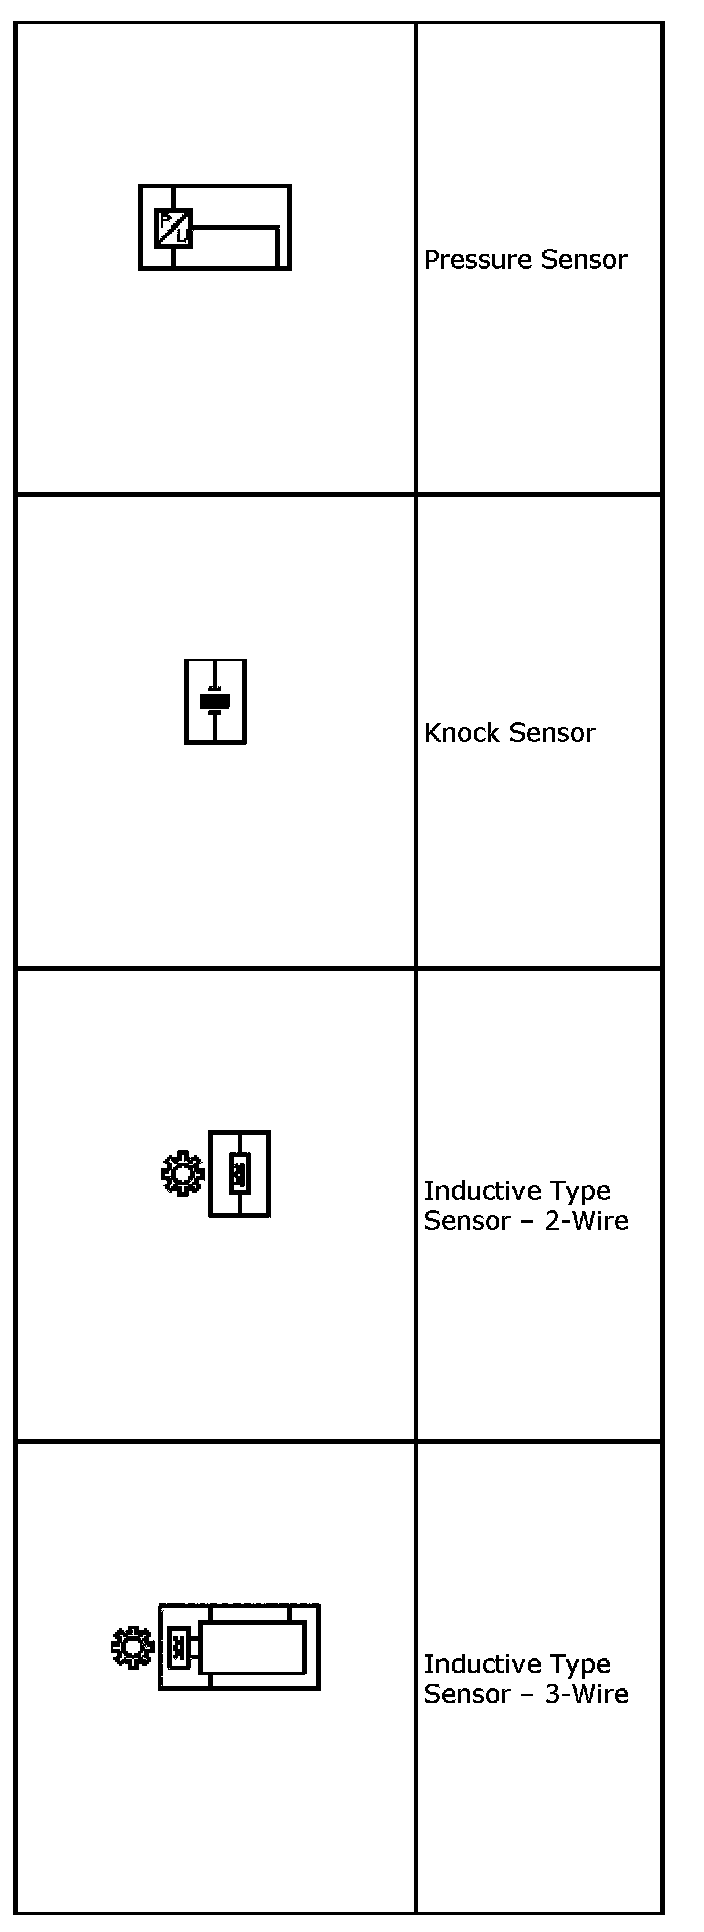
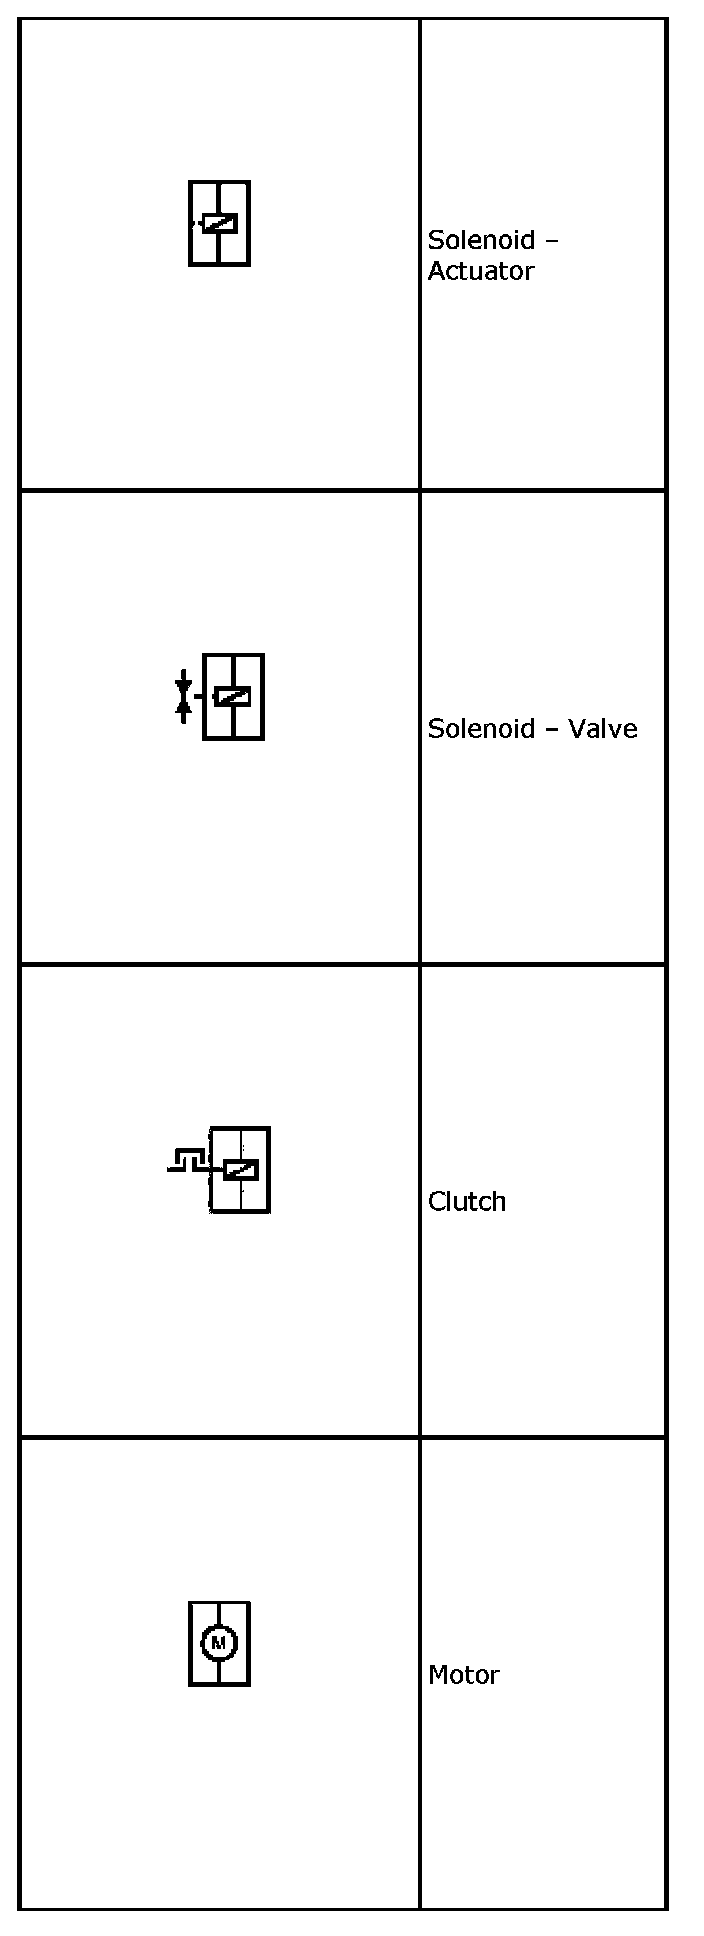
Devices and Sensors (Part 1):
Devices and Sensors (Part 2):
Devices and Sensors (Part 3):
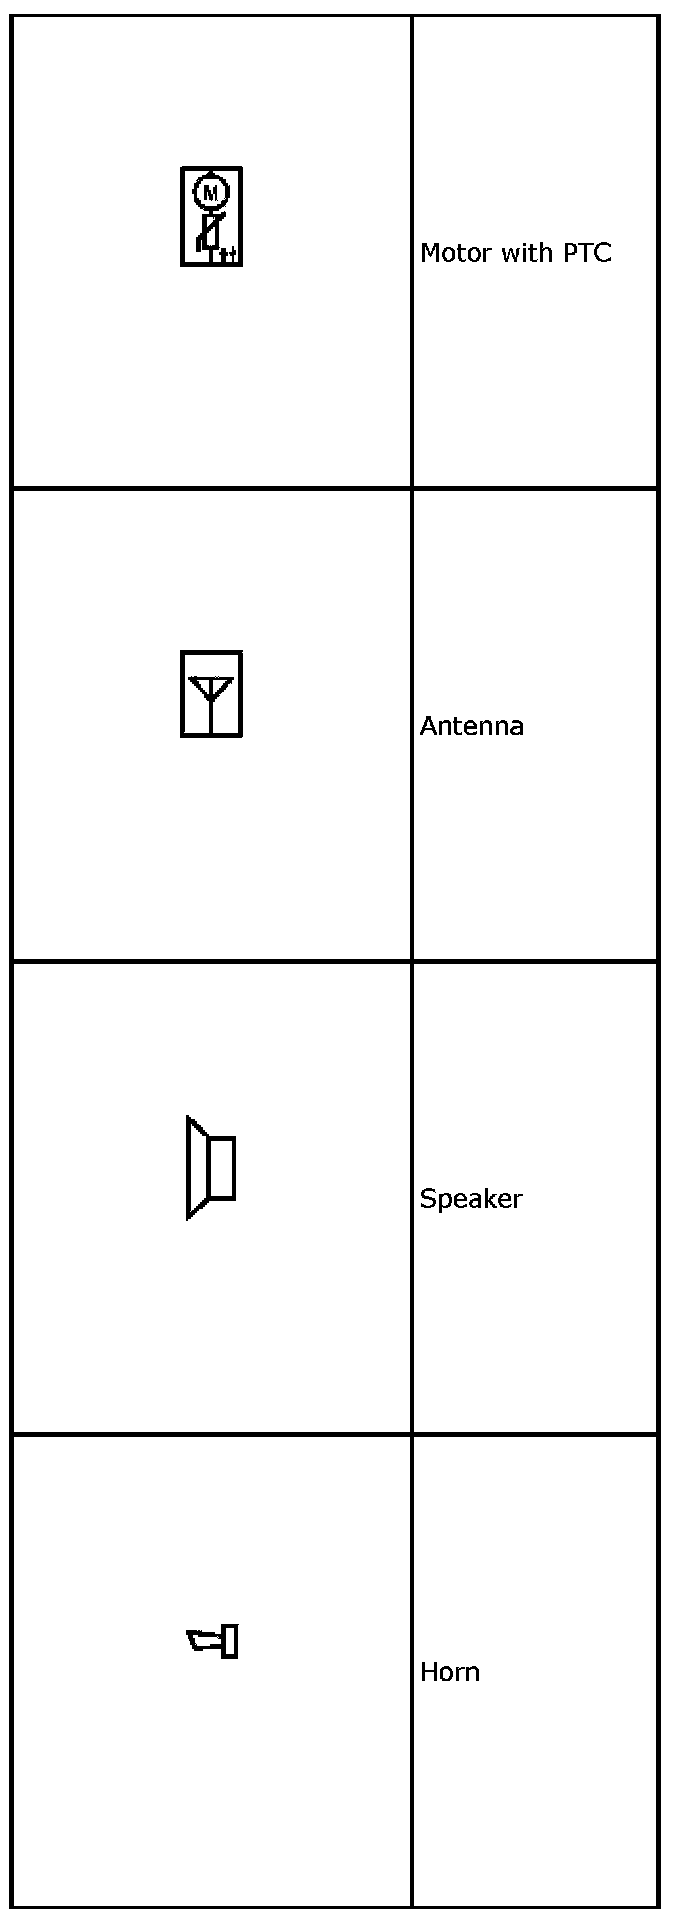
Devices and Sensors (Part 4):
Devices and Sensors (Part 5):
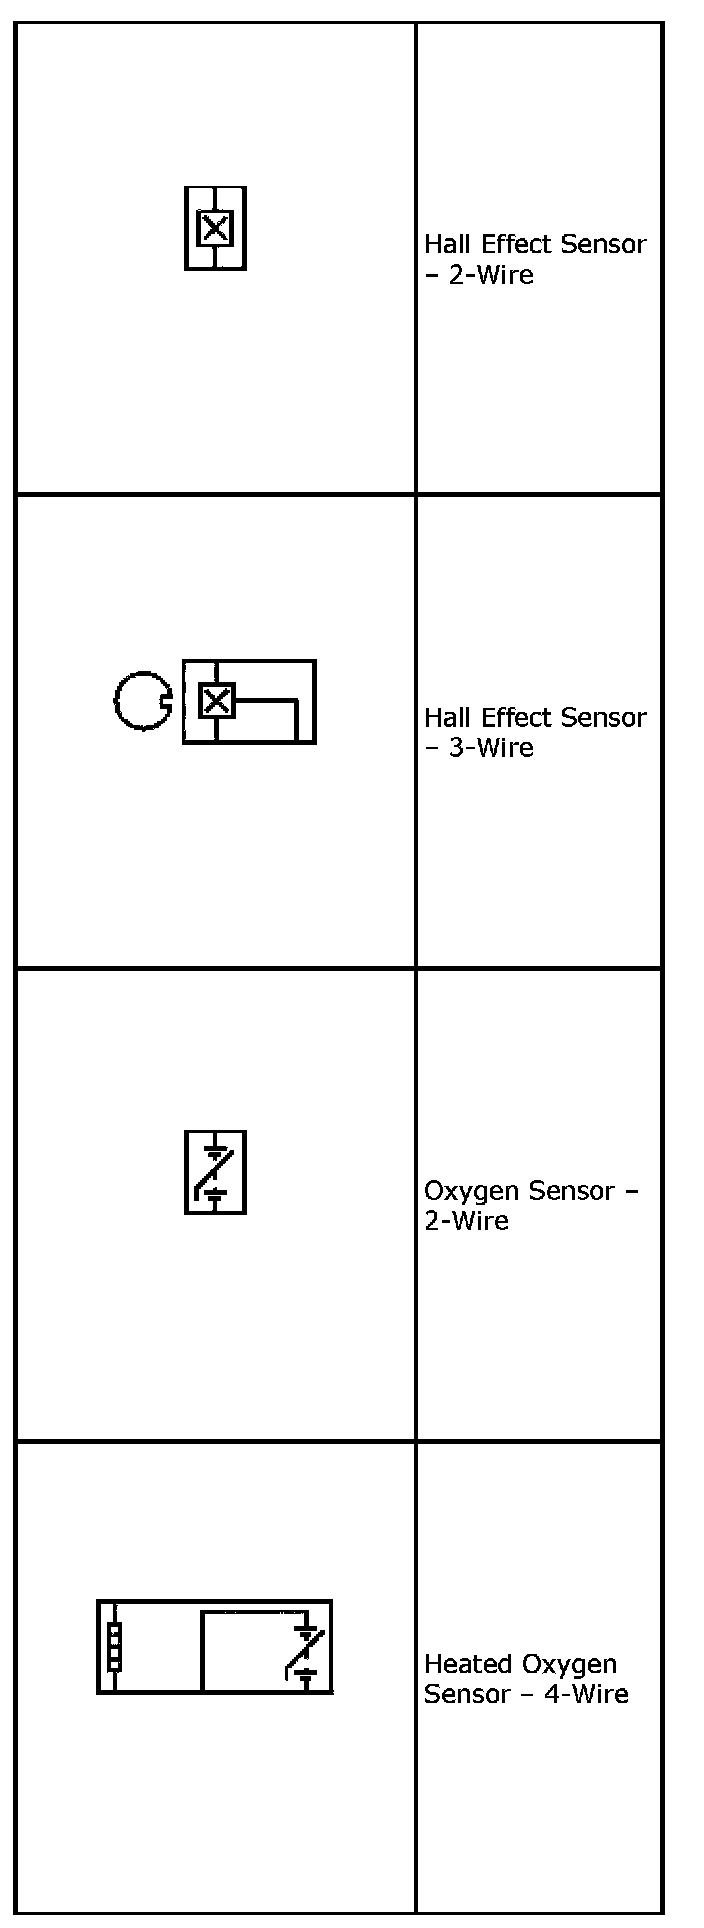
Devices and Sensors (Part 6):
Devices and Sensors (Part 7):
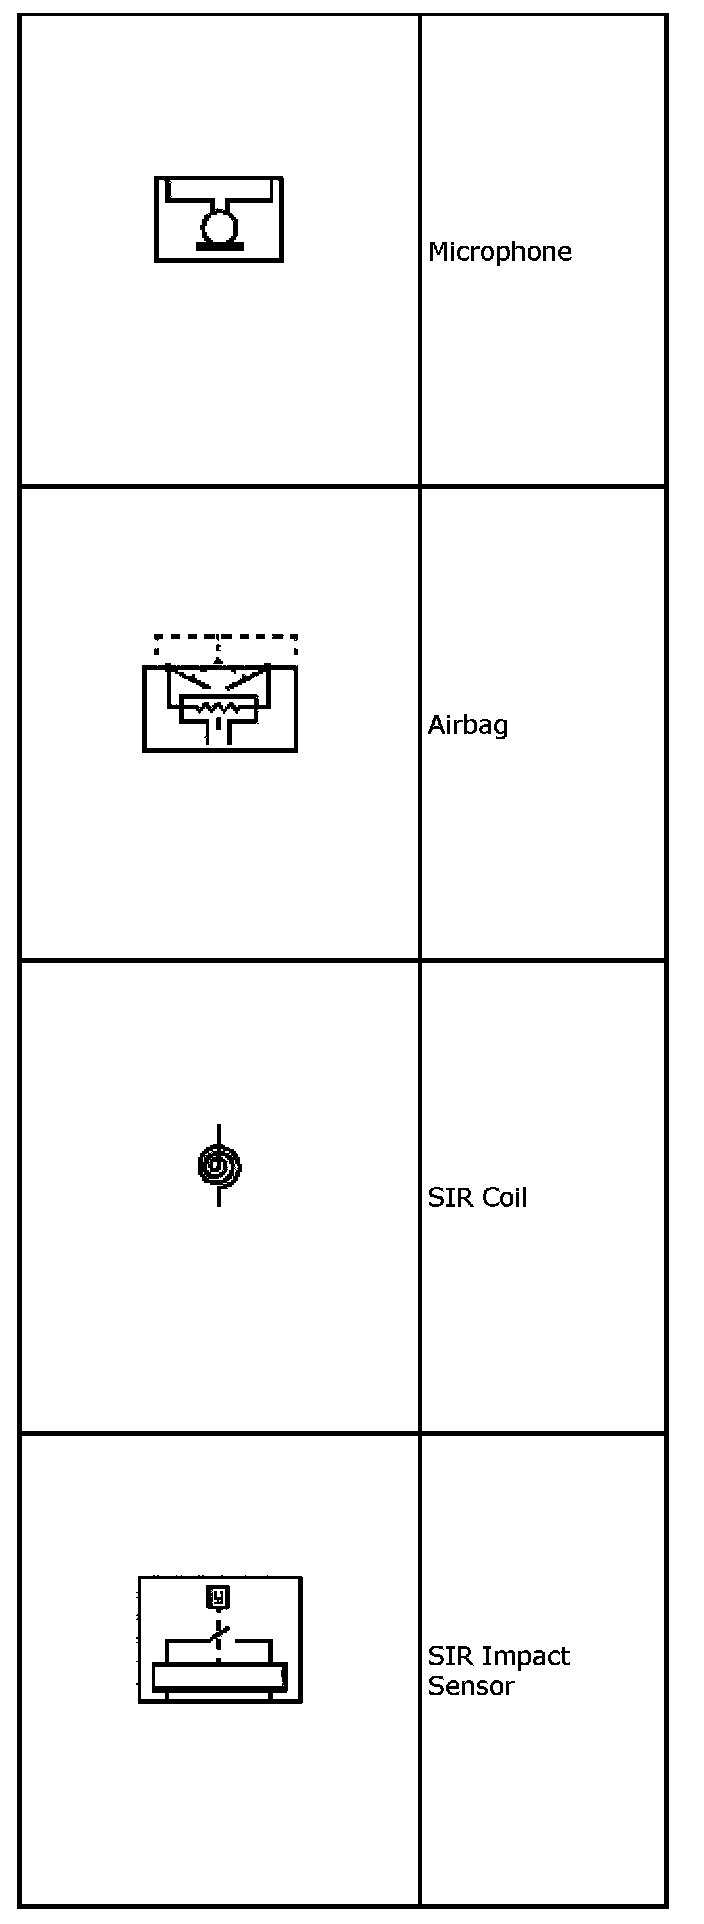
Devices and Sensors (Part 8):
Devices and Sensors (Part 9):