Evaporative Emission System Smoke Test
Evaporative Emission System Smoke TestWARNING: Use only nitrogen gas. If other gas is used instead, gasoline may ignite and explode.
CAUTION: Do not use smoke for any other systems except evaporative emission system in order to prevent performance degradation of the other systems.
NOTE:
- Vehicle battery must be fully charged for optimum tester performance.
- It is not recommended to use tester outdoors because wind and/or sunlight could make tester very difficult to read.
1. Connect red battery clip from tester to positive battery terminal, and then connect the black battery clip from tester to chassis ground.
NOTE: Unwind nitrogen/smoke hose completely from bracket to optimize tester's performance.
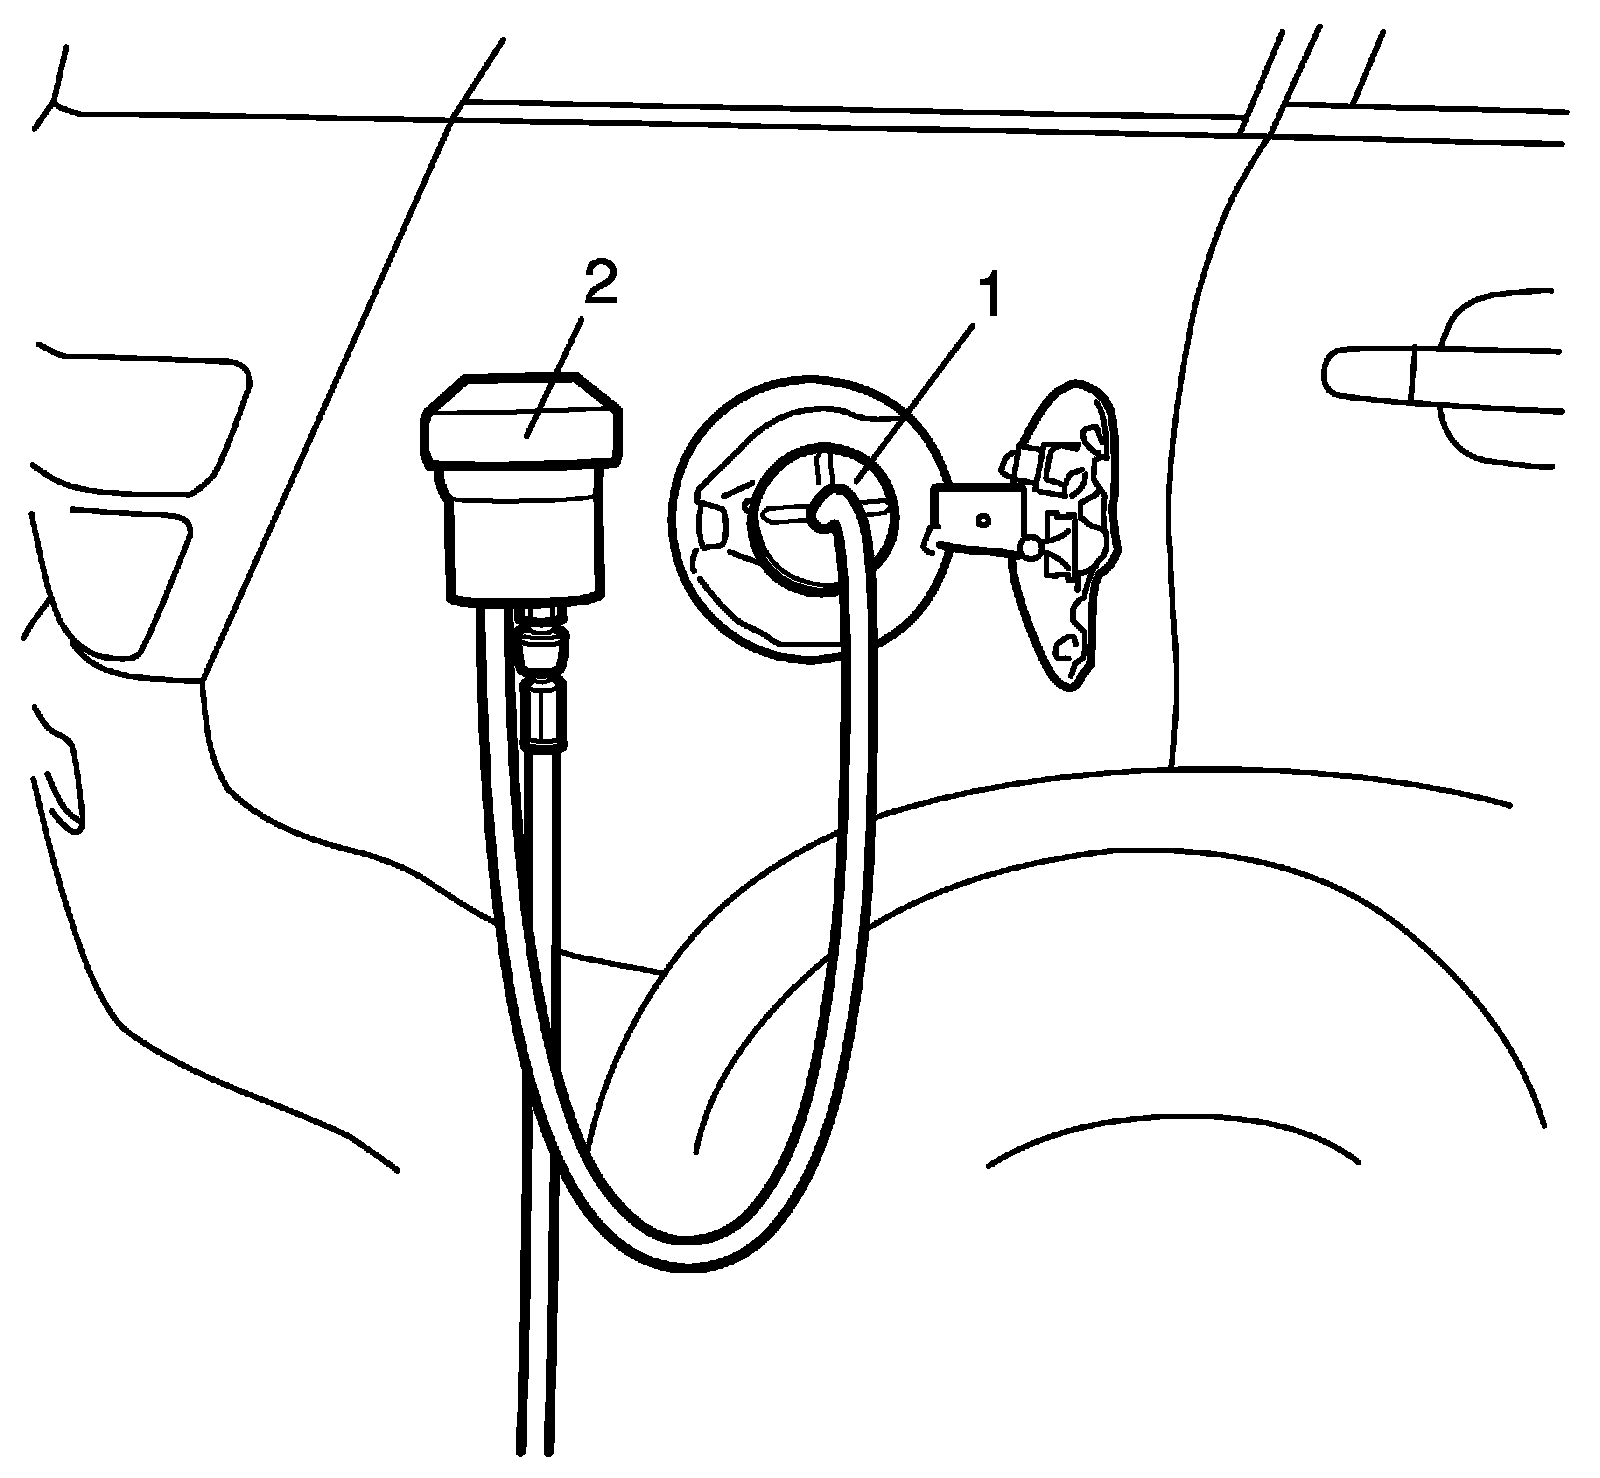
2. Connect nitrogen/smoke hose (1) to fuel cap adapter (2).
3. Remove fuel cap, and then install fuel cap adapter onto fuel filler neck.
4. Install fuel filler cap onto fuel cap adapter.
NOTE: Connections must be tight and leak-free.
5. Turn ignition switch to ON leaving the engine turned off.
WARNING: To prevent personal injury and equipment damage, tests with Evaporative Emission System Tester must be performed with engine turned OFF.
6. Using scan tool, close EVAP canister vent valve in EVAP leak check module. Evaporative emission system should how be sealed and ready to be tested.
Special Tool : SUZUKI scan tool (SUZUKI-SDT)
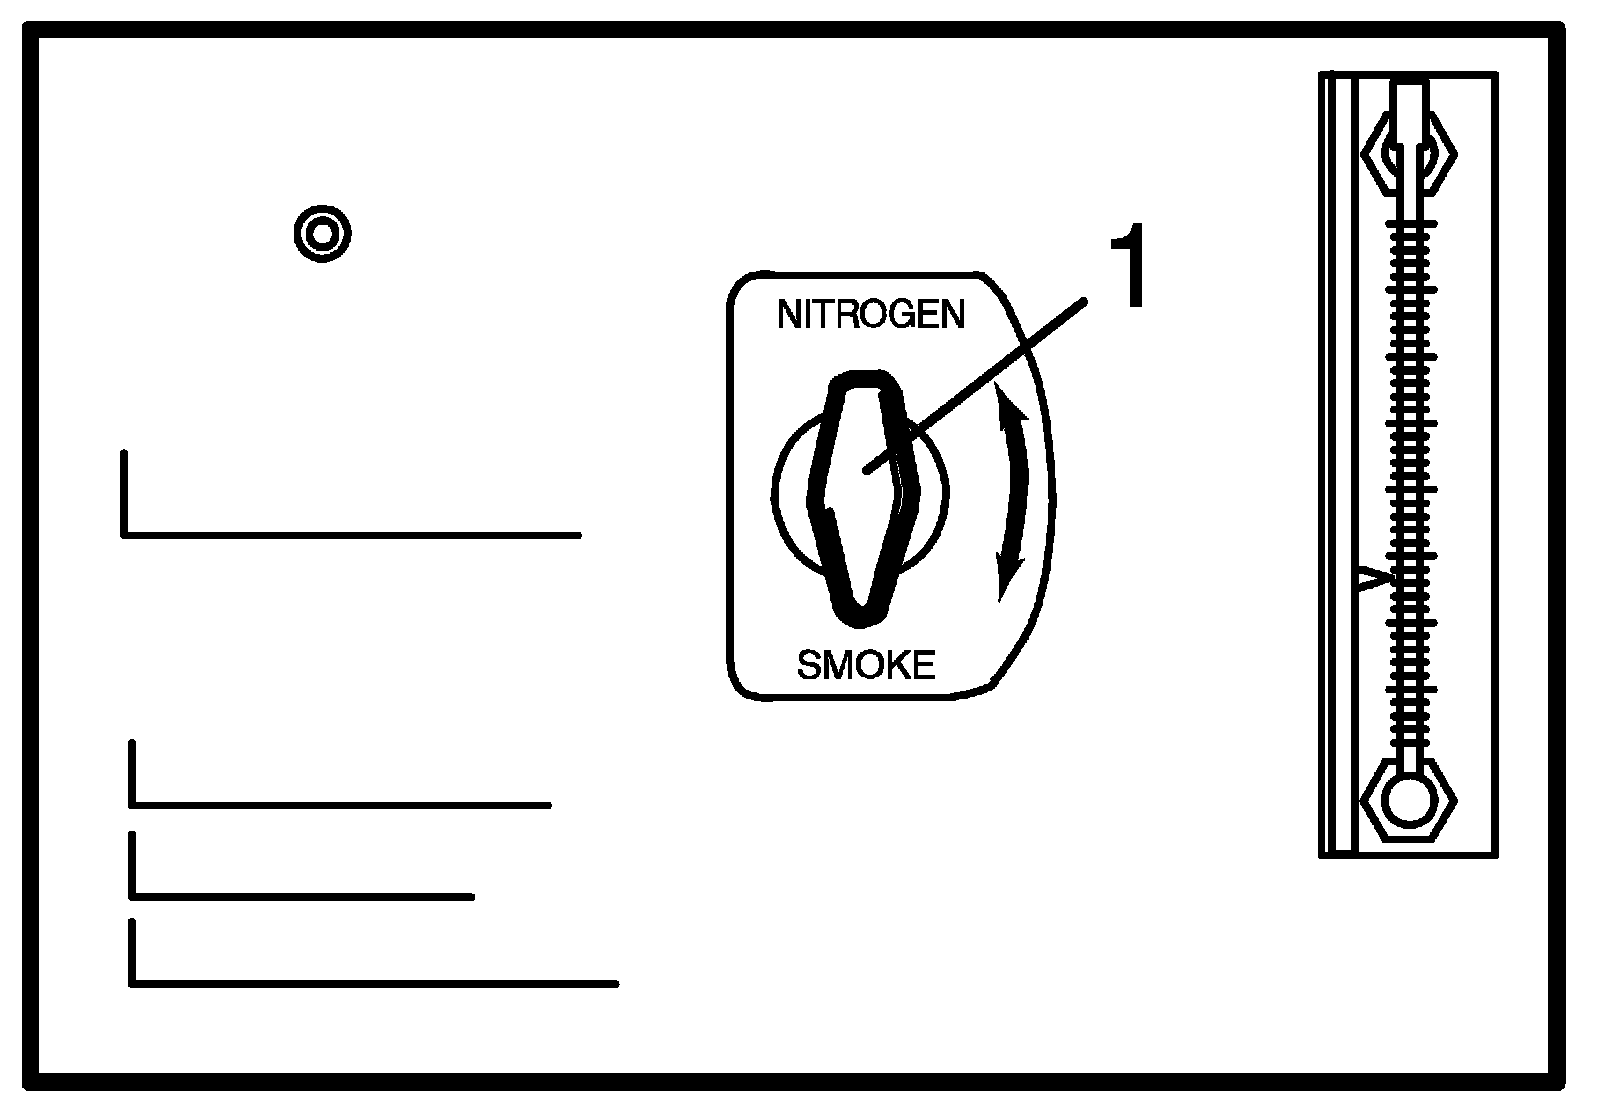
7. Turn NITROGEN/SMOKE valve (1) on control panel to SMOKE position.
8. Press and release remote switch to activate tester and inject smoke into EVAP system.
NOTE: The remote switch operates in a push ON, push OFF manner.
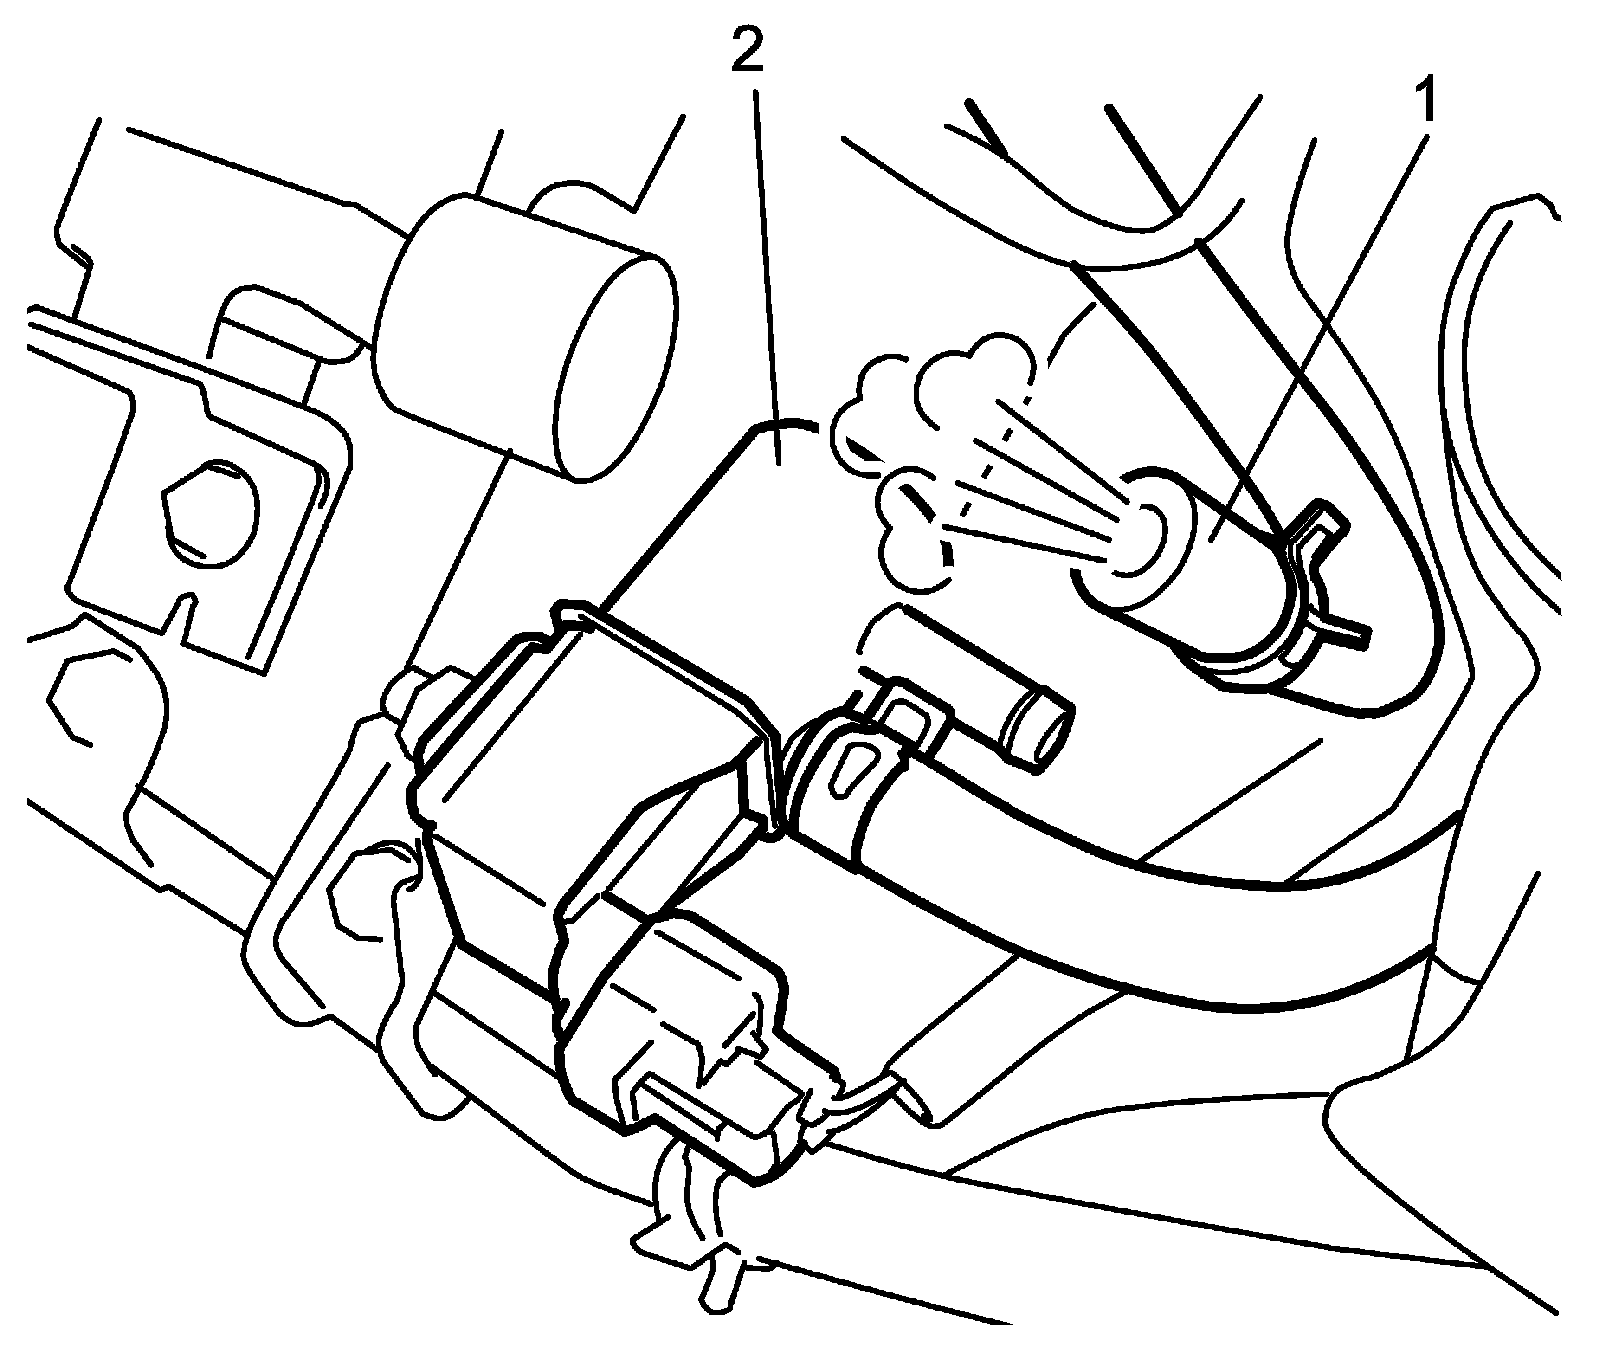
9. Disconnect EVAP canister purge hose (1) from EVAP canister purge valve (2) and check that smoke comes out of it in order to verify that EVAP system is filled with smoke.
NOTE: Inject smoke in less than two-minute cycles for optimum tester performance.
10. Press and release remote switch to deactivate tester.
11. Connect EVAP canister purge hose to EVAP canister purge valve.
12. Charge system with smoke for additional 60 seconds.
13. Continue smoke charging at 15 second intervals, as necessary.
NOTE: For optimum visual smoke performance, deactivate the smoke flow and allow the system pressure to drop. Allowing the smoke to exit small holes at a low flow rate greatly enhances visibility.
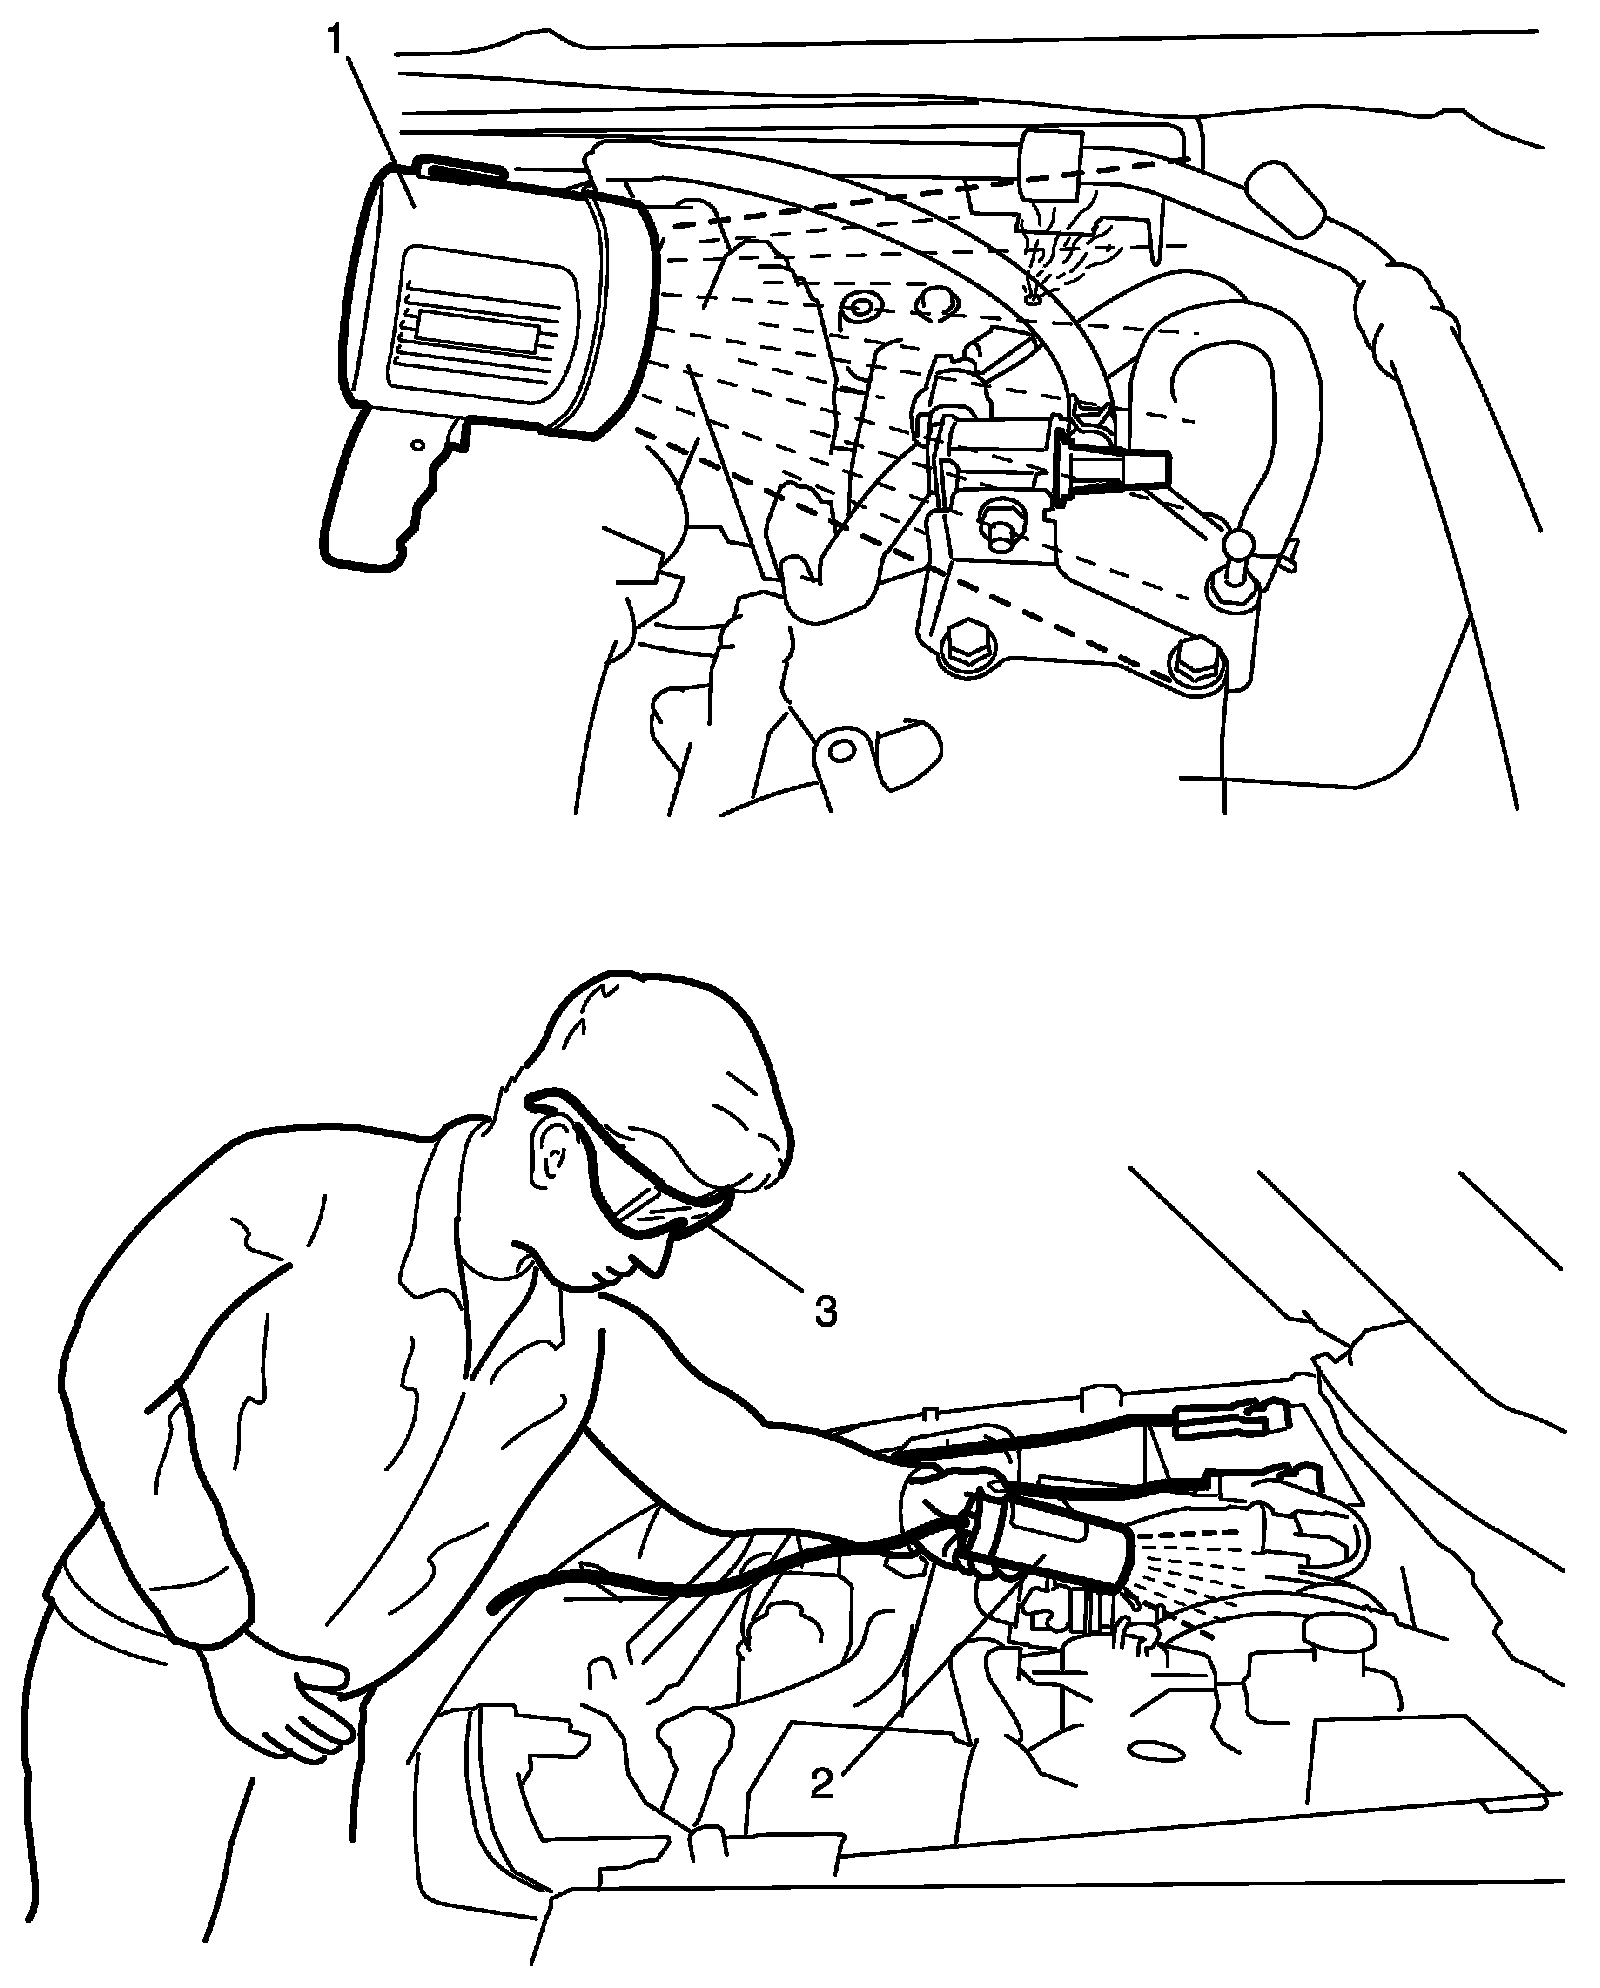
14. Using halogen light (1), inspect entire area along EVAP system path to look for any leak. Charge smoke system with at 15 second intervals, as needed, until leak source is identified. If any leak is not found, go to the next step. If any leak is found, skip steps from 15) to 20) and go to step 18).
NOTE: Using the ultraviolet light (2) and shield glasses (3) if available, the exact location of the leak can be identified. The Ultra Trace UVTM, which has been deposited at the exact location of the leak, fluoresces by shinning the ultraviolet light. Once the area of the leak is identified by the exiting smoke, this method is helpful when the leak is in an area that is not readily visible.
15. Operate EVAP canister vent valve in EVAP leak check module as follows. If you have SUZUKI scan tool, perform step a). If not, perform step b).
a. Method using SUZUKI scan tool
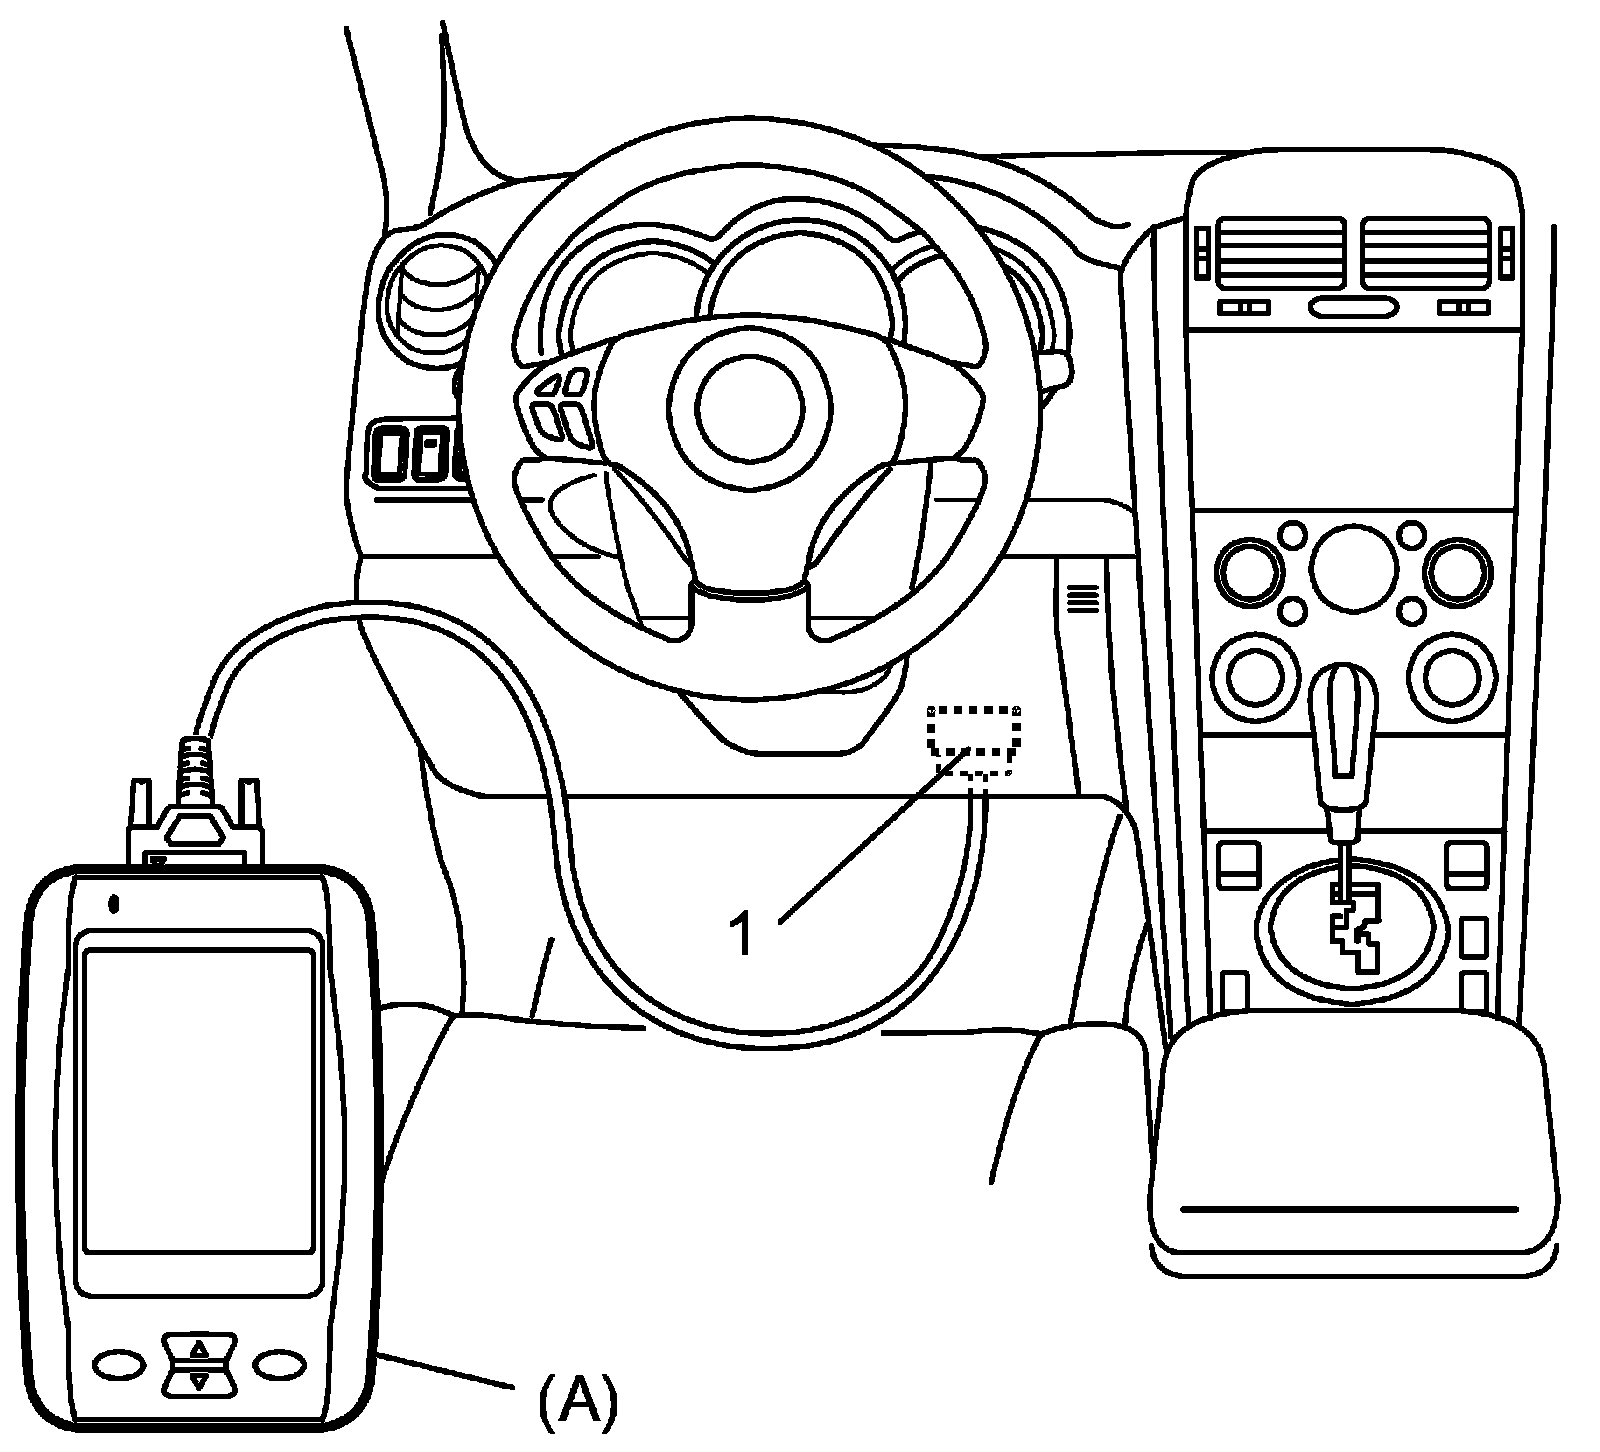
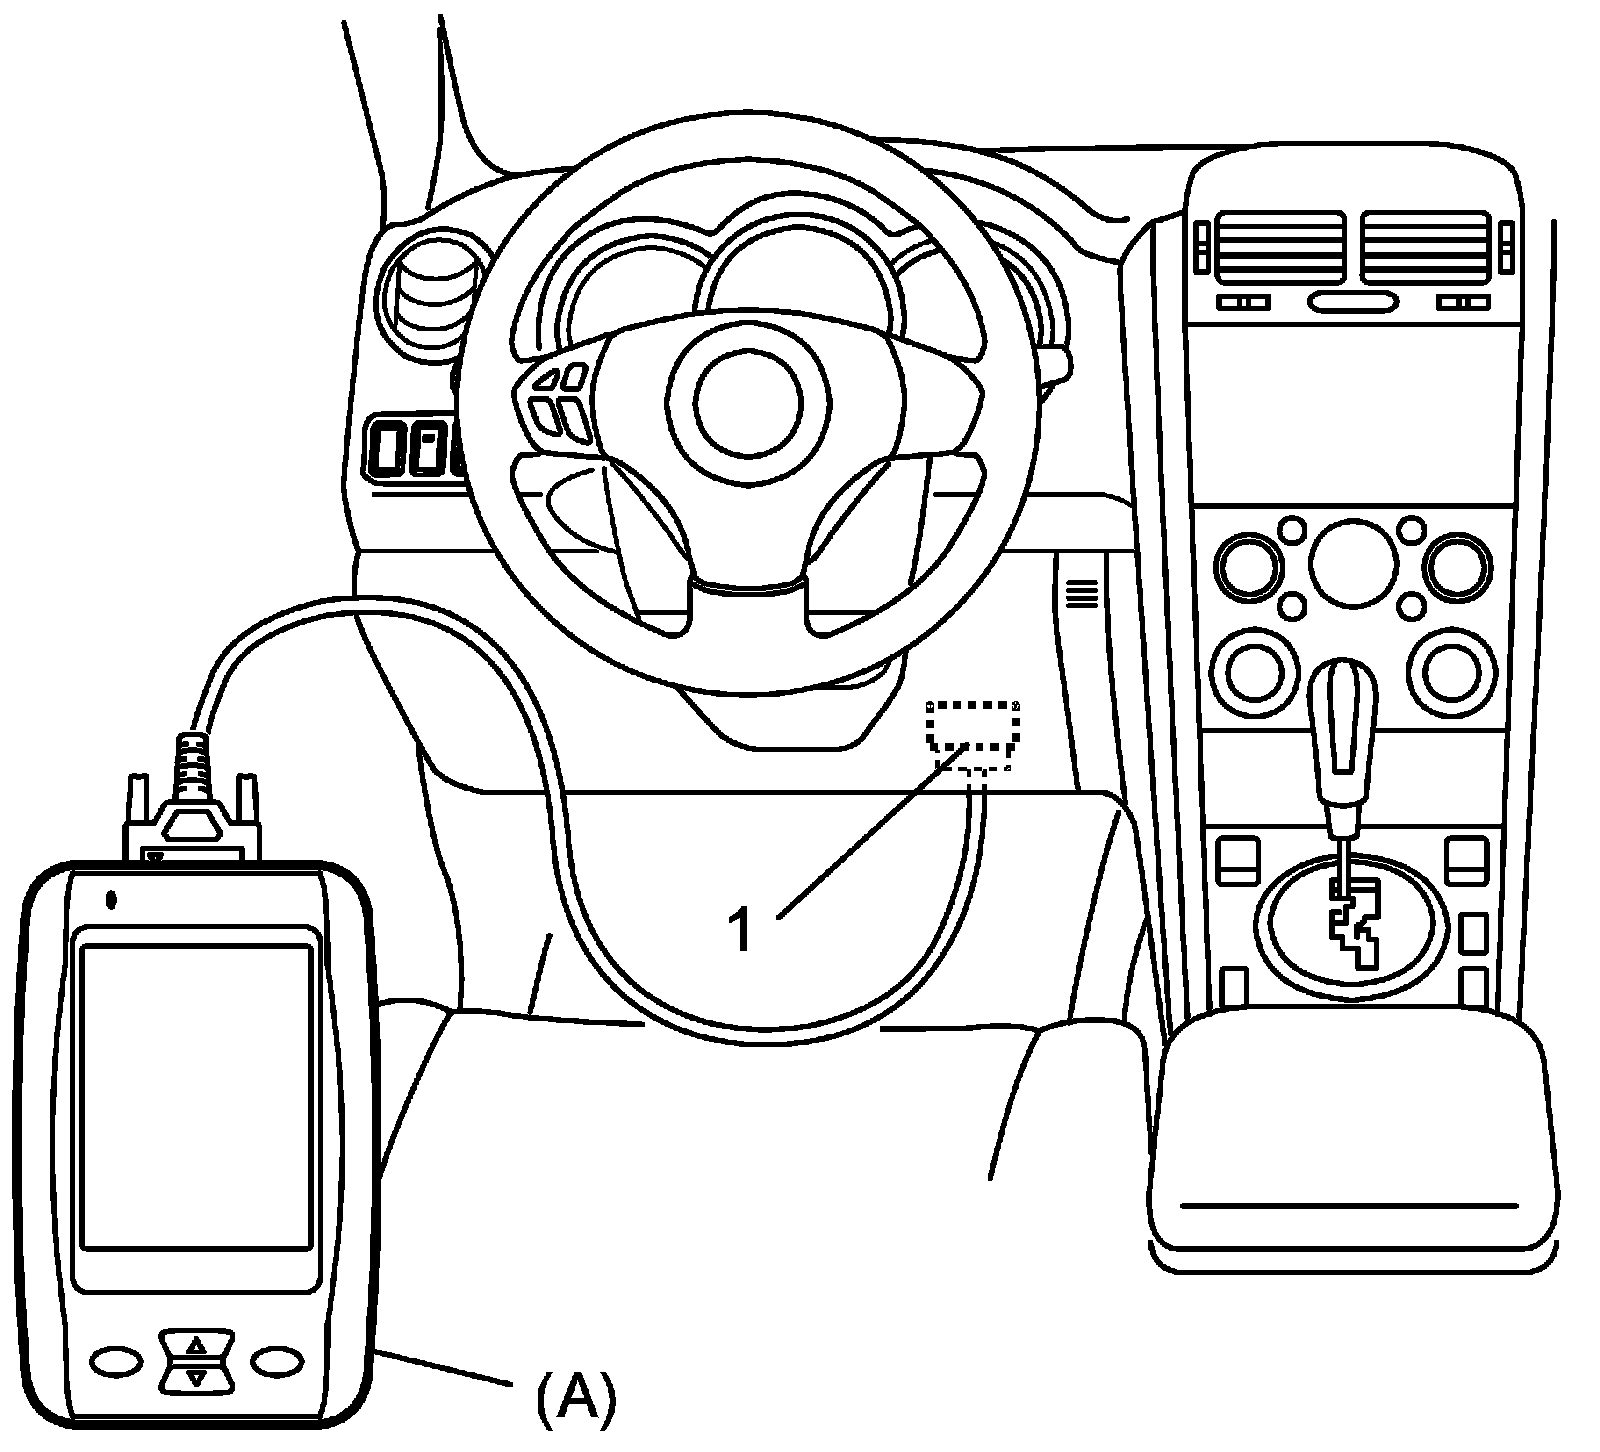
i. Connect SUZUKI scan tool to DLC (1) with ignition switch OFF.
ii. With ignition switch ON, turn ON and OFF EVAP canister vent valve in EVAP leak check module by using SUZUKI scan tool.
Special Tool : SUZUKI scan tool (SUZUKI-SDT)
b. Method not using SUZUKI scan tool
i. Turn ignition switch to ON.
ii. Using service wire, ground "E23-59" terminal of ECM connector (valve ON [b] and unground it (valve OFF [a])).

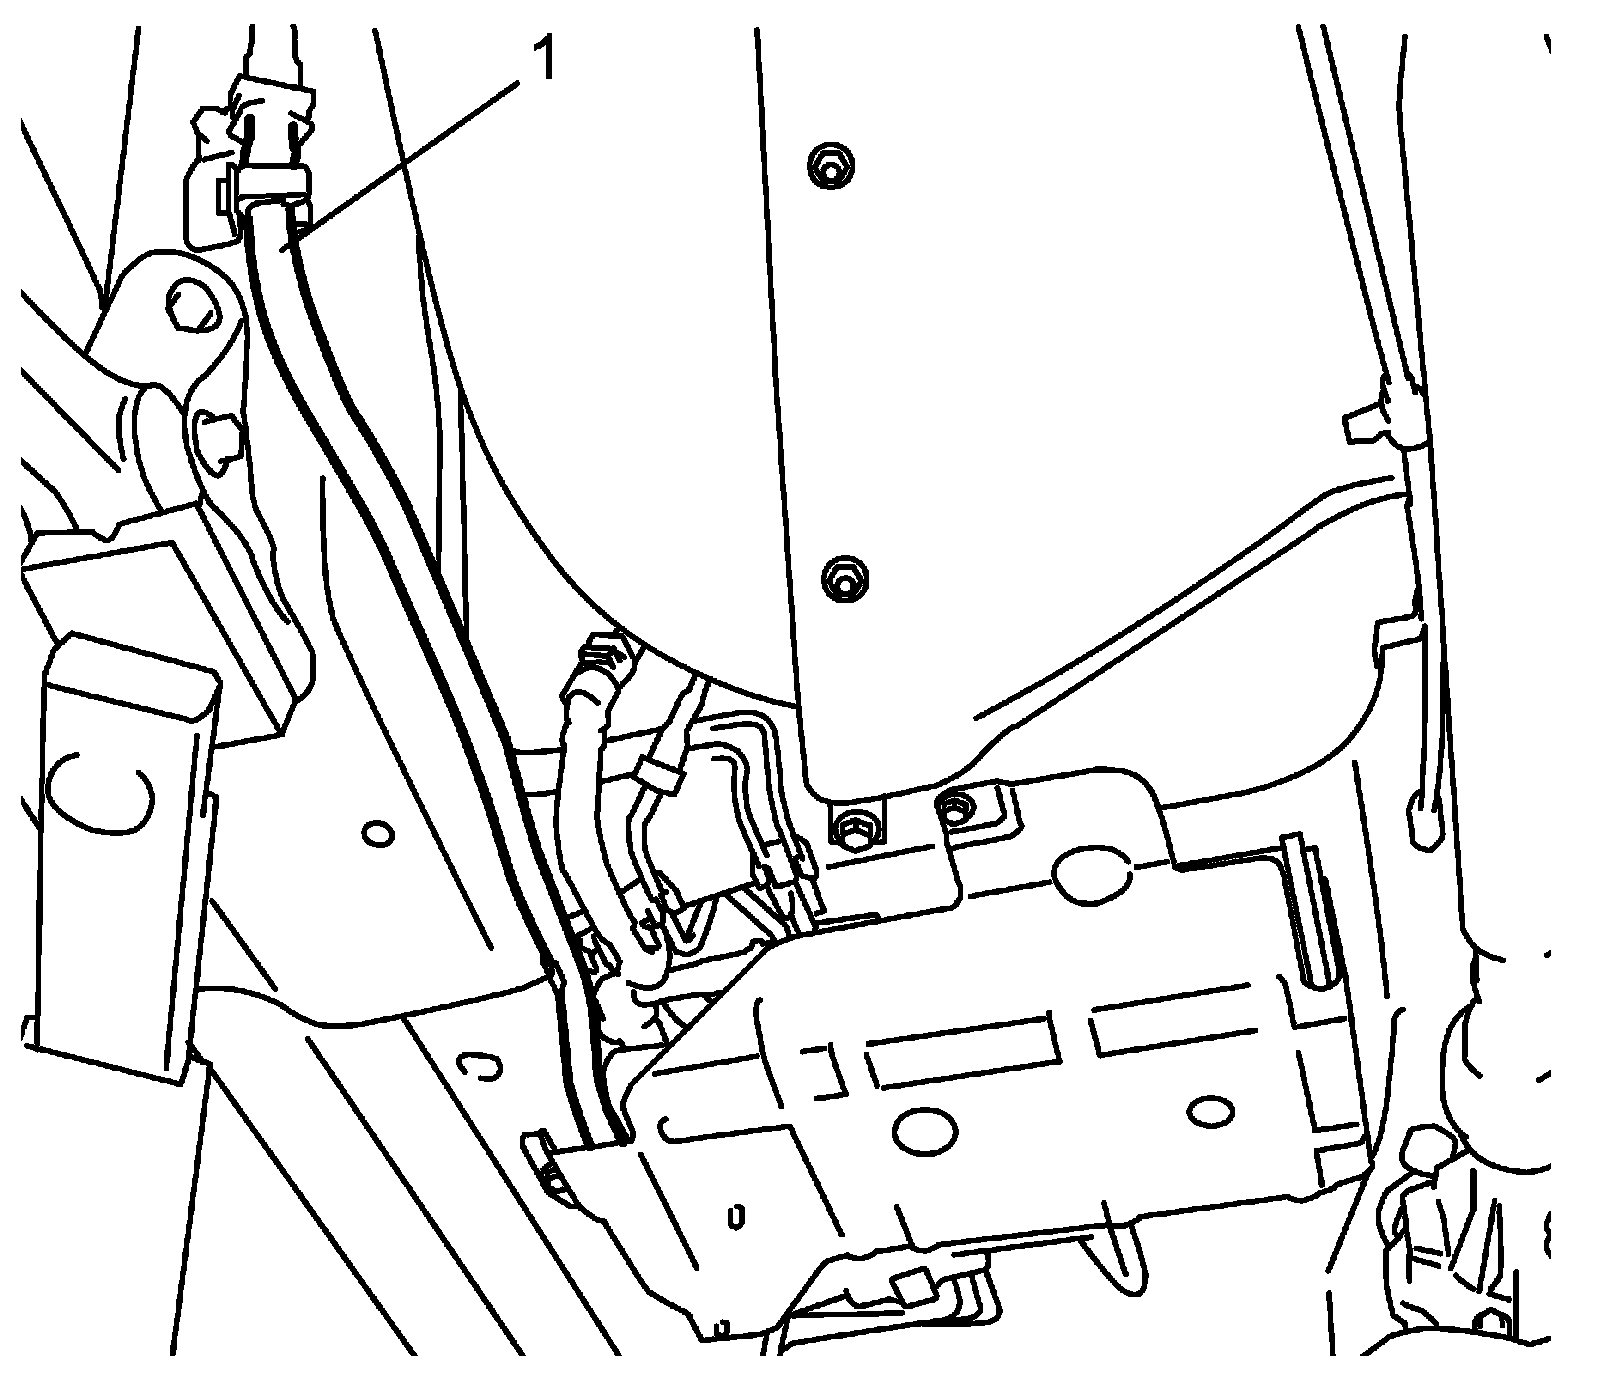
16. Disconnect air suction pipe (1).
17. Plug air suction pipe (1) with finger or rubber plug.
CAUTION:
- The air suction pipe must be blocked securely.
- The reason for this is that the EVAP system in its design cannot be sealed completely even though the EVAP canister vent valve and the EVAP canister purge valve are both closed because the leak check module internally opens to atmosphere through the leak detection pump. For this reason, if the air suction pipe is not blocked completely, smoke will leak through it possibly resulting in a diagnostic error of EVAP leak.
18. Operate EVAP canister purge valve as follows. If you have SUZUKI scan tool, perform step a), If not, perform step b).
a. Method using SUZUKI scan tool
i. Connect SUZUKI scan tool to DLC (1) with ignition switch OFF.
ii. With ignition switch ON, turn ON and OFF EVAP canister purge valve by using SUZUKI scan tool.
Special Tool (A): SUZUKI scan tool (SUZUKI-SDT)
b. Method not using SUZUKI scan tool
i. Turn ignition switch to ON.
ii. Using service wire, ground "C37-7" terminal of ECM connector (to turn ON valve [b]) and unground it (to turn OFF valve [a]).

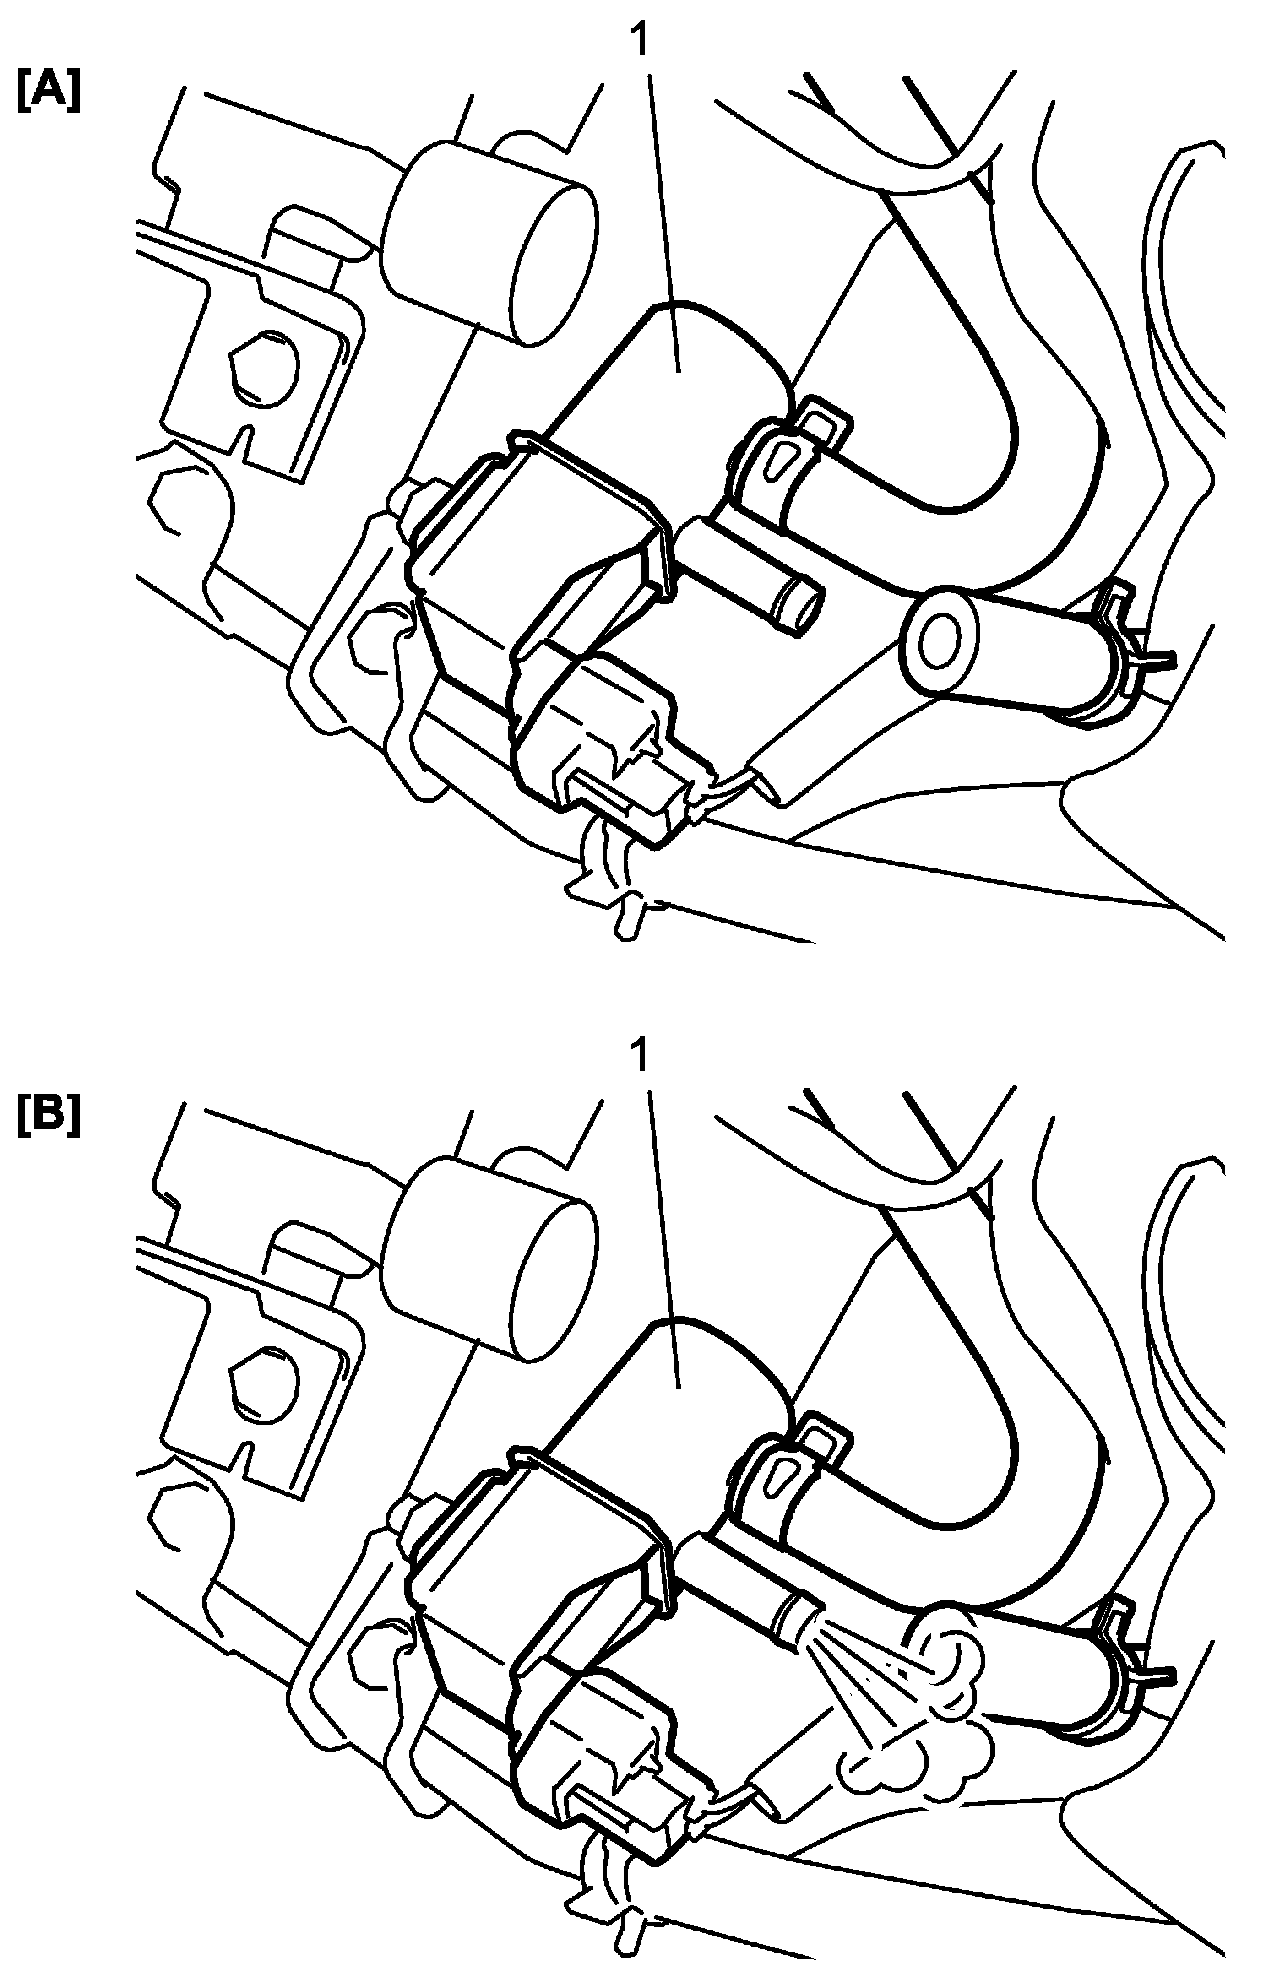
19. Disconnect hose form outlet nozzle of EVAP canister purge valve.
20. Check EVAP canister purge valve (1) for any leak when valve is switched ON and OFF by using SUZUKI scan tool or service wire. If check result is not as described below, replace EVAP canister purge valve.
EVAP canister purge valve specification
[A] Valve OFF: Smoke should not come out of EVAP canister purge valve.
[B] Valve ON: Smoke should come out of EVAP canister purge valve.
21. Repair leak.
22. Perform pressurization test again referring to Evaporative Emission System Leak Inspection: Evaporative Emission System Leak Inspection and check whether leak is completely repaired.
23. Charge battery as necessary.
NOTE: After tester has been used in SMOKE mode, smoke may condense inside nitrogen/smoke hose, turning into an oil. Over time, this buildup of oil could degrade performance of tester. Perform the following procedure any time the tester has been used in SMOKE mode and will not be used soon.
a. Close valve on nitrogen tank.
b. Disconnect nitrogen/smoke hose from vehicle.
c. Turn NITROGEN/SMOKE valve to NITROGEN position.
d. Press and release remote switch to activate tester, and then purge any residual smoke from nitrogen/smoke hose.