Radiator: Removal and Installation
Radiator: Removal and InstallationWARNING:
Do not remove radiator cap when engine is hot. Serious burns could occur from high pressure engine coolant escaping from radiator. Wrap a thick cloth around the cap. Slowly turn it a quarter of a turn to release built-up pressure. Carefully remove radiator cap by turning it all the way.
REMOVAL
1) Remove air dam using power tool.
2) Remove engine undercover using power tool.
3) Drain engine coolant from radiator.
CAUTION:
^ Perform this step when engine is cold.
^ Do not spill engine coolant on drive belts.
4) Remove air duct, air duct brackets and air cleaner case assembly.
5) Remove reservoir tank hose.
6) Removal (upper and lower) radiator hoses.
CAUTION:
Be careful not to allow engine coolant to contact drive belts.
7) Remove radiator cooling fan assembly.
8) Disconnect A/T fluid cooler hoses. (A/T models)
^ Install blind plug to avoid leakage of A/T fluid.
9) Remove the upper radiator mounting bracket bolts.
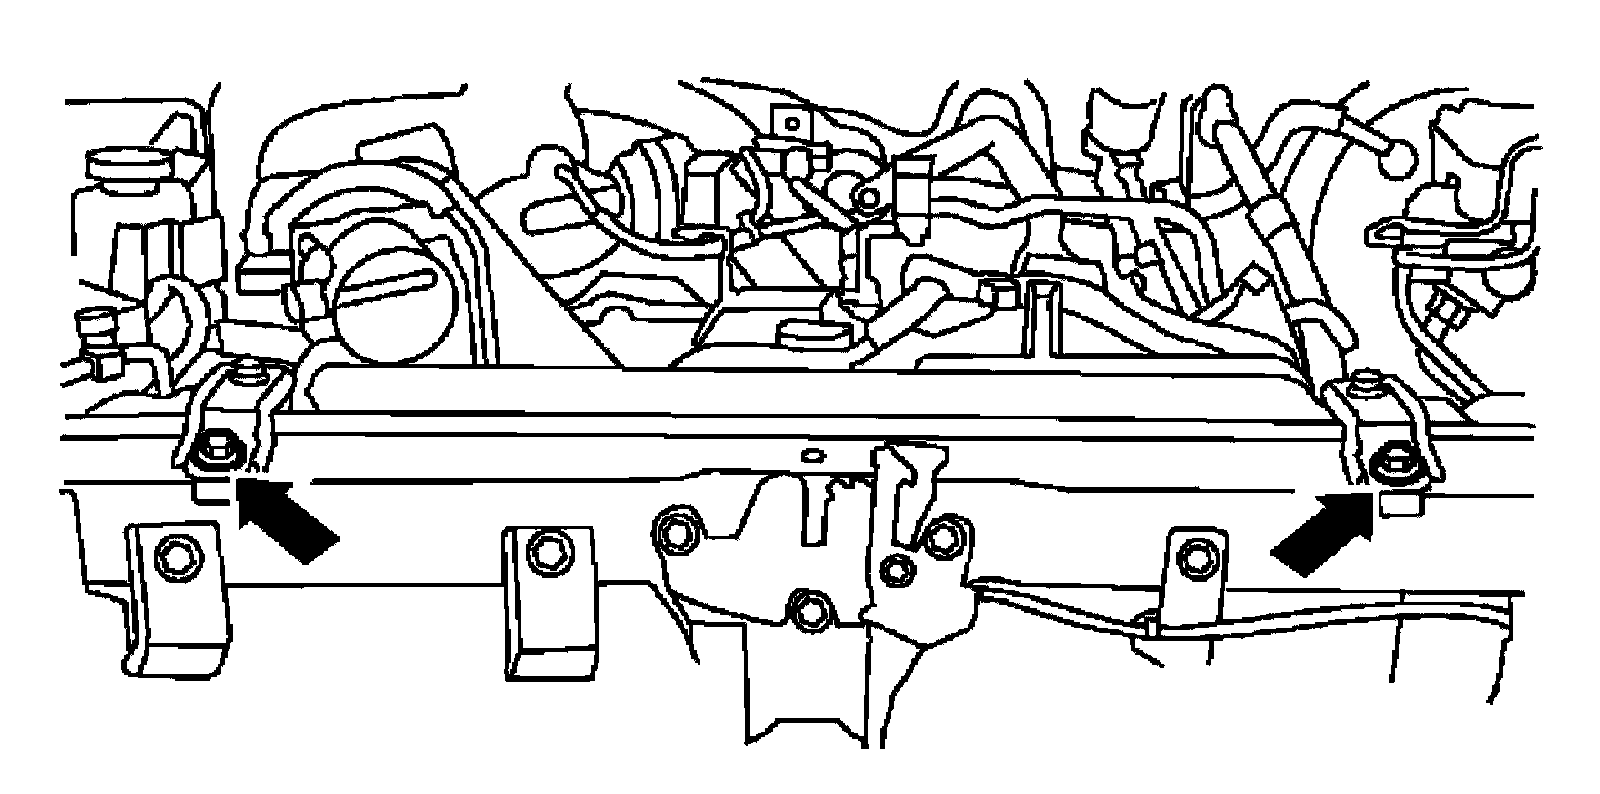
10) Remove the two A/C condenser bolts. (if equipped).
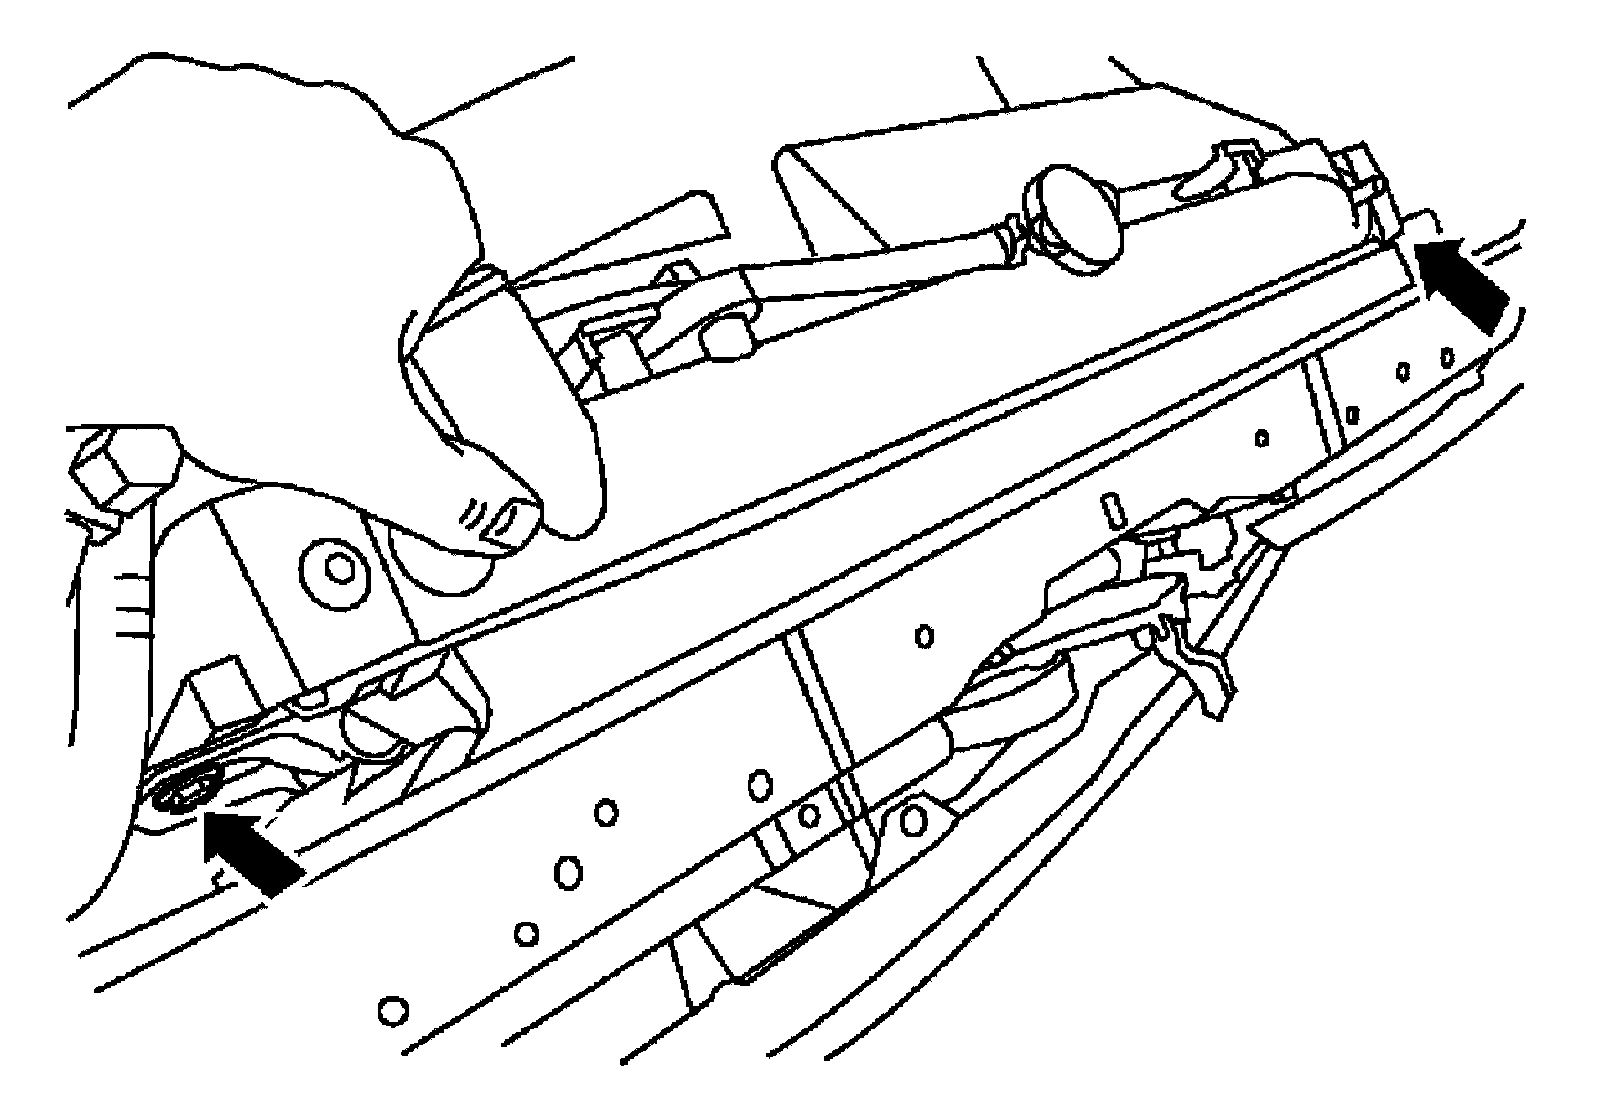
11) Remove radiator as follows:
CAUTION:
Do not damage or scratch A/C condenser and radiator core when removing.
a) With lifting and pulling radiator in a rear direction, disassemble mounting rubber (lower) from radiator core support center.
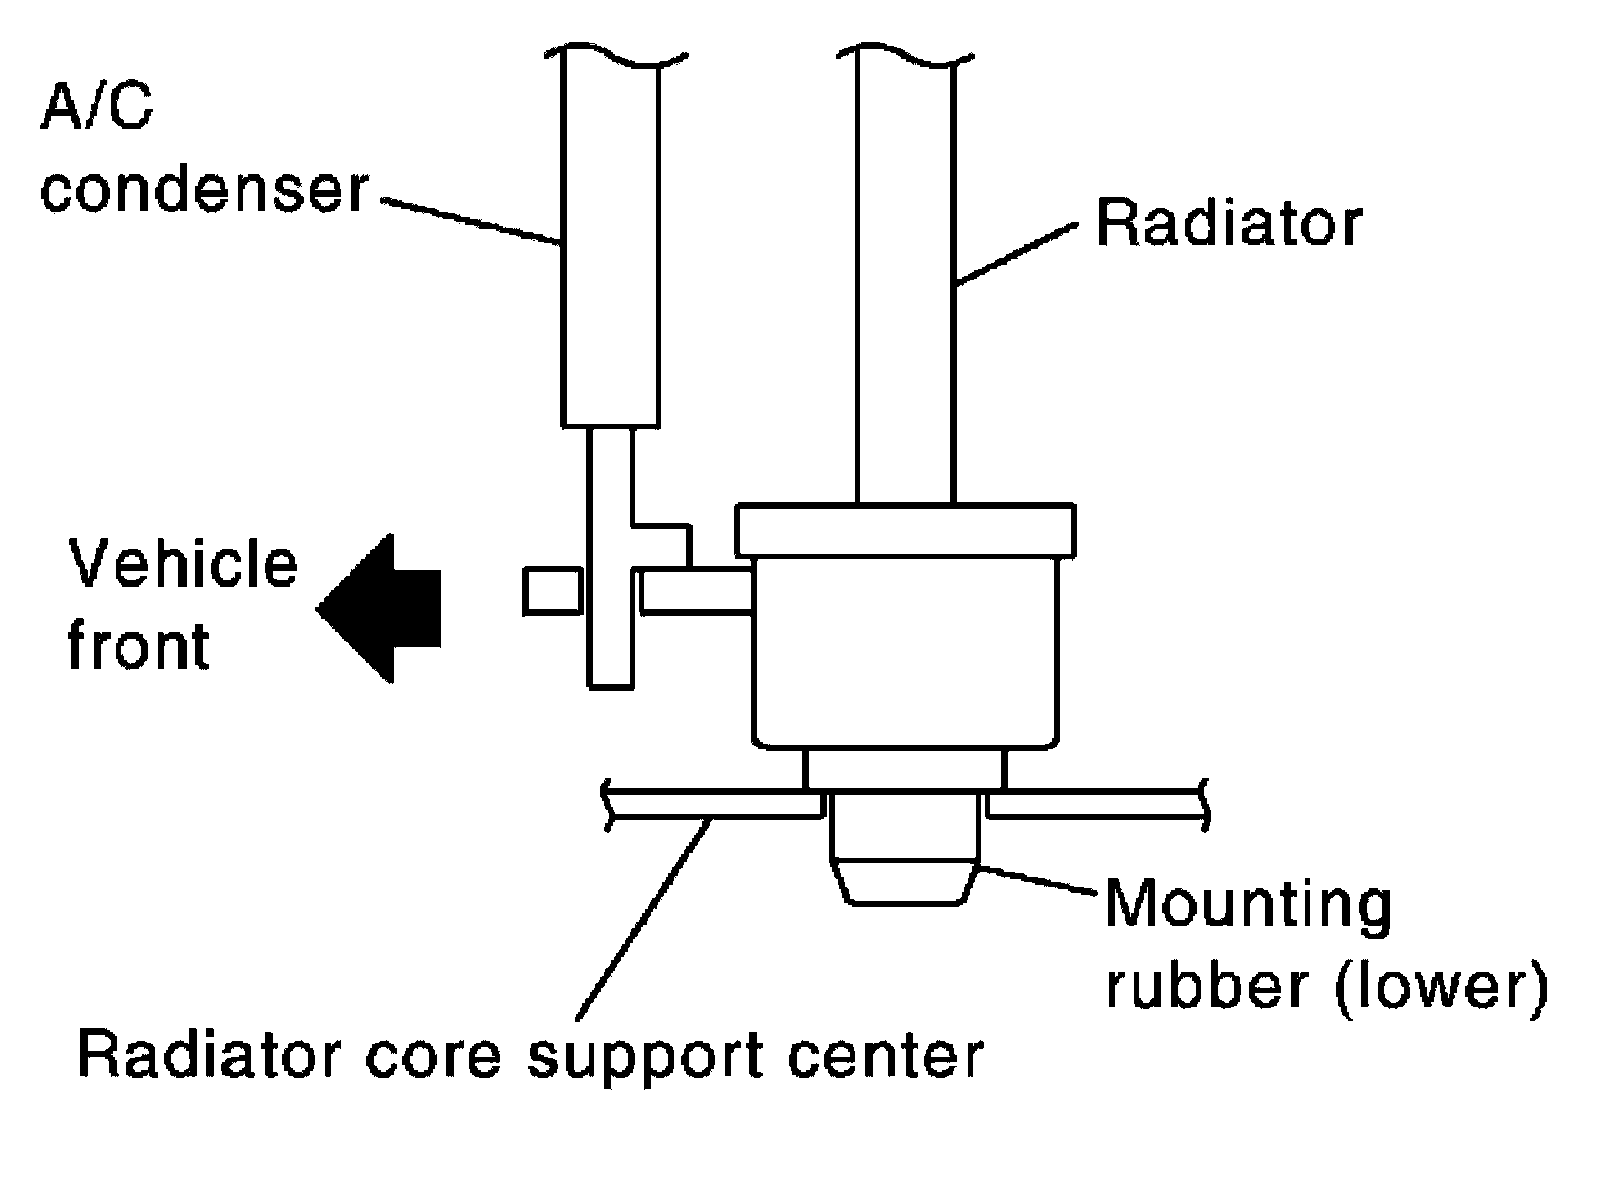
CAUTION:
Because A/C condenser is attached to the front-lower portion of radiator, moving it in the rear direction should be at a minimum.
b) Lift A/C condenser up and remove radiator after disengaging the fitting at front-bottom surface.
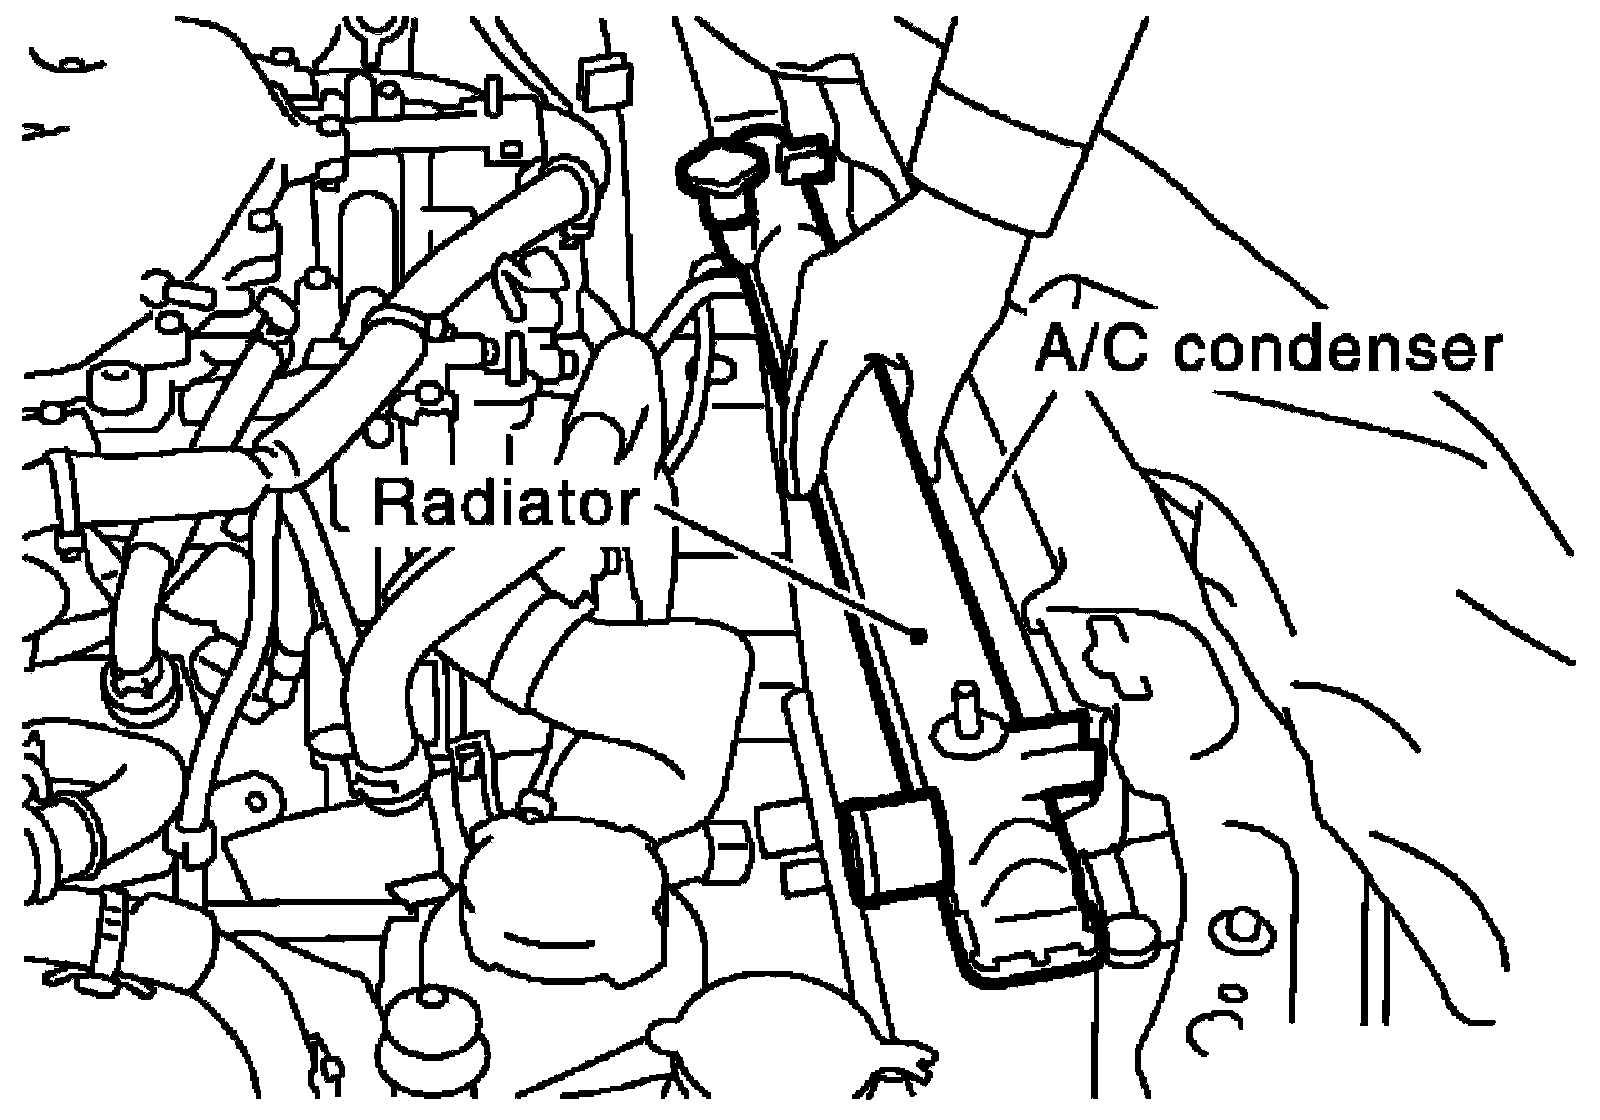
CAUTION:
Lifting A/C condenser should be minimum to prevent a load to A/C piping.
c) After removing radiator, put A/C condenser on radiator core support center to prevent a load to A/C piping, and temporarily secure it with rope or by similar means.
INSTALLATION
Installation is in the reverse order of removal.
INSPECTION AFTER INSTALLATION
^ Check for leaks of engine coolant.
^ Start and warm up engine. Visually check there are no leaks of engine coolant and A/T fluid.