Rear Disc Brake: Disassembly and Assembly
Rear Disc Brake: Disassembly and AssemblyDISASSEMBLY
1) Remove the caliper body from the torque member.
2) Remove the sliding sleeves and boots from the torque member.
3) Place a wooden block in the cylinder body and blow air into the union bolt hole to remove the piston and piston boot as shown.
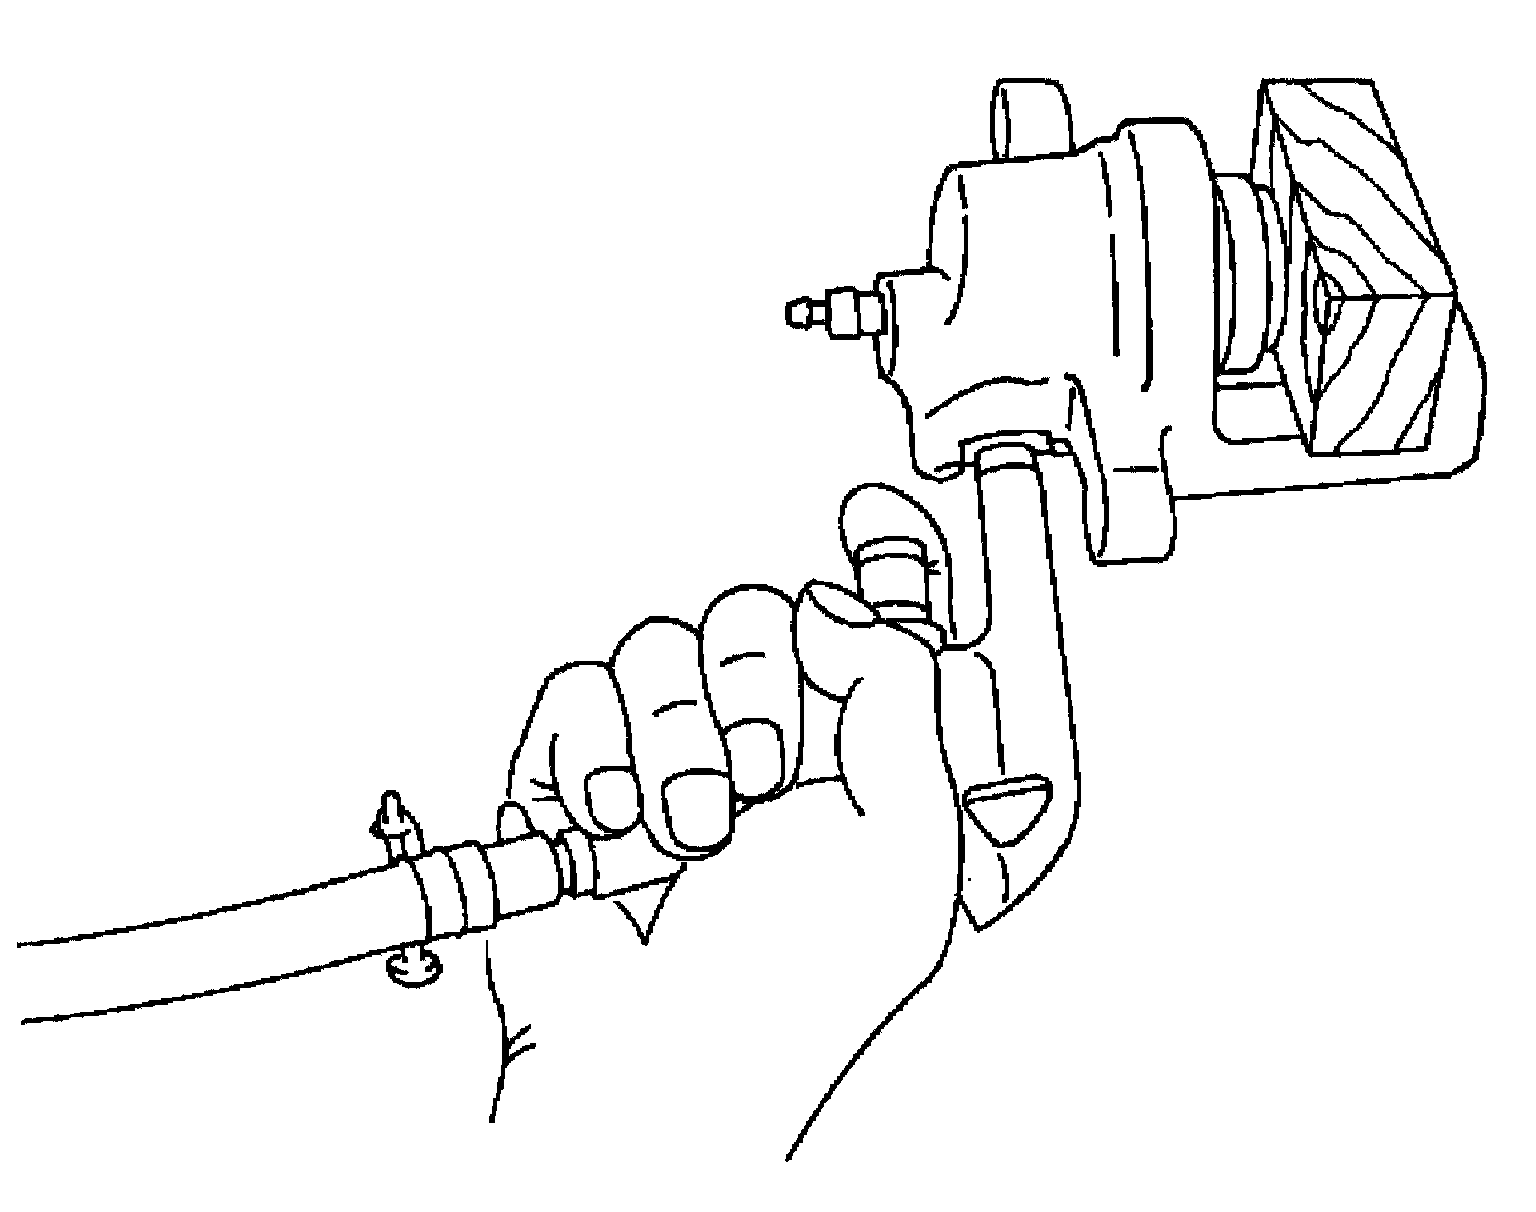
WARNING:
Do not get your fingers caught between the piston and wooden block.
4) Remove the piston boot from the piston.
CAUTION:
Do not reuse piston boot.
5) Remove piston seal from cylinder body, using a suitable tool.
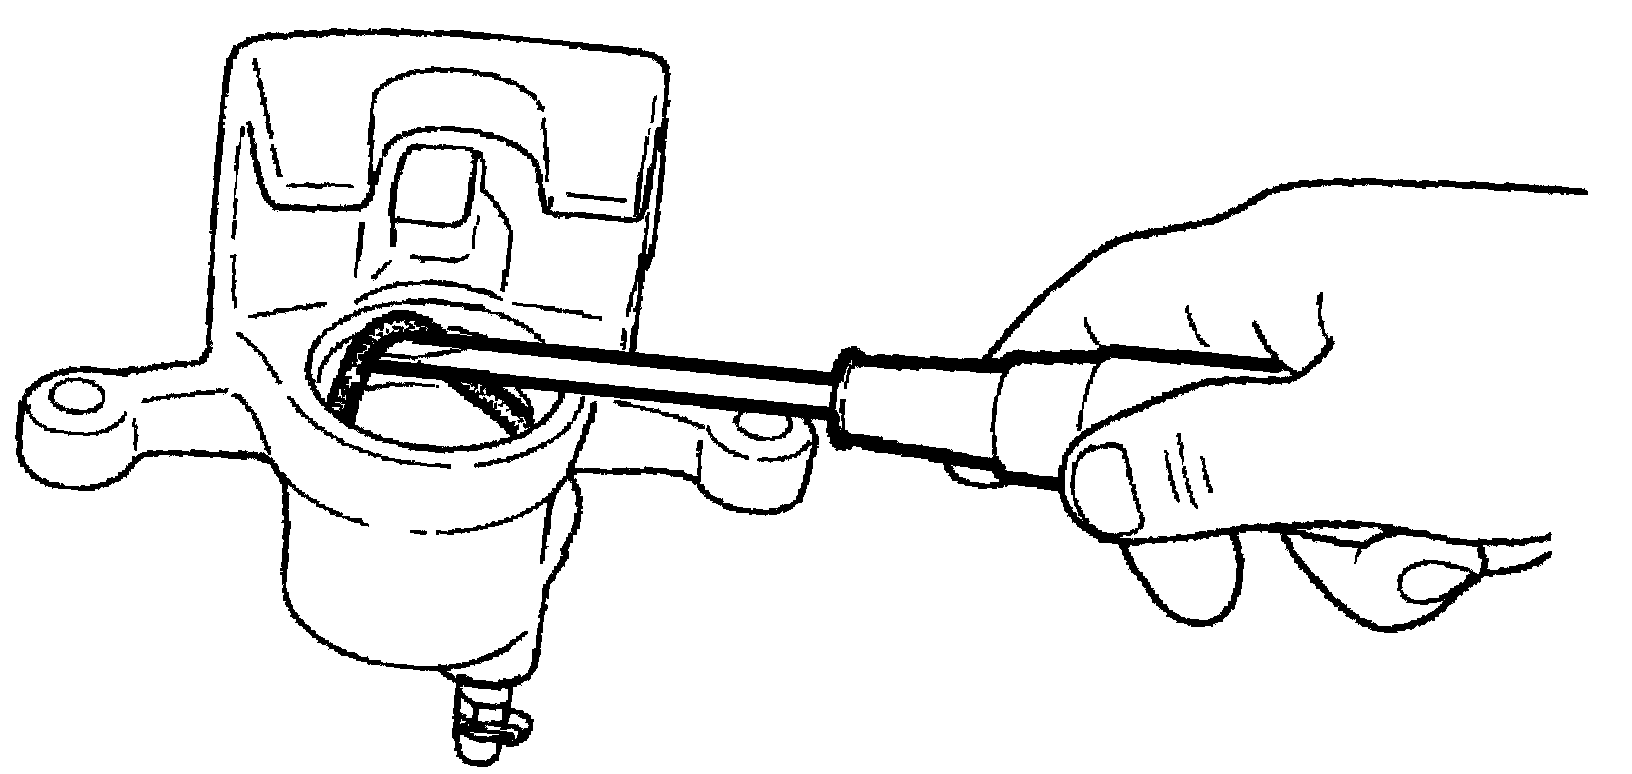
CAUTION:
Be careful not to damage cylinder body inner wall.
6) Remove the bleed valve and cap.
CALIPER INSPECTION
Cylinder Body
^ Check inside surface of cylinder for score, rust wear, damage or foreign materials. If any of the above conditions are observed, replace cylinder body.
^ Minor damage from rust or foreign materials may be eliminated by polishing surface with a fine emery paper. Replace cylinder body if necessary.
CAUTION:
^ Use new brake fluid for cleaning. Do not use mineral oils such as gasoline or kerosene.
Torque Member
Check the torque member for wear, cracks, and damage. If damage or deformation is present, replace the torque member.
Piston
Check the piston for score, rust, wear, damage or presence of foreign materials. Replace if any of the above conditions are observed.
CAUTION:
Piston sliding surface is plated, do not polish with emery paper even if rust or foreign materials are stuck to sliding surface.
Sliding Pin Bolts and Sliding Pin Boots
Check the sliding pins and sliding pin boots for wear, damage, and cracks. If damage or deformation is present, replace the affected part.
ASSEMBLY
CAUTION:
Do not use Rubber Grease when assembling.
1) Install the bleed valve and cap.
2) Apply clean brake fluid to the new piston seal (1) and insert the new piston seal (1) into the groove on the cylinder body.
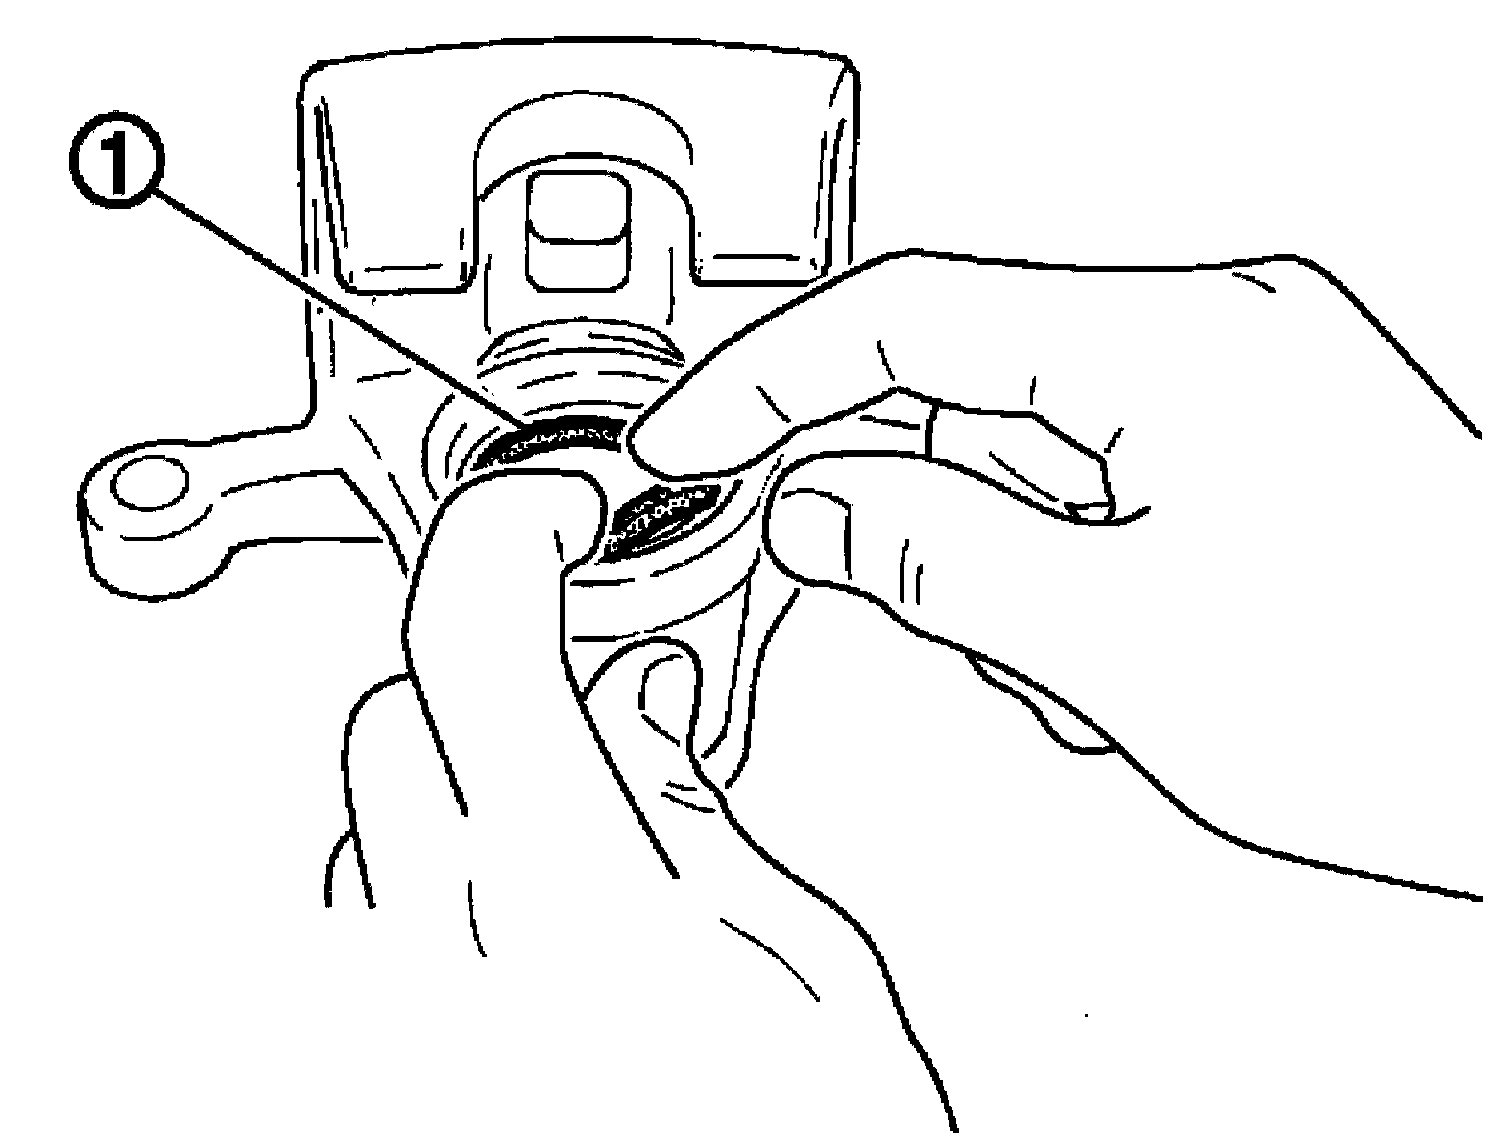
CAUTION:
Do not reuse piston seal.
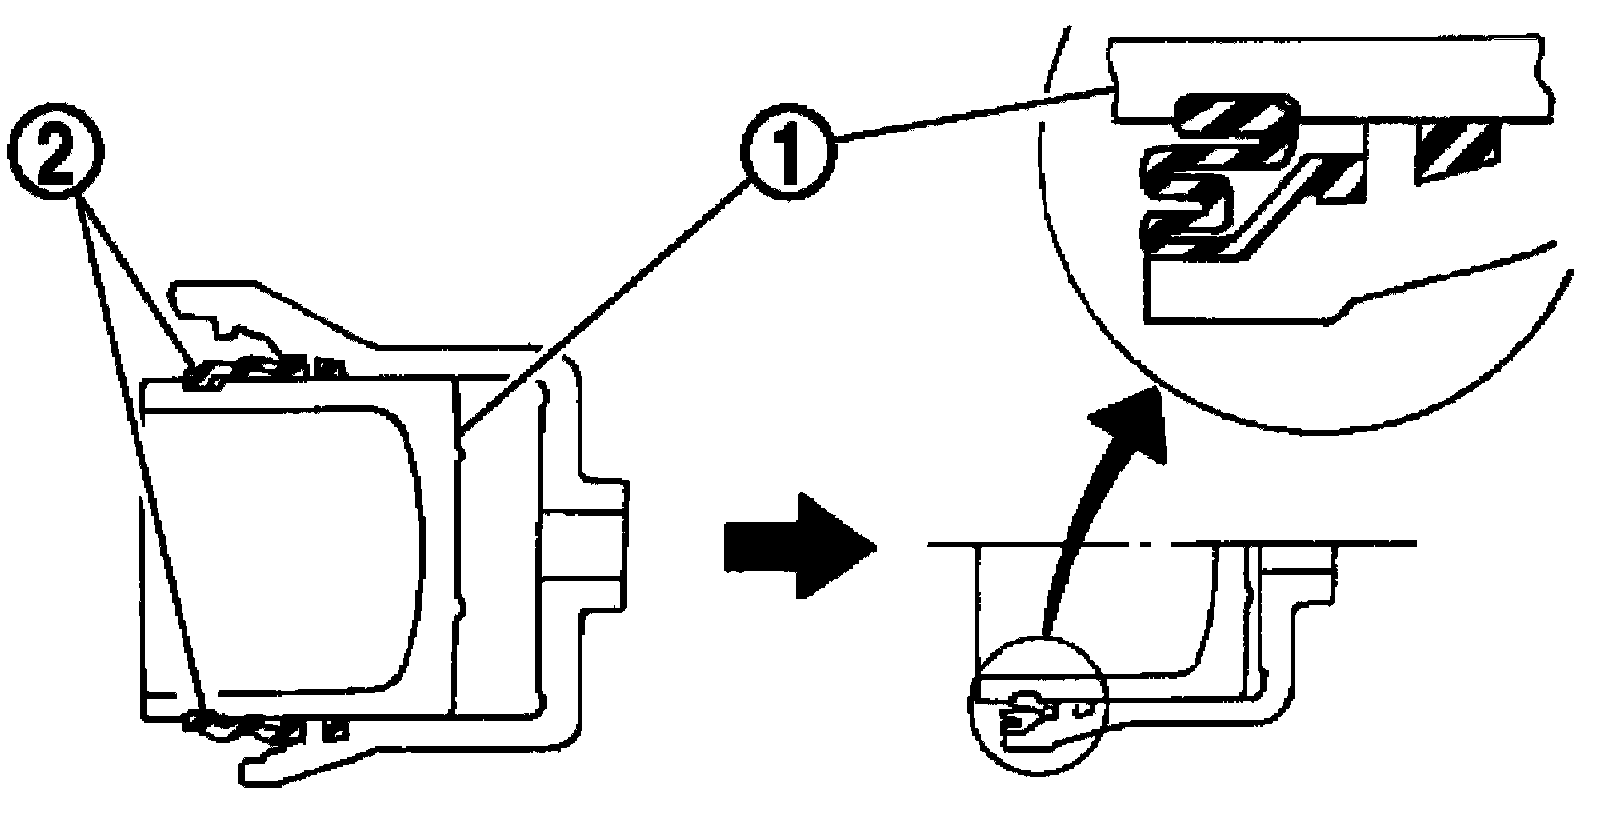
3) Apply clean brake fluid to the new piston boot (1). Cover the piston end (2) with the piston boot (1), and then install the cylinder side lip on the piston boot (1) securely into the groove on the cylinder body.
CAUTION:
^ Do not reuse piston boot.
^ Press pistons in evenly and vary the pressing points to prevent the cylinder inner wall from being damaged.
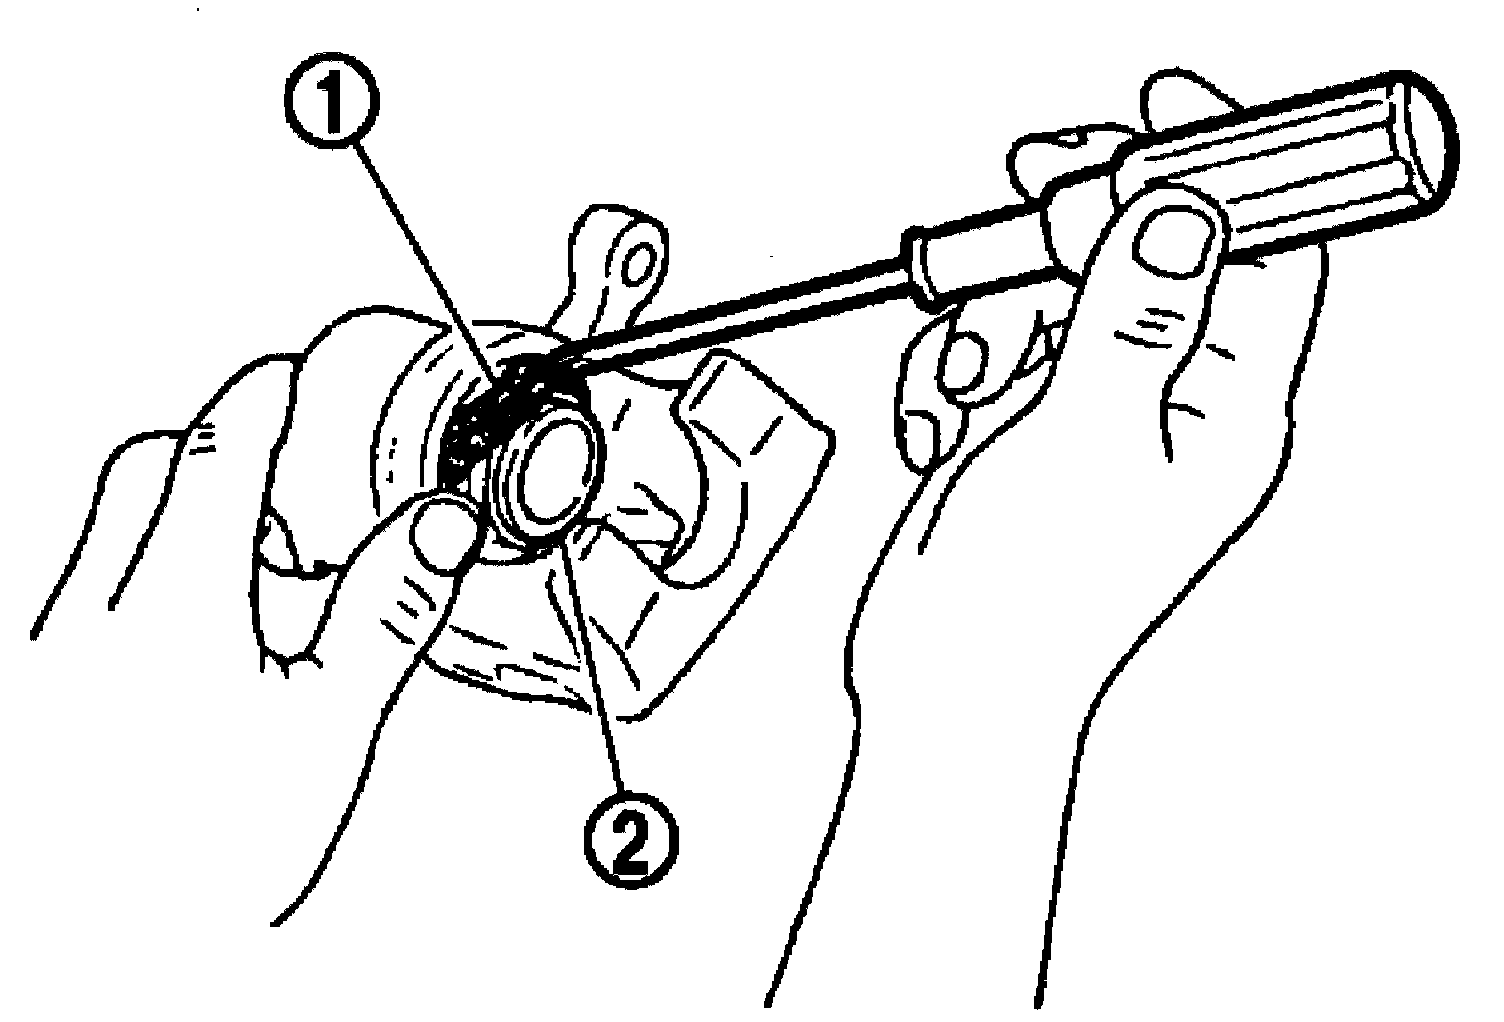
4) Apply brake fluid to the piston (1), then install the piston (1) into the cylinder body and insert the piston boot (2) side lip into the piston groove as shown.
CAUTION:
Press pistons in evenly and vary the pressing points to prevent the cylinder inner wall from being damaged.
5) Insert into cylinder body by hand and insert piston boot piston-side lip into piston groove.
CAUTION:
Press piston evenly and vary the pressing point to prevent cylinder inner wall from being rubbed.
6) Install sliding pins and sliding pin boots on the torque member.
7) Install the caliper body on the torque member.