Removal Procedure
- Remove the control valve body cover. Refer to CONTROL VALVE BODY COVER REPLACEMENT .
 Courtesy of SUZUKI OF AMERICA CORP.
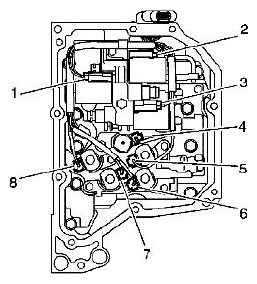
- Disconnect the wiring harness connectors (1-8).
 Courtesy of SUZUKI OF AMERICA CORP.
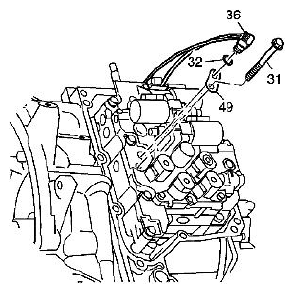
- Remove the fluid temperature sensor bolt (31).
- Remove the fluid temperature sensor clamp (49).
- Remove the fluid temperature sensor (36) and the O-ring (32) from the control valve body.
 Courtesy of SUZUKI OF AMERICA CORP.
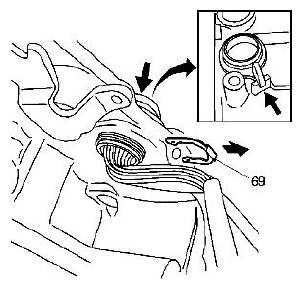
- Remove the A/T control wiring harness connector retainer (69).
 Courtesy of SUZUKI OF AMERICA CORP.
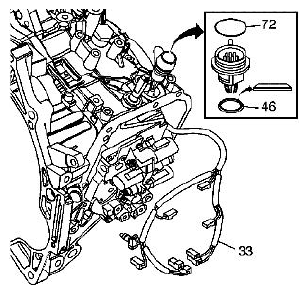
- Remove the transmission wiring harness assembly (33) from the transmission case assembly through the wiring harness bore.
- Remove the TCM seal (72) and the automatic transmission wiring connector seal (46) from the connector.