Removal Procedure
- Recover the refrigerant. Refer to REFRIGERANT RECOVERY AND RECHARGING .
- Remove the front fascia. Refer to FRONT BUMPER FASCIA REPLACEMENT
.
 Courtesy of SUZUKI OF AMERICA CORP.
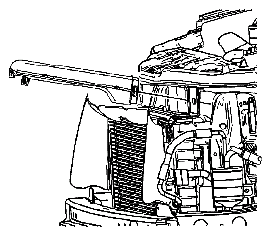
- Remove the battery box air duct.
 Courtesy of SUZUKI OF AMERICA CORP.
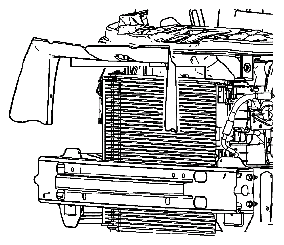
- Remove the condenser radiator fan module (CRFM) closeout panel.
 Courtesy of SUZUKI OF AMERICA CORP.
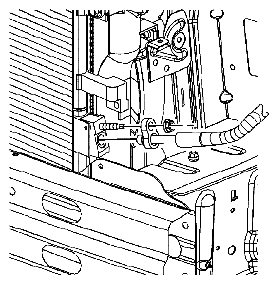
- Remove the liquid line nut from the condenser.
- Remove the liquid line from the condenser.
- Install a protective cap to the liquid line to prevent contamination and desiccant saturation.
 Courtesy of SUZUKI OF AMERICA CORP.
- Remove the compressor hose nut from the condenser.
- Remove the compressor hose from the condenser.
- Install a protective cap to the compressor hose to prevent contamination and desiccant saturation.
 Courtesy of SUZUKI OF AMERICA CORP.
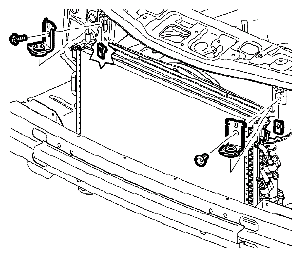
- Remove the CRFM bracket bolts from the radiator support.
- Remove the CRFM brackets from the vehicle.
 Courtesy of SUZUKI OF AMERICA CORP.
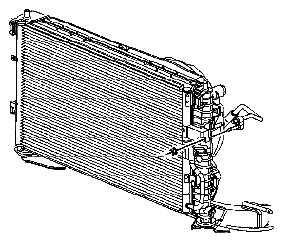
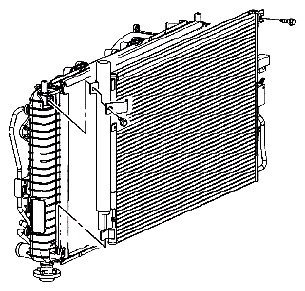
- Remove the bolts retaining the top of the condenser to the radiator.
- Remove the condenser from the vehicle.