Removal Procedure
 Courtesy of SUZUKI OF AMERICA CORP.
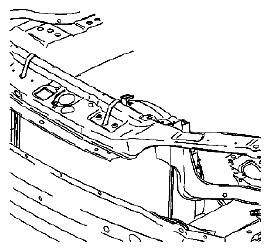
- Tie the radiator, air conditioning condenser, and fan module assembly to the upper radiator support to keep the assembly with the vehicle when the frame is lowered.
- Install the engine support fixture. Refer to INSTALLATION PROCEDURE
.
- Raise and support the vehicle. Refer to LIFTING AND JACKING THE VEHICLE
.
- Remove the front wheels. Refer to TIRE AND WHEEL REMOVAL AND INSTALLATION
.
- Remove the side splash shield-to-frame fasteners.
- Remove the front air dam-to-frame fasteners.
 Courtesy of SUZUKI OF AMERICA CORP.
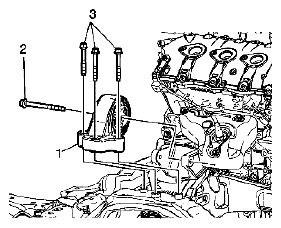
- Remove the rear transmission mount-to-frame bolts (3).
 Courtesy of SUZUKI OF AMERICA CORP.
- Remove the front transmission mount-to-frame bolt.
 Courtesy of SUZUKI OF AMERICA CORP.
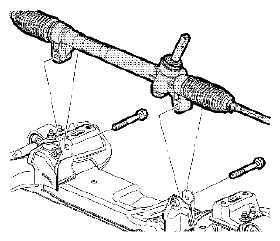
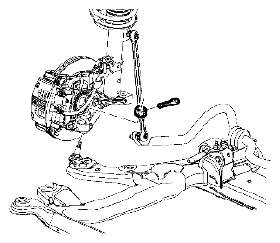
- Remove the steering gear-to-frame bolts.
- Using mechanics wire, secure the steering gear to the exhaust.
 Courtesy of SUZUKI OF AMERICA CORP.
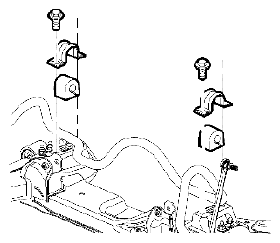
- Remove the stabilizer shaft clamp-to-frame bolts.
 Courtesy of SUZUKI OF AMERICA CORP.
- Separate the lower ball joint from the steering knuckle. Refer to LOWER CONTROL ARM REPLACEMENT
.
- Remove the power steering cooler line retainer clips from the frame.
- Lower the vehicle until the frame contacts J 39580.
 Courtesy of SUZUKI OF AMERICA CORP.
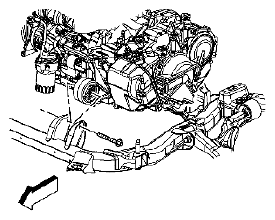
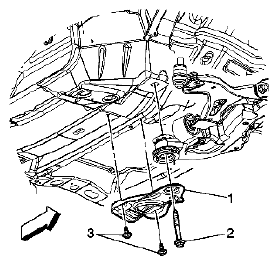
- Remove the reinforcement bolts (3).
- Remove the rear frame to body bolts (2). DISCARD the bolts.
- Remove the reinforcement (1) from the vehicle.
 Courtesy of SUZUKI OF AMERICA CORP.
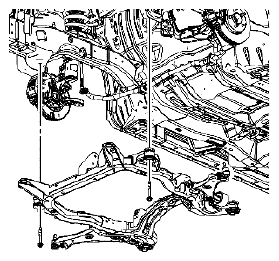
- Remove the front frame-to-body bolts. DISCARD the bolts.
- Carefully raise the vehicle in order to separate the frame from the body.
- Remove the lower control arms. Refer to LOWER CONTROL ARM REPLACEMENT
.