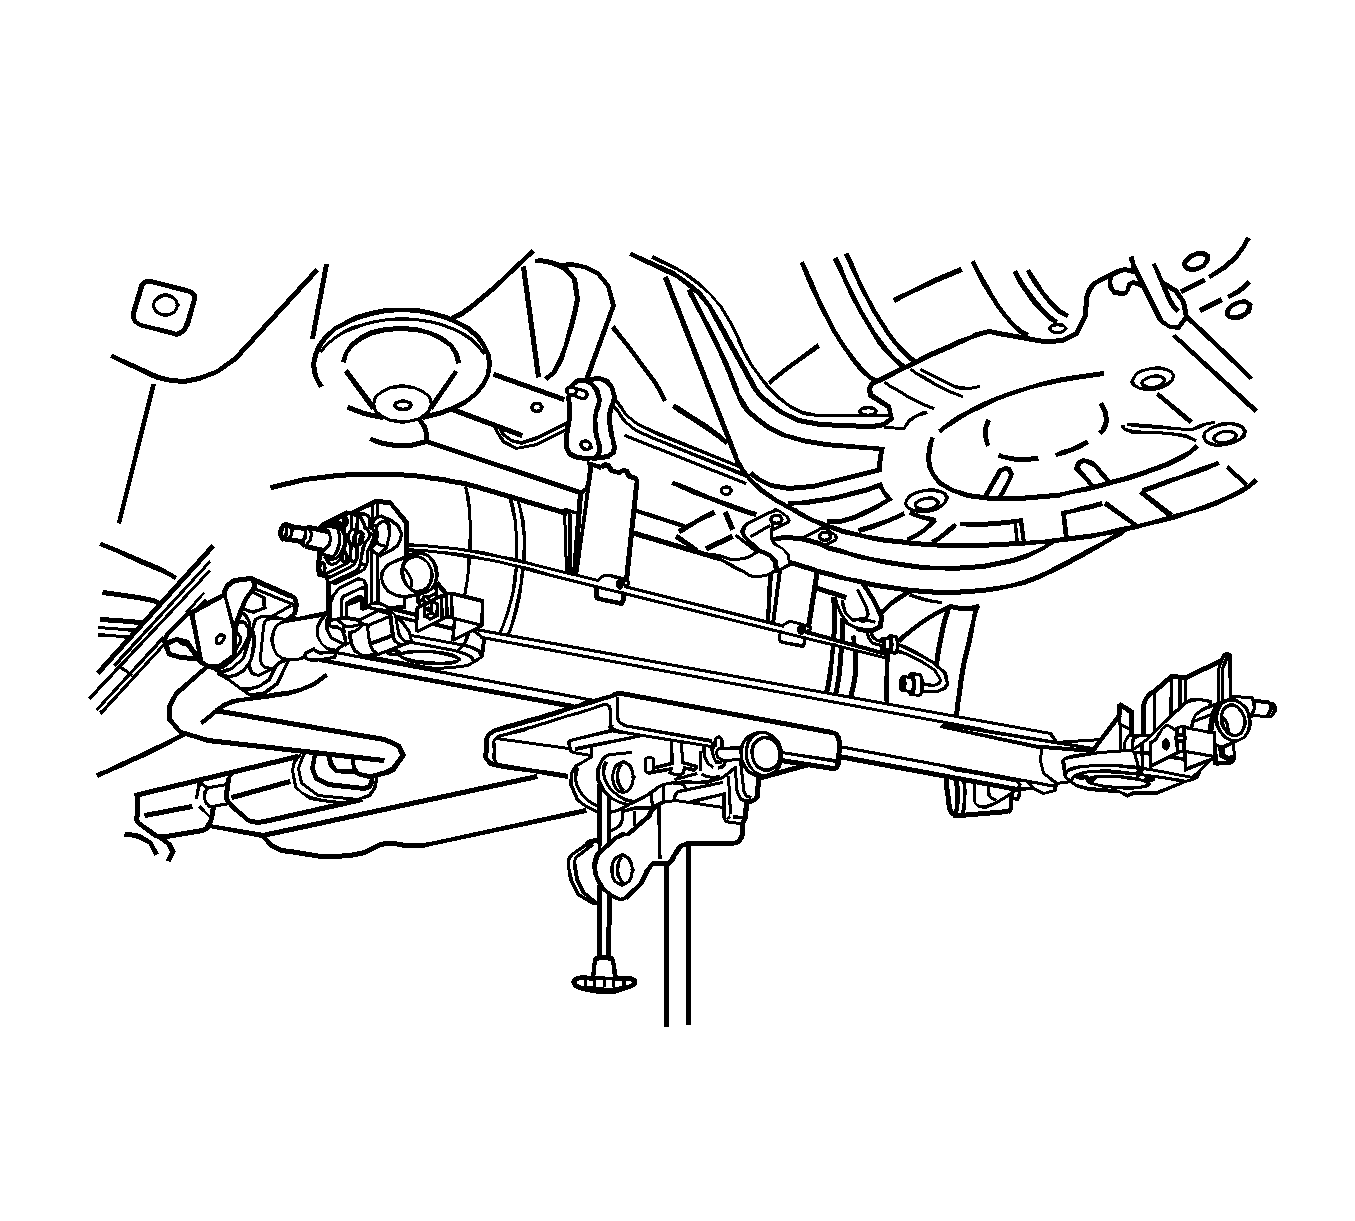
Removal Procedure
 Courtesy of GENERAL MOTORS CORP.
- Raise and support the vehicle. Refer to Lifting and Jacking the Vehicle
.
- Remove the rear tire and wheel assemblies. Refer to Tire and Wheel Removal and Installation
.
- Remove the brake shoes. Refer to Brake Shoe Replacement
.
- Remove the park brake cable from the rear axle. Refer to Park Brake Cable Replacement
.
- Disconnect the wheel speed sensor connector, if equipped.
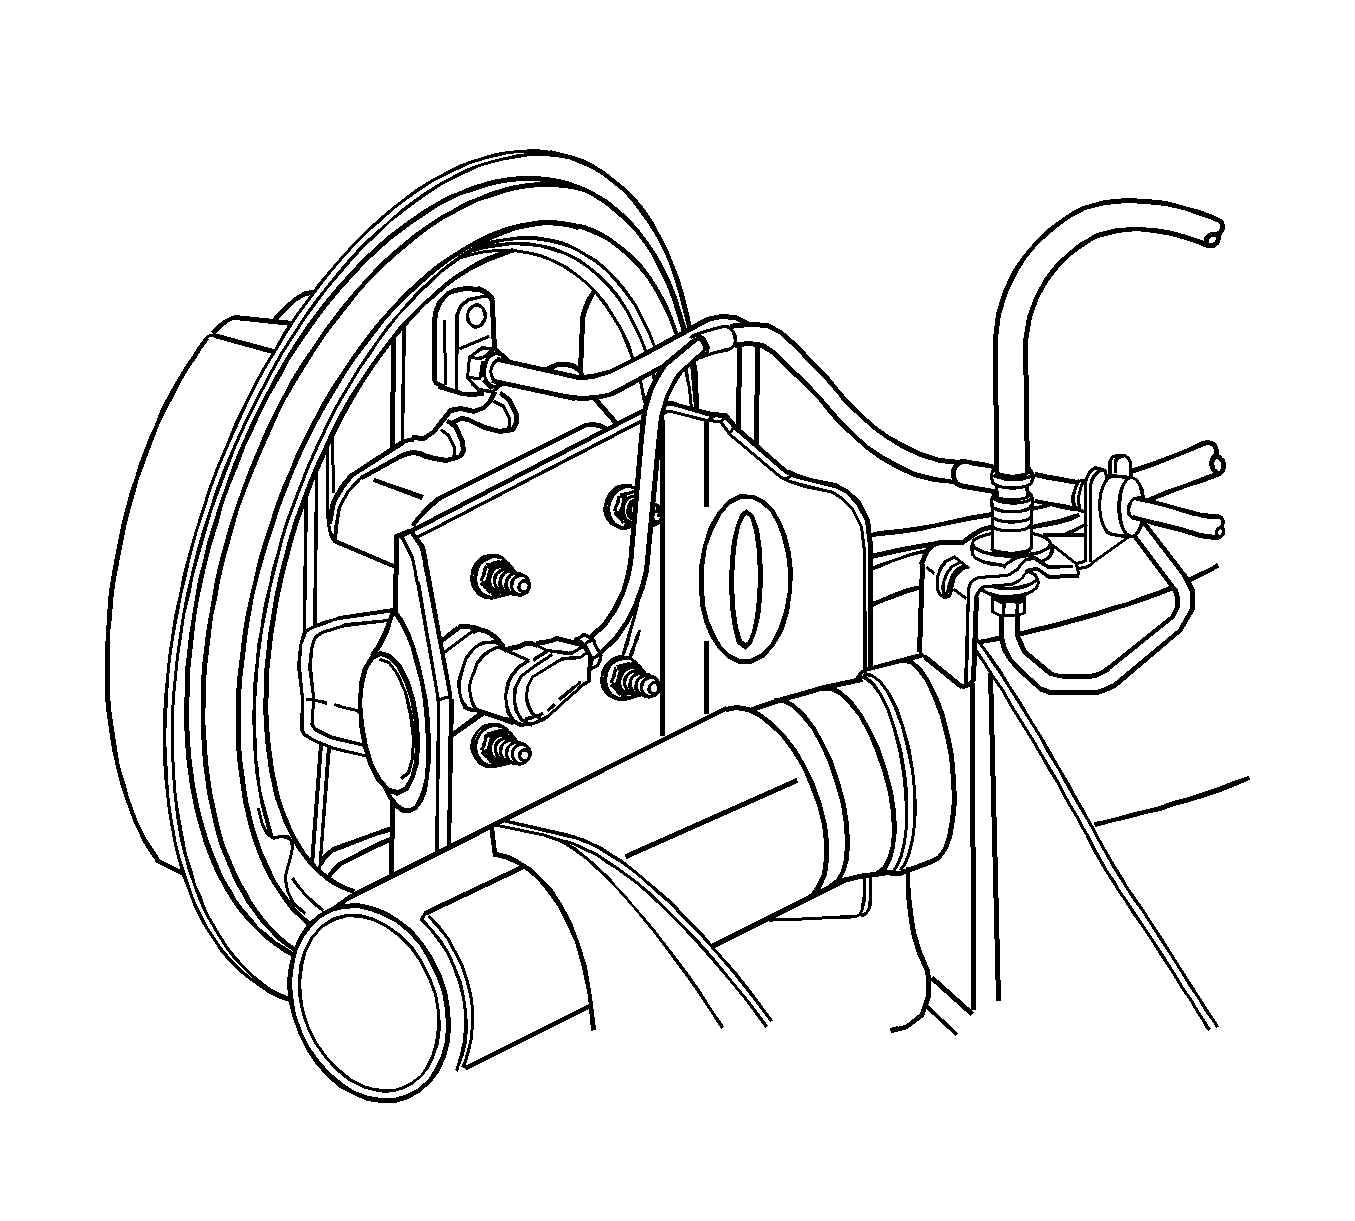 Courtesy of GENERAL MOTORS CORP.
- Remove the brake pipes from the brake hoses at the rear axle brackets. Cap or tape the brake hose openings to prevent entry of foreign matter.
- Remove the retaining clips from the brake hoses.
- Unclip the brake hoses from the rear axle brackets.
- Place support jacks under the arms of the rear axle and raise the rear axle arms slightly.
- Remove the shock absorbers. Refer to Shock Absorber Replacement .
- Lower the support jacks and remove the rear springs. Refer to Coil Spring Replacement .
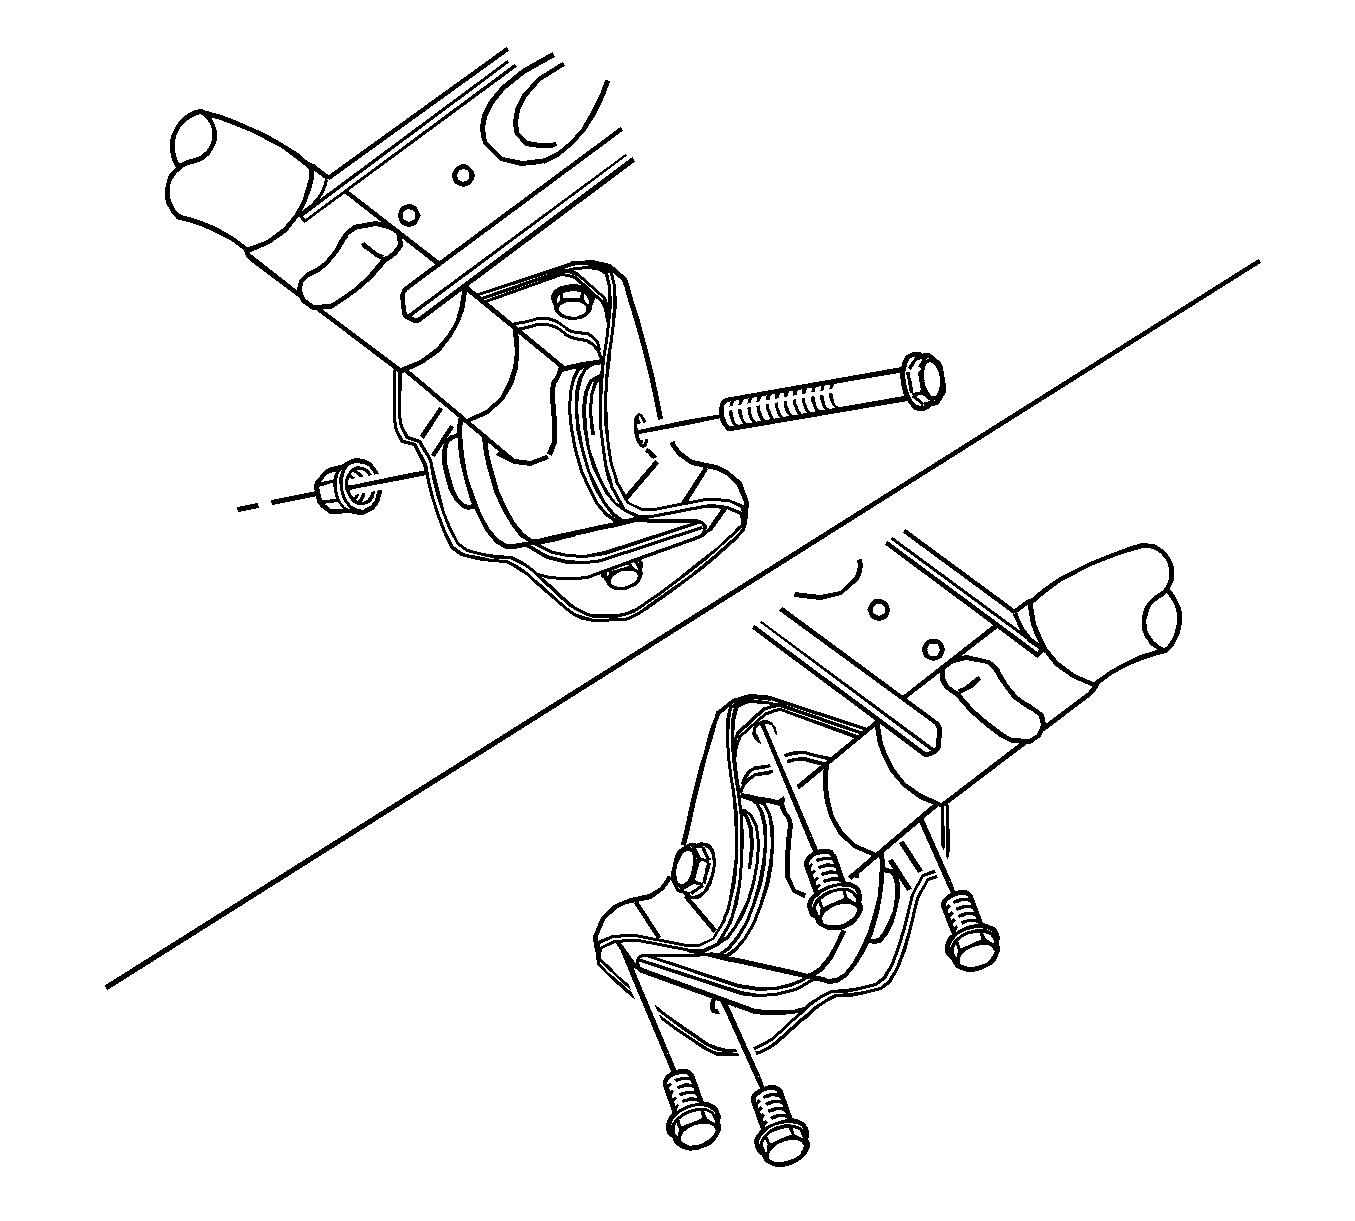 Courtesy of GENERAL MOTORS CORP.
- Remove the left axle-to-bracket nut and bolt from the bracket. Pry the rear axle slightly, if necessary.
- Remove the right axle mounting bracket bolts from the underbody.
- Remove the rear axle from the vehicle.
- Remove the right axle-to-bracket nut and bolt from the bracket.
- Remove the right axle bracket from the axle.
- Remove the remaining drum brake components from the axle. Refer to Drum Brake Backing Plate Replacement
.