Steering - Rubbing/Humming When Turning Steering Wheel
GRAND VITARASection Title: Steering
TSB No. TS 02 04207
Division: Automotive
Category: Technical
SUBJECT:
HUMMING OR RUBBING NOISE WHEN TURNING THE STEERING WHEEL, MOST NOTICEABLE WHEN PARKING
MODEL(S):
GRAND VITARA (JB627)
YEAR:
2006~2007
CONDITION:
A noise can be heard inside the vehicle when turning the steering wheel at slow speeds.
CAUSE:
Rubber to metal contact of steering shaft to the dust boot.
CORRECTION:
Please follow the attached instructions to lubricate the rubber boot on the engine side of the dash panel.

WARRANTY CLAIM INFORMATION
Lubrication of the middle shaft dust boot
1. Make sure the vehicle is parked with the steering wheel centered and the wheels in the straight ahead position. Turn OFF the ignition and remove the key to lock the steering wheel.
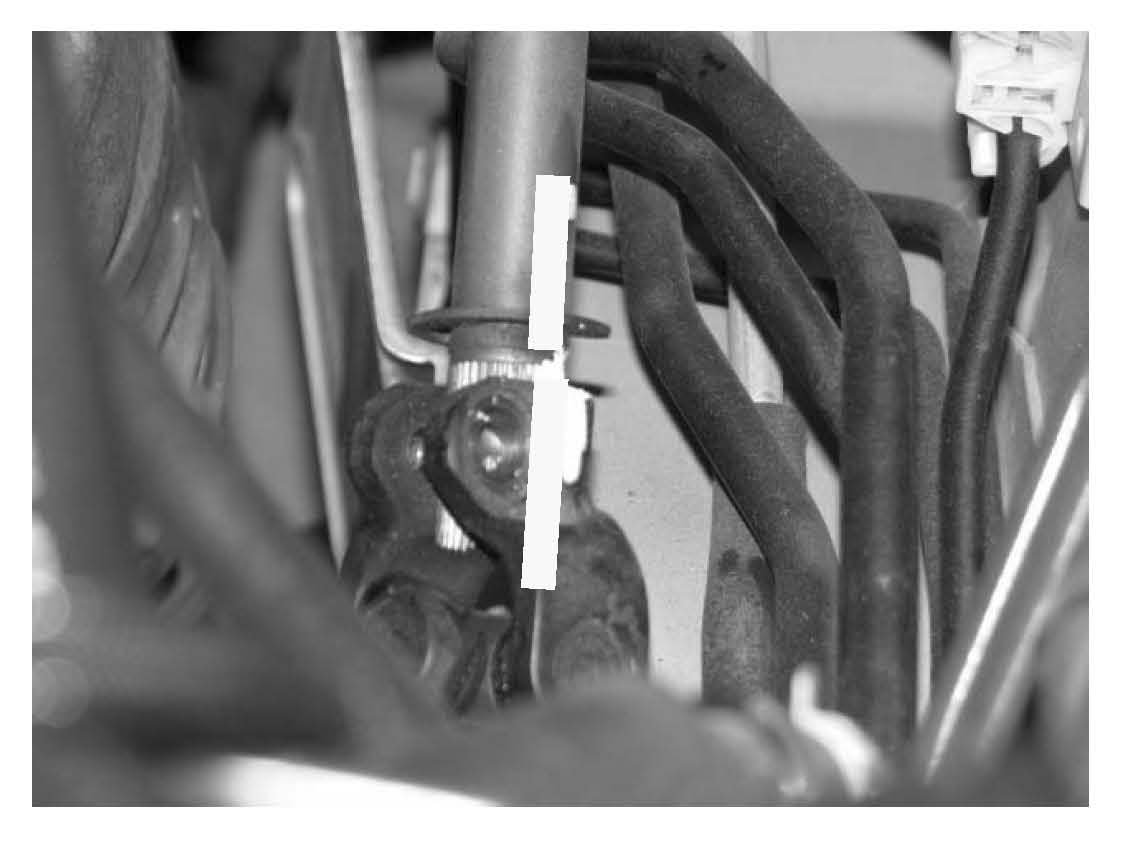
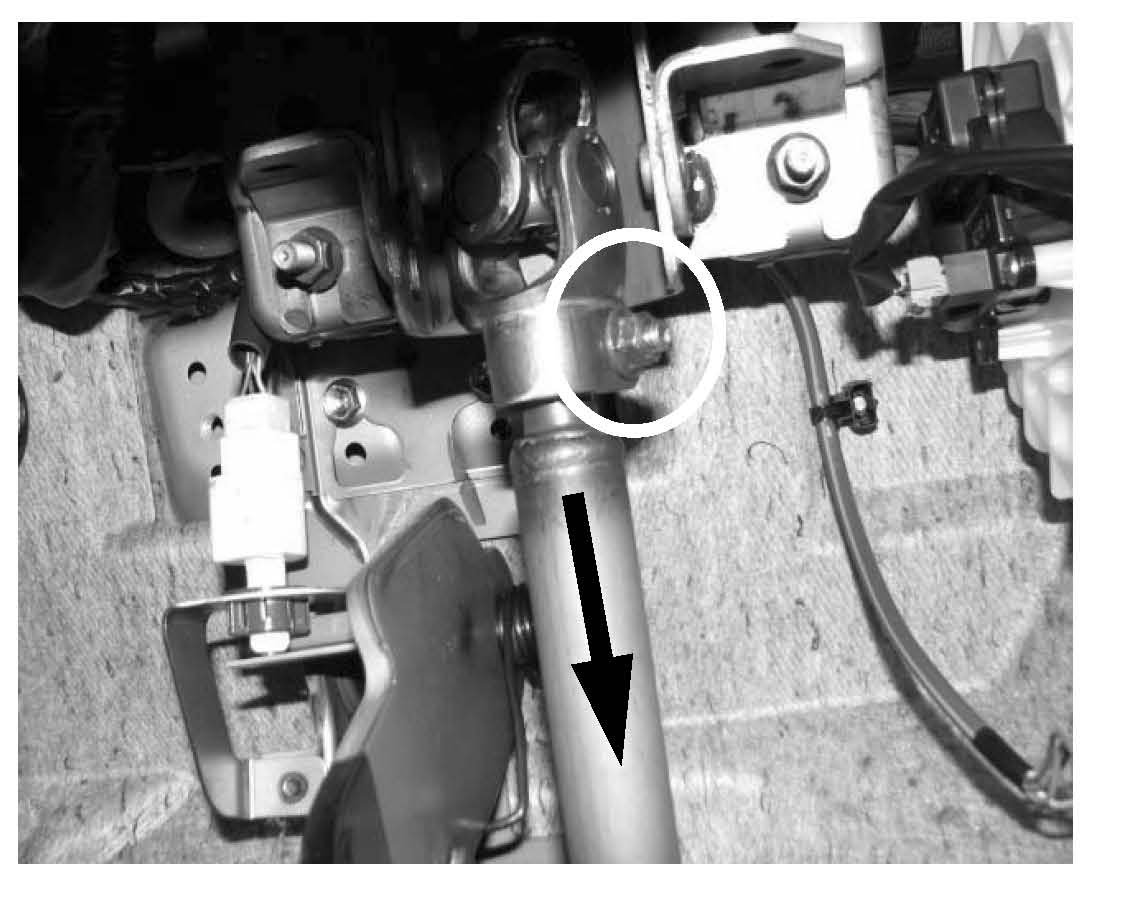
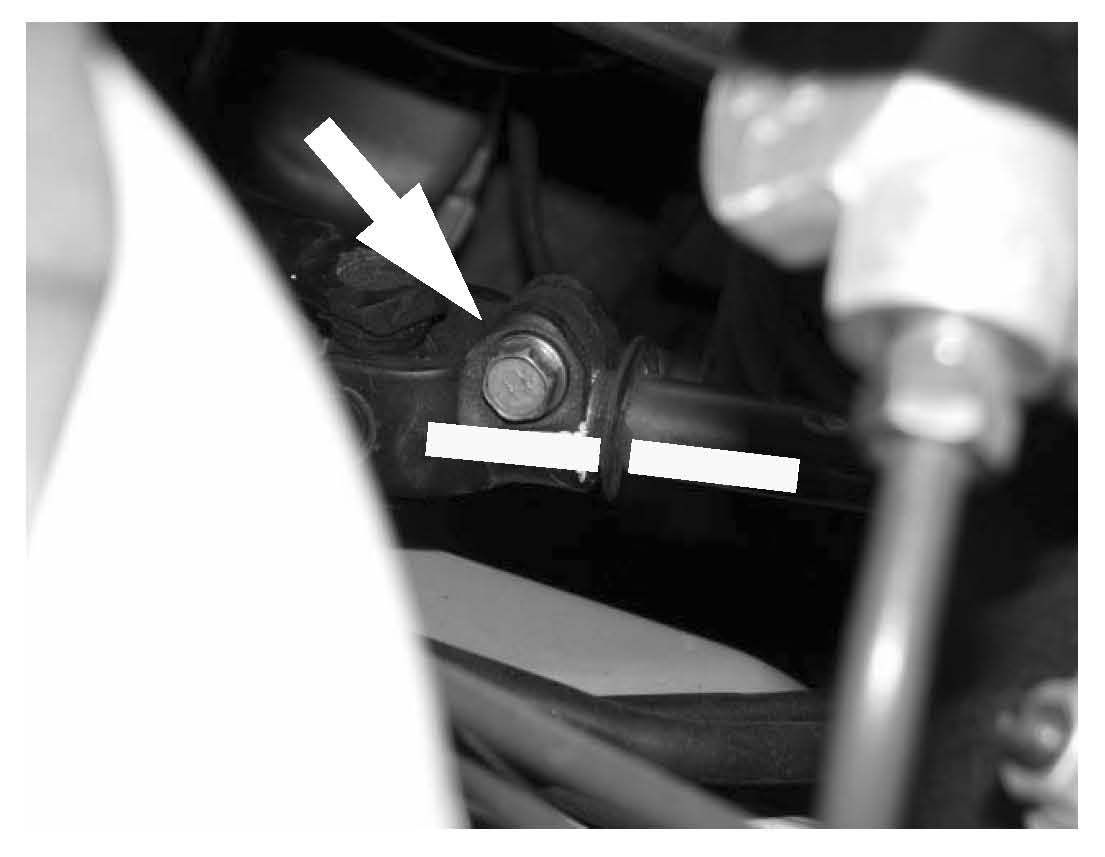
2. In the engine compartment place an index mark on the steering coupling between the middle shaft and the lower shaft U-joint.
NOTE:
This index mark will be used to align the shafts for re-assembly to insure the steering wheel is centered when driving.
CAUTION:
Once the coupling is separated the steering wheel MUST NOT be allowed to rotate more than one inch from center. If the wheel is allowed to turn, damage to the Airbag contact coil cable assembly can occur.
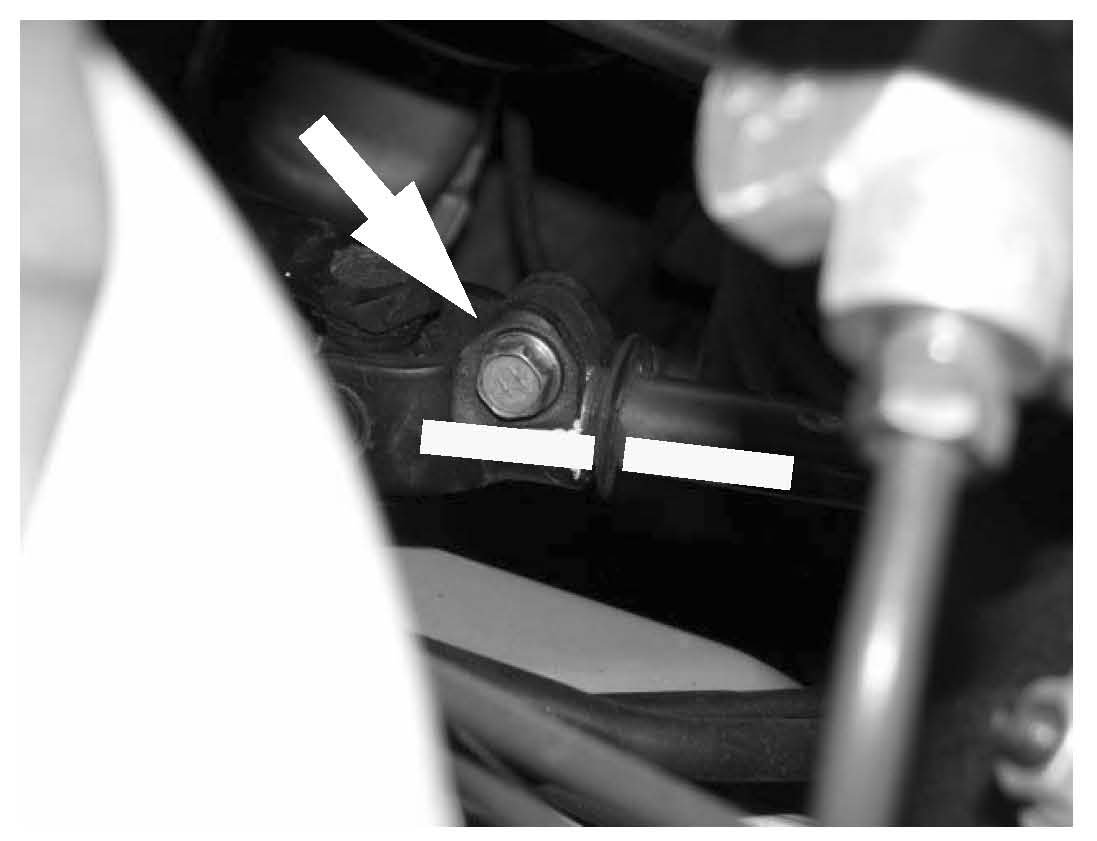
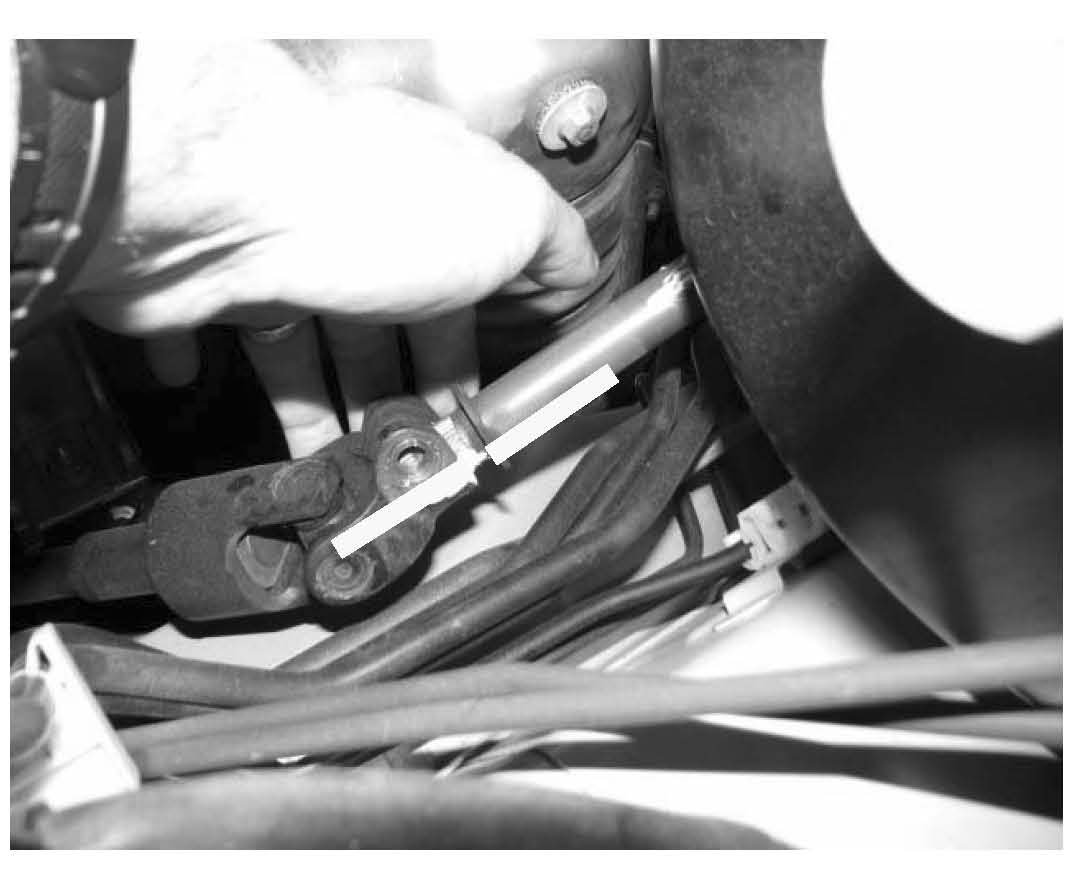
3. Remove the bolt from the U-joint of the lower shaft.
4. Slide the engine side of the middle shaft toward the dash panel to disengage the shaft from the U-joint.
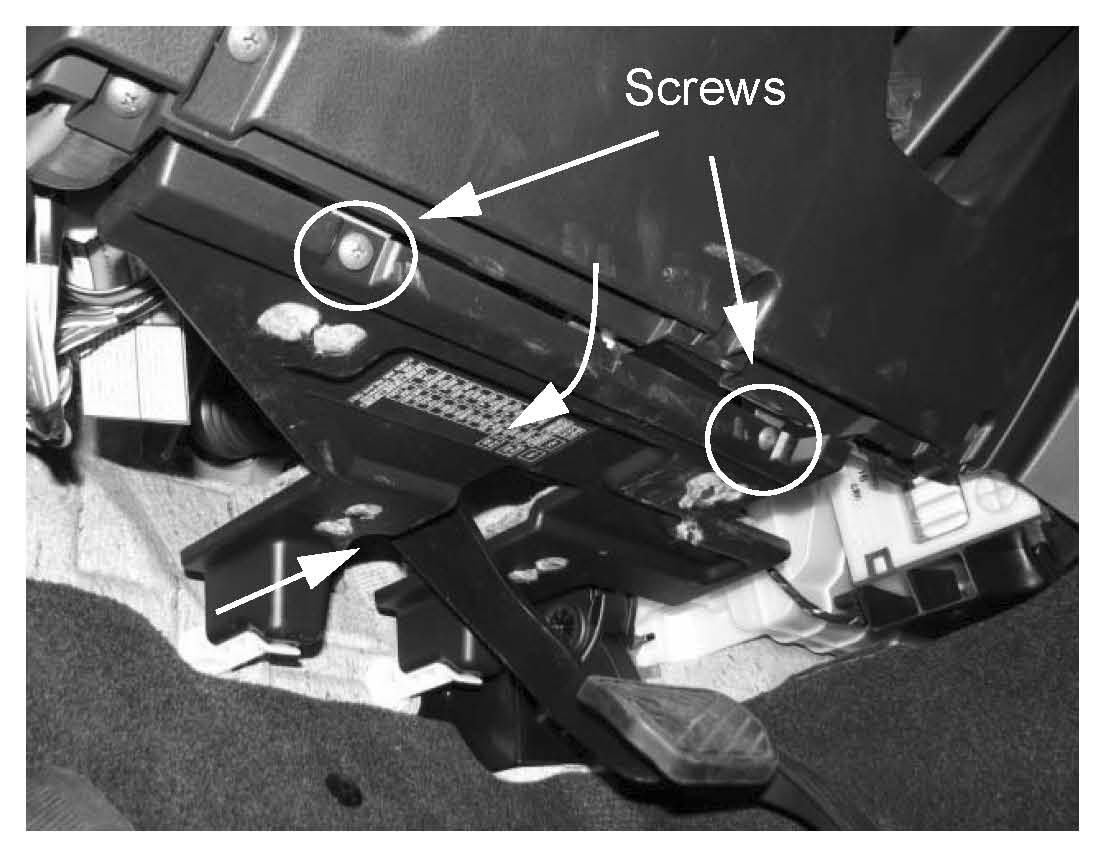
5. Working inside the vehicle under the dash, remove the dash under cover. Remove the two screws then lower the cover and slide it out.
6. Remove the nut and bolt from the column U-joint. Then slide the middle shaft toward the dash panel to disengage the shaft from the U-joint.
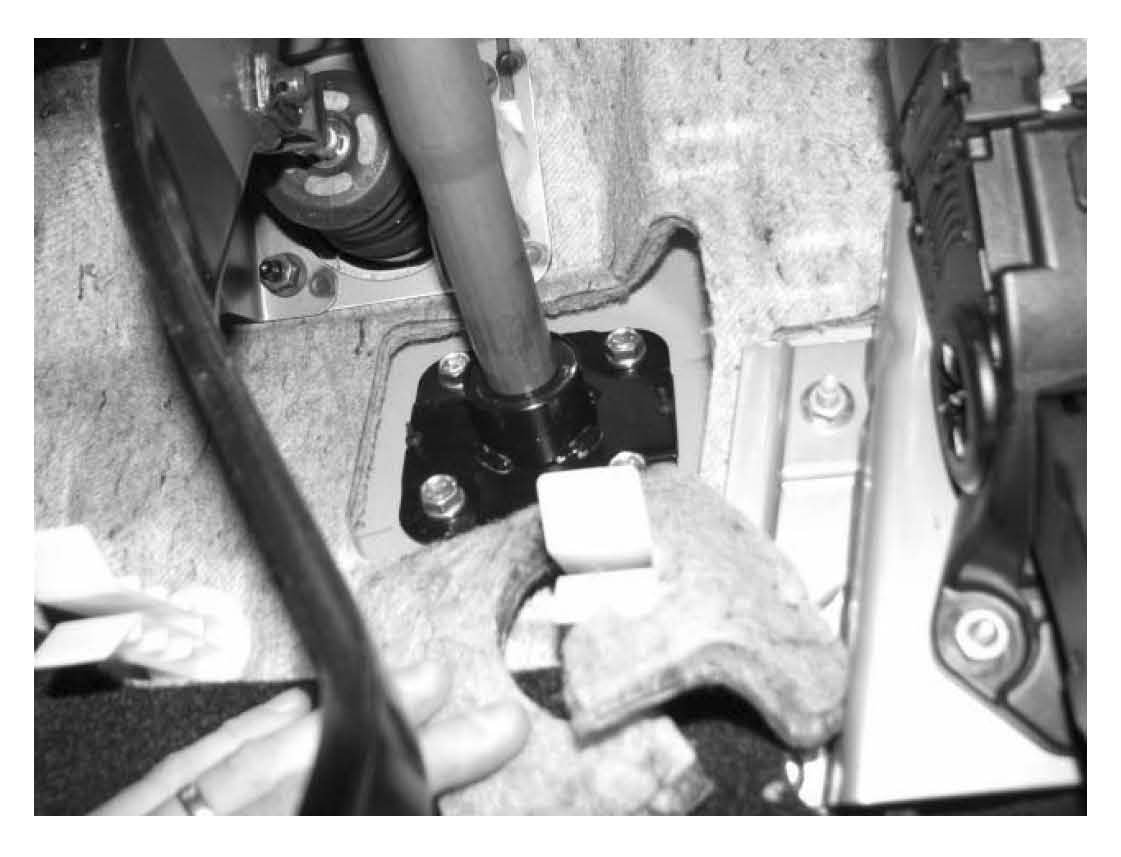
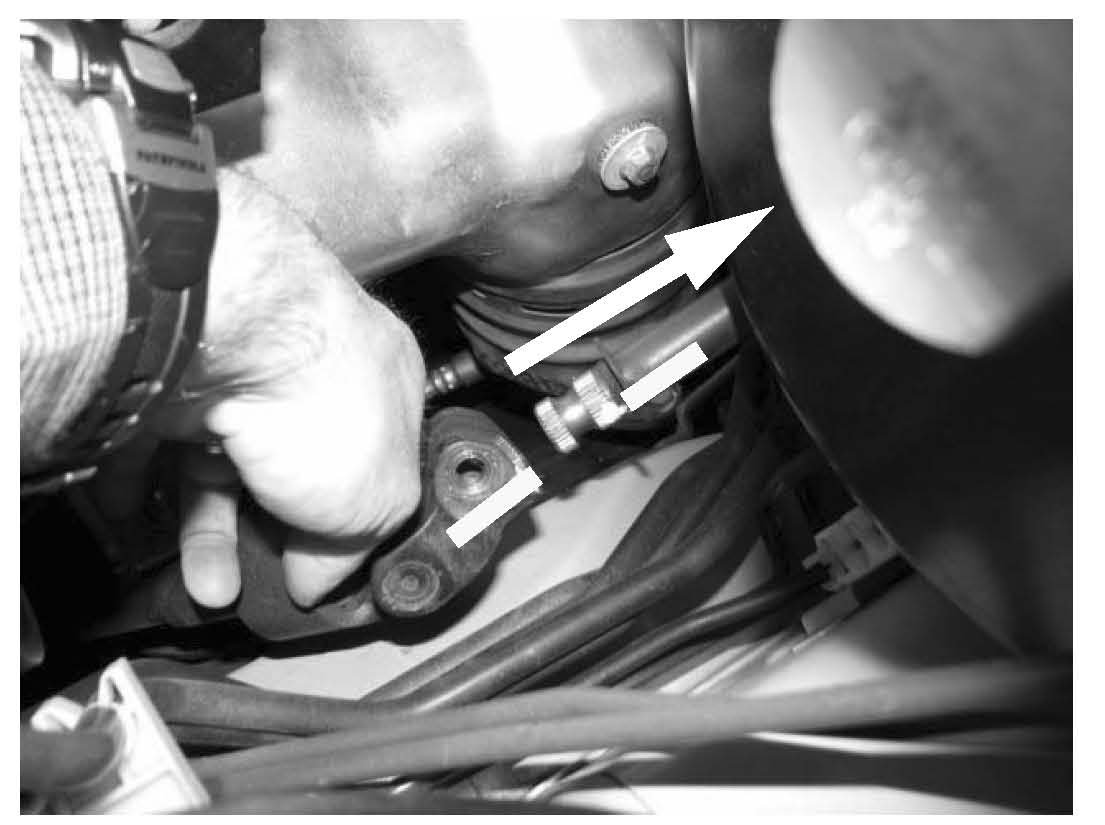
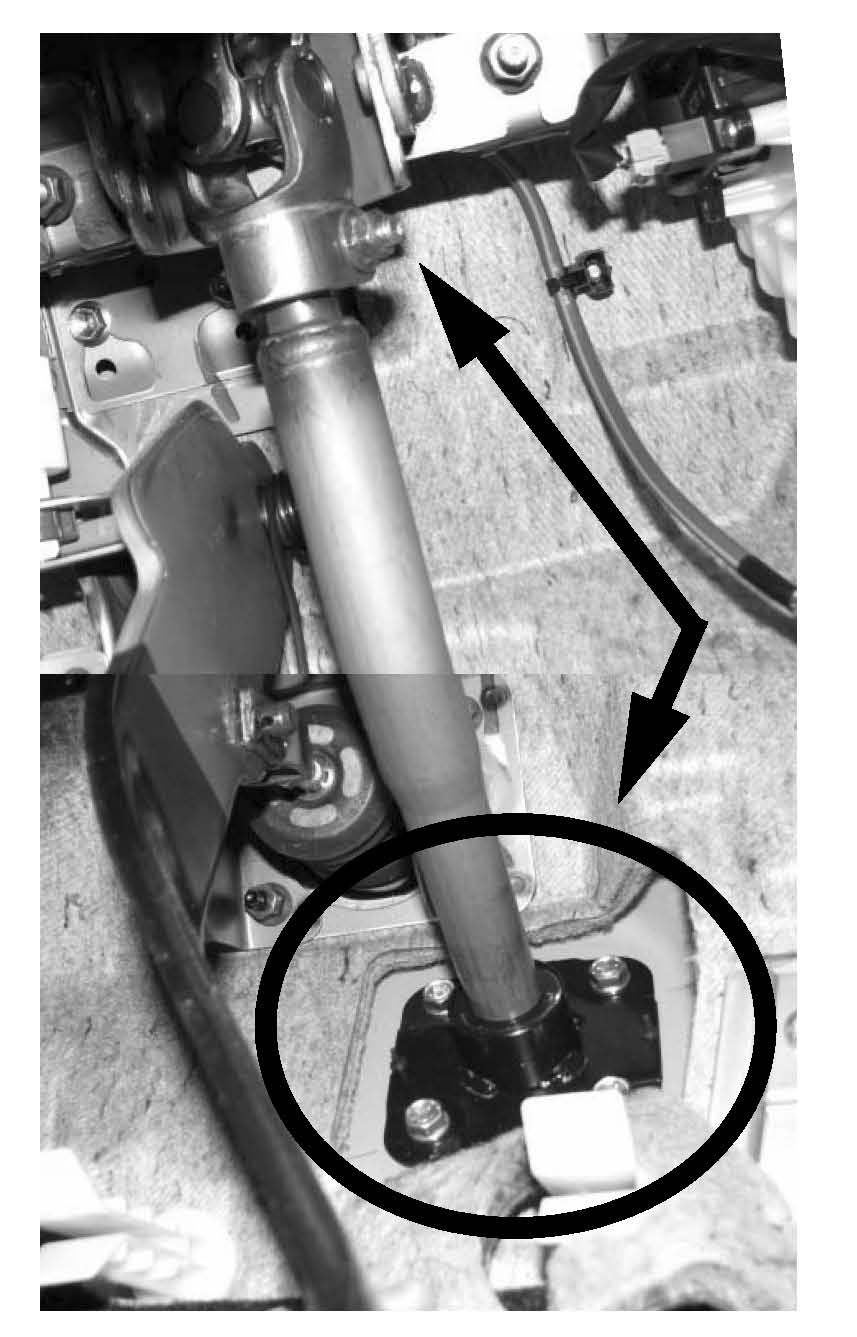
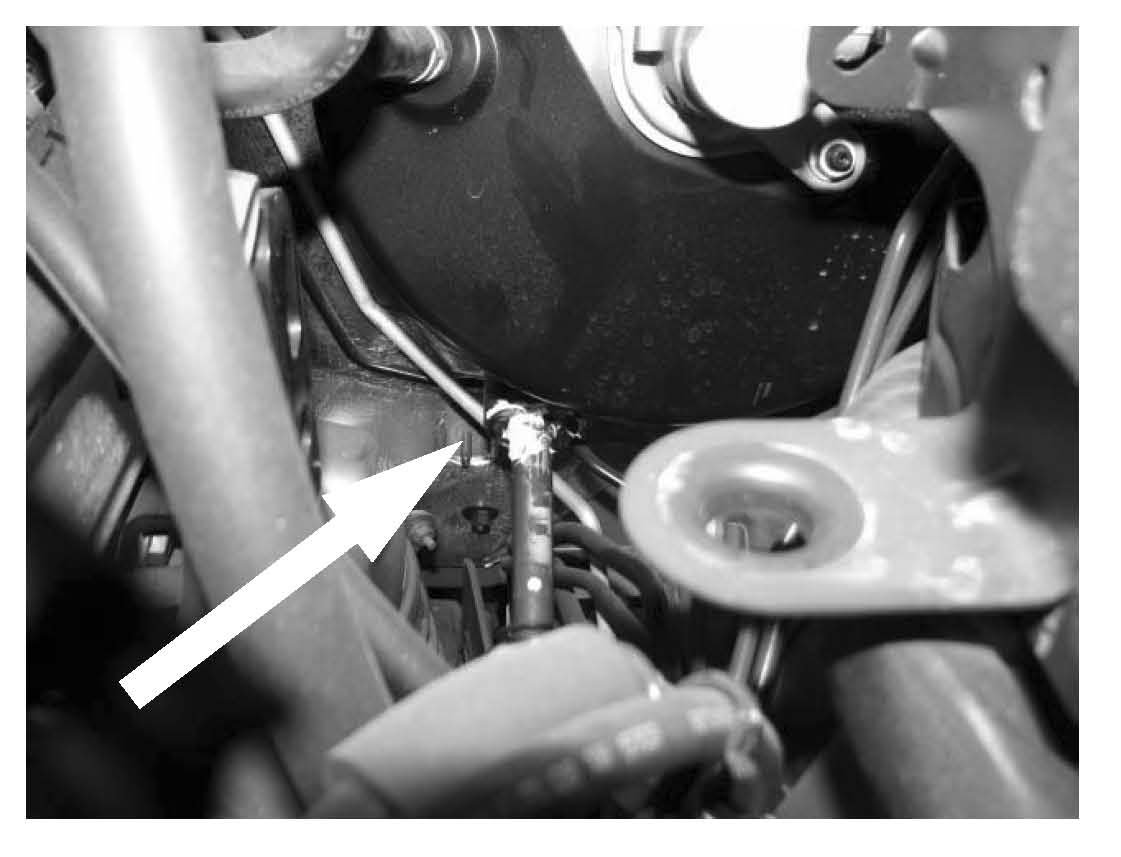
7. At the dash panel uncover the shaft flange by moving the sound insulation away and down from around the middle shaft bearing flange. This section of insulation is pre cut all around accept for the bottom section. This allows uncovering the flange without damaging the insulation.
8. Then remove the four bolts and remove the shaft assembly from the vehicle.

9. On a work bench gently extend the splined shaft until it stops.
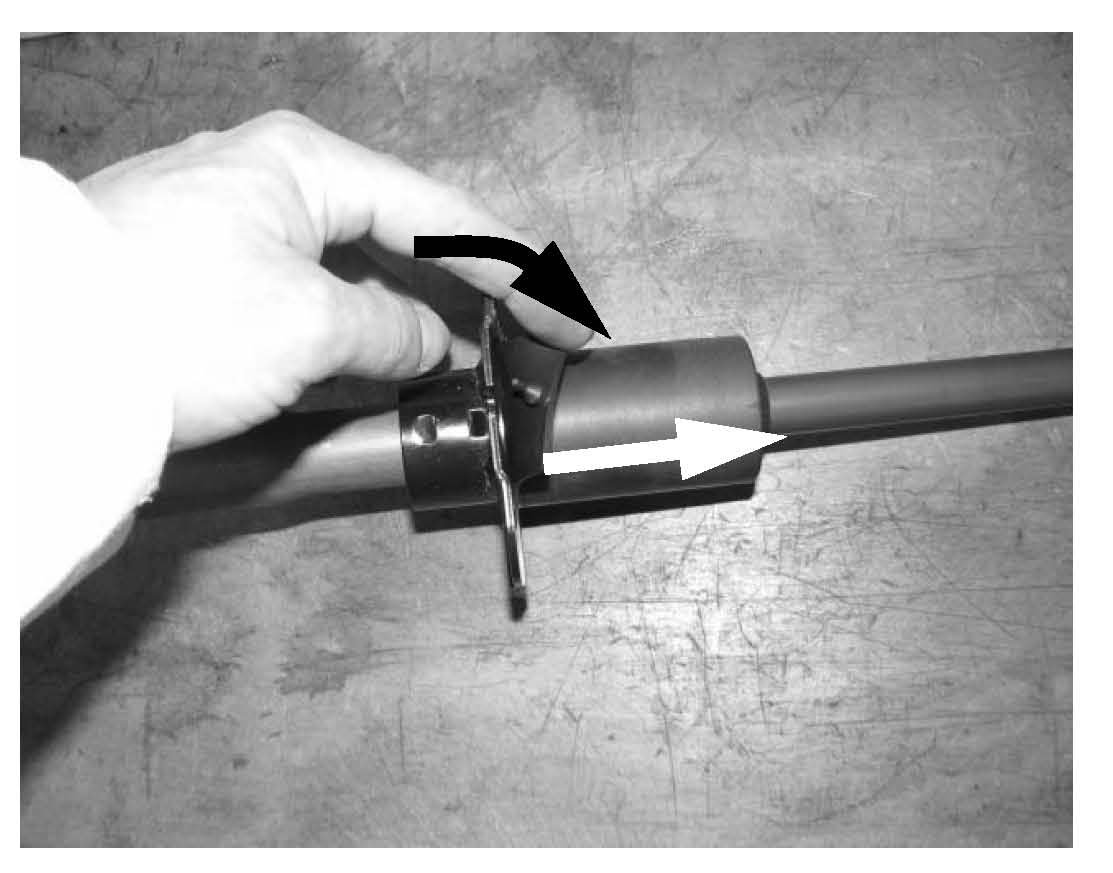
10. Release the two stays of the rubber boot from the flange of the shaft assembly.
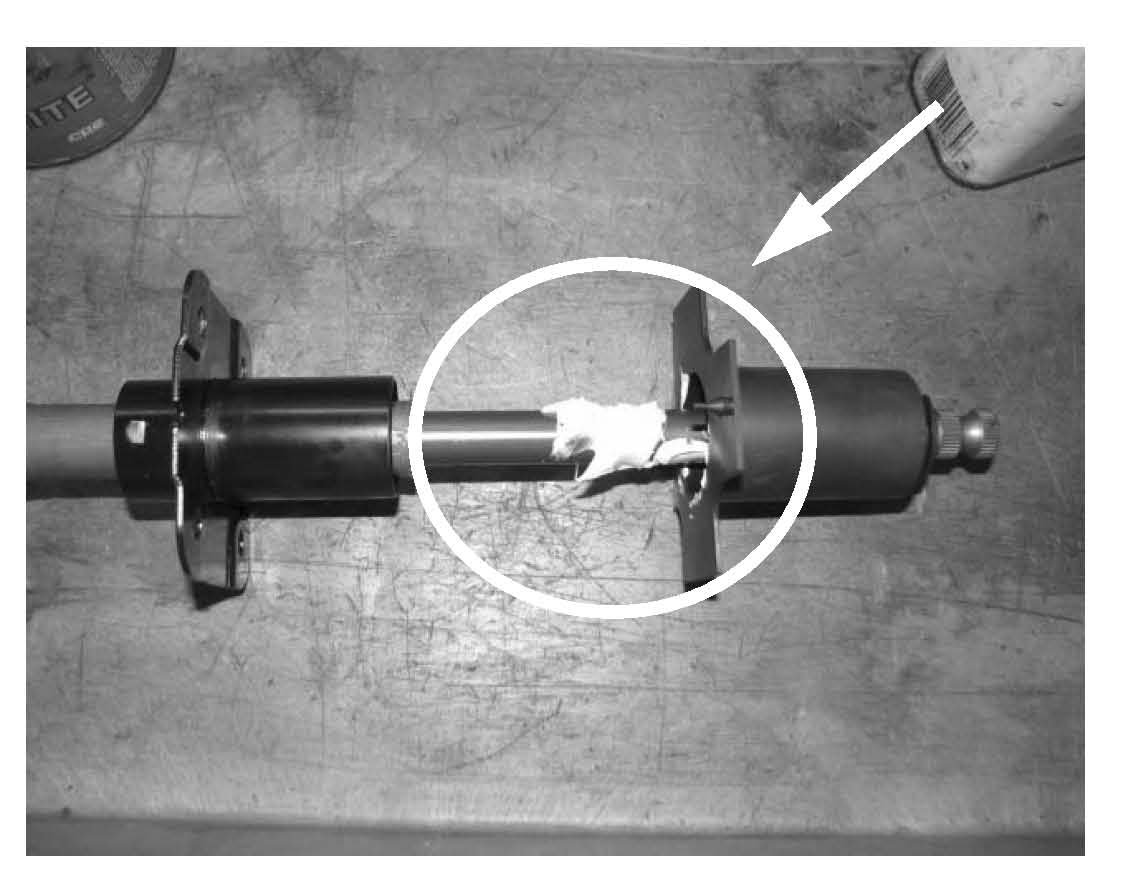
11. Slide the boot as far as possible toward the end of the shaft and apply about a tablespoon of high temp wheel bearing grease around the shaft as shown.
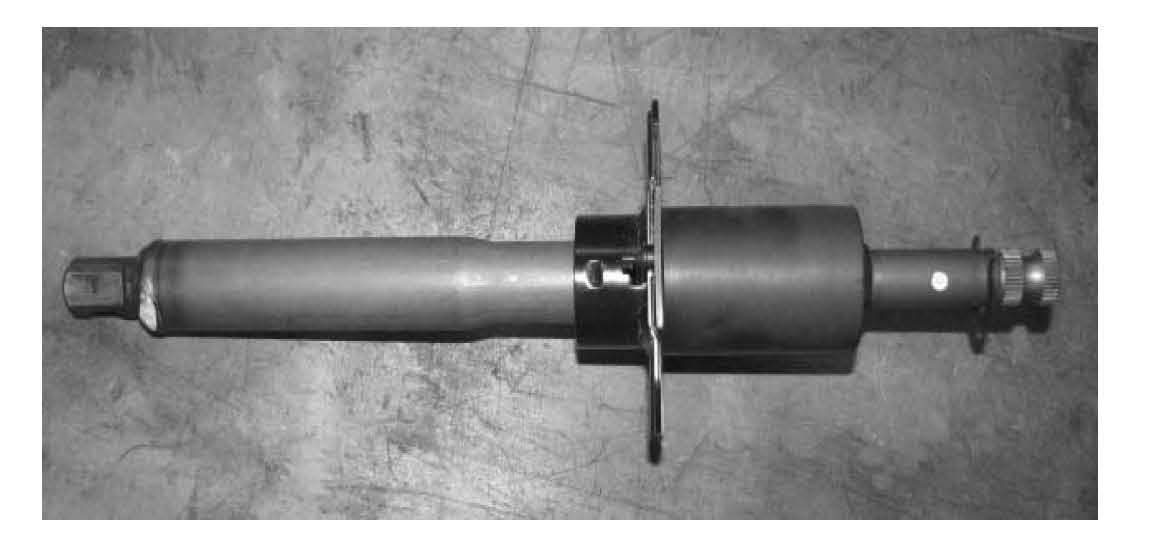
12. Re-attach the boot to the flange and retract the splined shaft back into the assembly.
13. Re-install the middle shaft assembly to the vehicle. Connect and tighten the bolts on the flange and the nut and bolt of the upper U-joint on the interior side of the dash panel. Flange bolts and upper U-joint nut torque 23 Nm (17.0 lb-ft). Re-install the under cover.
14. In the engine compartment align the middle shaft mark with the lower shaft U-joint. Slide the shaft into the U-joint.
NOTE:
It may be required to insert and turn the ignition key to run to unlock the steering wheel.
CAUTION:
Do not allow the steering wheel to turn more than one inch from center; damage to Airbag contact coil cable assembly can occur.
15. Install and tighten the joint bolt to 25 Nm (18.0 lb-ft)
16. Apply a small amount of grease to the middle shaft on the engine compartment side at the end of the boot.
17. Test drive the vehicle to make sure the steering wheel is aligned. If it is not, you will need to re-adjust the middle shaft one spline at time in the appropriate direction at the U-joint connection. (One spline will rotate the steering wheel about an inch.)

Disclaimer