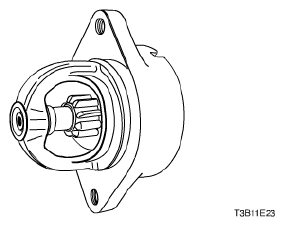
- Remove the starter. Refer to Starter Removal .
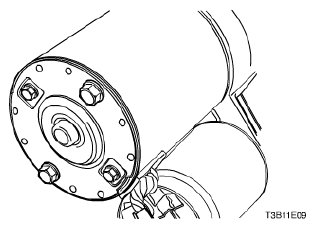
- Remove the starter through-bolts.
 Courtesy of SUZUKI OF AMERICA CORP.
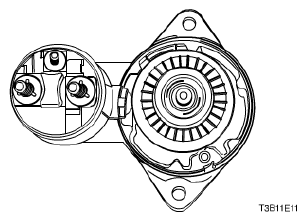
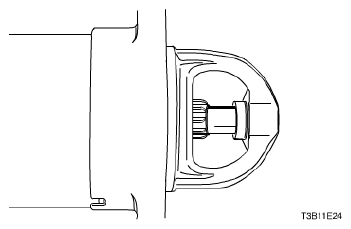
- Remove the commutator end frame and brush holder assembly.
- Inspect the brushes, the pop-out springs, and the brush holders for wear and damage. Replace the assembly, if needed.
 Courtesy of SUZUKI OF AMERICA CORP.
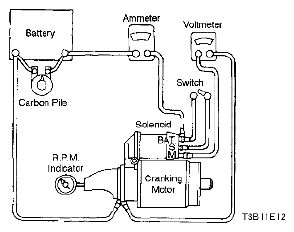
- Check the armature to see if it turns freely. If the armature does not turn freely, break down the assembly immediately, starting with Step 14. Otherwise, give the armature a no-load test.
Courtesy of SUZUKI OF AMERICA CORP.
- To begin the no-load test, close the switch and compare the RPM, the current, and the voltage readings with the specifications. Refer to Starter Specifications . Make disconnections only with the switch open. Use the test results as follows:
CAUTION:
Complete the testing in a minimum amount of time to prevent overheating and damaging the solenoid.
NOTE:
If the specified current draw does not include the solenoid, deduct from the armature reading the specified current draw of the solenoid hold-in winding.
 Courtesy of SUZUKI OF AMERICA CORP.
- Rated current draw and no-load speed indicate a normal condition for the starter motor.
- Low RPM combined with high current draw is an indication of excessive friction caused by tight, dirty, or worn bearings; a bent armature shaft; a shorted armature; or a shorted field coils.
- Failure to operate with high current draw indicates a direct ground in the terminal or fields, or "frozen" bearings.
- Failure to operate with no current draw indicates an open field circuit, open armature coils, broken brush springs, worn brushes, high insulation between the commutator bars, or other causes which would prevent good contact between the brushes and the commutator.
- Low, no-load speed and low current indicate high internal resistance and high current draw, which usually mean shorted fields.
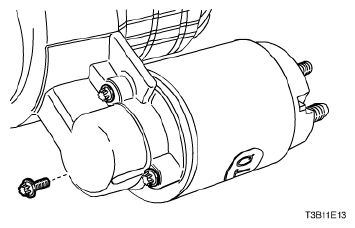
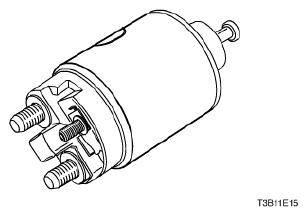
- Remove the solenoid assembly screws.
 Courtesy of SUZUKI OF AMERICA CORP.
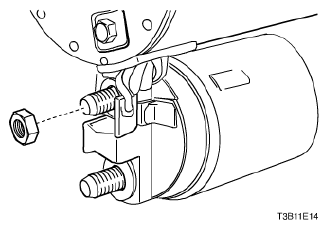
- Remove the field connector nut. Disconnect the field connector.
 Courtesy of SUZUKI OF AMERICA CORP.
- Remove the plunger return spring.
 Courtesy of SUZUKI OF AMERICA CORP.
- Test the solenoid windings by checking the current draw.
NOTE:
If the solenoid is not removed from the starting motor, the connector strap terminals must be removed from the terminal on the solenoid before making these tests.
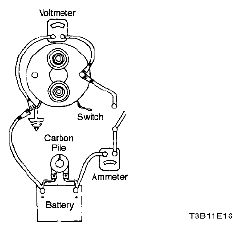
- Check the hold-in windings by connecting an ammeter in series with a 12 V battery, the switch terminal, and to ground.
- Connect the carbon pile across the battery.
- Adjust the voltage to 10 V. The ammeter reading should be 13 - 19 A. Current will decrease as the windings heat up. Current draw readings that are over specifications indicate shorted turns or a ground in the windings of the solenoid. Both conditions require replacement of the solenoid. Current draw readings that are under specifications indicate excessive resistance. No reading indicates an open circuit.
 Courtesy of SUZUKI OF AMERICA CORP.
- Check both windings, connecting them according to the preceding test.
NOTE:
Current will decrease as the windings heat up. Current draw readings that are over specifications indicate shorted turns or a ground in the windings of the solenoid. Both conditions require replacement of the solenoid. Current draw readings that are under specifications indicate excessive resistance. No reading indicates an open circuit.
- Ground the solenoid motor terminal.
- Adjust the voltage to 10 V. The ammeter reading should be 59 - 79 A.
- Check the connections and replace the solenoid, if necessary.
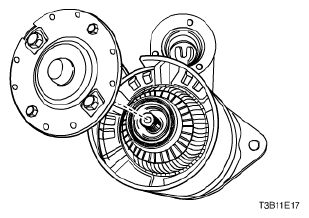
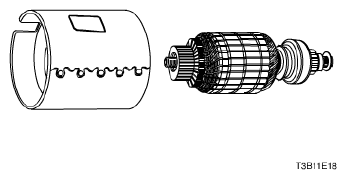
- Slide the field frame with enclosed armature assembly away from the starter assembly.
- Remove the shield.
 Courtesy of SUZUKI OF AMERICA CORP.
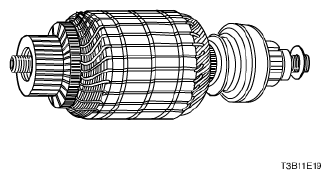
- Separate the field frame from the armature.
 Courtesy of SUZUKI OF AMERICA CORP.
- Inspect the shaft and the pinion for discoloration, damage, or wear. Replace, if necessary.
- Inspect the armature commutator. If the commutator is rough, it should be turned down. The outside diameter of the commutator must measure at least 26.9 - 27.1 mm (1.059 - 1.067 in.) after it is undercut or turned. Do not turn out-of-round commutators.
- Inspect the points where the armature conductors join the commutator bars. Make sure they have a good connection. A burned commutator bar is usually evidence of a poor connection.
- If test equipment is available, check the armature for short circuits by placing it on a growler, and holding back a saw blade over the armature core while the armature is rotated. If the saw blade vibrates, replace the armature.
- Recheck the armature after cleaning between the commutator bars. If the saw blade vibrates, replace the armature.
 Courtesy of SUZUKI OF AMERICA CORP.
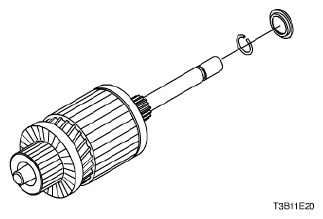
- Remove the locking ring from the groove in the driveshaft.
 Courtesy of SUZUKI OF AMERICA CORP.
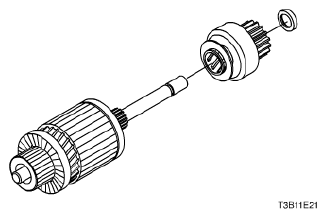
- Remove the pinion stop and the drive from the driveshaft.
 Courtesy of SUZUKI OF AMERICA CORP.
- If not done in the previous steps, remove the screws that hold the solenoid assembly into the housing, and remove the nut from the field coil connector.
Courtesy of SUZUKI OF AMERICA CORP.
- Rotate the solenoid 90° and remove it along with the return spring.
Courtesy of SUZUKI OF AMERICA CORP.
- Remove the plunger with the boot and the shift lever assembly. Test the solenoid windings, if not done in Step 11.
 Courtesy of SUZUKI OF AMERICA CORP.
- When the starter motor is disassembled and the solenoid is replaced, it is necessary to check the pinion clearance.
NOTE:
The pinion clearance must be correct to prevent the buttons on the shift lever yoke from rubbing on the clutch collar during the cranking.
 Courtesy of SUZUKI OF AMERICA CORP.
- Disconnect the motor field coil connector from the solenoid motor terminal and carefully insulate the connector.
- Connect one 12 V battery lead to the solenoid switch terminal and the other to the starter frame.
- Flash a jumper lead momentarily from the solenoid motor terminal to the starter frame, allowing shifting of the pinion in the cranking position, where it will remain until the battery is disconnected.
- Push the pinion back as far as possible to take up any movement, and check the clearance with a feeler gauge. The clearance should be 0.25 - 3.56 mm (0.01 - 0.14 in.).
NOTE:
A means for adjusting the pinion clearance is not provided on the starter motor. If the clearance does not fall within the limits, check for improper installation and replace all worn parts.
 Courtesy of SUZUKI OF AMERICA CORP.