Disassembly Procedure
 Courtesy of GENERAL MOTORS CORP.
- Raise and suitably support the vehicle. Refer to Lifting and Jacking the Vehicle
in General Information.
- Remove the rear axle and secure the axle to a workbench. Refer to Rear Axle Replacement .
- In order to remove the bushings, warm the rear axle in the area of the bushings to approximately 50-75°C (122-158°F) using an industrial hot air dryer.
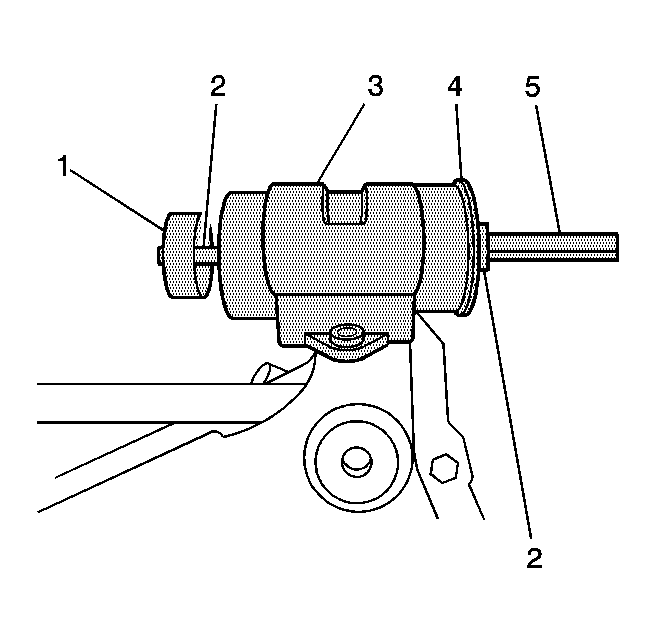
- Using J 29376-A
, place the housing (3) on the rear axle. See Special Tools .
- Using J 21474-01
and J 29376-A
, perform the following procedures. See Special Tools .
- Slide the J 21474-19
(2) through the J 29376-6-A bushing remover (1). See Special Tools .
- Slide the J 21474-19
through the rear control arm bushing. See Special Tools .
- Slide the J 21474-19
through the J 29376-7
(4). See Special Tools .
- Install the J 21474-18
(5). See Special Tools .
- Partially remove the bushing by holding the J 21474-19
and turning the J 21474-18
. See Special Tools .
- Remove the bushing completely by striking the J 29376-6-A bushing remover (1) with KM-266-A
. See Special Tools .