Terminal Removal Procedure
- Disconnect the connector from the component or separate the connector halves for in-line connectors.
 Courtesy of GENERAL MOTORS CORP.
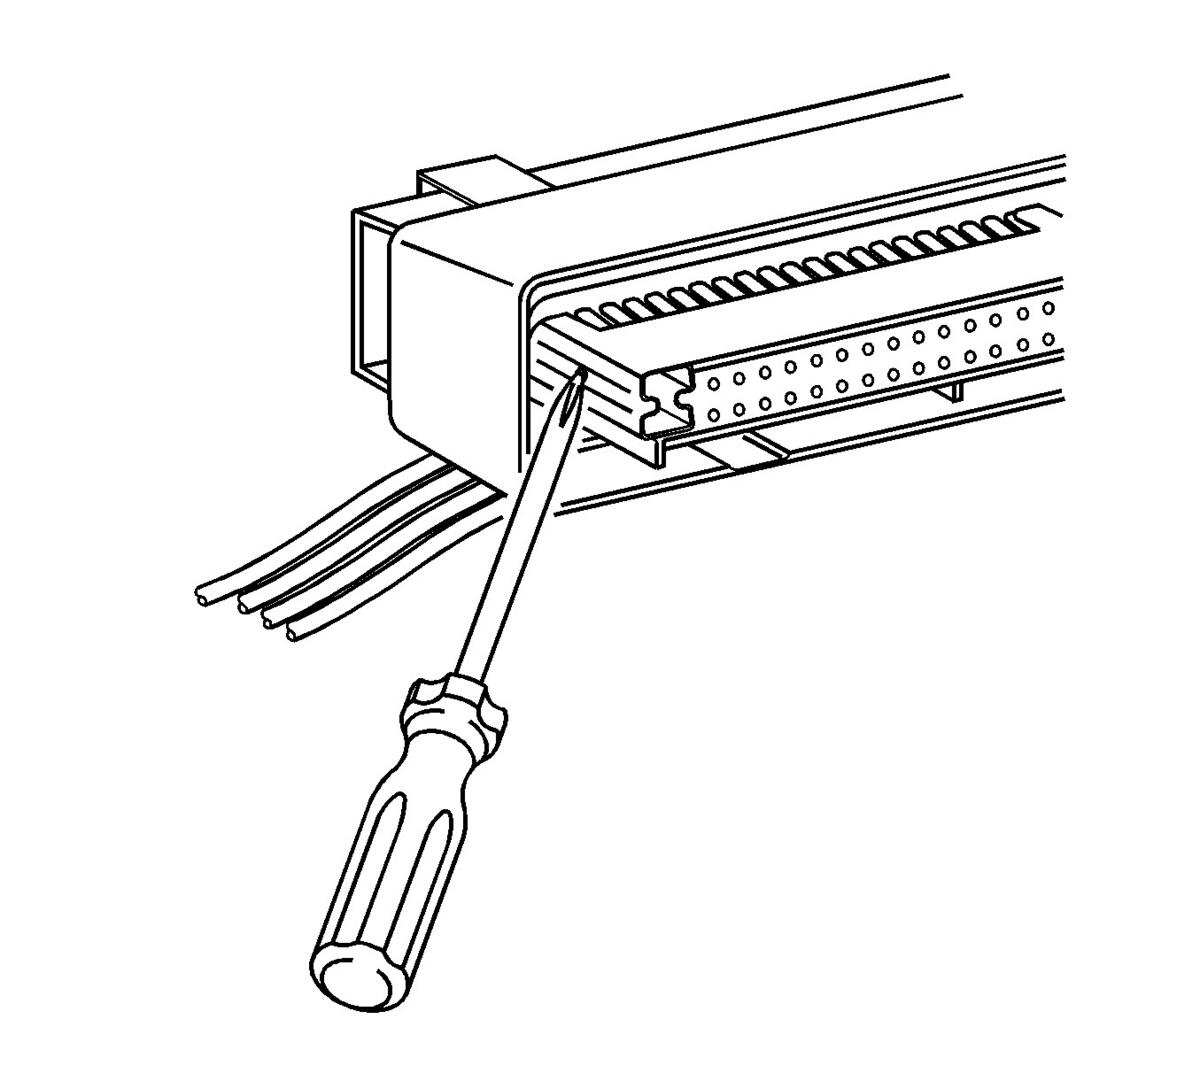
- Locate the nose piece locking tabs that are positioned on the side of the connector nose piece.
 Courtesy of GENERAL MOTORS CORP.
- Use a small flat-bladed tool to push in one of the locking tabs while gently pushing on the same side of the nose piece.
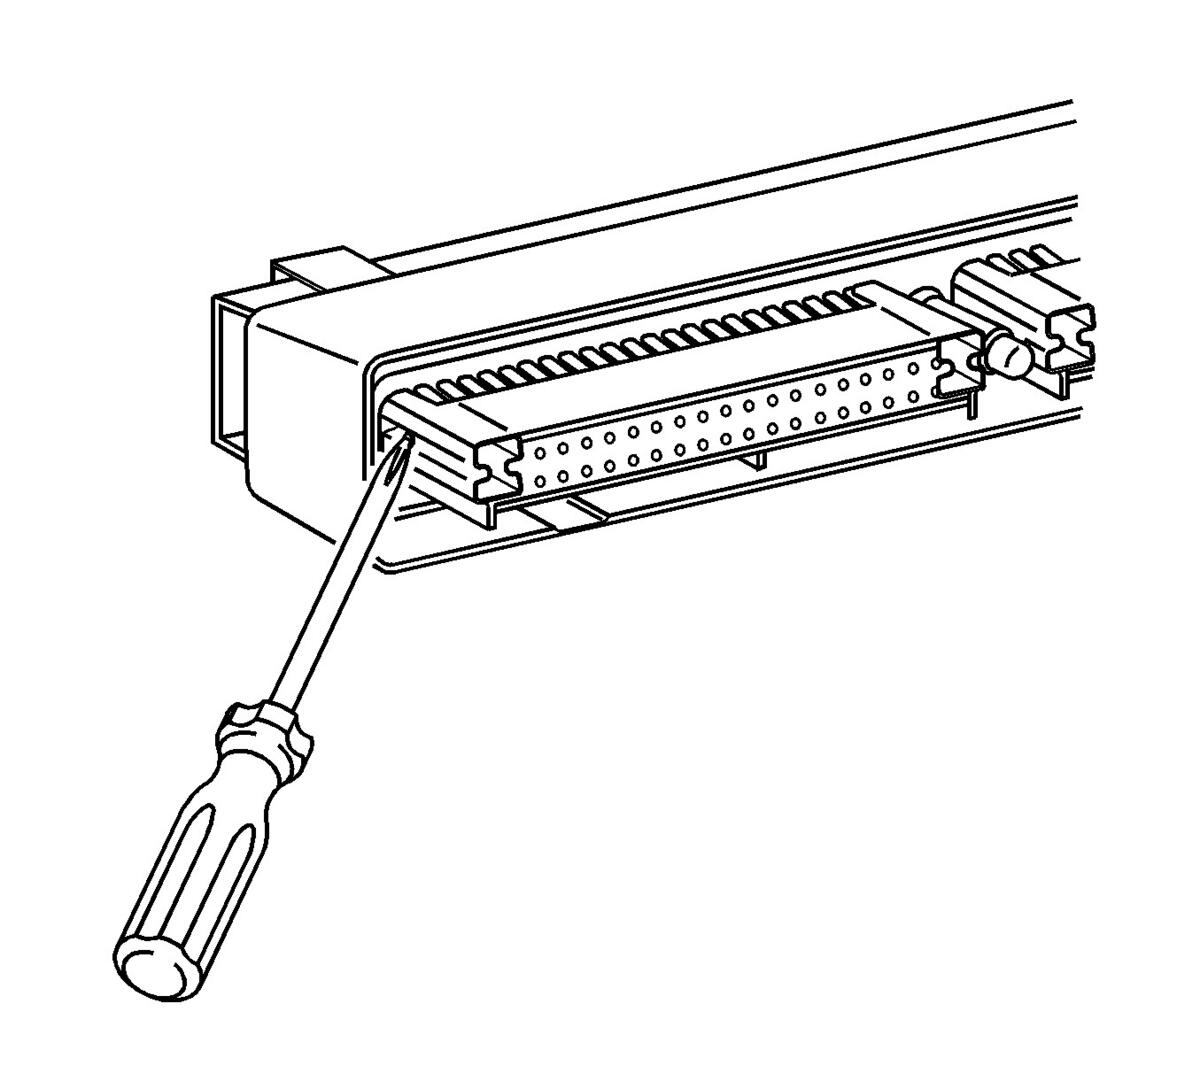
- Repeat the procedure for the other locking tab and remove the nose piece.
- Remove the wire dress cover. The following is a general procedure for wire dress cover removal. Use this procedure as a guide, some dress cover removal procedures may vary.
 Courtesy of GENERAL MOTORS CORP.
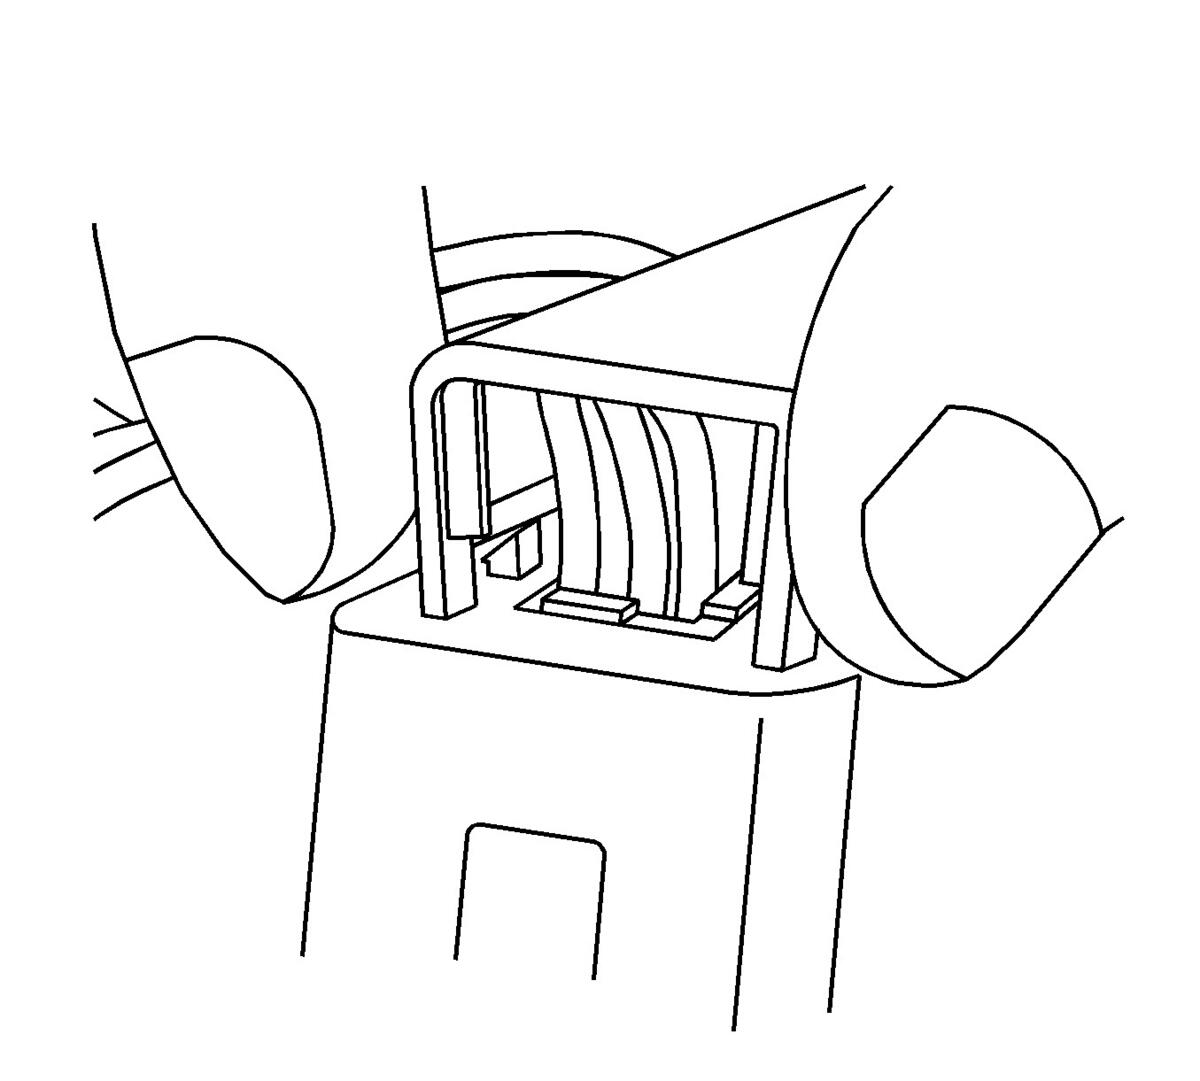
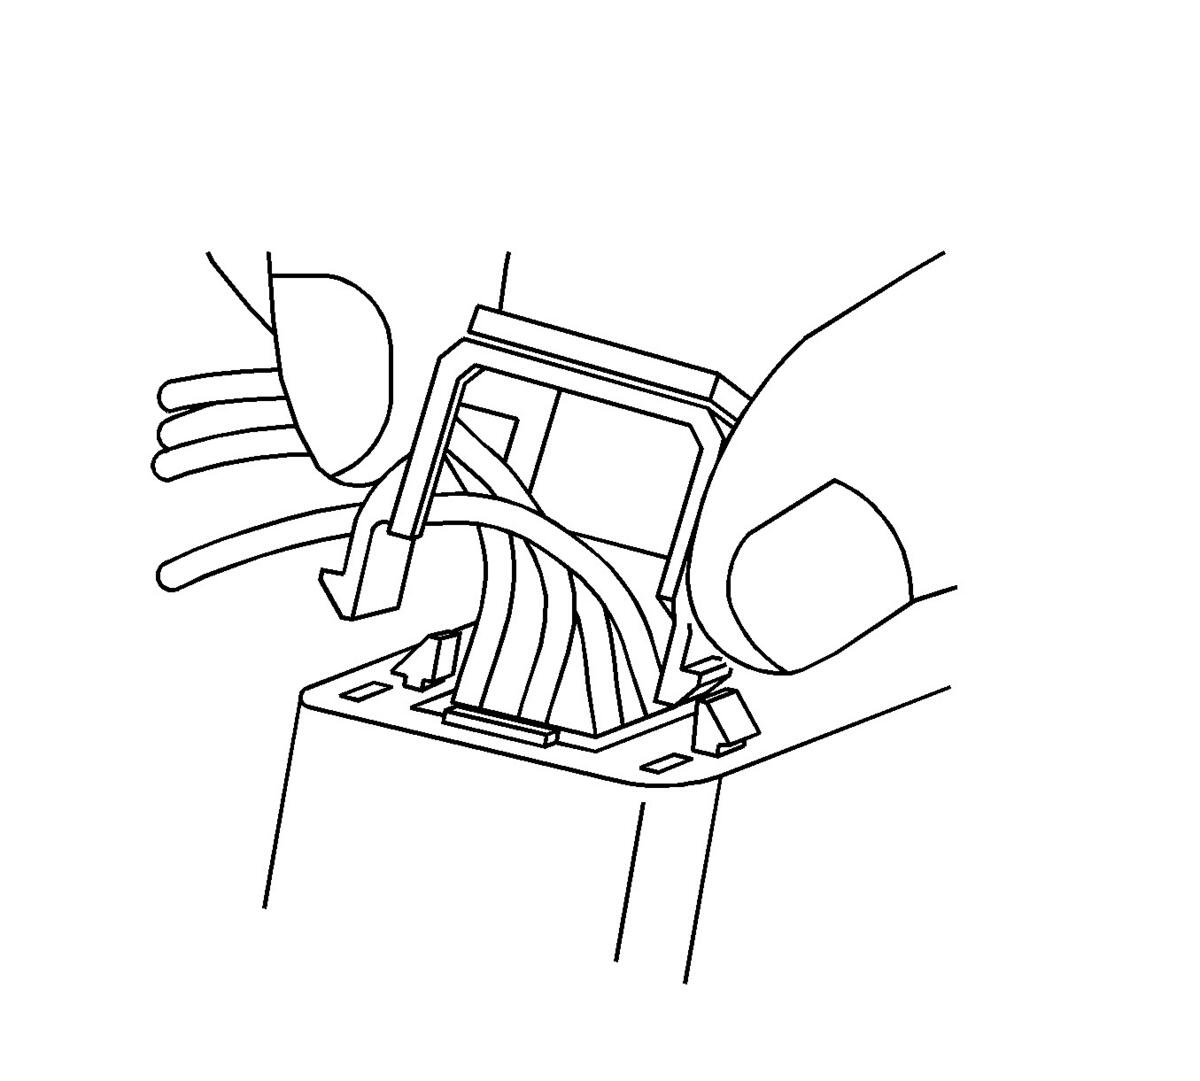
- Use fingers to squeeze the 2 locking legs of the cover.
 Courtesy of GENERAL MOTORS CORP.
- Apply pressure and gently rock the cover until one locking leg is unseated.
 Courtesy of GENERAL MOTORS CORP.
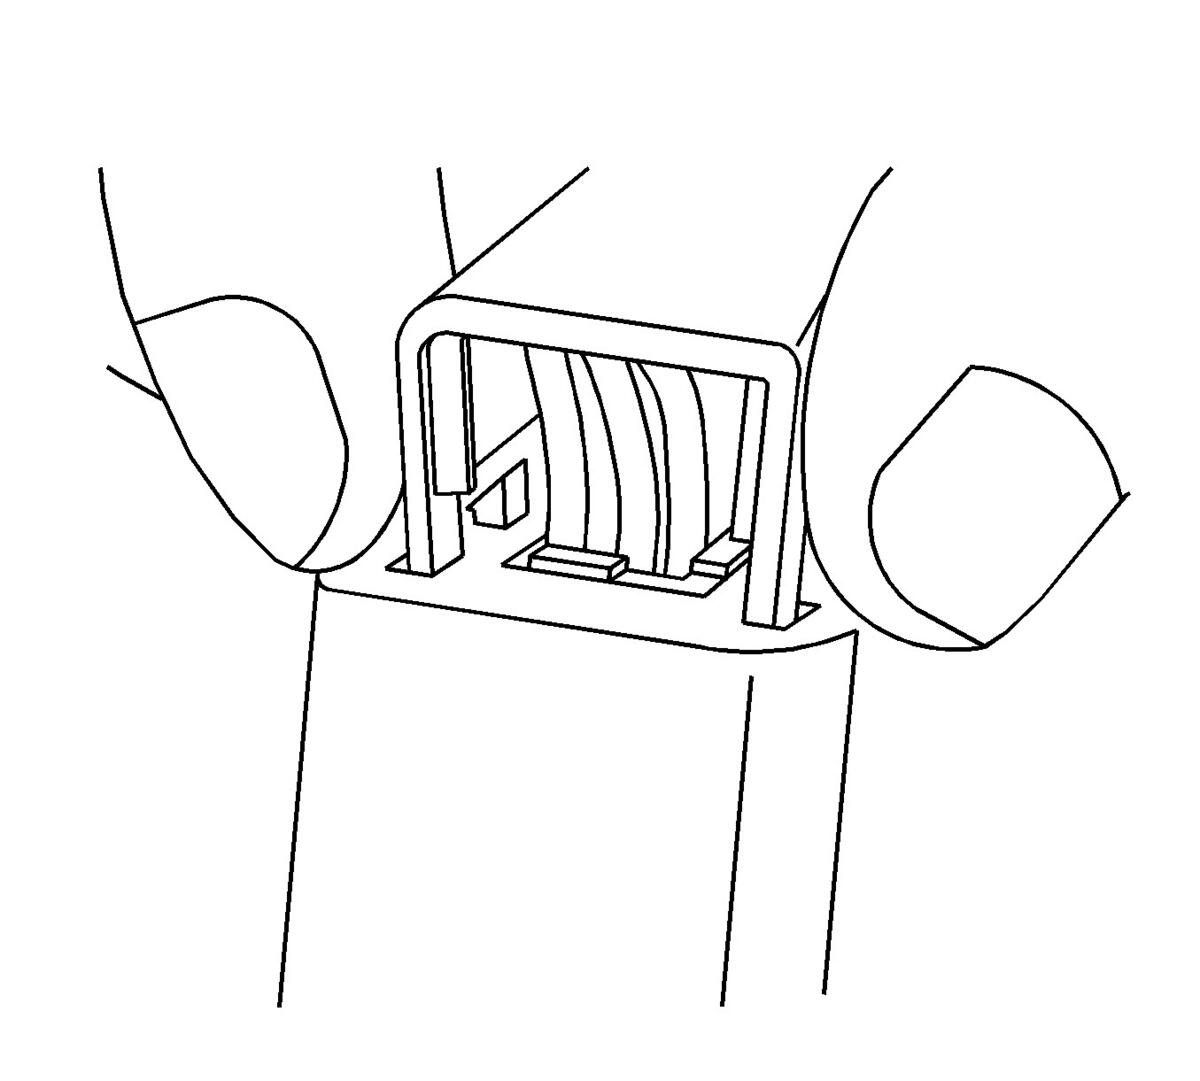
- Continue to apply pressure and rock the cover until the second locking leg is unseated. Repeat procedure for the other side of the dress cover and remove the cover.
 Courtesy of GENERAL MOTORS CORP.
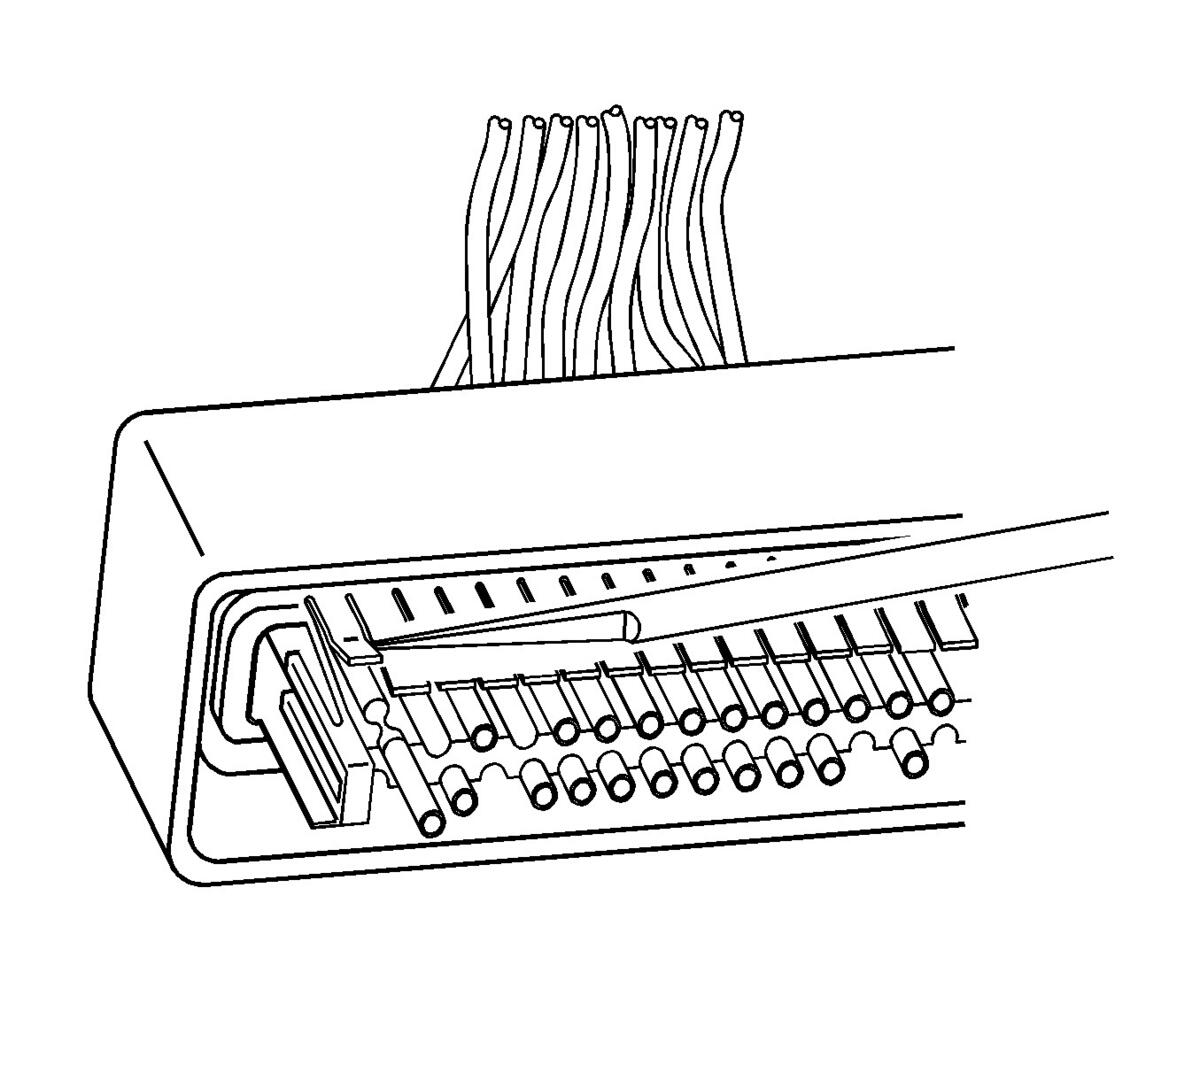
- Use a small flat-bladed tool to gently lift the terminal retaining tab while gently pulling the wire out of the back of the connector. Always remember never use force when pulling a terminal out of a connector. If the terminal is severely bent or damaged, push the wire out of the front of the connector instead of pulling it through. This will prevent damage to the internal seals of the connector. Once the terminal is pushed out of the connector, cut the wire as close to the terminal as possible and pull the wire through the connector.