Strut Assembly Removal and Installation: Removal
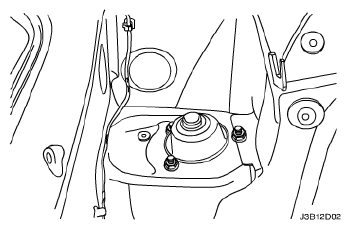
- Remove the trunk carpeting that covers the rear strut mounting nuts. For station wagons, remove the panels that cover the luggage compartment wheelhouse trim panel (wagon). Refer to LUGGAGE COMPARTMENT WHEELHOUSE TRIM PANEL REMOVAL AND INSTALLATION
.
 Courtesy of SUZUKI OF AMERICA CORP.
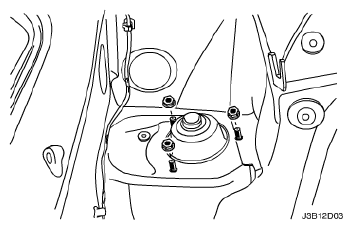
- Remove the rear strut mounting nuts.
 Courtesy of SUZUKI OF AMERICA CORP.
- Raise and suitably support the vehicle.
- Remove the wheel. Refer to WHEEL REMOVAL AND INSTALLATION
.
- Disconnect the parking brake. Refer to PARKING BRAKE CABLE REMOVAL AND INSTALLATION
.
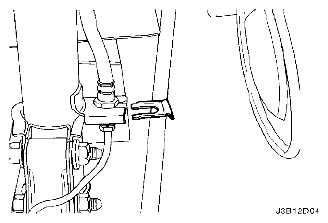
- Remove the clip that holds the brake hose to the strut assembly.
 Courtesy of SUZUKI OF AMERICA CORP.
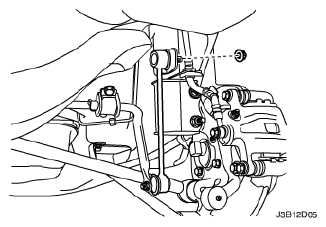
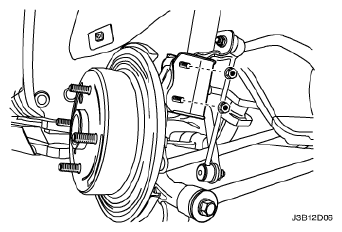
- Remove the stabilizer link-to-strut assembly nut and disconnect the stabilizer link from the strut assembly.
 Courtesy of SUZUKI OF AMERICA CORP.
- Remove the knuckle-to-strut assembly nuts and the bolts.
- On vehicles equipped with rear drum brakes, lower the strut assembly and separate the brake line from the strut assembly.
 Courtesy of SUZUKI OF AMERICA CORP.
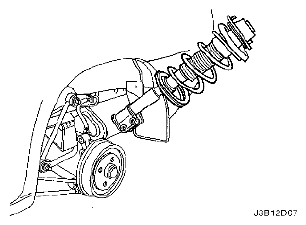
- Remove the rear strut assembly from the vehicle.
 Courtesy of SUZUKI OF AMERICA CORP.