Control Arm Removal and Installation: Removal
- Raise and suitably support the vehicle. Let the control arms hang free.
- Remove the wheel. Refer to WHEEL REMOVAL AND INSTALLATION
.
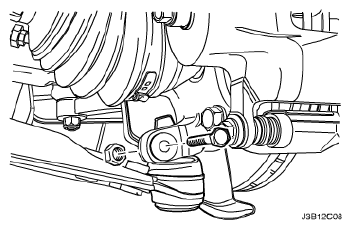
- Remove the pinch bolt and the nut from the ball joint.
- In case of right-hand side, remove the engine mounting.
 Courtesy of SUZUKI OF AMERICA CORP.
- Disconnect the ball joint from the knuckle assembly using the ball joint remover KM-507-B.
 Courtesy of SUZUKI OF AMERICA CORP.
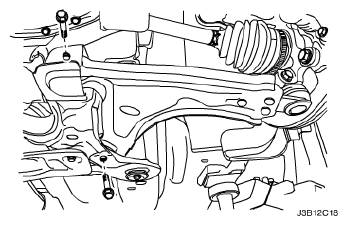
- Remove the control arm-to-crossmember bolts.
- Remove the control arm from the vehicle.
 Courtesy of SUZUKI OF AMERICA CORP.