Deadner Repair
- Remove the related parts.
- Seats, carpet.
- Trims, others.
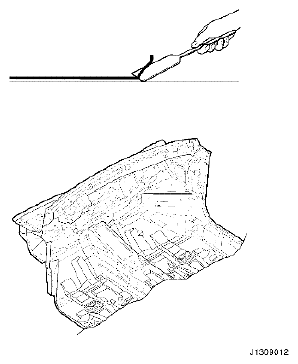
- Removal of the damaged deadner.
- Peel off the damaged deadner with a steel spatula, carefully.
- Clean and dry.
- Before applying the deadner, thoroughly clean and dry the areas to be applied.
- Prelocation the new deadner on the panels to be applied.
 Courtesy of SUZUKI OF AMERICA CORP.
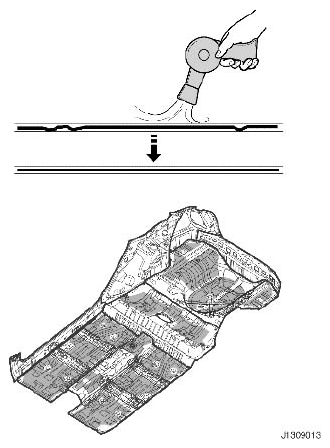
- Adherence of deadner.
- Heat the surface of deadner with a torch or heating gun unit it adheres itself.
- Push and adhere to the panel with a rubber spatula.
 Courtesy of SUZUKI OF AMERICA CORP.
- Install the related parts.
- Install in the reverse order in which they were removed.
 Courtesy of SUZUKI OF AMERICA CORP.