Campaign MW - ESP(R) Wiring Harness Modification
GRAND VITARASection Title: Brake System
TSB No. TS 08 09267
Division: Automotive
Category: Technical
SUBJECT:
CUSTOMER SATISFACTION CAMPAIGN "MW", MODIFIED HARNESS INSTALLATION
MODEL(S):
RAND VITARA (JB627) MANUAL TRANSMISSION ONLY
YEAR:
2006
AFFECTED VIN(S):
2WD: J53TE941_64100001~J53TE941_64103733
4WD: J53TD941_641 00005~JS3TD941_64104048
CONDITION:
ESP(R) will be disabled with no warning if a reverse lamp burns out. If certain test conditions are met the ESP(R) light will be ON and DTC C1050 (Back Switch Failure) will be in memory.
CAUSE:
The original design ESP(R) controller uses the back-up light circuit on the manual transmission vehicles to normally disengage the ESP(R) when the vehicle is reversed. This circuit is not checked during a self diagnostic. Therefore a burned out bulb will cause a change in the circuit that signifies the vehicle is in reverse disabling the ESP� without warning. When the ESP(R) is disabled no warning light will illuminate unless certain driving conditions are met.
CORRECTION:
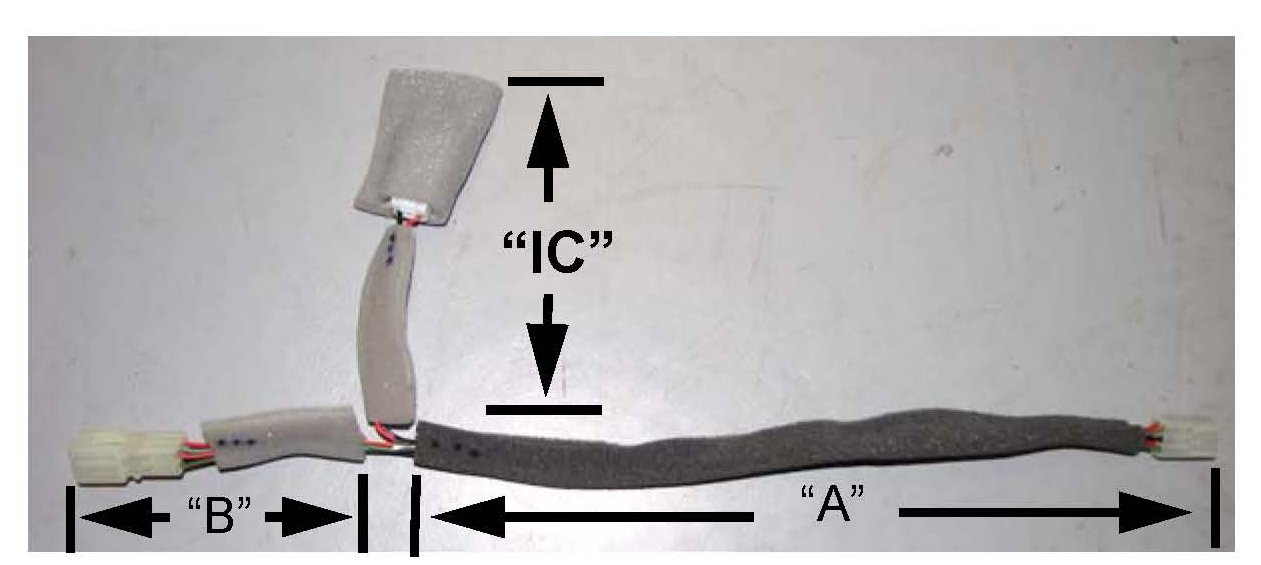
A sub harness which contains a resistor to simulate the correct circuit electrical value in case a bulb is burned out needs to be added. Please install Joint Harness 56500-65J00 on all vehicles in the affected VIN range. Use the attached instructions for installation.
WARRANTY:
Please refer to the Campaign Bulletin SC-40 for claim submission instructions and labor times.

PART(S) INFORMATION:
Installation Procedure:
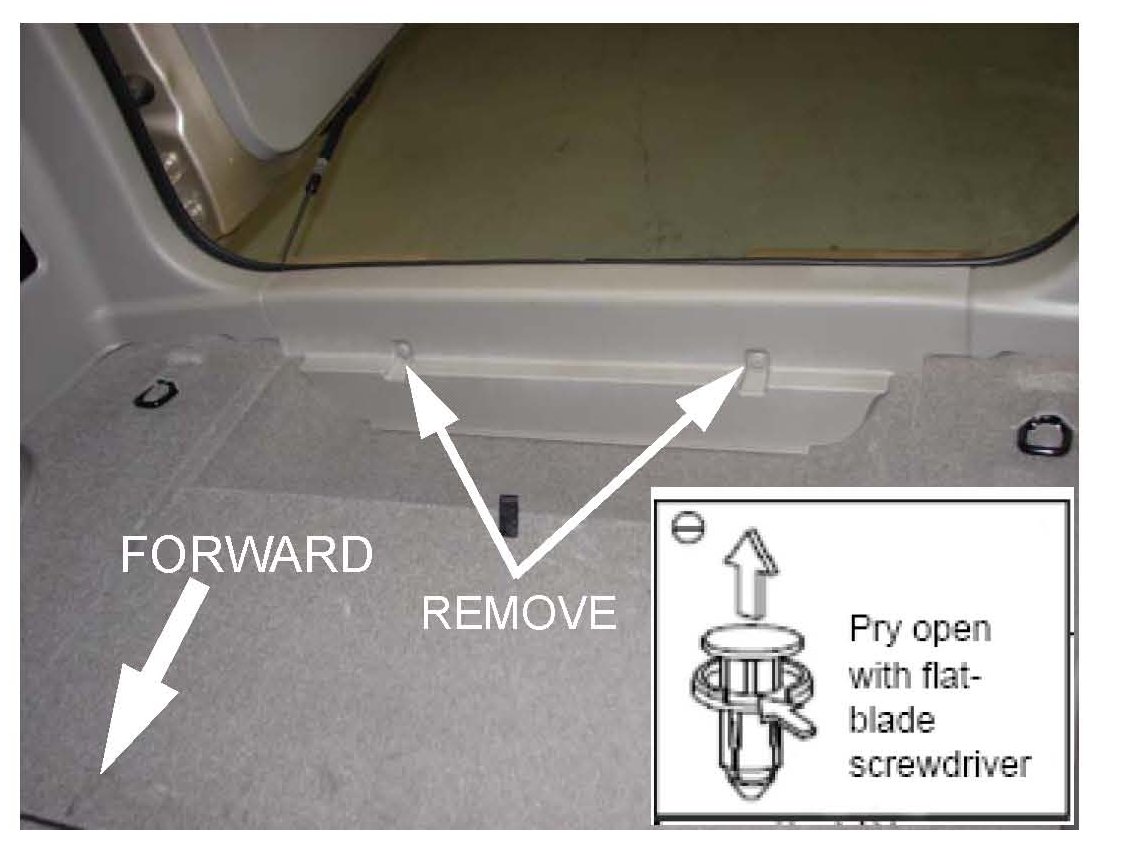
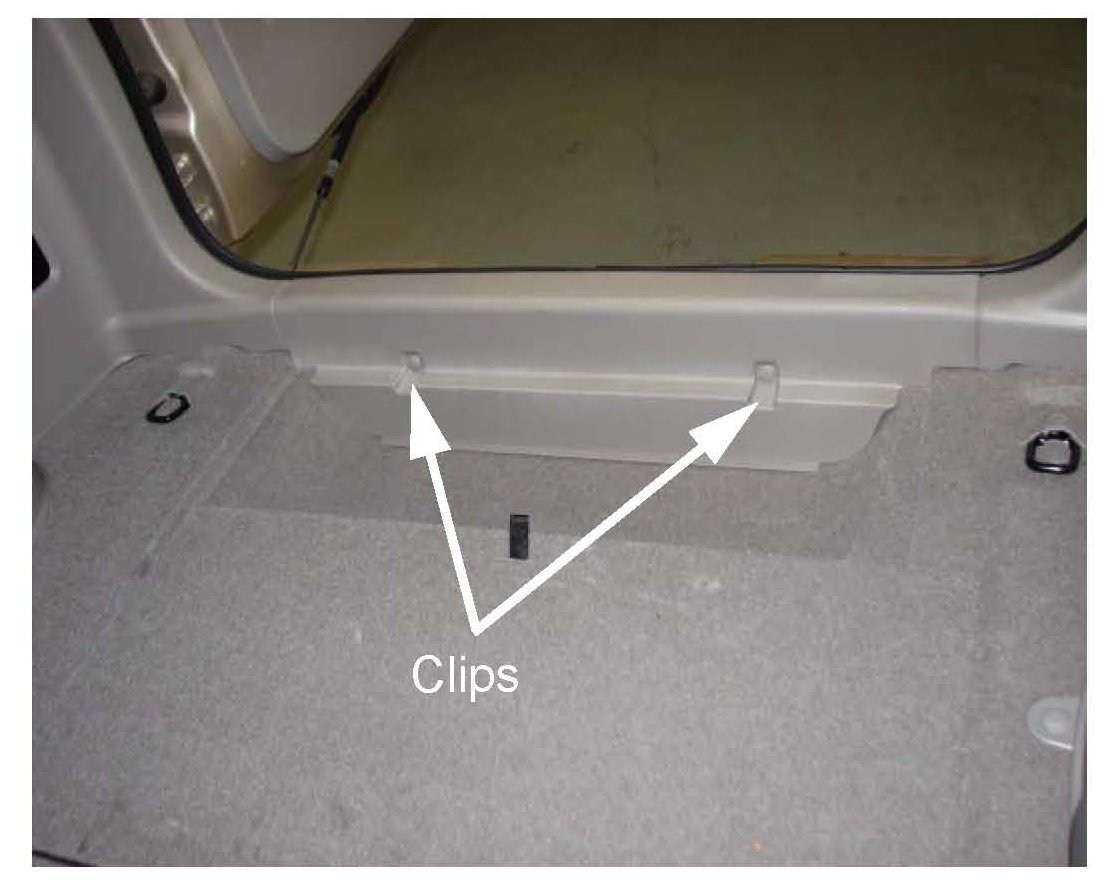
1. Remove the back panel trim. Release and remove the two clips.
2. Lift the panel straight up to release the anchoring clips under the back panel trim. Set panel aside.
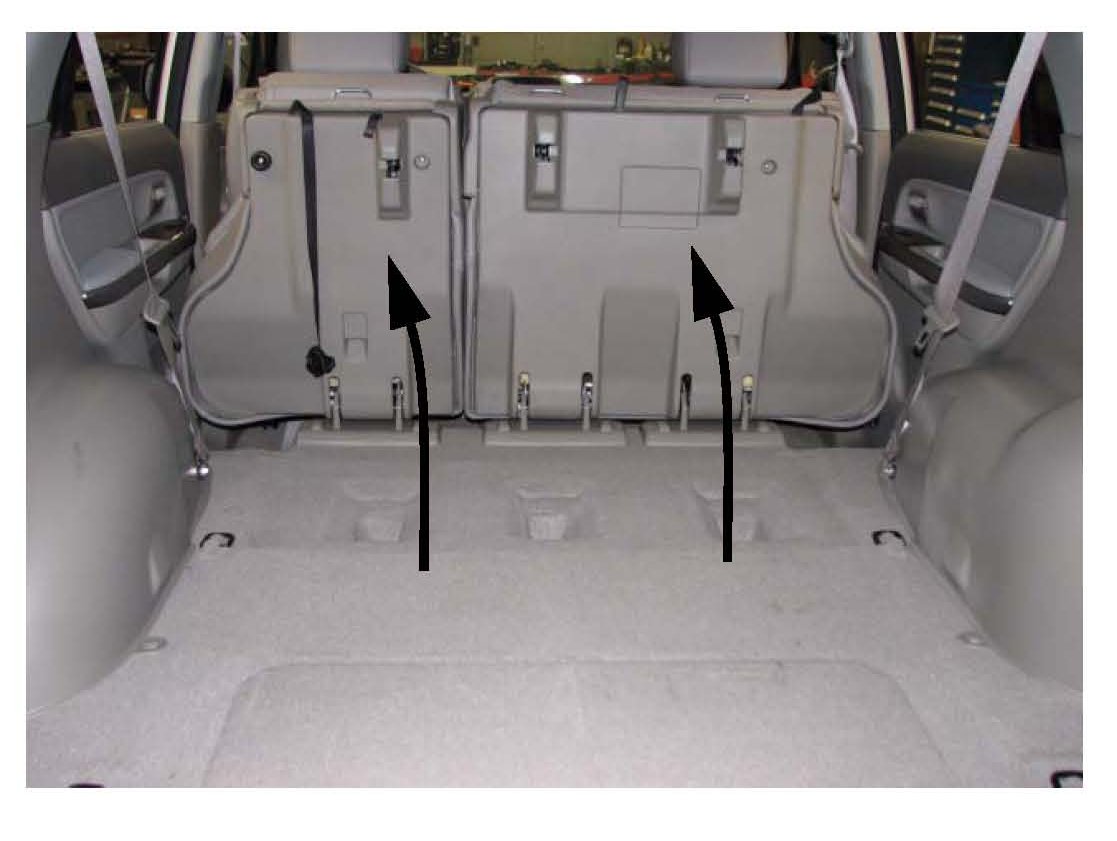
3. Fold both rear passenger seats up to allow clearance of interior trim removal. For instructions refer to owners manual (99011-66J20-03E pages 5-4 and 5-5)
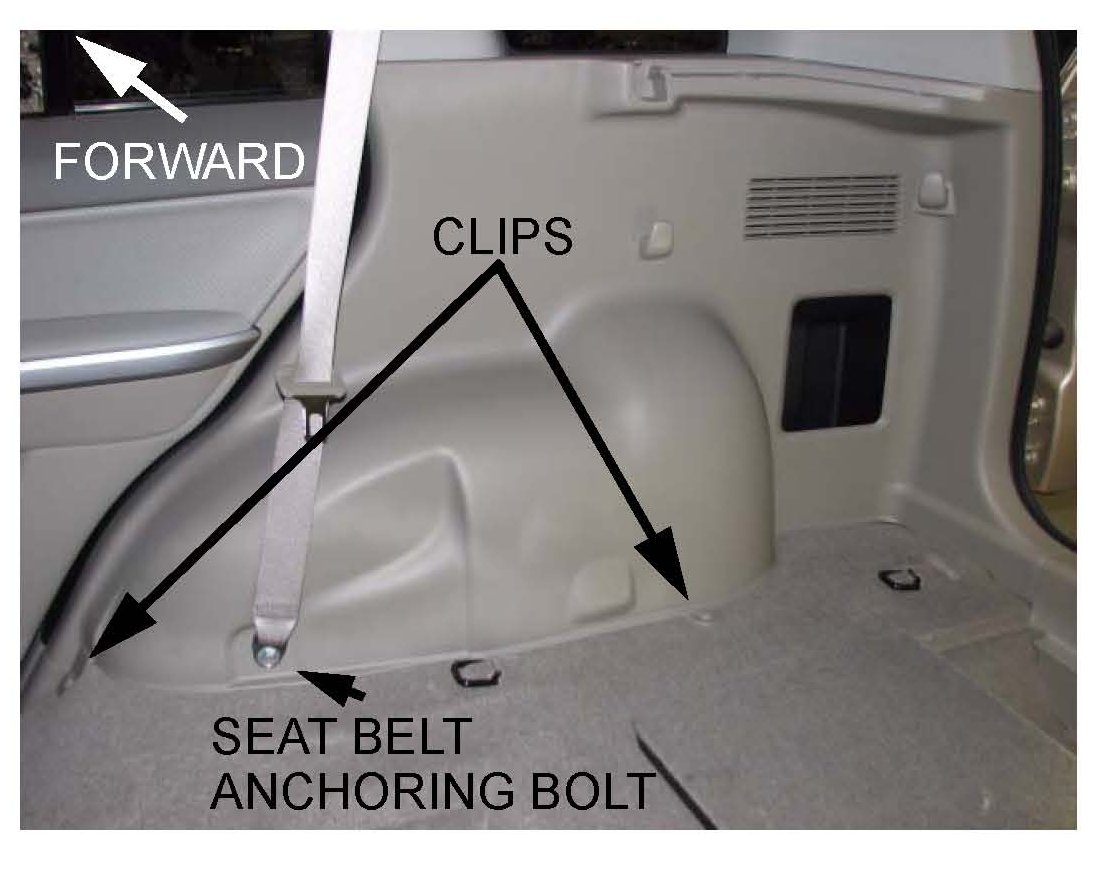
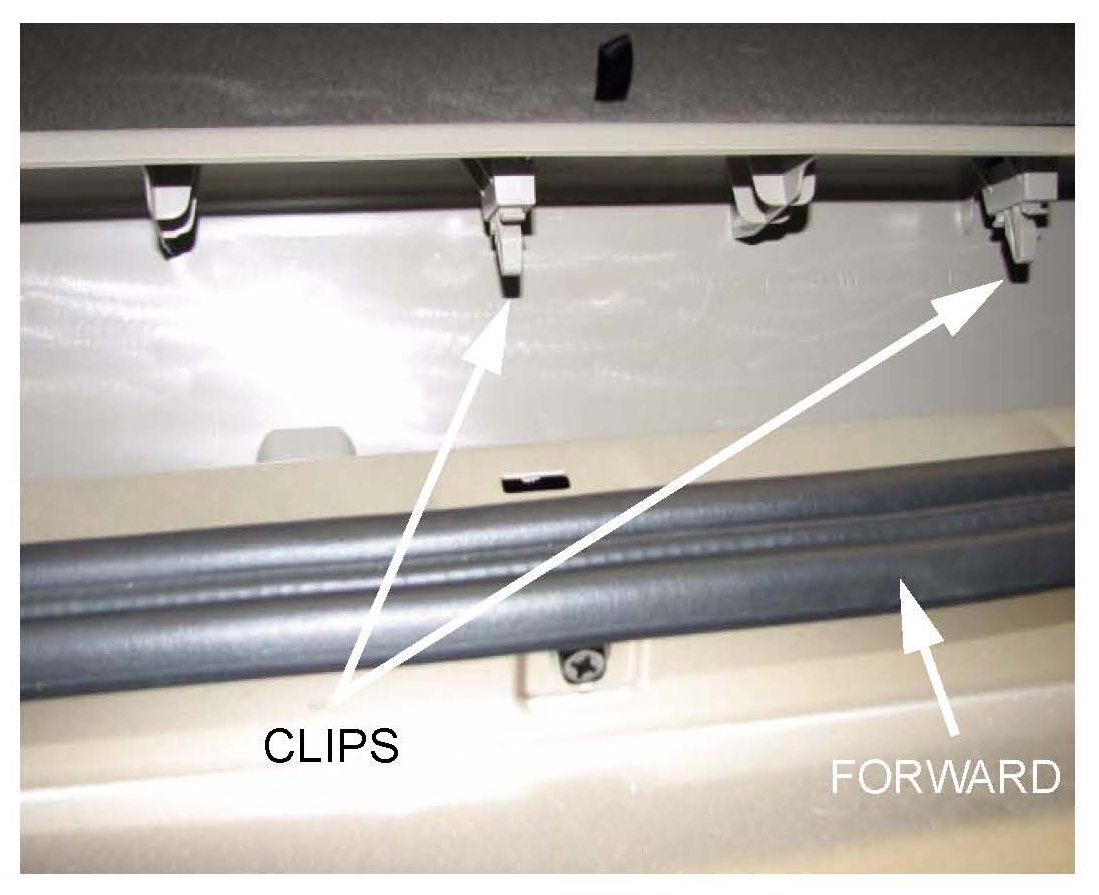
4. Remove the right rear seat belt anchoring bolt and remove the two indicated clips.
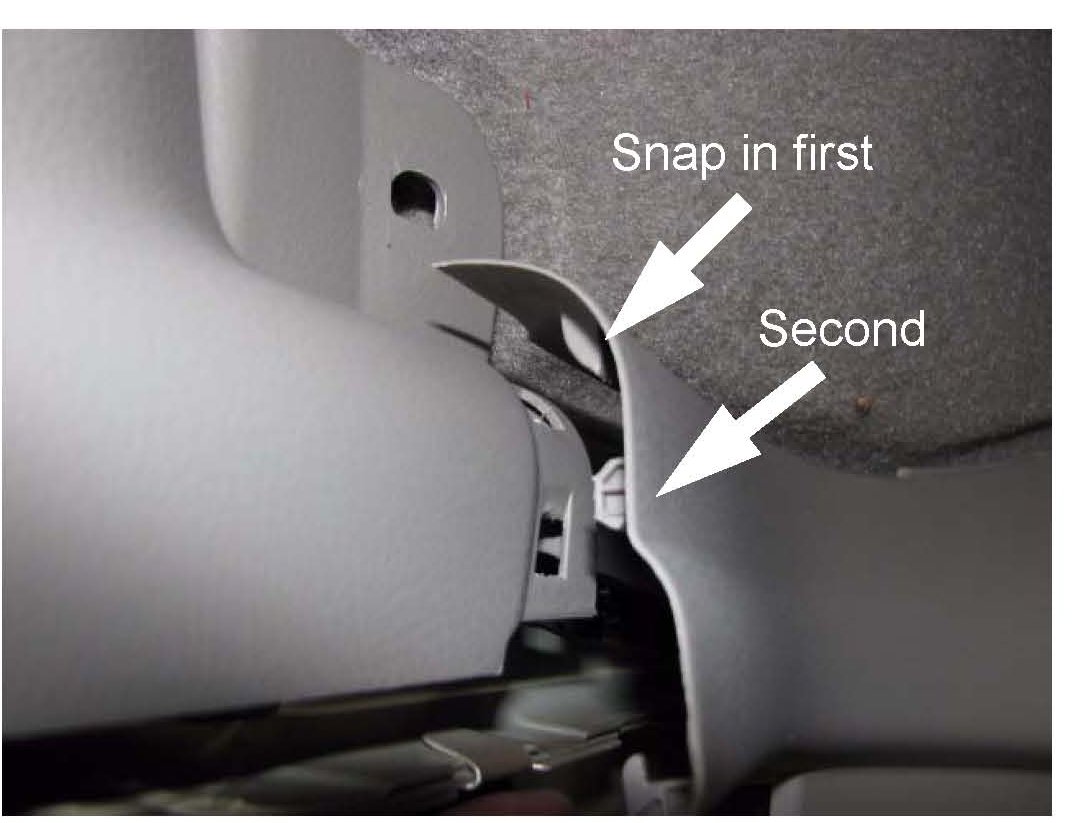
5. Start removal of the right hand rear quarter trim panel by first lifting the edge found under the back panel trim. NOTE: An alignment pin is located at the edge of the trim which will require disengaging prior to the panel removal.
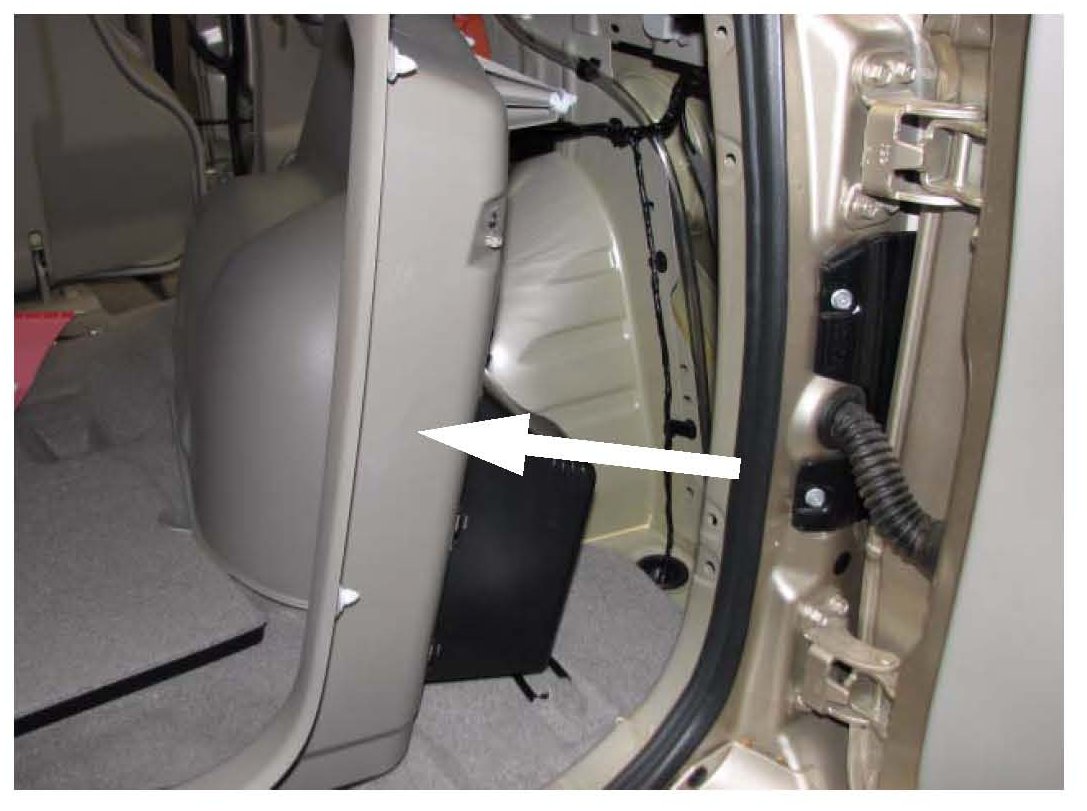
6. With a reasonable amount of force, pull the quarter trim panel away from the "D" pillar. Move the quarter trim panel aside to see the wiring for the right rear combination lamp unit.
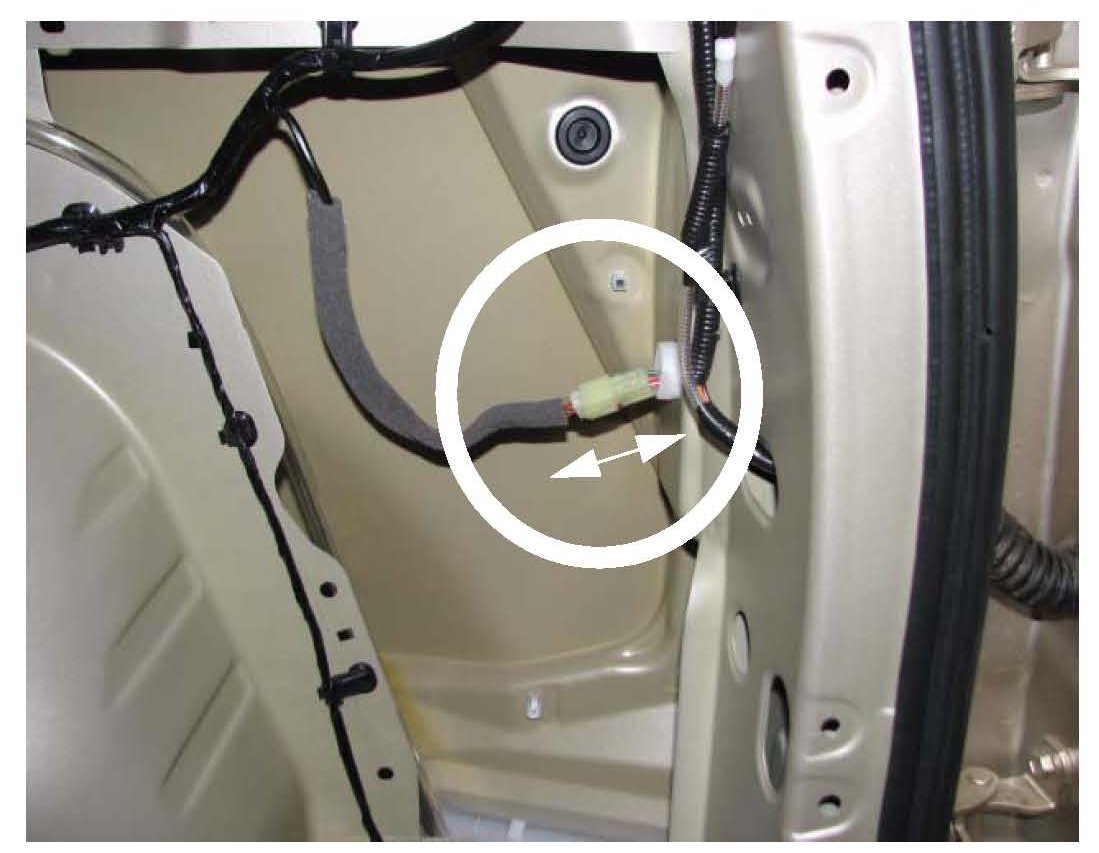
7. Disconnect the connector for the right rear combination lamp unit.
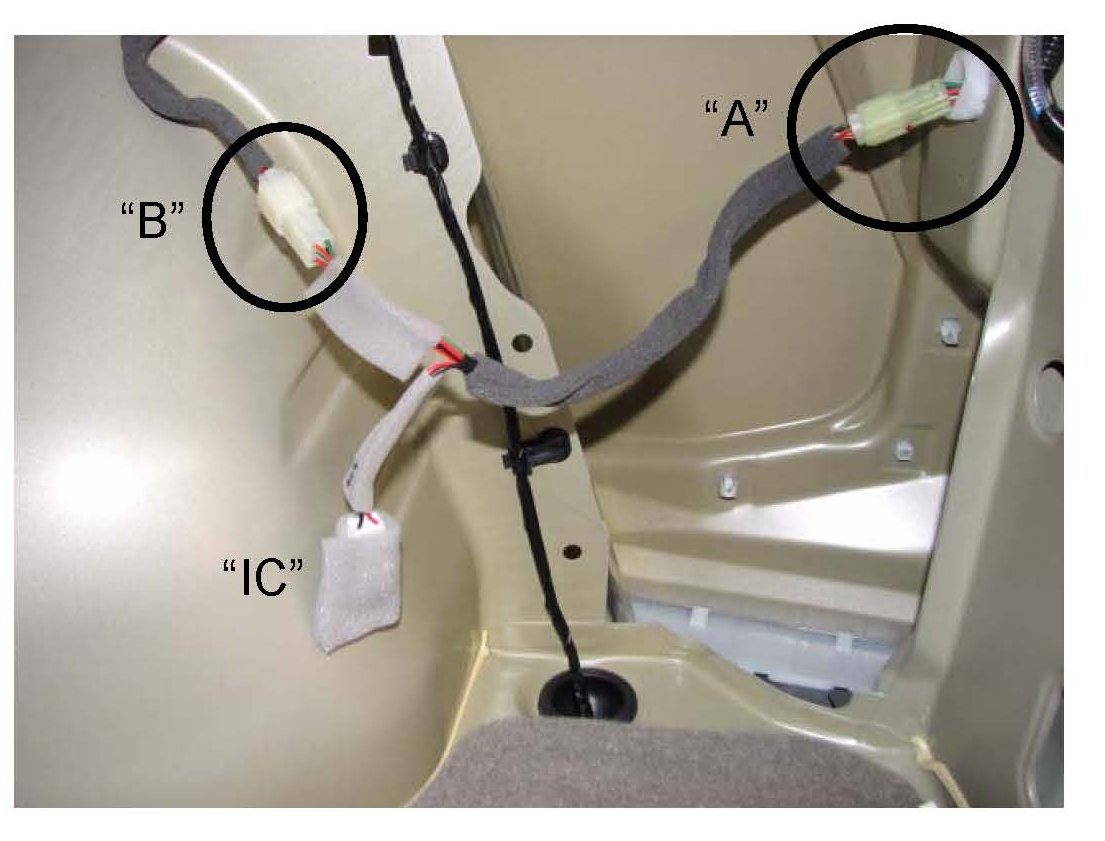
8. Connect "A" side of the joint harness into rear combination lamp connector and connector "B" side into the floor harness connector.
9. Position the joint harness with the end of the "A" side opposite the tail lamp at the same location as the disconnected harness extending out of the floor harness.
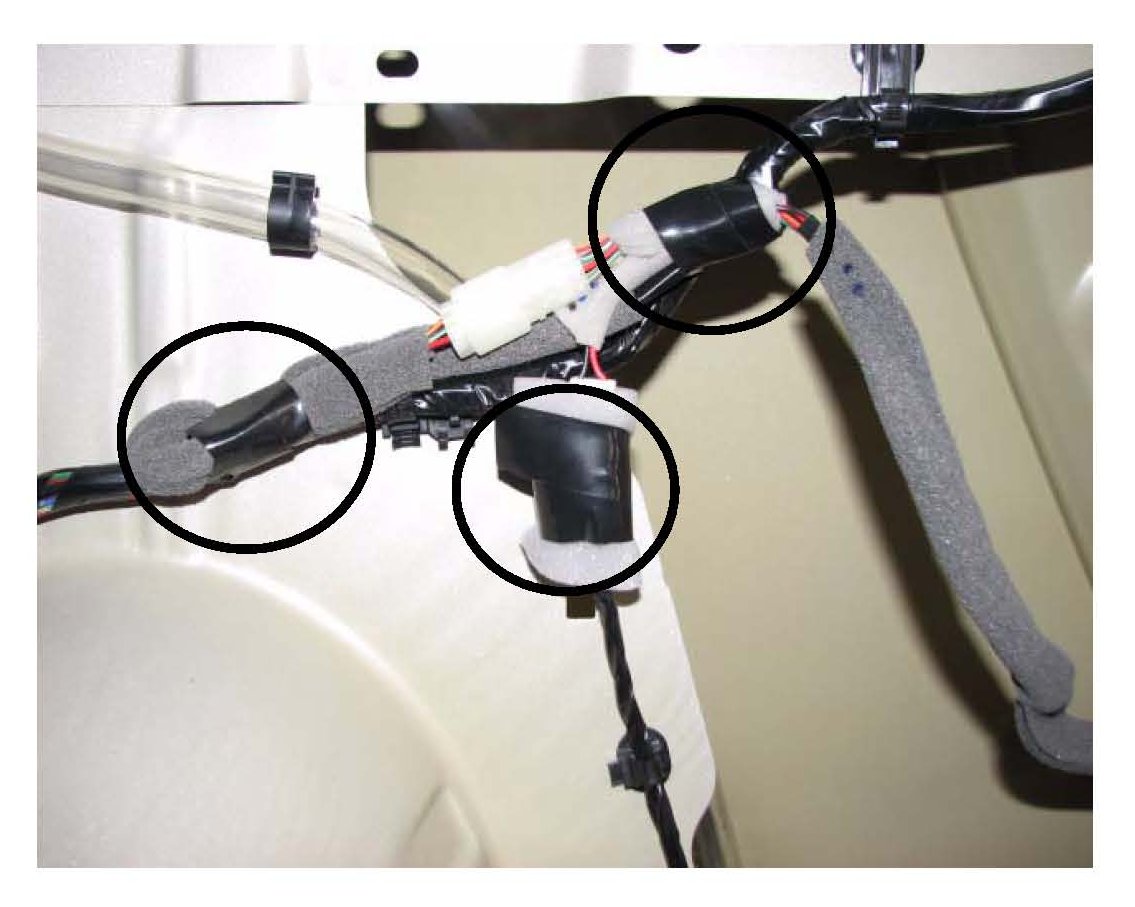
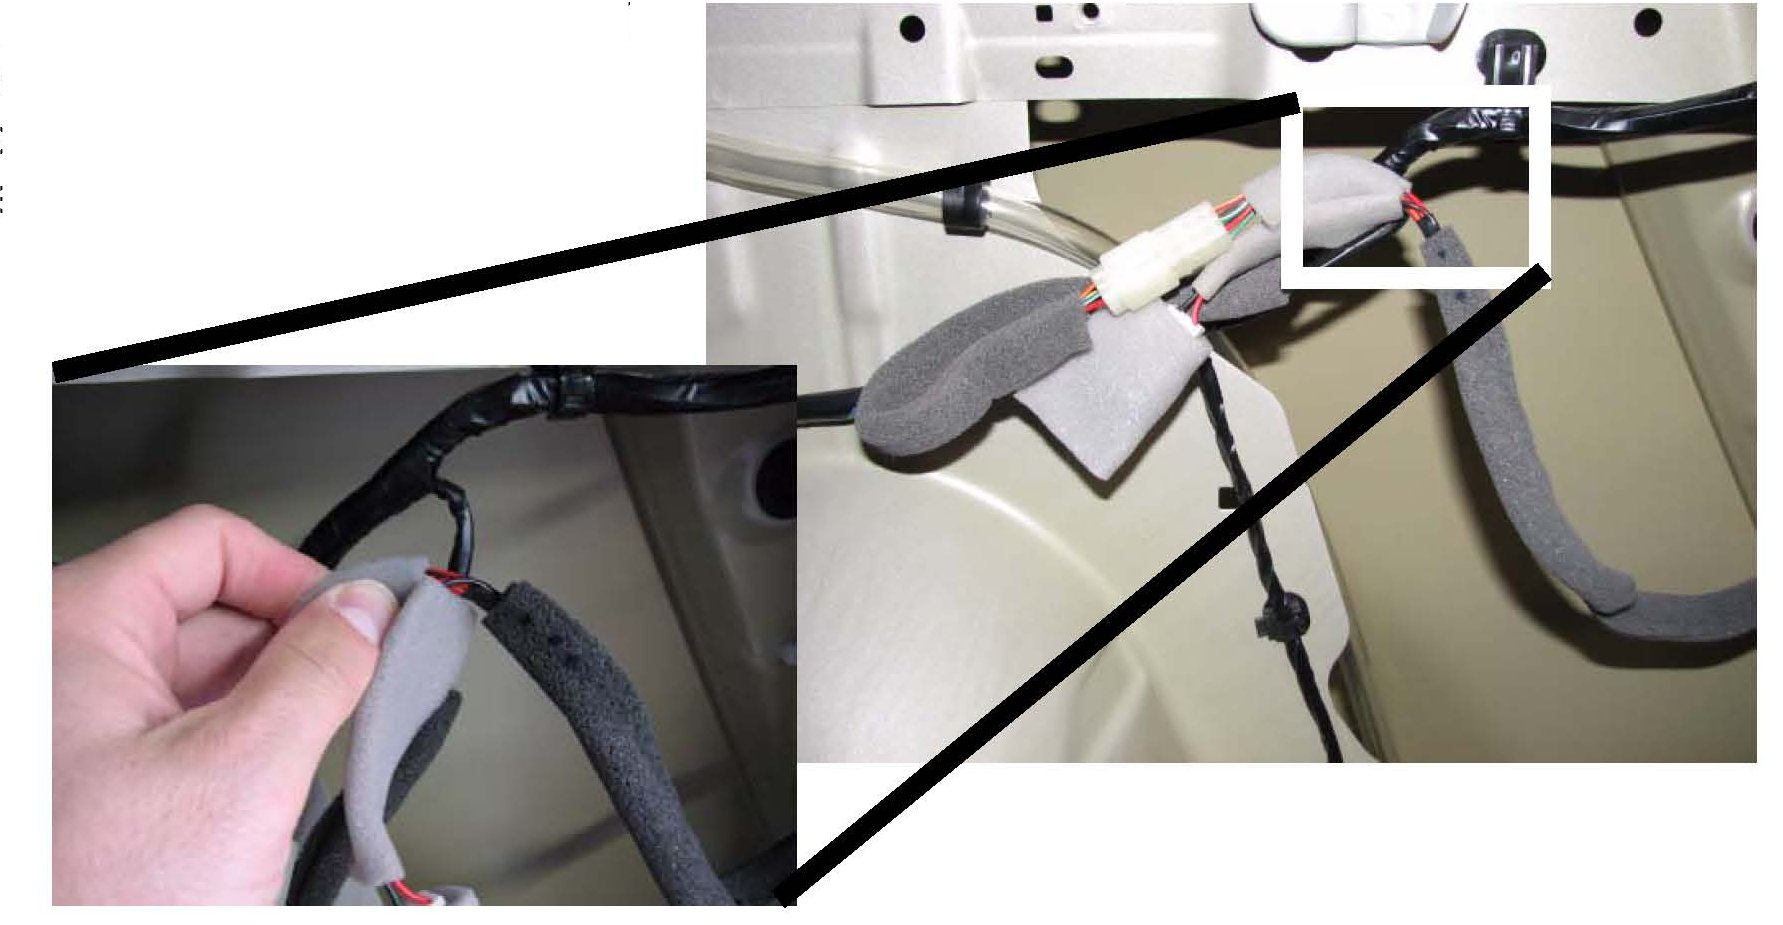
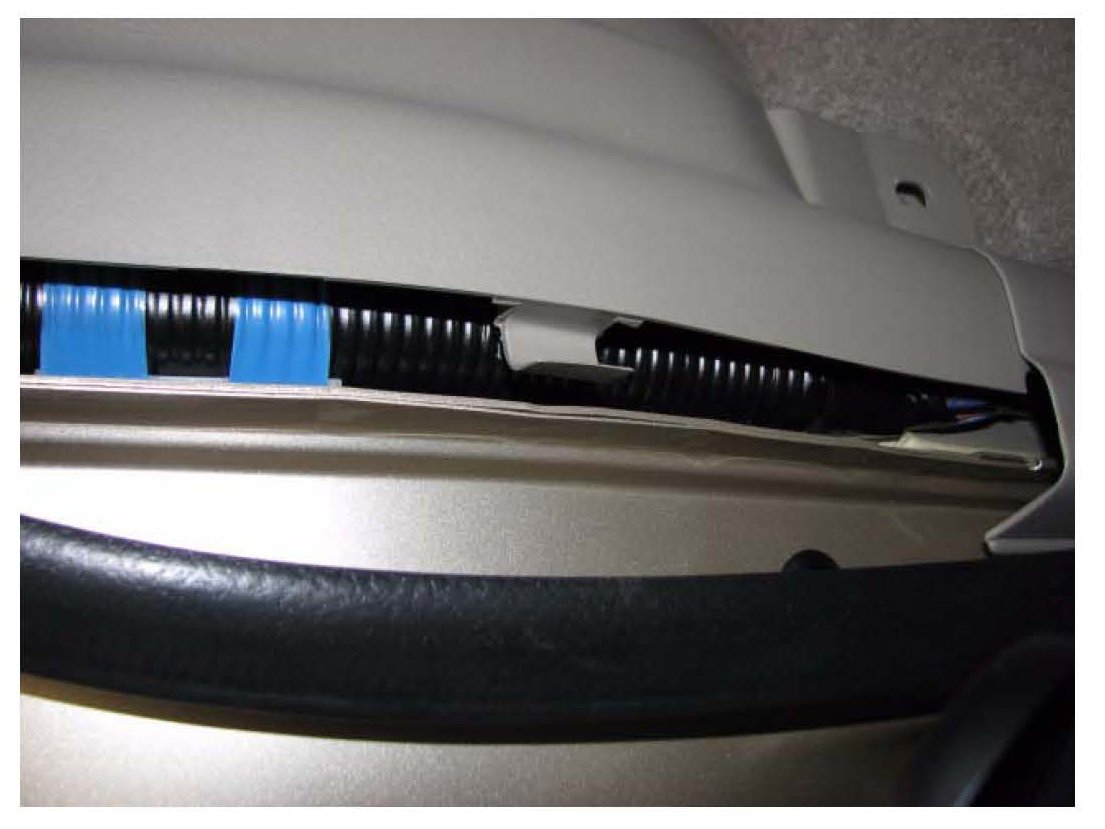
10. Secure the joint harness with electrical tape to the floor harness in three places as shown. Harness install is complete. Continue to step 11 for quarter trim panel re-installation tips.
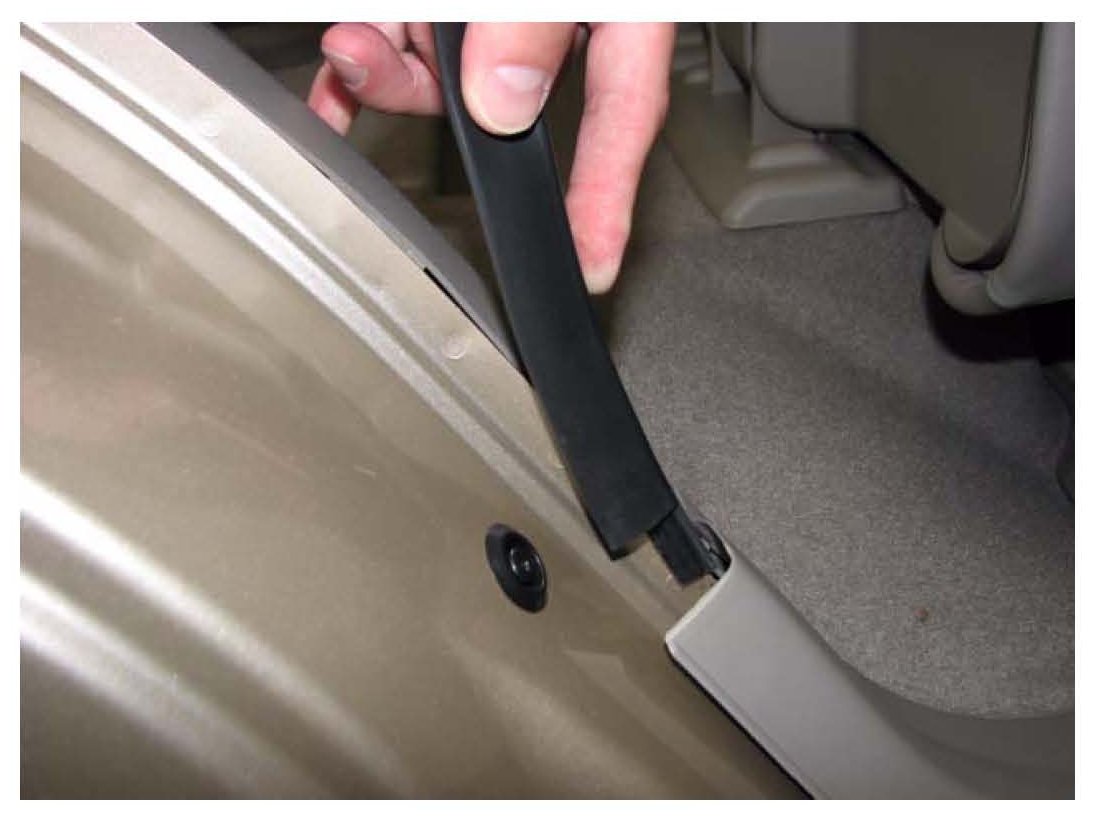
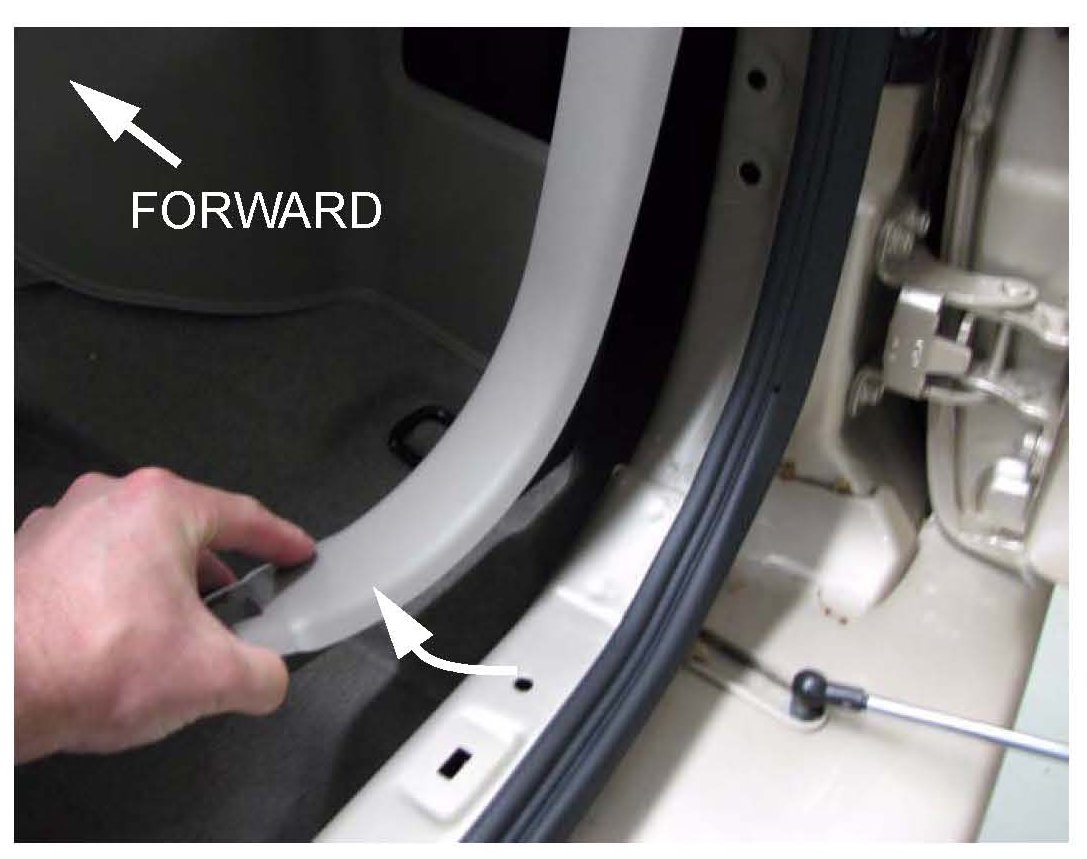
11. Remove the lower one foot of weather seal, before fitting the quarter trim panel, to allow the quarter panel to fit properly under the weather seal.
12. Re-install the right rear quarter trim panel starting at the right side passenger door. Attach the side sill to the quarter trim.
13. With the quarter panel in place, align the weather seal and insert the end under the side sill first.

14. Press the weather seal in place starting from the rear and move toward the side sill.
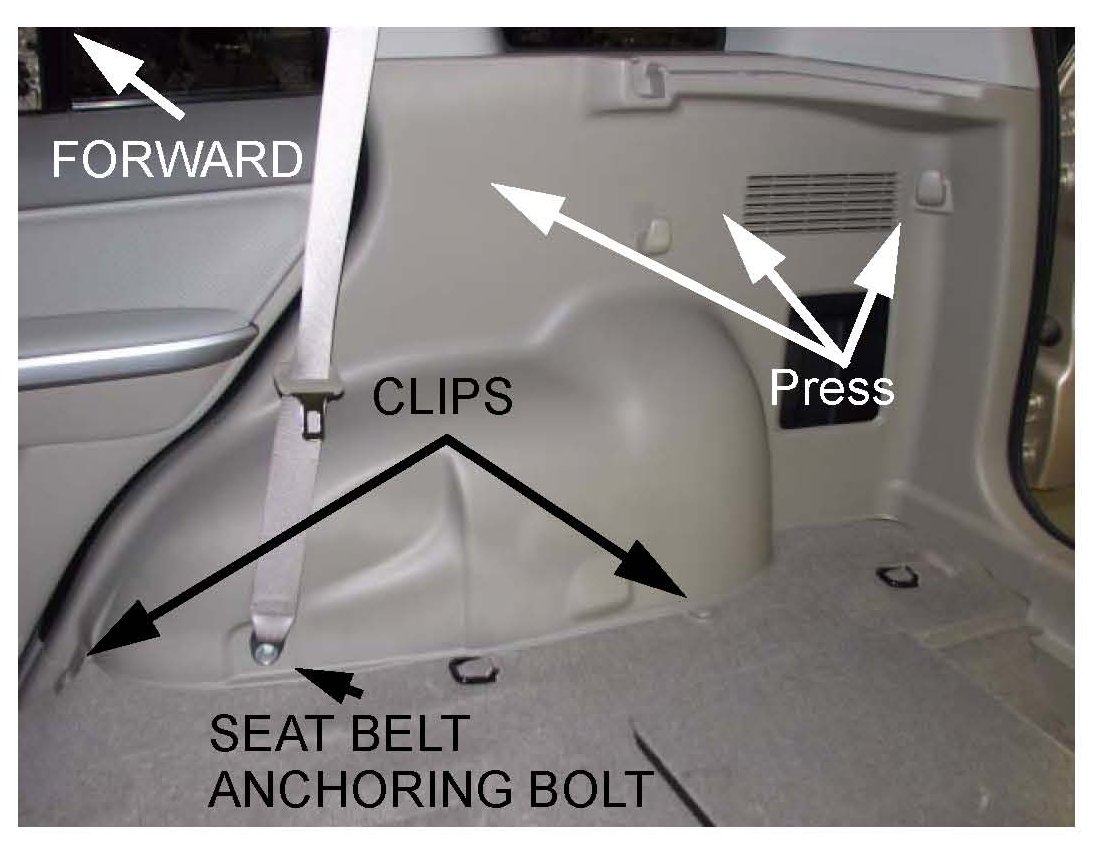
15. Press the panel in place with the palm of your hand in the areas indicated.
16. Install the two clips and seat belt anchor bolt. Tightening torque: 35 Nm (26 lb-ft)
17. Re-install the back panel. Press straight down to engage the built in clips. Then install the two front clips.
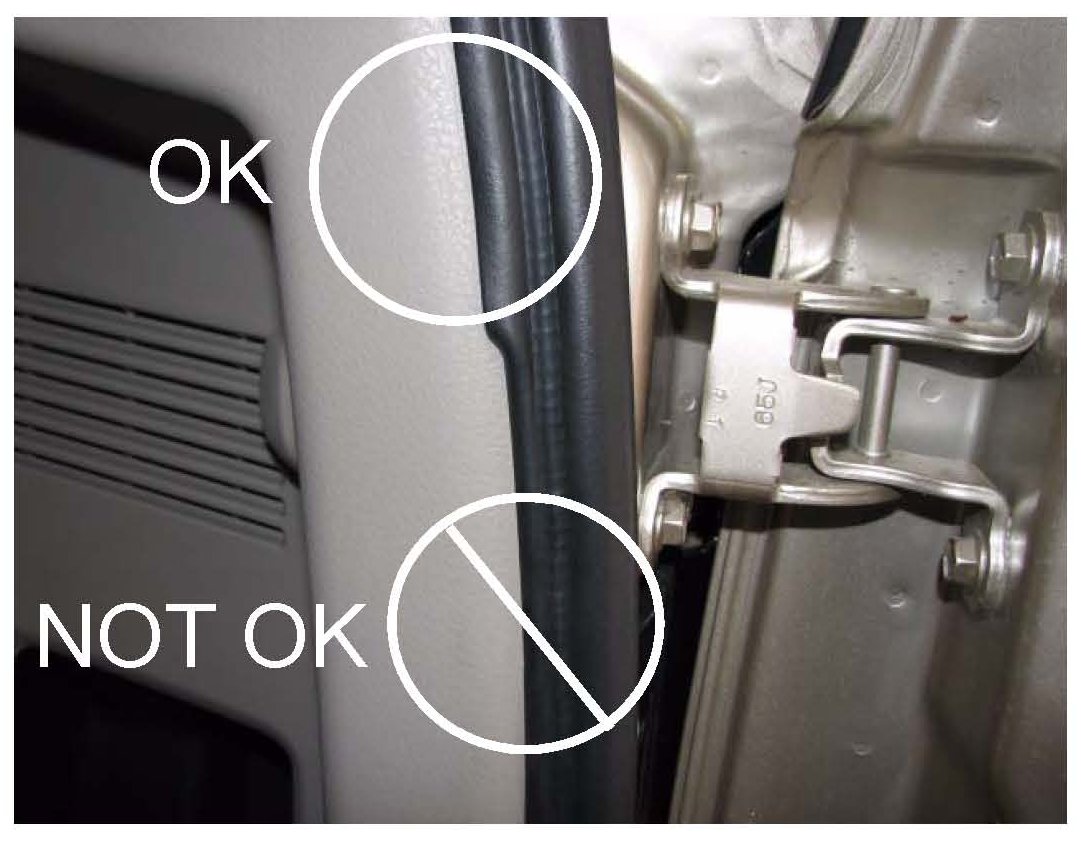
18. Make sure the weather strip seal lip is installed over all trim panel pieces.

Disclaimer