Backing Plate: Service and Repair
Rear Brake Back Plate Removal and InstallationRemoval
1. Hoist vehicle and remove rear wheel.
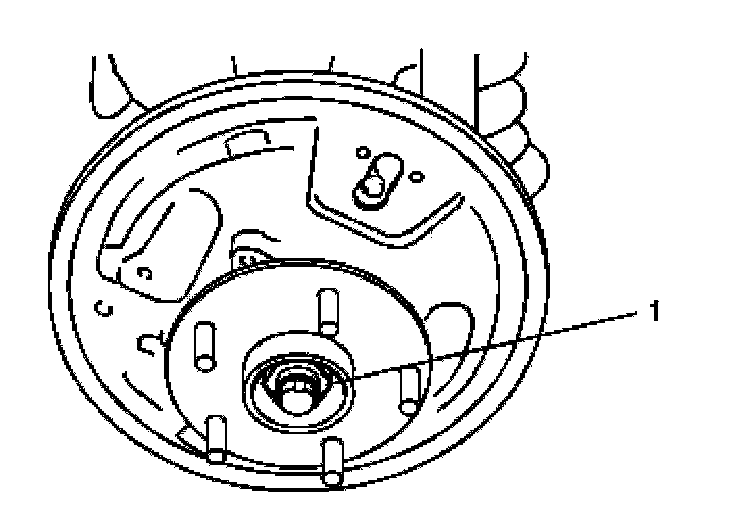
2. Uncaulk rear axle nut (1).
3. Pull up parking brake lever fully and remove rear axle nut (1).
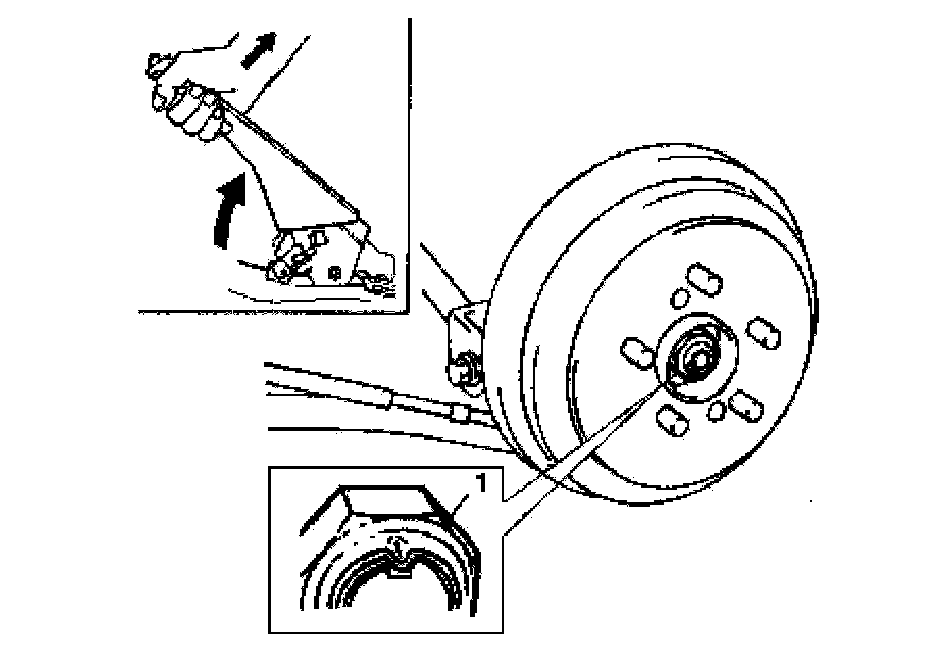
4. Remove brake drum.
5. Remove brake shoe.
6. Remove wheel cylinder.
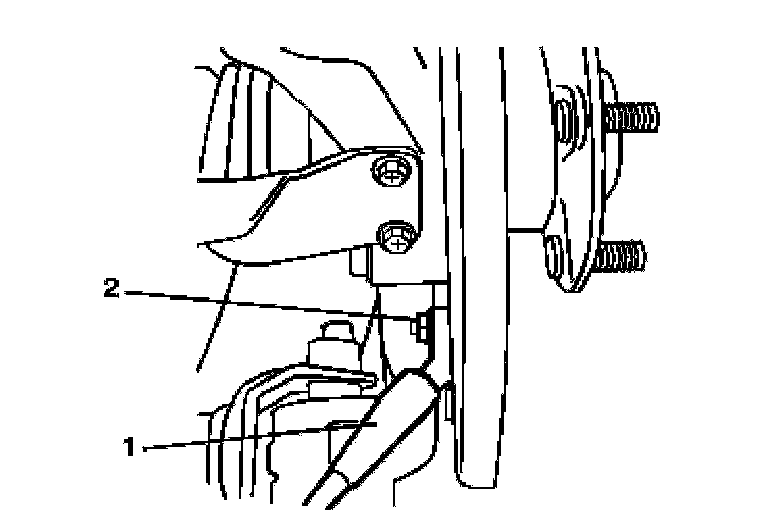
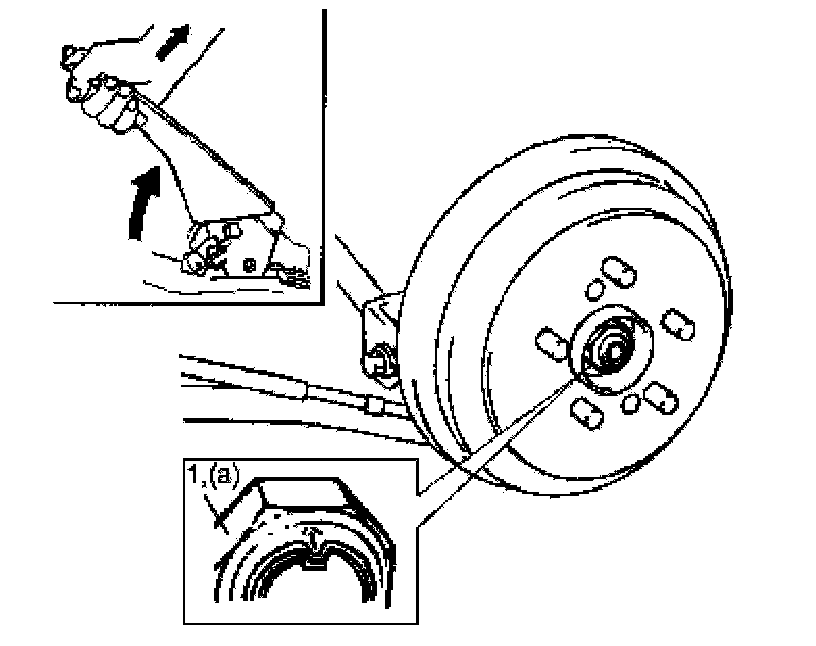
7. Remove parking brake cable (1) from brake back plate by loosening parking cable cap nut (2).
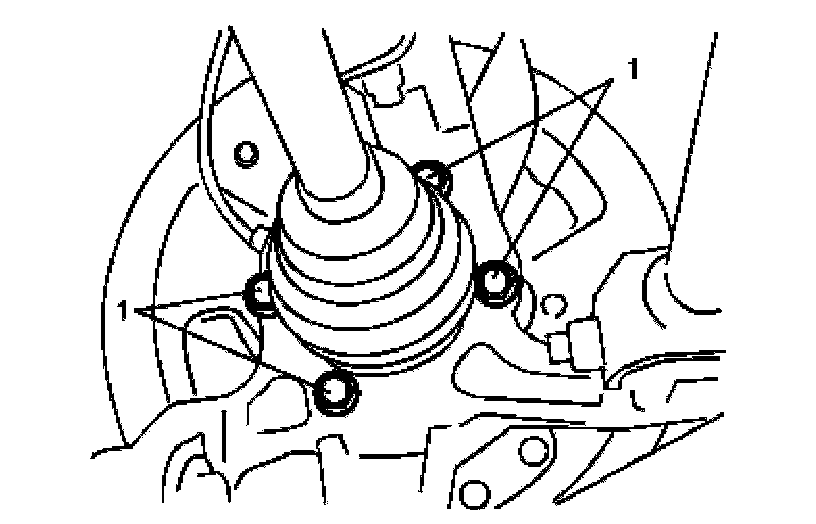
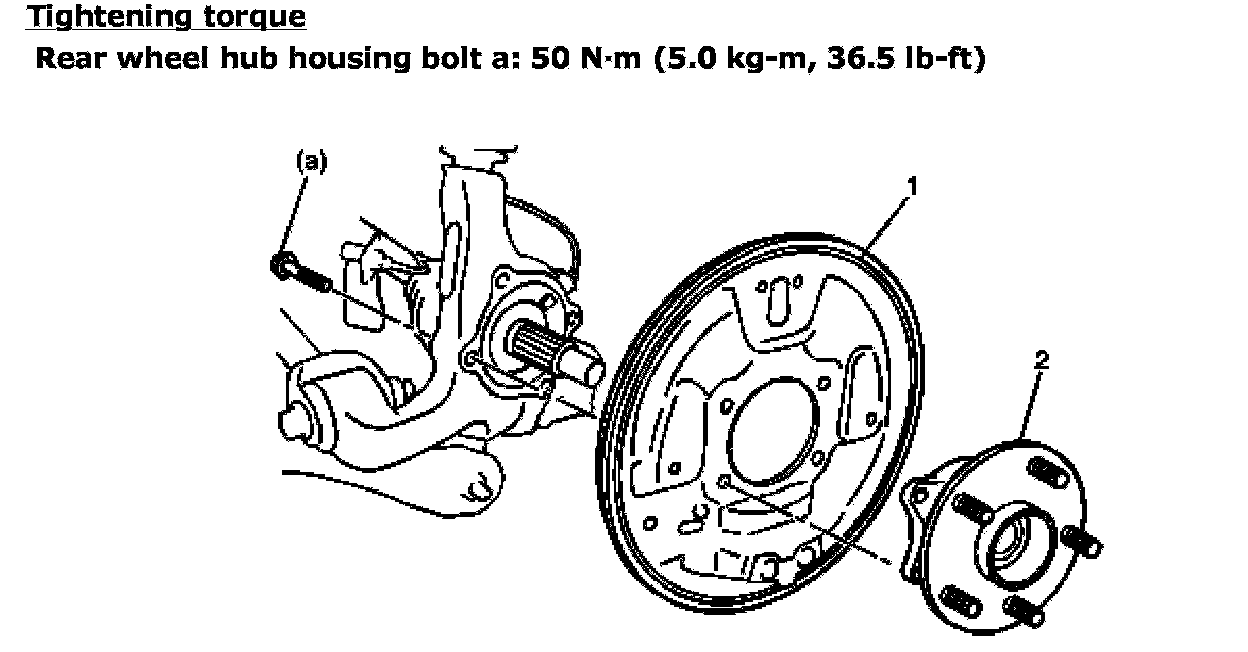
8. Remove rear wheel hub housing bolts (1).
9. Remove rear wheel hub assembly and brake back plate from knuckle.
Installation
1. Install brake back plate (1) and rear wheel hub assembly (2) to knuckle, and tighten wheel hub housing bolts to specified torque.
Tightening torque
Rear wheel hub housing bolt a: 50 Nm (5.0 kg-m, 36.5 ft. lbs.)
2. Tighten rear axle nut (1) temporarily by hand at this step.
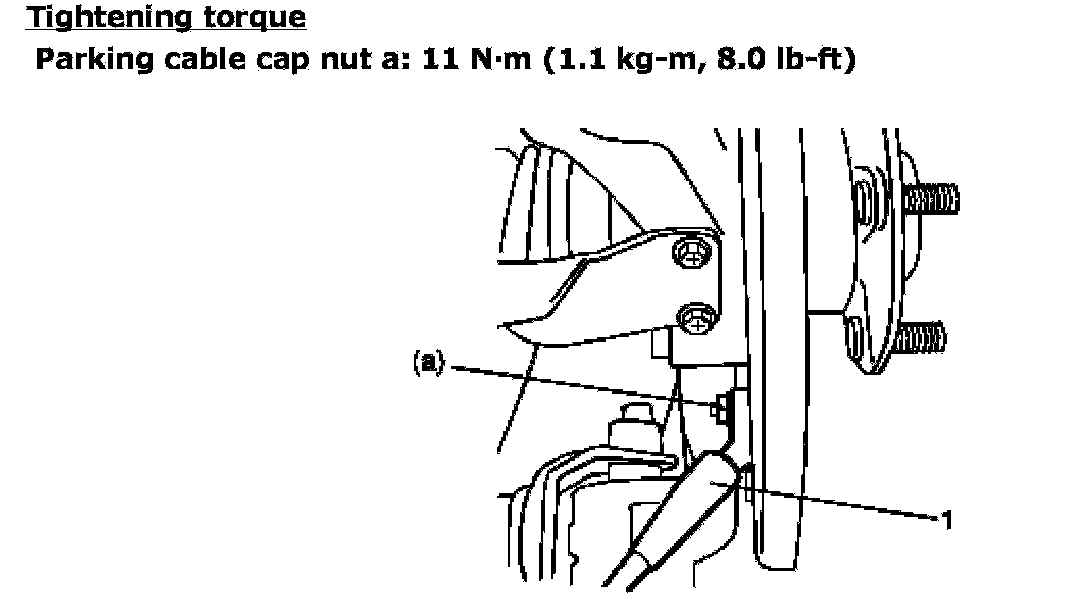
3. Install parking brake cable (1) to brake back plate and tighten cable cap nut to specified torque.
Tightening torque
Parking cable cap nut a: 11 Nm (1.1 kg-m, 8.0 ft. lbs.)
4. Install wheel cylinder and rear brake shoe.
5. Install brake drum and adjust brake.
6. Pull up parking brake lever fully and tighten rear axle nut (1).
Tightening torque
Rear axle nut a: 200 Nm (20.0 kg-m, 145.0 ft. lbs.)
7. Caulk rear axle nut (1).
8. Fill reservoir with brake fluid and bleed brake system. For bleeding operation, refer to Air Bleeding of Brake System.
9. Install wheel and tighten wheel nuts to specified torque.
10. Check to ensure that brake drum is free from dragging and proper braking is obtained. Remove vehicle from hoist and perform brake test (foot brake and parking brake).