Intake Collector and Intake Manifold Removal and Installation
Intake Collector and Intake Manifold Removal and InstallationReference: Intake Collector and Intake Manifold Components
Removal
1) Remove electric throttle body assembly, referring to Electric Throttle Body Assembly Removal and Installation.
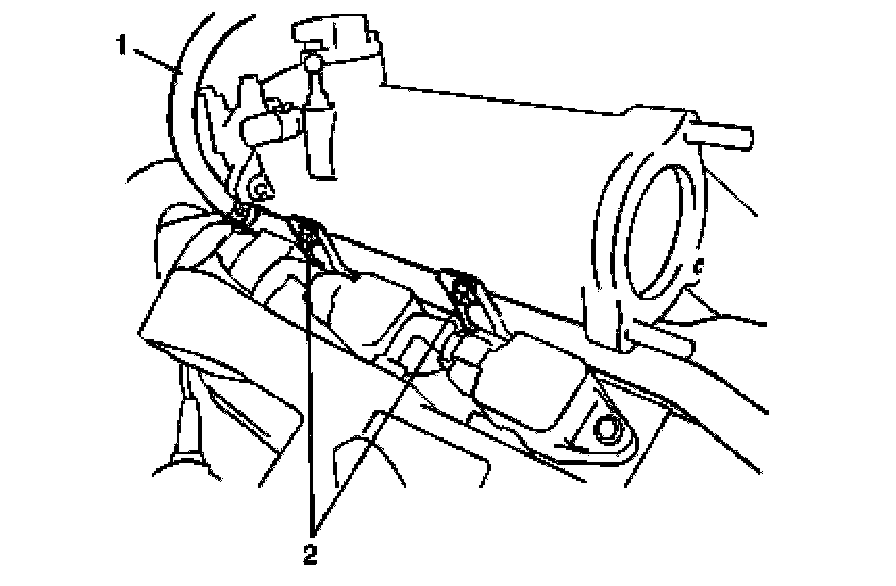
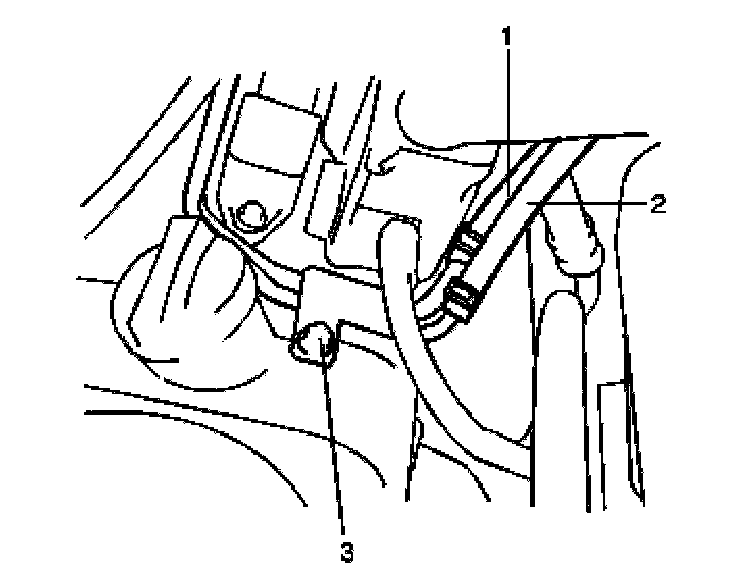
2) Disconnect water hose (1) from heater outlet pipe.
3) Remove heater outlet pipe bolts (2).
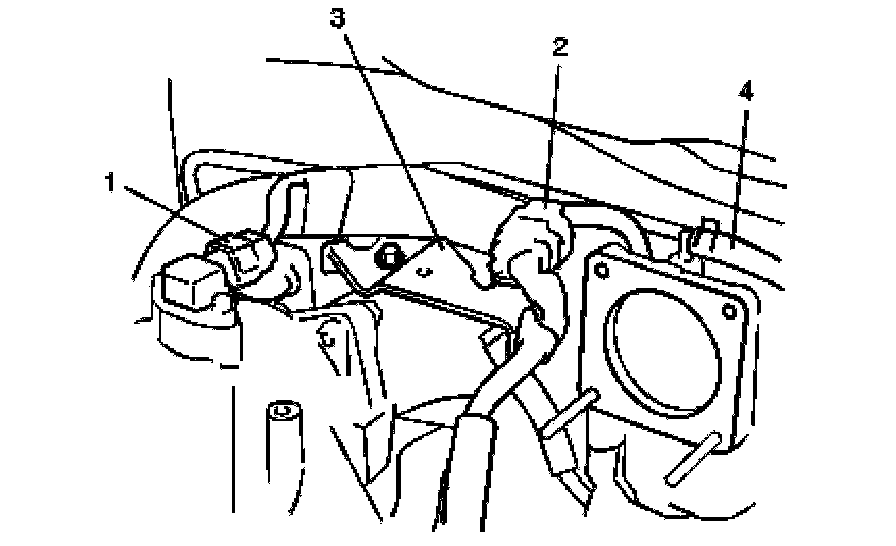
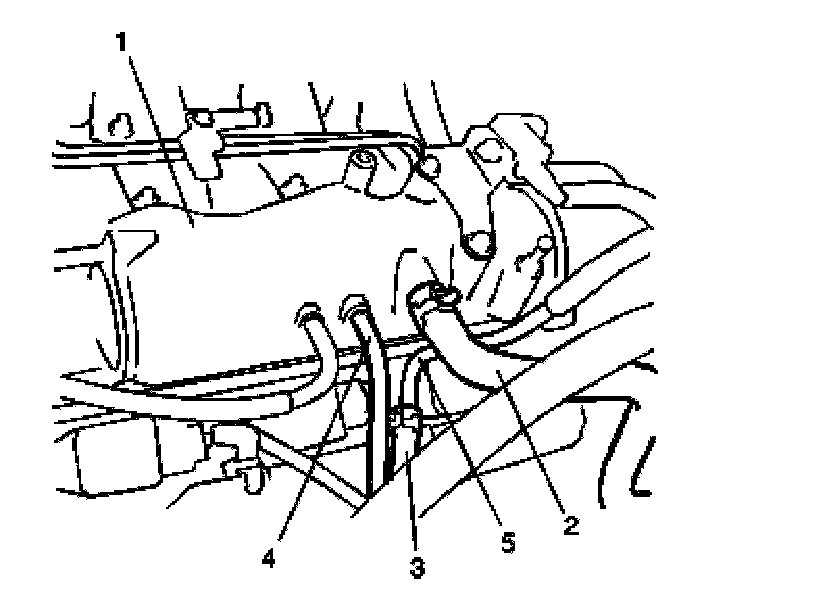
4) Disconnect MAP sensor connector (1) and fuel injector harness connector (2).
5) Remove harness clamp bracket (right side) (3) from intake collector.
6) Disconnect vacuum hose (4) of EVAP canister purge valve from intake collector.
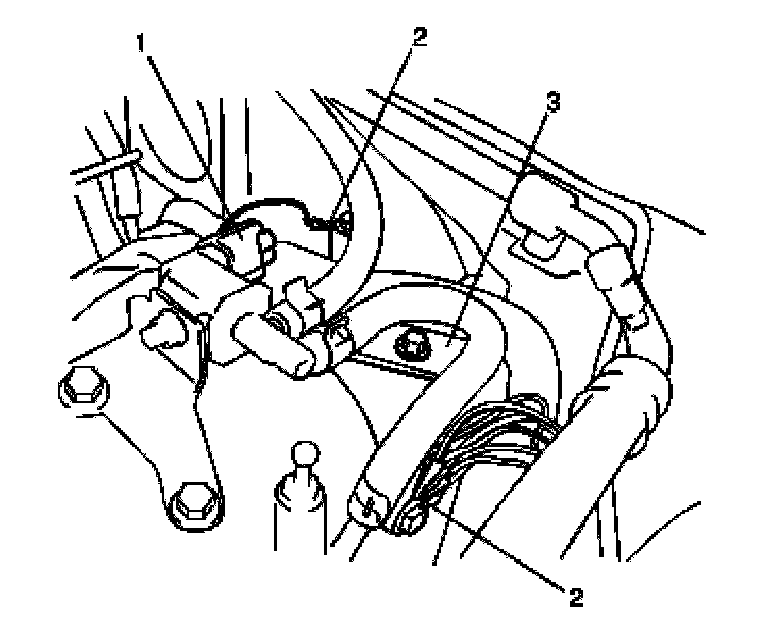
7) Disconnect EVAP canister purge valve connector (1) and ground terminals (2).
8) Remove harness clamp bracket (left side) (3) from intake collector.
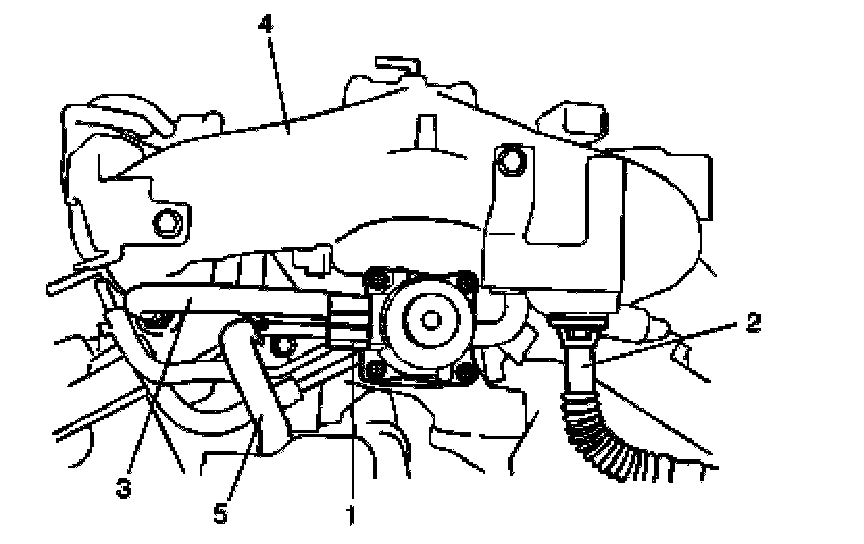
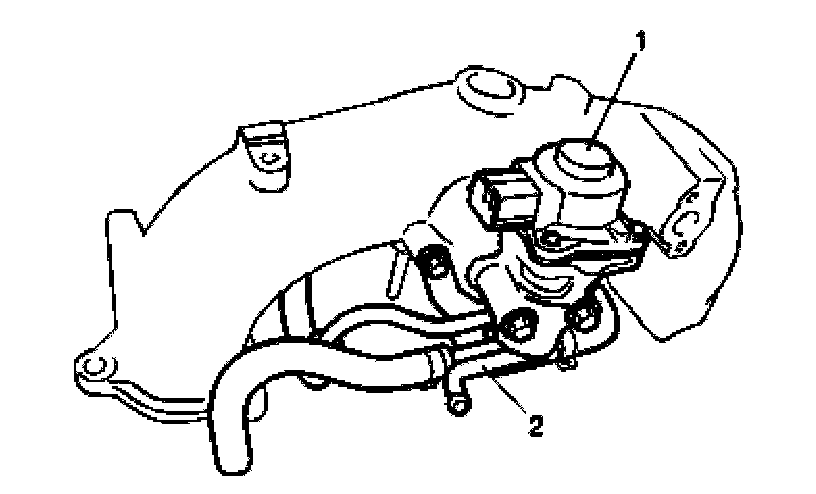
9) Disconnect EGR valve assembly connector (1), EGR pipe (2) and PCV hose (3).
10) Detach intake collector (4) from intake manifold, and then disconnect water hose (5).
11) Remove EGR valve assembly (1) and PCV pipe (2) from intake collector, if necessary.
12) Disconnect brake booster hose (2) and vacuum tank hose (4) from intake manifold (1) then
EVAP canister purge valve hose (3) from fuel No.2 pipe (5).
13) Disconnect fuel feed hose (1) and fuel return hose (2).
14) Remove fuel No.2 pipe bolts (3).
15) Remove intake manifold bolts (8 pcs.) and nuts (4 pcs.).
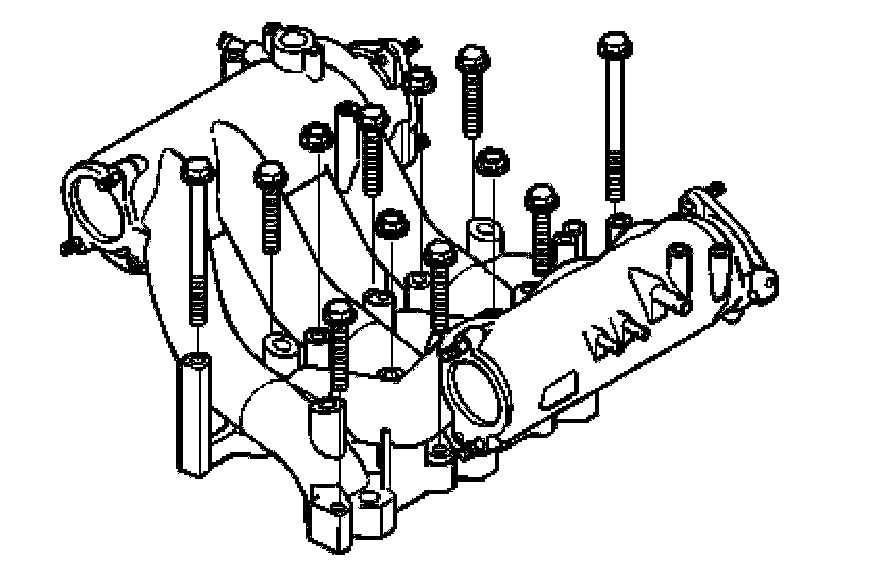
16) Remove intake manifold.
Installation
Reverse removal procedure for installation noting the following.
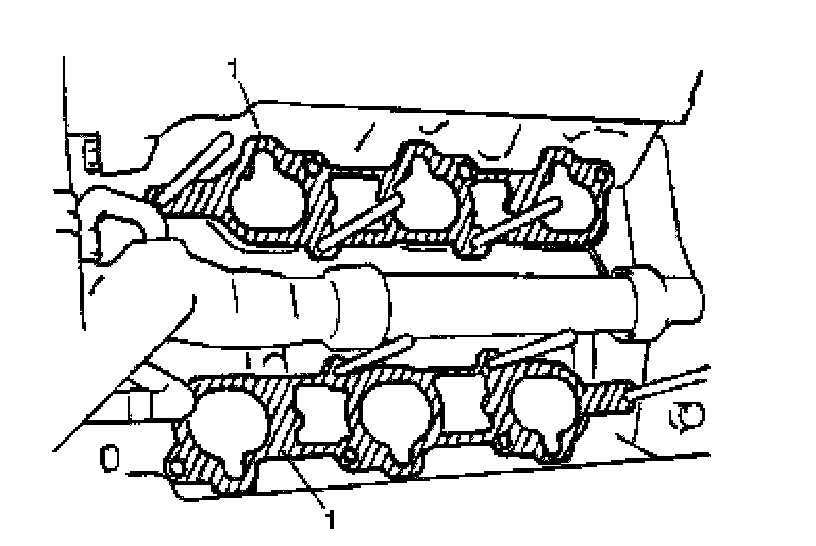
^ Use new intake manifold gaskets (1).
^ Use new intake collector gaskets, EGR valve gasket and EGR pipe gasket.
^ Install electric throttle body assembly, referring to Electric Throttle Body Assembly Removal and Installation.
^ Check to ensure that all removed parts are back in place.
Reinstall any necessary parts which have not been reinstalled.
^ Refill cooling system.
^ Connect negative cable (-) at battery.
^ Upon completion of installation, verify that there is no fuel leakage at each connection according to Fuel Leakage Check Procedure.