Front Disc Brake Pad Removal and Installation
Front Disc Brake Pad Removal and InstallationReference: Front Disc Brake Pad On-Vehicle Check
Removal
1. Hoist vehicle and remove front wheel.
2. Remove caliper pin bolts (2).
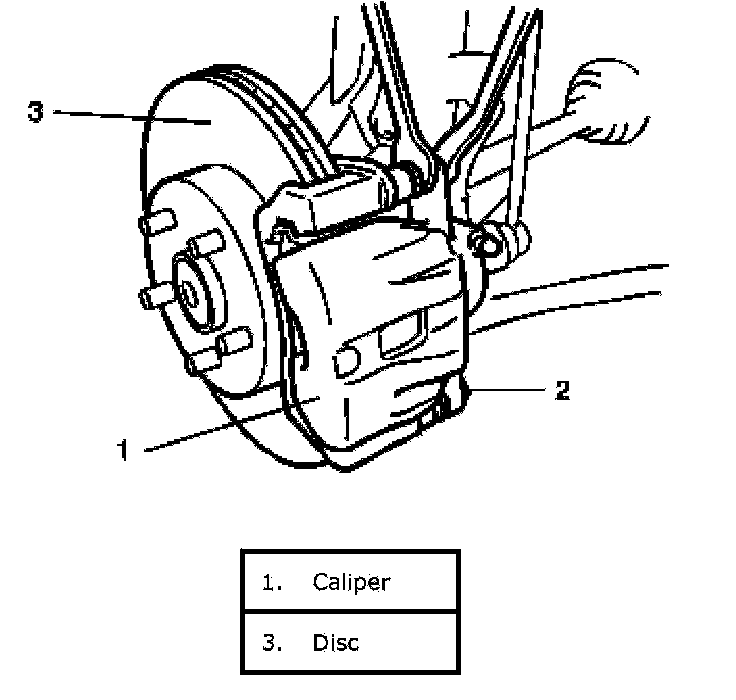
3. Remove caliper (1) from caliper carrier.
NOTE:
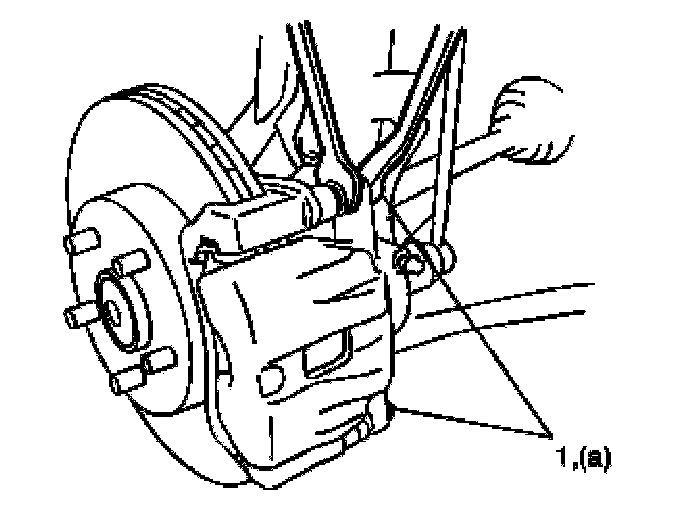
Hang removed caliper (1) with a wire hook (2) or the like so as to prevent brake hose from bending and twisting excessively or being pulled. Don't operate brake pedal with pads removed.
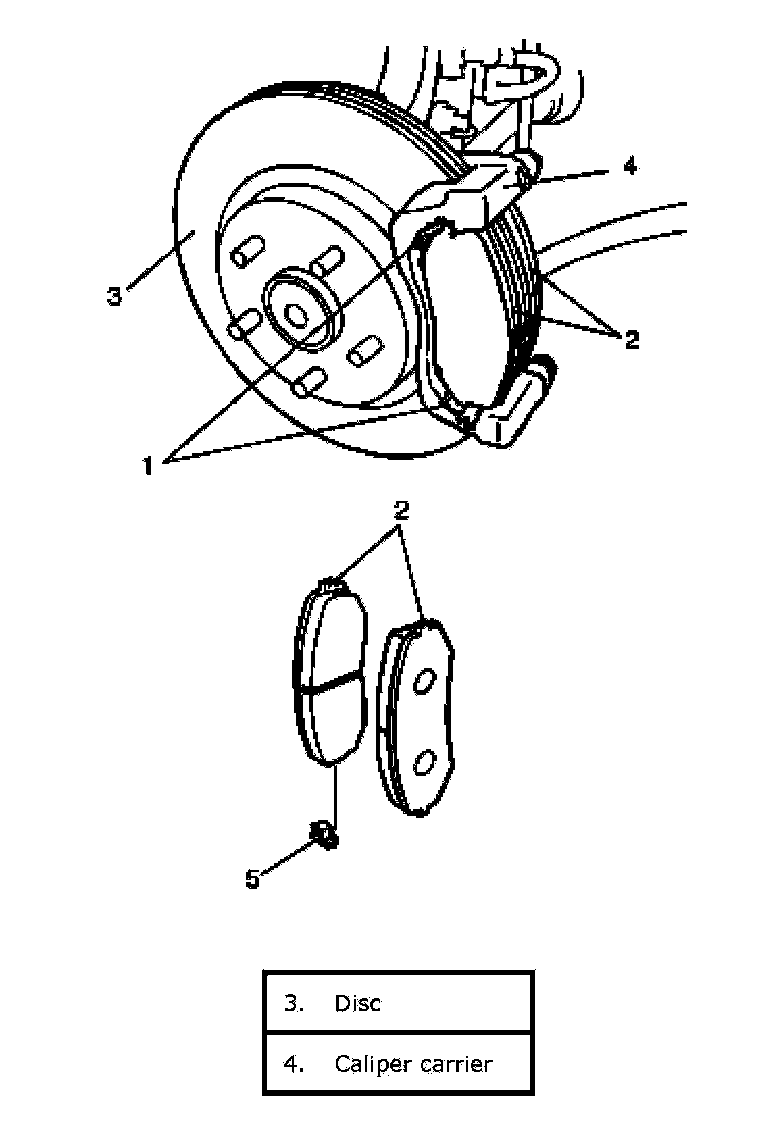
4. Remove pads (3).

Installation
Reference: Front Brake Disc and Pad Inspection
1. Install pad spring (1) and pads (2).
NOTE:
Install brake pad with wear indicator (5) to vehicle center side on right wheel brake.
2. Install caliper and tighten caliper (slide) pin bolts (1) to specification.
NOTE:
Make sure that boots are fit into groove securely.
Tightening torque
Caliper pin bolt a: 36 Nm (3.6 kg-m, 26.0 ft. lbs.)
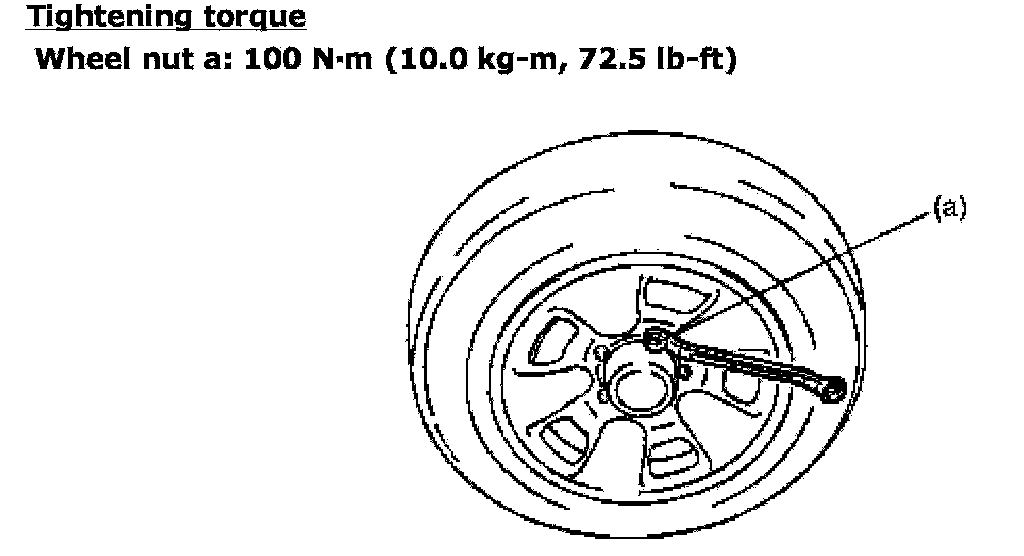
3. Tighten front wheel nuts to specification.
Tightening torque
Wheel nut a: 100 Nm (10.0 kg-m, 72.5 ft. lbs.)
4. Upon completion of installation, perform brake test.