Crankshaft Disassembly and Assembly: Disassembly
- Remove the engine. Refer to Engine Removal and Installation .
- Remove the flywheel or flexible plate bolts.
- Remove the flywheel or the flexible plate.
 Courtesy of SUZUKI OF AMERICA CORP.
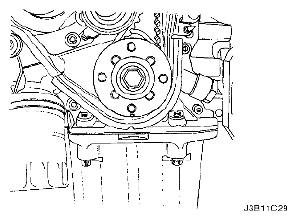
- Remove the crankshaft rear oil seal.
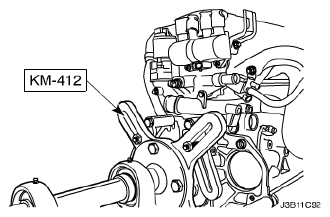
- Mount the engine assembly on the engine overhaul stand KM-412.
 Courtesy of SUZUKI OF AMERICA CORP.
- Remove the front timing belt cover bolts.
- Remove the front timing belt cover.
- Remove the crankshaft pulley bolts.
- Remove the crankshaft pulley.
 Courtesy of SUZUKI OF AMERICA CORP.
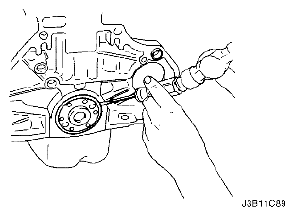
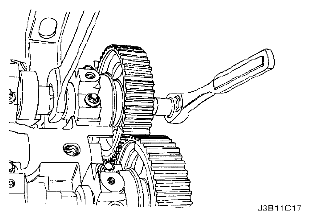
- Loosen the timing belt automatic tensioner bolt.
- Rotate the timing belt automatic tensioner hex-key clockwise to release the tension.
- Remove the timing belt idler pulley bolt and nut.
- Remove the timing belt idler pulleys.
- Remove the timing belt.
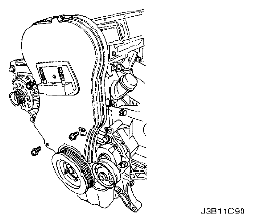
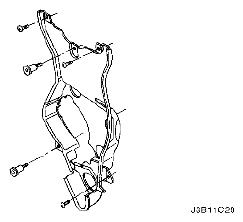
- Remove the engine mount retaining bolts.
- Remove the engine mount.
 Courtesy of SUZUKI OF AMERICA CORP.
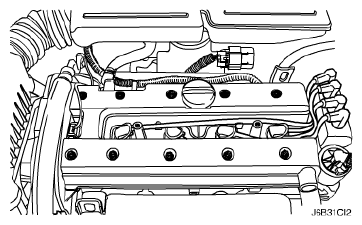
- Disconnect the breather tubes from the camshaft cover.
- Remove the spark plug cover bolts.
- Remove the spark plug cover.
- Disconnect the ignition wires from the spark plugs.
- Remove the camshaft cover bolts.
- Remove the camshaft cover washers.
- Remove the camshaft cover and the camshaft cover gasket.
 Courtesy of SUZUKI OF AMERICA CORP.
- While holding the intake camshaft firmly in place, remove the intake camshaft bolt.
- Remove the intake camshaft gear.
- While holding the exhaust camshaft firmly in place, remove the exhaust camshaft bolt.
- Remove the exhaust camshaft gear.
 Courtesy of SUZUKI OF AMERICA CORP.
- Remove the crankshaft timing belt gear.
 Courtesy of SUZUKI OF AMERICA CORP.
- Remove the rear timing belt cover bolts and cover.
 Courtesy of SUZUKI OF AMERICA CORP.
- Rotate the engine on the engine overhaul stand KM-412.
 Courtesy of SUZUKI OF AMERICA CORP.
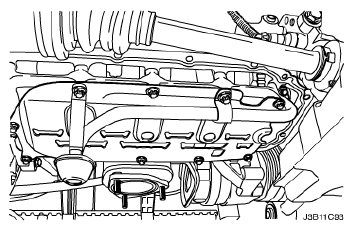
- Remove the oil pan retaining bolts.
- Remove the oil pan.
- Remove the oil suction pipe and support bracket bolts.
- Remove the oil suction pipe.
- Remove the crankshaft bearing bridge and oil pan scraper bolts.
- Remove the oil pan scraper.
- Remove the crankshaft bearing bridge bolts.
- Remove the crankshaft bearing bridge.
 Courtesy of SUZUKI OF AMERICA CORP.
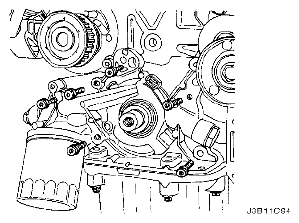
- Remove the oil pump retaining bolts.
- Remove the oil pump.
 Courtesy of SUZUKI OF AMERICA CORP.
- Mark the order of the connecting rod bearing caps.
- Remove the connecting rod bearing cap bolts for all of the pistons.
- Remove the connecting rod bearing caps and the lower connecting rod bearings.
 Courtesy of SUZUKI OF AMERICA CORP.
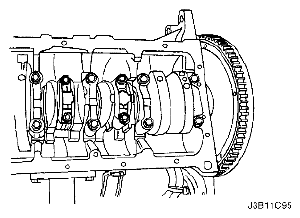
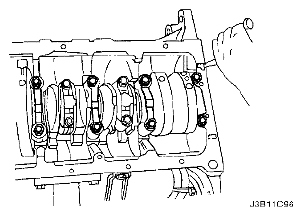
- Mark the order of the crankshaft bearing caps.
- Remove the crankshaft bearing cap bolts.
- Remove the crankshaft bearing caps and the lower crankshaft bearings.
- Remove the crankshaft.
- Clean the parts, as needed.
 Courtesy of SUZUKI OF AMERICA CORP.