Desiccant Removal and Installation For Sedan Model
Desiccant Removal and Installation For Sedan ModelRemoval
1. Remove condenser assembly.
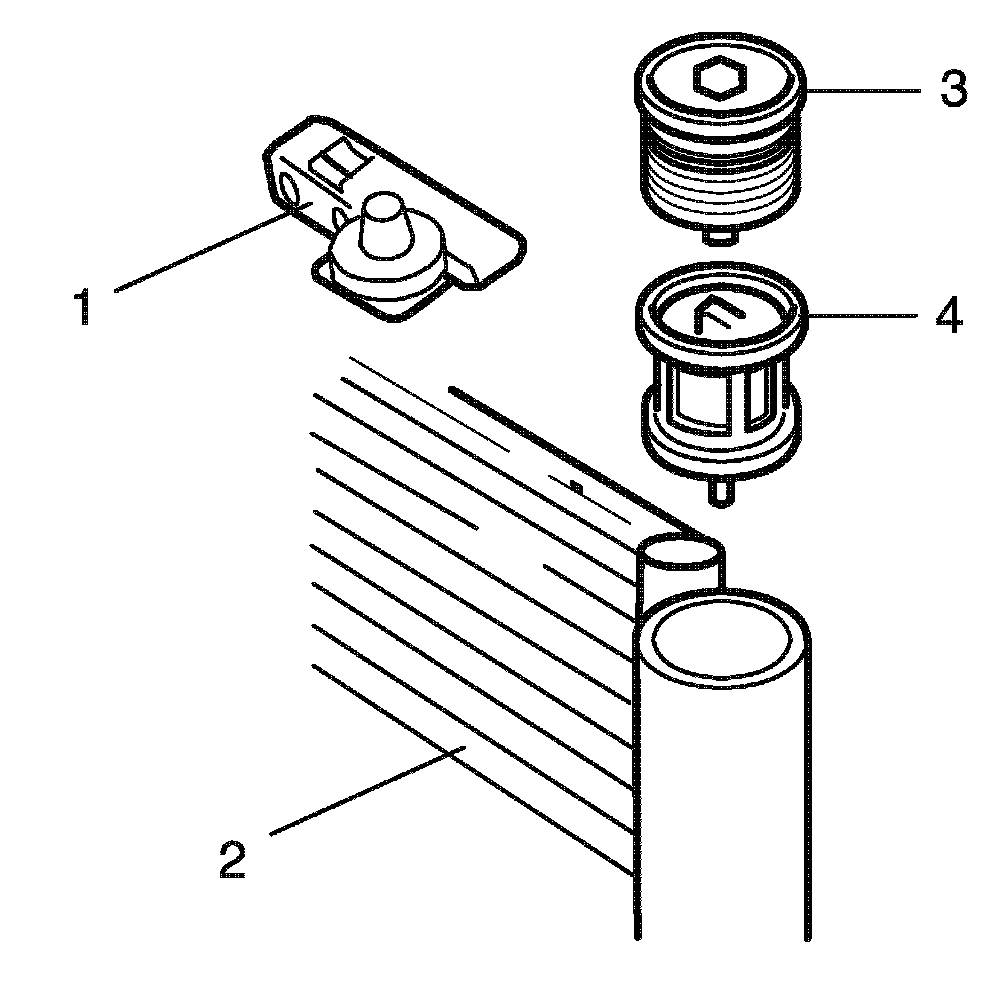
2. Remove condenser mounting bracket (1) from condenser (2) as shown.
3. Remove receiver/dryer cap (3) using a hexagon wrench.
4. Remove filter (4) from the receiver/dryer.
CAUTION: Keep internal parts of air conditioning system free from moisture and dirt. When disconnecting any line from system, install a blind plug cap to the fitting immediately.
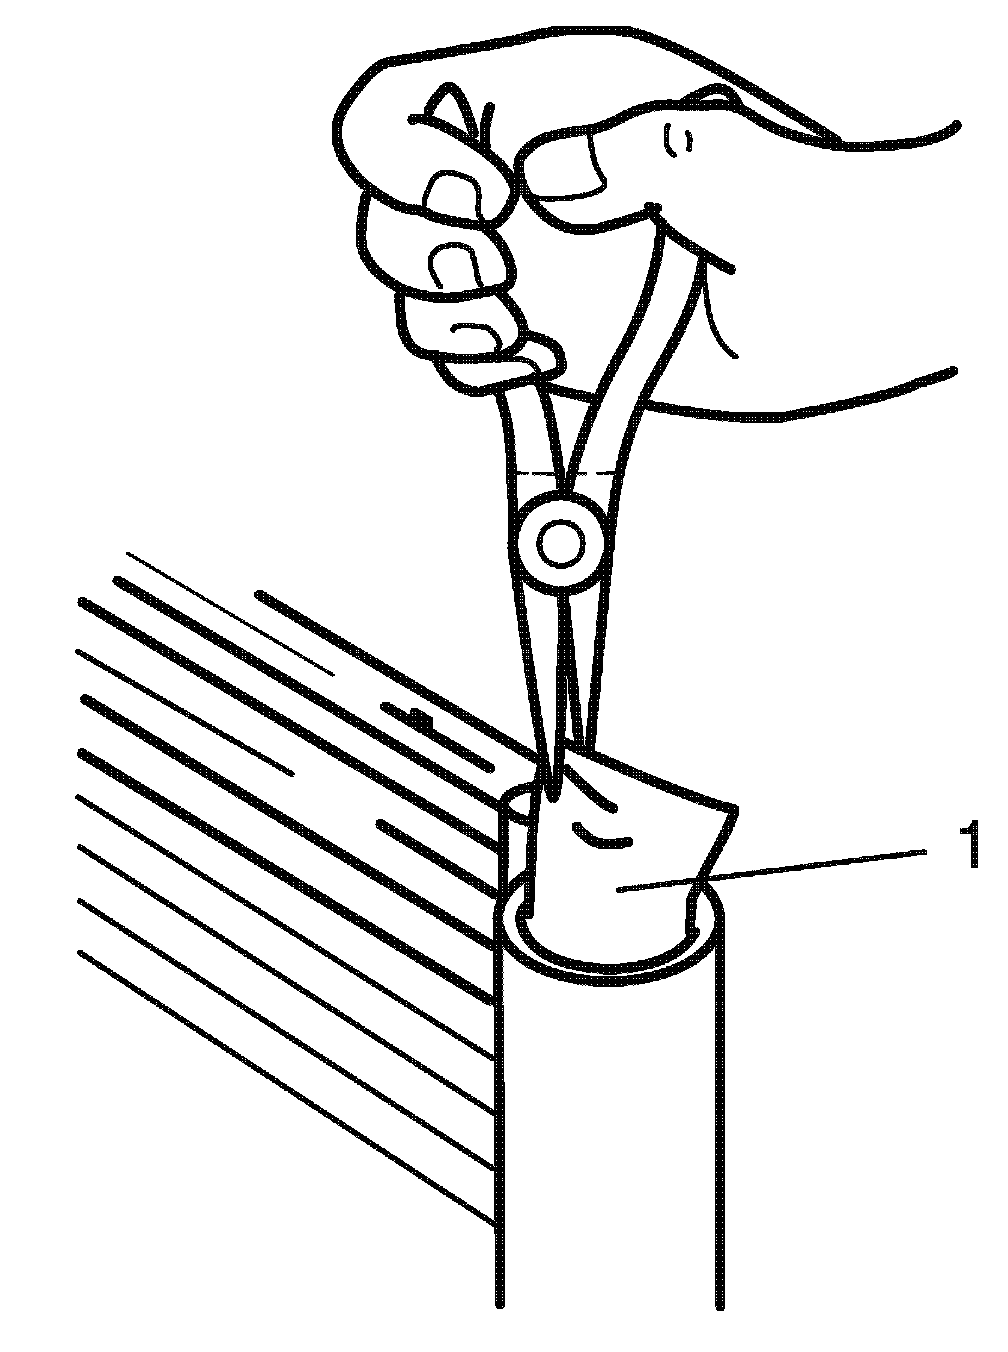
5. Remove desiccant (1) using a plier.
Installation
Reverse removal procedure to install desiccant noting the following instructions.
- Do not remove desiccant from the plastic bag until just before inserting it into the receiver.
- Tighten receiver/dryer cap to specified torque.
Tightening torque
Receiver/dryer cap 13 N.m (1.3 kg-m, 9.5 lb-ft)
- Replenish specified amount of compressor oil to compressor suction side.