Instrument Panel Removal and Installation: Removal
- Disconnect negative (-) cable at battery.
- Disable air bag system referring to DISABLING AIR BAG SYSTEM
or DISABLING AIR BAG SYSTEM
.
- Remove steering column hole cover.
- Detach steering lower shaft referring to STEERING LOWER SHAFT REMOVAL AND INSTALLATION
.
- Remove glove box (1) and hood latch release lever (2).
 Courtesy of SUZUKI OF AMERICA CORP.
- Remove console box referring to CONSOLE BOX COMPONENTS.
- Remove instrument panel center lower covers (1).
 Courtesy of SUZUKI OF AMERICA CORP.
- Remove front pillar trims (1), front pillar lower garnishes (2), front side sill scuffs (3) and dash side trims (4).
 Courtesy of SUZUKI OF AMERICA CORP.
- Disconnect instrument panel harness connectors and antenna cable which need to be disconnected for removal for instrument panel.
- Remove instrument panel ground wire.
- Remove instrument panel mounting bolts (1).
- Remove instrument panel (2) with steering column, steering support member (3) and instrument panel harness.
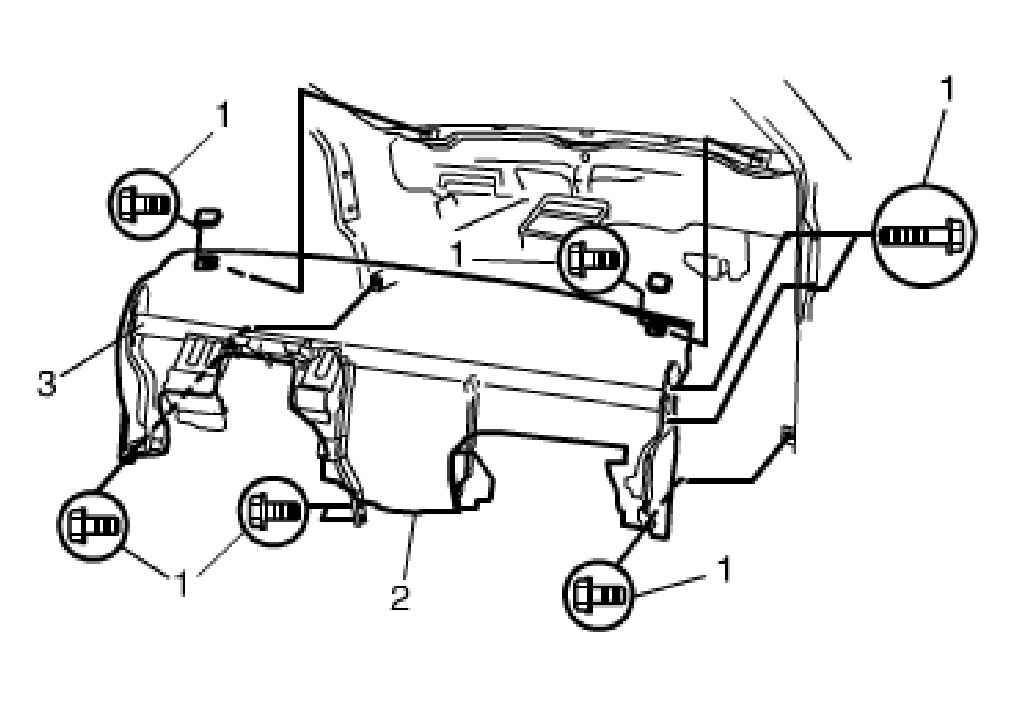 Courtesy of SUZUKI OF AMERICA CORP.