Diagnostic Procedure
- Turn ignition on while observing AIR BAG warning light. If AIR BAG warning light flashes 7 times, system is okay. If AIR BAG warning light does not flash 7 times, go to next step.
- Turn ignition off and remove key. Connect scan tool to Data Link Connector (DLC), located under driver-side instrument panel. If DTCs are displayed on scan tool, diagnose and repair appropriate DTCs. If SIR DTCs are not displayed on scan tool, go to next step.
- Remove and inspect fuse F1 from instrument panel fuse box. If fuse is blown, go to next step. If fuse is not blown, go to step 5.
- Replace fuse F1 and retest system.
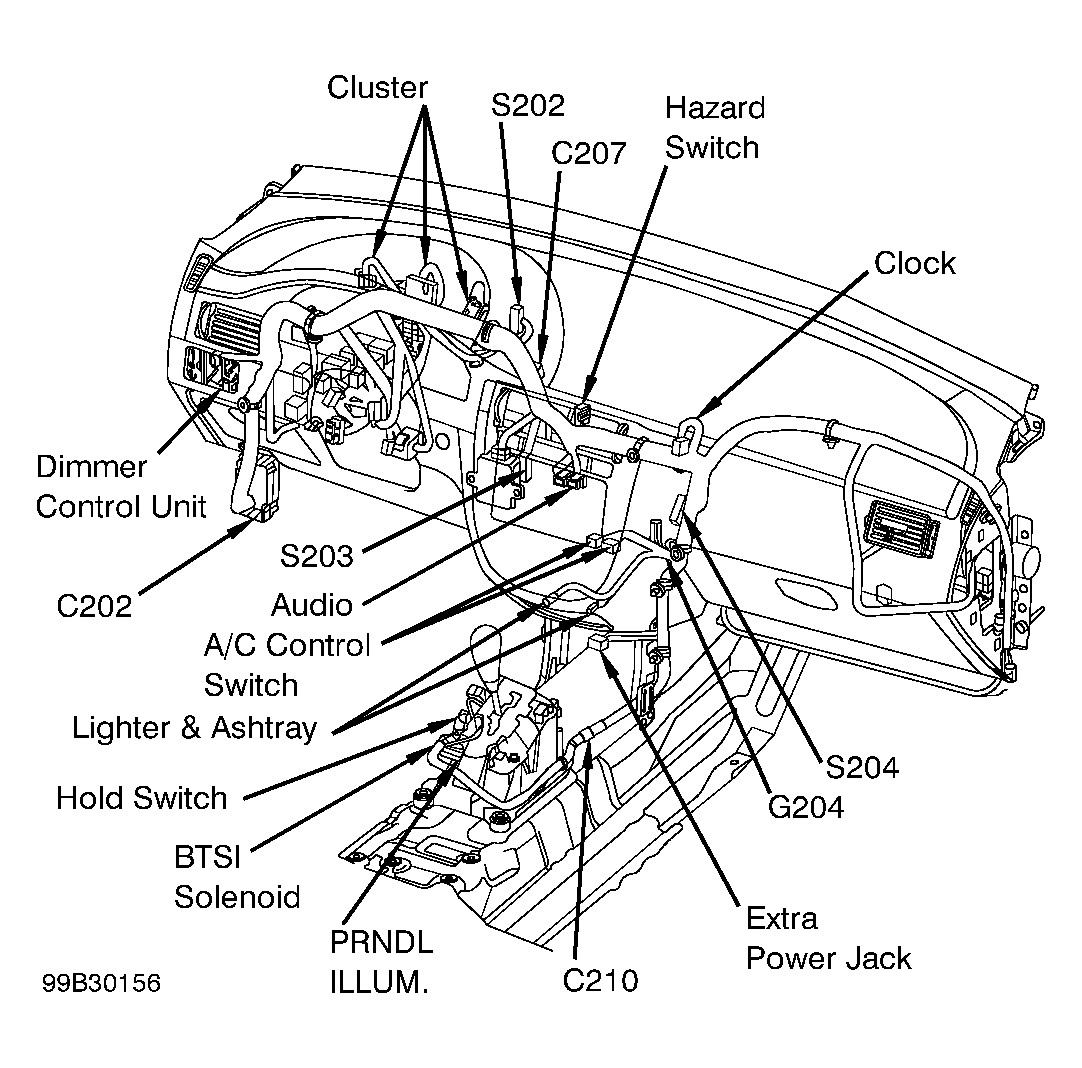
- Disconnect connector C207. See Fig 1. Check for a short to ground in Pink wire between fuse F1 and terminal No. 1 of connector C207. See Fig 2. If a short to ground is not found, go to next step. If a short to ground is found, go to step 12.
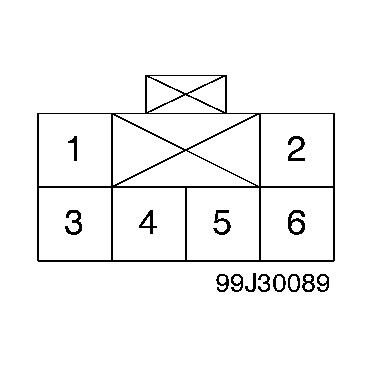
- Disconnect SDM connector. See SENSING & DIAGNOSTIC MODULE (SDM) under REMOVAL & INSTALLATION. Check Pink wire between terminal No. 1 of connector C207 and SDM connector terminal No. 26 for a short to ground. See Fig 3. If a short to ground is not found, go to next step. If a short to ground is found, go to step 12.
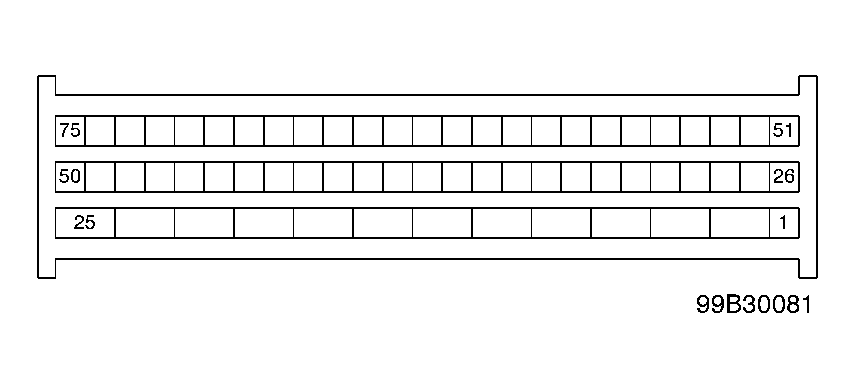
- Measure continuity between ground and Data Link Connector (DLC) ground terminal. See WIRING DIAGRAMS . If continuity exists, go to next step. If continuity does not exist, go to step 12.
- Turn ignition on. Measure voltage at cigarette lighter. If voltage is 11-14 volts, go to step 10. If voltage is not 11-14 volts, go to next step.
- Repair wiring to cigarette lighter. Go to SIR DIAGNOSTIC SYSTEM CHECK .
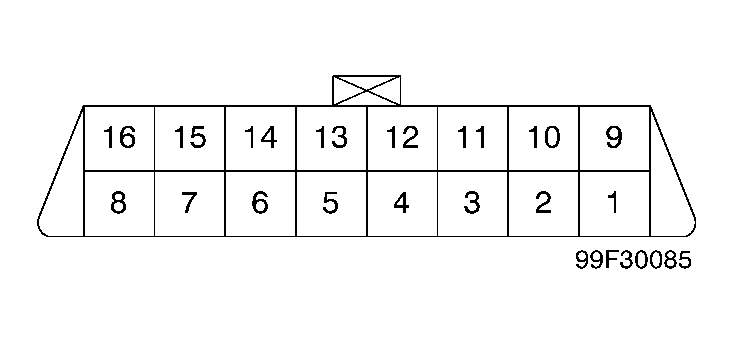
- Inspect Light Blue wire between terminal No. 4 of connector C207 and terminal No. 13 of DLC for an open or short. See Fig 4. If a short or open is found, go to step 12. If a short or open is not found, go to next step.
- Inspect Light Blue wire between terminal No. 4 of connector C207 and terminal No. 54 of SDM connector. If a short or open is found, go to next step. If an open or short is not found, go to step 13.
- Repair wiring harness. See WIRE REPAIR .
- Replace SDM. Go to SIR DIAGNOSTIC SYSTEM CHECK .
 Courtesy of SUZUKI OF AMERICA CORP.
 Courtesy of SUZUKI OF AMERICA CORP.
 Courtesy of SUZUKI OF AMERICA CORP.
 Courtesy of SUZUKI OF AMERICA CORP.