Stabilizer Bar: Service and Repair
Removal1. Hoist vehicle.
2. Remove stabilizer bar mount bush bracket bolts (7).
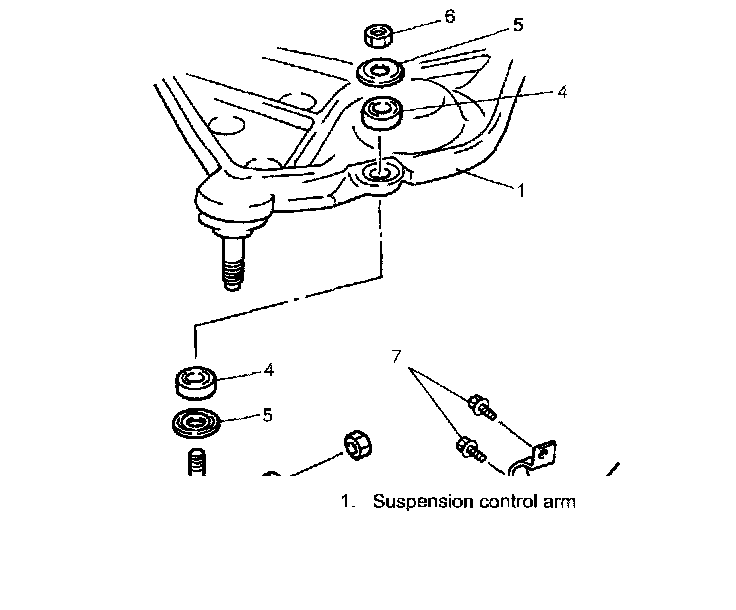
3. Remove stabilizer ball joint nuts (6), washers (5) and bushings (4).
4. Remove stabilizer bar (2) with its ball joints (3).
5. Disconnect stabilizer ball joints (3) from stabilizer bar (2).
Installation
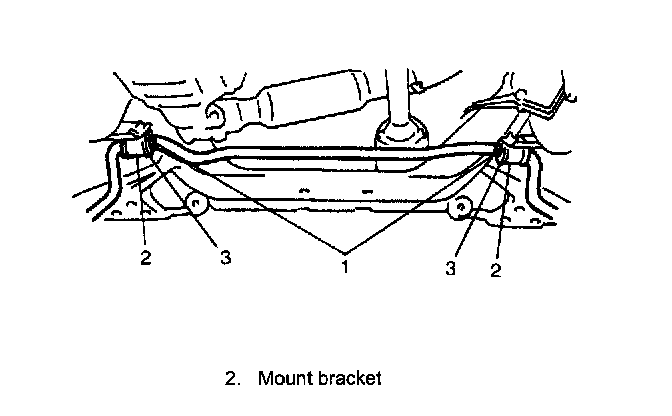
NOTE: For correct installation of stabilizer bar, side-to-side, be sure that color paint (1) on stabilizer bar aligns with mount bush (3), both right and left, as shown.
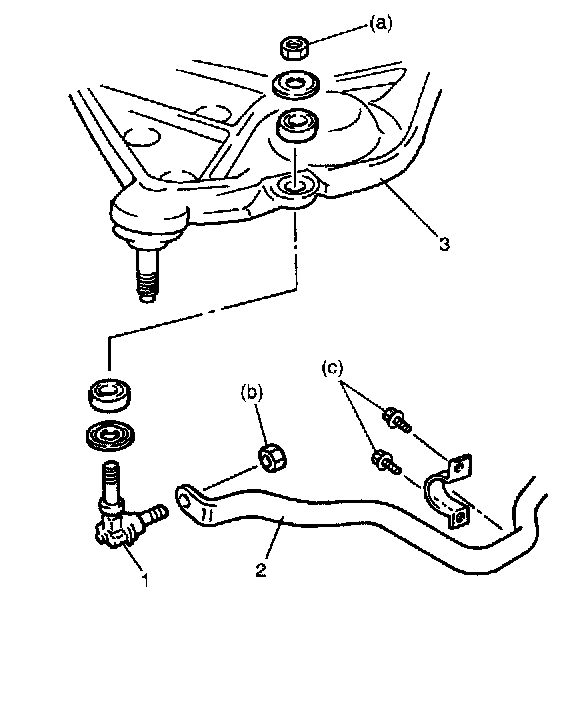
1. Connect stabilizer ball joints (1) and stabilizer bar (2).
2. Install stabilizer ball joints (1) to lower arms (3).
NOTE: Do not tighten stabilizer ball joint nuts completely.
3. Install stabilizer bar mount bush brackets.
4. When installing stabilizer (2), loosely assemble all components while insuring that stabilizer is centered, side-to side. Check that ball joint is set at neutral position seeing from body upper side.
5. Tighten stabilizer bracket bolts and stabilizer ball joint nuts to specified torque.
Tightening torque
Stabilizer ball joint nut (a): 29 Nm (2.9 kg-m, 21.0 ft. lbs.)
Stabilizer ball joint nut (b): 50 Nm (5.0 kg-m, 36.5 ft. lbs.)
Stabilizer bracket bolt (c): 23 Nm (2.3 kg-m, 17.0 ft. lbs.)