Trunk / Liftgate: Service and Repair
Back Door/Rear Gate Assembly Removal and InstallationRemoval
1. Remove back door trim, and door/rear gate sealing cover, refer to Steps (1) to (4) of "Removal" in "Back Door/Rear Gate Assembly Removal and Installation".
2. Remove wire harness connector inside the back door/rear gate.
3. Remove back door/rear gate balancer (1) (first at its door-side and next at its body-side), as shown.
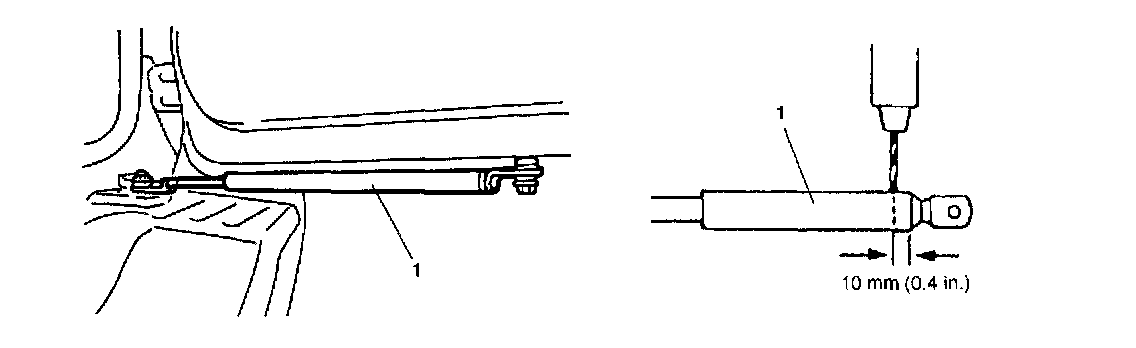
WARNING:
Handling of Back Door/Rear Gate Balancer (Damper)
- Do not disassemble balancer because its cylinder is filled with gas.
- The gas itself is harmless but it may issue out of the hole together with chips generated by the drill. Therefore, be sure to wear goggle.
- When discarding removed back door/rear gate balancer (damper), use a 2 to 3 mm (0.08 to 0.12 in.) drill to make a hole as shown.
- Handle balancer carefully. Do not scar or scratch exposed surface of its piston rod, and never allow any paint or oil to stick to its surface.
- Do not turn piston rod with balancer fully extended.
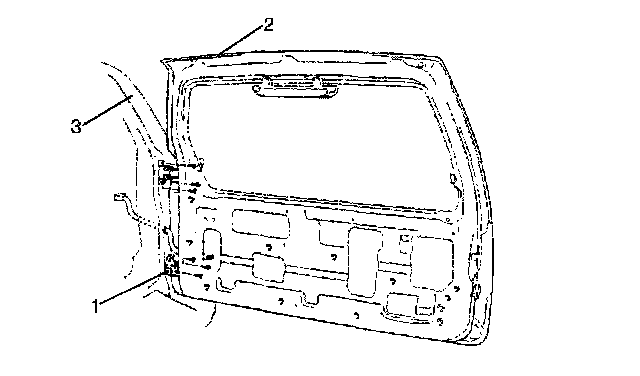
4. Remove back door/rear gate hinge (1) bolts and back door/rear gate (2) from body (3).
Installation
Reverse removal procedure to install back door/rear gate noting the following points.
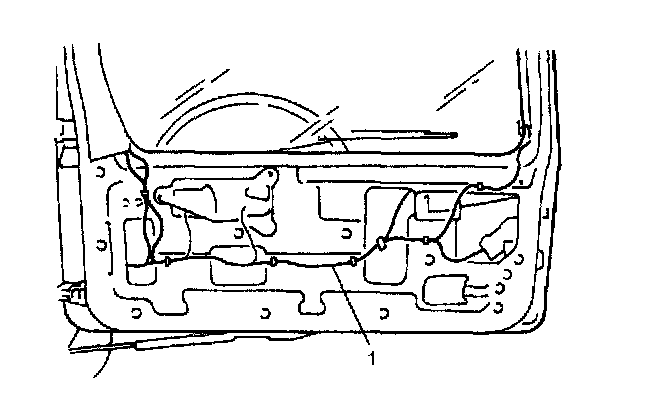
- Secure wiring harness (1).
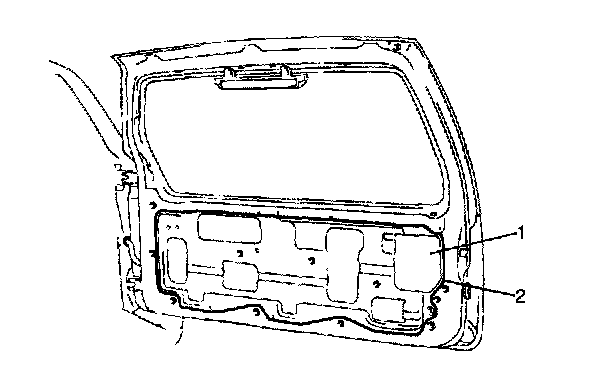
- Secure back door/rear gate sealing cover (1).
NOTE: Use adhesive (2) to seal sealing cover (1) to back door/rear gate.
- Adjust back door/rear gate latch striker position by referring to Back Door/Rear Gate Assembly Removal and Installation" so that back door/rear gate is positioned correctly.
- Adjust back door/rear gate cushion so that back door/rear gate contacts body when closed.