Headliner: Service and Repair
Head Lining Removal and InstallationRemoval
1. Remove front side sill scuffs (1), rear side sill scuffs (2), center pillar lower trims (3), center pillar upper trims (4), front pillar upper trims (5) rear luggage mat end garnish (6), rear luggage box (7), rear quarter lower trims (8) and rear quarter upper trims (9).
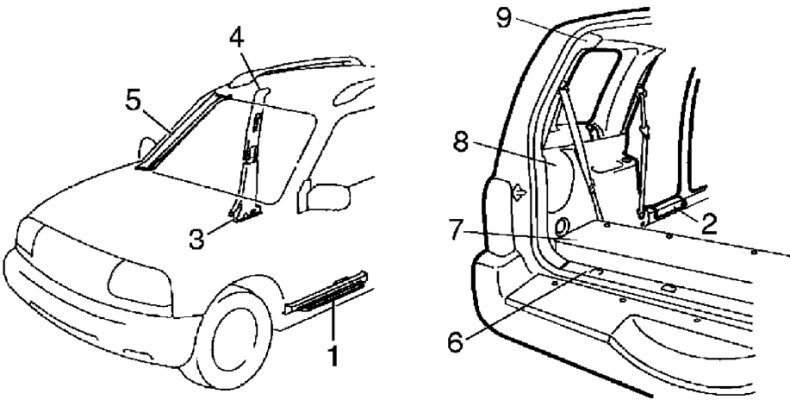
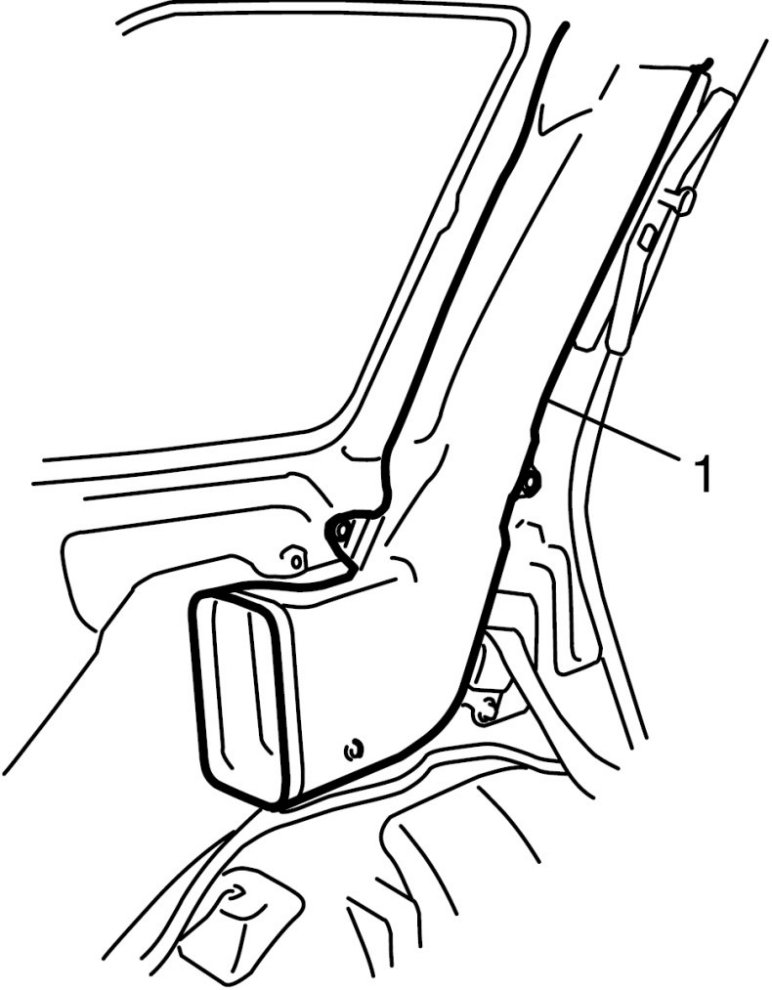
2. Remove rear A/C No.1 duct (1).
3. Remove sliding roof switch and sliding roof trim (if equipped).
4. Remove sun visor assembly (1)
5. Remove map lamp (2), doom lamp (3) and luggage lamp (4).
6. Remove assistant grips (5).
7. Disconnect rear washer hose and roof harness.
8. Remove head lining (6).
NOTE:
For without sunroof model:
Adhesive is used in head lining. Clear adhesive from head lining and roof after removing roof lining.

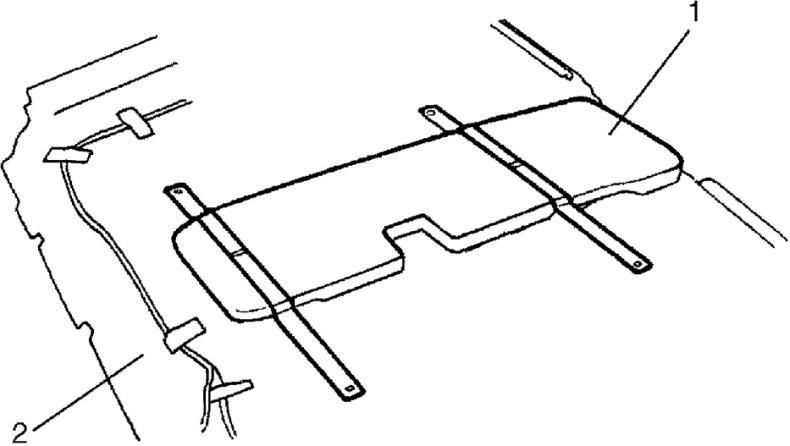
CAUTION: Do not remove rear A/C No.2 duct (1) from head lining (2). If perform this prohibited service, head lining (2) will be broken.
Installation
Reverse removal procedure to install head lining noting the following instructions.
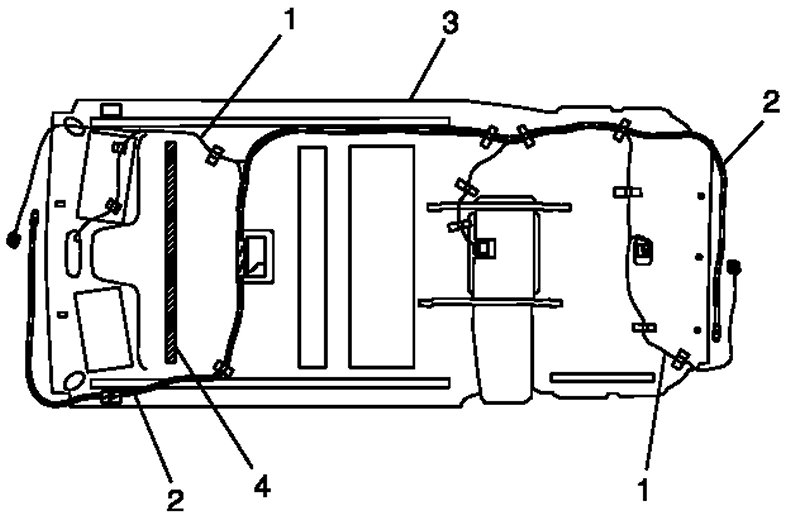
- Set roof harness (1) and rear washer hose (2) to head lining (3) with adhesive tape as shown.
- For without sunroof model, apply double coated tape (4) to head lining as shown.
- Tighten seat belt anchor bolt as specified torque referring to Front Seat Belt with Pretensioner Construction.